

1/2A Astrostar
Terry Thorkildsen
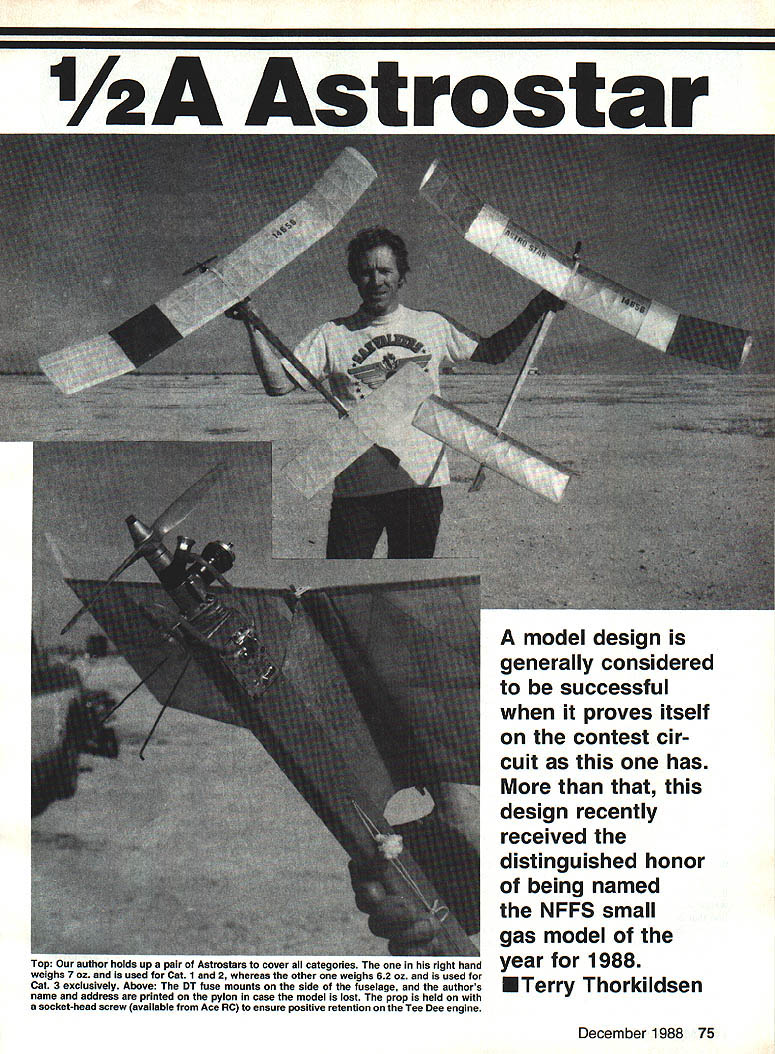
A model design is generally considered successful when it proves itself on the contest circuit — this one has. More than that, this design was named the NFFS Small Gas Model of the Year for 1988.
This aircraft was designed in 1985 based on an earlier model called Jupiter. Jupiter had nice lines and elliptical tips and was fairly successful on the contest circuit, but it lacked the consistency I wanted. As a starting point to refine the design I came up with the Astrostar.
Astrostar uses a constant-chord wing (317 sq in.), a rear rudder, and a smaller stabilizer. Construction is straightforward and suitable for a novice with good chances of favorable results. The size was chosen with Taft Cat 1 conditions in mind (5-mm maxes). Smaller models can be difficult to fly and can get specked out in booming thermals. The Astrostar, however, has flown successfully in both Cat 1 and Cat 3.
Typical empty weight is 6.5–7.0 oz. A very light build can be 6.2 oz; that weight held the Cat 3 record in 1987. Achieving the light weight takes careful selection of components and attention to detail — don’t give anything a free ride (the engine mount can cost 0.25–0.5 oz). Always back-mount Tee Dees.
Careful selection of wood, finishes, and glues is required to hit lighter weights. The model can be built in the 6.5–7.0 oz range quite easily. To help keep weight down use Micafilm covering exclusively. Micafilm is fuel-proof and puncture resistant, and it doesn’t loosen in early-morning dampness, which is an advantage in dawn events. Micafilm’s lack of torsional rigidity compared with tissue-and-dope is eliminated by Union Jack geodetic construction, which yields a strong, warp-free structure and retains overall rigidity.
The airfoil is similar to the Ramrod’s but thinner so it isn’t draggy. It is a flat-bottom section 9.3% thick with its high point at 35%, which yields a faster climb. On a lightly loaded model like this one, you don’t give up much in glide. The stab section is thinned to 7.3% to avoid overpowering the wing at high speeds when going over the top. Turbulator spars offer rigidity and a consistent airfoil in the critical front section. Carbon fiber is used to reinforce the center dihedral break and to stiffen the rudder.
Wings are built flat except for a small amount of wash-in (about 1/32") on the right main panel. No washout is used on the tips — I don’t recommend washout on a fast-moving model (I prefer wash-in on rubber/Nordic models). Center-of-gravity (CG) is positioned at 73–74% aft (without fuel). The fuel pylon is located last, after the model is completely assembled, and is glued to the bottom of the fuselage to create an exceptionally strong joint and extra rigidity. I now add a small piece of 1/16-sq. spruce to the front of the pylon to avoid nicks and stress cracks that can develop over time.
The fuselage uses 1/32-sq. balsa stringers on the four corners, full length, to provide an exceptional strength-to-weight ratio. This technique allows a fuselage with no bulkheads, although I usually add a bulkhead at the tail in front of the stab and a half bulkhead near the dethermalizer (DT) tube for added strength where a tight fit may be required. The fuselage is doped with nitrate, followed by a couple coats of thinned clear dope and K&B Super Poxy. I add a dab of white dope to the nitrate dope for a vivid translucent coloring effect. With Super Poxy and Micafilm your model won’t pick up weight as it becomes a contest veteran.
Astrostar uses a rear rudder to produce a more consistent power pattern. With this rudder location, keying the stab is less critical and the model tends to groove better. Some rear-rudder models can weather-vane; the height and size of the rudder determine this. Use a rudder about 3.5% of the wing area in the configuration shown to avoid that problem.
Keying the wing so it always mounts in the same position is important — no devices to trip you up in the heat of battle. A properly trimmed Astrostar will roll out at the top of the power run with no loss of altitude.
I fly the Astrostar right-right, but it can be trimmed right-left if desired. I prefer right-right, though I don’t fight a model that wants to glide left. Check wash-in amount to ensure it isn’t forcing the model left. The model uses no downthrust, but a small amount of left thrust is sometimes added to eliminate an initial bank to the right. Thrust adjustments lose effectiveness in the latter power stages when the model picks up speed.
The Astrostar has been scaled up for other sizes: a 600-sq.-in. version is used for A/B Gas with a K&B .325 or .350, and an 840-sq.-in. size is being built for C/D. The 1/2A version has been flown for a long time and has many wins to its credit. If 1/2A is an event at a contest I attend, I usually fly it first.
It is imperative that all flying surfaces be warp-free to eliminate trim changes with differences in speed. I can’t overemphasize the importance of a honed Tee Dee — select your best engine or order one from Kustom Kraftsmanship and fuel it with 50–70% nitro. The Astrostar will reward you with the performance to match.
Construction
For best performance build your Astrostar between 6.2 and 7.2 oz. To achieve this, take care selecting wood and covering materials. Equally important is building a strong, warp-free model. I build on a special plank trued up to provide a flat surface; building without warps gives more consistent flight characteristics across speeds.
Wing
- All panels are built flat except the right main panel, which should have about 1/32" of wash-in at the outer dihedral break.
- Use carbon fiber for the center dihedral breaks; if unavailable, substitute 1/32" plywood.
- Use light 1/16" sheet balsa (preferably C-grain) for ribs. Use medium balsa for leading and trailing edges and the main spar. Top spars should be hard.
- Ensure all wood is straight and true.
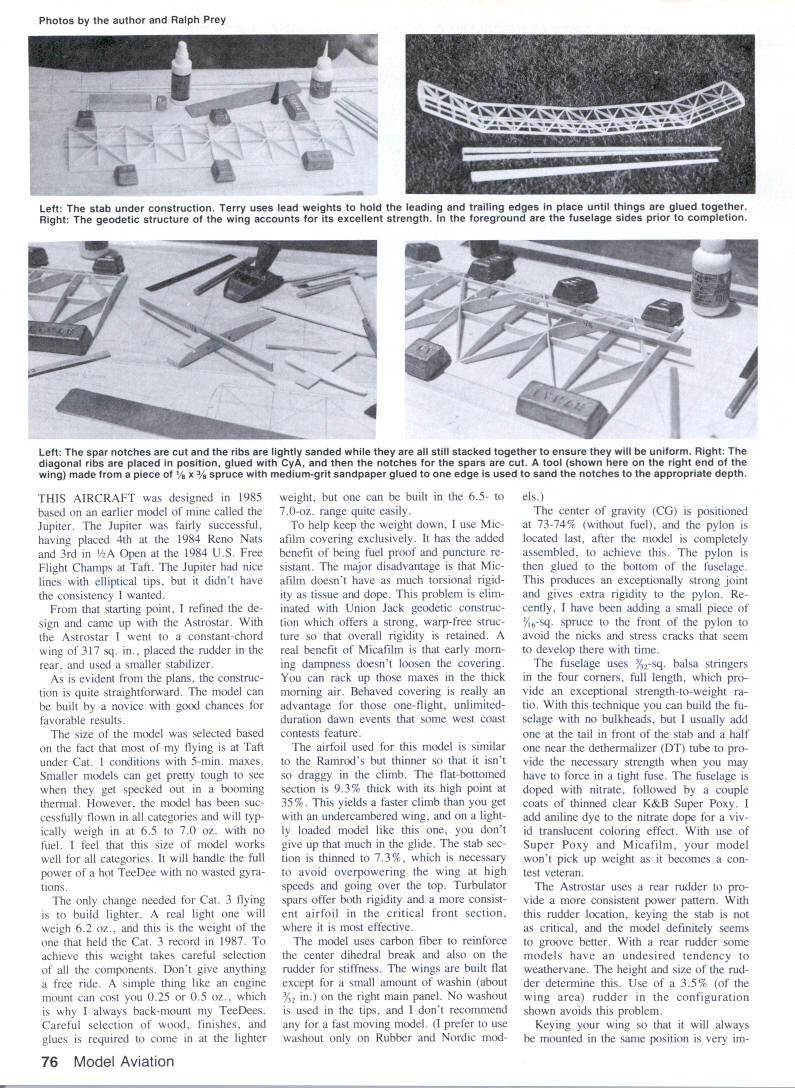
Build the geodetic ribs in place prior to adding the top spars. Notch them for exact spar locations using a tool (a piece of sandpaper glued to the edge of a 7/8 x 3/8-in. spruce about 10 in. long works well) or by using a straightedge and an X-Acto knife.
The stabilizer is built similar to the wing but lighter to avoid a tail-heavy model.
Fuselage
- Select medium to medium-light 1/16" sheet balsa.
- Add the 1/32" corner stringers to the sides first.
- Glue bulkhead for the DT tube in position, along with the one in front of the stab. Temporarily glue a bulkhead at the firewall location to help alignment.
- Lay a slightly oversize top sheet on a flat surface. Put thick Hot Stuff (Super T) on the top-side stringers and carefully place the sheet on top. Glue the bottom on similarly.
- The pylon is added after assembly. Set the CG at 73–74% (without fuel) and then glue the pylon to the bottom to provide a strong joint without bulkheads.
- Add a small 1/16-sq. spruce at the front of the pylon to prevent nicks and stress cracks.
This construction yields a strong, straight fuselage.
Covering
I use Micafilm for its weight advantage, fuel-proofing, and puncture resistance. To apply Micafilm:
- Apply adhesive to the framework: thinned Balsarite on ribs and spars and 3M 77 spray adhesive on the LE and TE. 3M 77 stays tacky long enough to position the Micafilm before ironing down edges.
- Cover the bottom first. The top covering should overlap the bottom by about 1/8". Seal the overlap with Balsarite or thin Hot Stuff.
- Use an iron to tighten the covering.
If you prefer tissue covering, use three to four coats of thinned nitrate dope followed by one to two coats of fuel proofer or butyrate dope.
Flying
- Let finishes cure for a week and remove any warps.
- Make sure the wing is keyed.
- Use a baby pacifier pressure fuel tank for a consistent engine run and set the timer for 2–3 seconds.
- The model should climb steeply with a slight right turn. Correct adverse turn tendencies with a rudder tab (trailing-edge stock) glued to the rear of the rudder.
- Slowly lengthen engine runs until you reach the full limit. Properly trimmed, the model will make a couple of turns in 12 seconds followed by a smooth transition to a floating glide.
Enjoy flying your Astrostar — it should bring you as much pleasure as my Astros have given me.
Product sources:
- Bradley Model Products, 1337 Pine Sap Ct., Orlando, FL 32825.
- Jack’s Models, 4036 W. 173rd Pl., Torrance, CA 90504.
- Kustom Kraftsmanship, Box 3010, Fullerton, CA 92628.
- MRL, 25108 Marguerite Pkwy. B-160, Mission Viejo, CA 92692.
Transcribed from original scans by AI. Minor OCR errors may remain.

