
1939 ART CHESTER GOON
Dave Linstrum
One of the most popular events promoted by the Flying Aces Club is a simple Profile class that allows two-dimensional structures, covered one side only, with simple scale detail and gear-up construction (if the original had retracts).
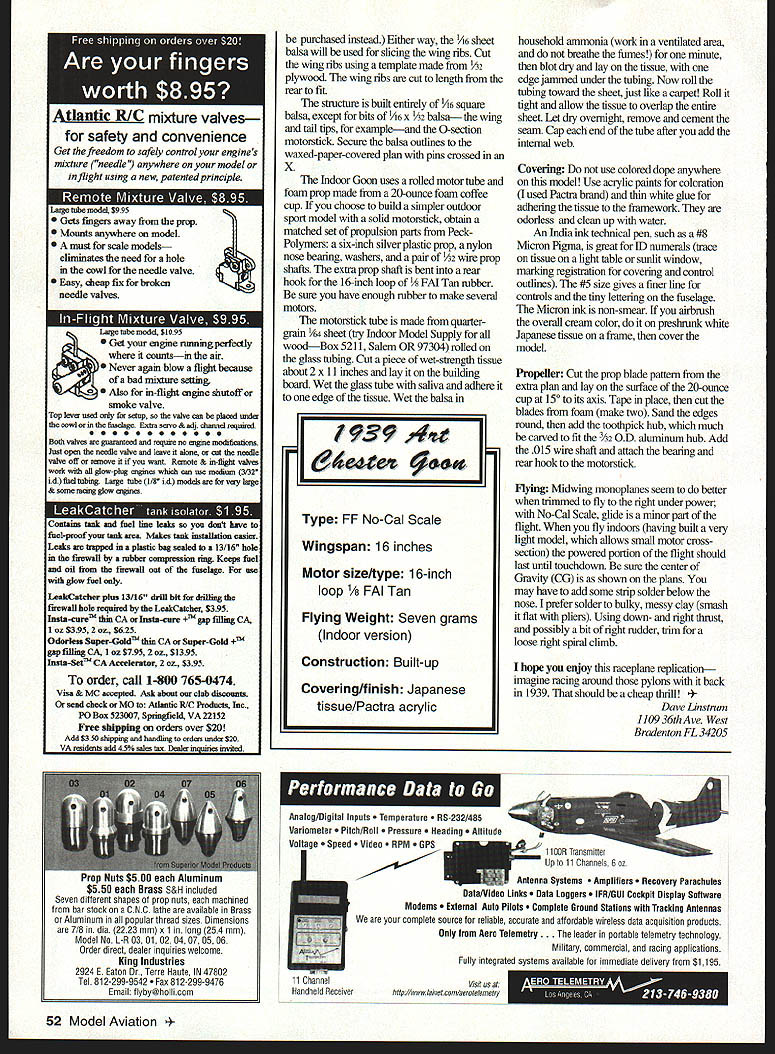
Here is a sleek 1939 raceplane for FAC No-Cal Competition—the Art Chester Goon. This is to the United States Indoor Championships No-Cal specifications, and is not a sport model. However, it could be built with a solid motorstick and heavier wood for sport flying. I think it is one of the cleanest and prettiest racers ever. It looks great in the air.
Since the photos show all the major framework assembled and the plans are fully annotated, we will not tell you how to "Glue Part A to Part B" here. You should not attempt the model until you have some experience with stick-and-tissue construction; a Peck-Polymers Peanut Scale model should teach you the tricks.
Make a photocopy of the plans to use for patterns, tracing I.D. numerals, etc. Read the callouts on the plans and assemble the requisite tools, balsa, tissue, and paint.
Minimal workshop inventory
- X-Acto with #11 blade or a broken (non-stainless) double-edge razor blade
- Dressmaker pins (bead-head type recommended)
- Self-healing cutting board (or a scrap of artist's mat board if economy-minded)
- Glue applicator
- Artist's sable brush
- Needlenose pliers
- Good light and an uncluttered work area
If you have a balsa stripper, cut a single sheet of medium, straight-grained 1/16" balsa into uniform 1/16" square strips. The balsa strips can be purchased instead. Either way, the 1/16" sheet balsa will be used for slicing the wing ribs. Cut the wing ribs using a template made from 3/32" plywood. The wing ribs are cut to length from the rear to fit.
The structure is built entirely of 1/16" square balsa, except for bits of 1/16" x 1/32" balsa—the wing and tail tips, for example—and the O-section motorstick. Secure the balsa outlines to the waxed-paper-covered plan with pins crossed in an X.
Propulsion options
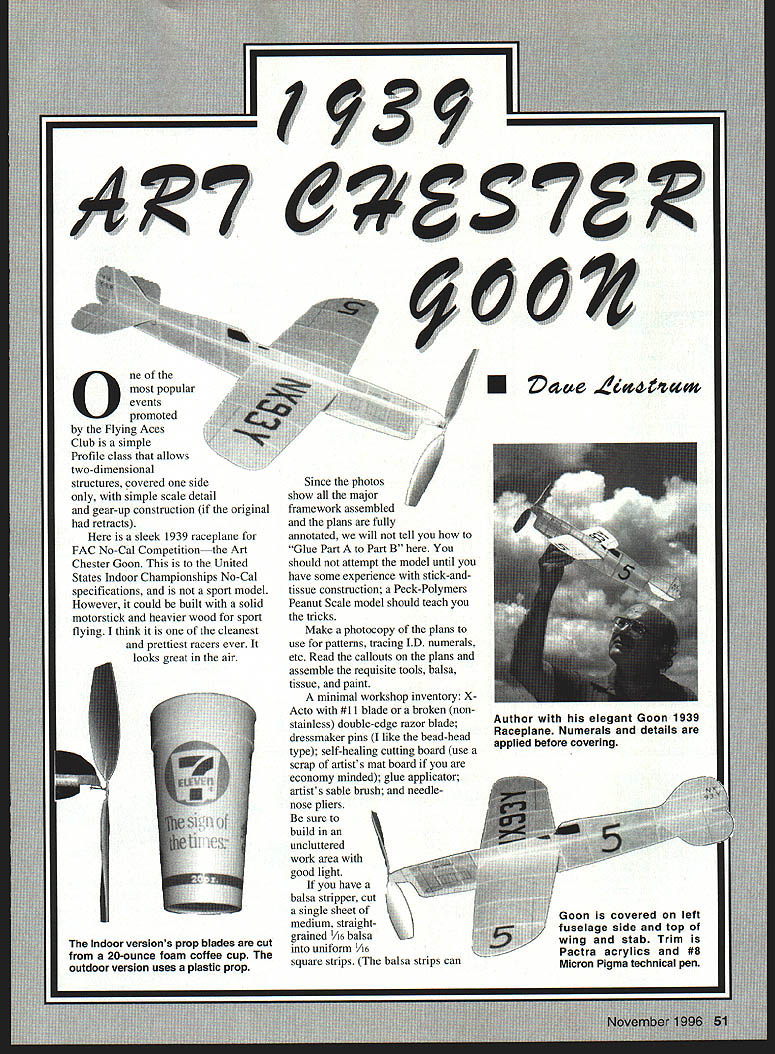
The Indoor Goon uses a rolled motor tube and foam prop made from a 20-ounce foam coffee cup. If you choose to build a simpler outdoor sport model with a solid motorstick, obtain a matched set of propulsion parts from Peck-Polymers: a six-inch silver plastic prop, a nylon nose bearing, washers, and a pair of 3/32" wire prop shafts. The extra prop shaft is bent into a rear hook for the 16-inch loop of 1/8" FAI Tan rubber. Be sure you have enough rubber to make several motors.
Motorstick tube (rolled)
The motorstick tube is made from quarter-grain 1/16" sheet (try Indoor Model Supply for wood—Box 5211, Salem OR 97304) rolled on glass tubing.
- Cut a piece of wet-strength tissue about 2" x 11" and lay it on the building board.
- Wet the glass tube with saliva and adhere it to one edge of the tissue.
- Wet the balsa in household ammonia (work in a ventilated area and do not breathe the fumes) for one minute, then blot dry and lay on the tissue, with one edge jammed under the tubing.
- Roll the tubing toward the sheet, just like a carpet. Roll so the tissue overlaps the entire sheet.
- Let dry overnight, remove and cement the seam. Cap each end of the tube after you add the internal web.
Covering and finish
Do not use colored dope anywhere on this model! Use acrylic paints for colorant (Pactra brand recommended) and then white glue for adhering the tissue to the framework. They are odorless and clean up with water.
If you airbrush the overall cream color, do it on pre-shrunk white Japanese tissue on a frame, then cover the model.
I.D. numerals and detailing
An India ink technical pen, such as a #8 Micron Pigma, is great for I.D. numerals (trace on tissue on a light table or sunlit window, then mask for registration when covering and control outlines). The #5 size gives a finer line for controls and the tiny lettering on the fuselage. The Micron ink is non-smear.
Propeller
- Cut the prop blade pattern from the extra plan and lay it on the surface of the 20-ounce cup at a 15° angle to its axis.
- Tape in place, then cut the cup into the blanks (make two).
- Sand the edges round, then add the toothpick hub, which must be carved to fit the 3/32" O.D. aluminum hub.
- Add the .015" wire shaft and attach the bearing and rear hook to the motorstick.
Flying and trimming
Midwing monoplanes seem to do better when trimmed to fly to the right under power; with No-Cal scale, glide is a minor part of the flight. When you fly indoors (having built a very light model, which allows small motor cross-sections) the powered portion of the flight should last until touchdown. Be sure the center of gravity (CG) is as shown on the plans. You may have to add some strip balsa below the nose. I prefer softer balsa, but very dry (smash it flat with pliers).
Using down- and right-thrust, and possibly a bit of right rudder, trim for a loose right spiral climb.
I hope you enjoy this raceplane replication—imagine racing around those pylons with it back in 1939. That should be a cheap thrill!
Specifications
- Type: FF No-Cal Scale
- Wingspan: 16 inches
- Motor size/type: 16-inch loop 1/8" FAI Tan
- Flying Weight: Seven grams (Indoor version)
- Construction: Built-up
- Covering/finish: Japanese tissue / Pactra acrylic
Dave Linstrum 1109 36th Ave. West Bradenton FL 34205
Transcribed from original scans by AI. Minor OCR errors may remain.

