

Advanced Heli Radios
Paul Tradelius
A few months ago, when I did a fill-in column for Larry Jolly, we took a look at some of the standard features of the basic helicopter radio. I described why those features were needed and how to use them. Now we'll take a look at some of the features that may look complex with all their switches and knobs—higher-end heli radios do a lot to make your flying easier and smoother.
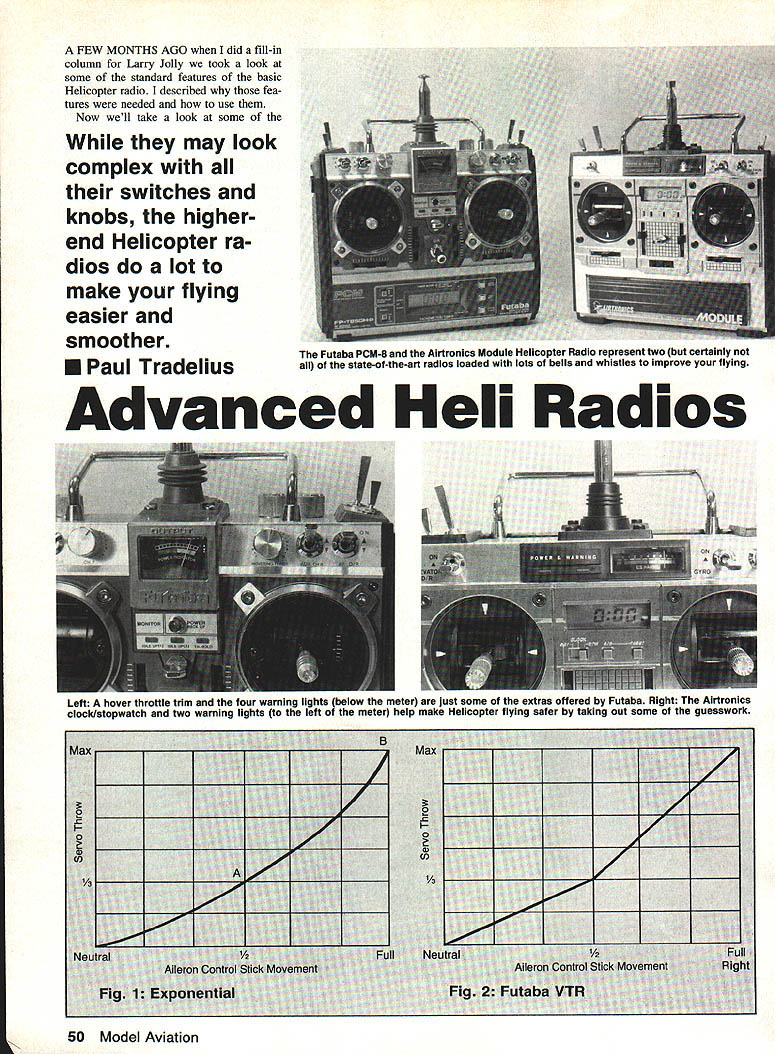
Certain radios, such as the Futaba PCM-8 and the Airtronics module heli radio, represent two (but certainly not all) of the state-of-the-art units loaded with bells and whistles to improve your flying. Advanced features and capabilities of top-of-the-line heli radios improve model performance and flying enjoyment. This article gives an idea of the features important to have.
When I decided to give helicopters a try several years ago, I wanted to get started with the least initial expense. I used an airplane radio I already had to see if this was more than a passing fad. It wasn't long before I knew I wanted to continue flying helis. My airplane radio had a lot of drawbacks, so I purchased a basic heli radio. My flying really improved with the added features of the new radio. I soon felt my flying had progressed to the point where I was ready for advanced aerobatics and would need a top-of-the-line heli radio.
Unfortunately, the advertisements for the various heli radios did not explain all the special features they have, so I was quite surprised when I read through the instruction manual and saw what I had been missing. There were many features I was very happy to have—and sure could have used before. If I had known more about these better radios, I probably would have purchased one a lot sooner.
I'm not suggesting that you need to run out and buy an expensive radio to enjoy flying helis, but I think you should take a closer look at the advanced features on top-of-the-line units. They may make your flying safer and a whole lot more enjoyable.
Second idle up
My earlier article described the basic idle-up function and how to use it, but many top radios also have a second idle-up to give more flexibility in controlling the throttle for various maneuvers. I use the first idle-up for normal and inverted flying and in the landing pattern to keep rotor speed up during descents. The second idle-up is set to almost full power for very fast forward flight and for aerobatics, which require very high rotor RPM throughout the entire collective range. Having that second idle-up lets you fine-tune rotor RPM for either normal flying or aerobatics without making sacrifices between the two.
Multiple pitch curves
I also described basic pitch-curve adjustments before, but having a second pitch curve provides the capability to fine-tune the collective range for different maneuvers. Suppose the first pitch curve is adjusted to give optimum performance for cruise and engine response; the second pitch curve can then be set for high-power maneuvers.
The most critical setting is the maximum pitch, because using much more pitch than recommended can overload the engine and cause it to overheat or quit. For autorotation practice you may need a higher maximum pitch to provide sufficient lift as rotor speed decreases during the flare. Before second pitch curves, you had to choose between settings optimized for normal flying or for autorotations. The second pitch curve solves that compromise with the flip of a switch.
Recommended starting values (adjust to your helicopter and flying style):
- Normal flying: minimum -2° to maximum 7°
- Autorotations: minimum -4° to maximum 10°
Exponential or VTR
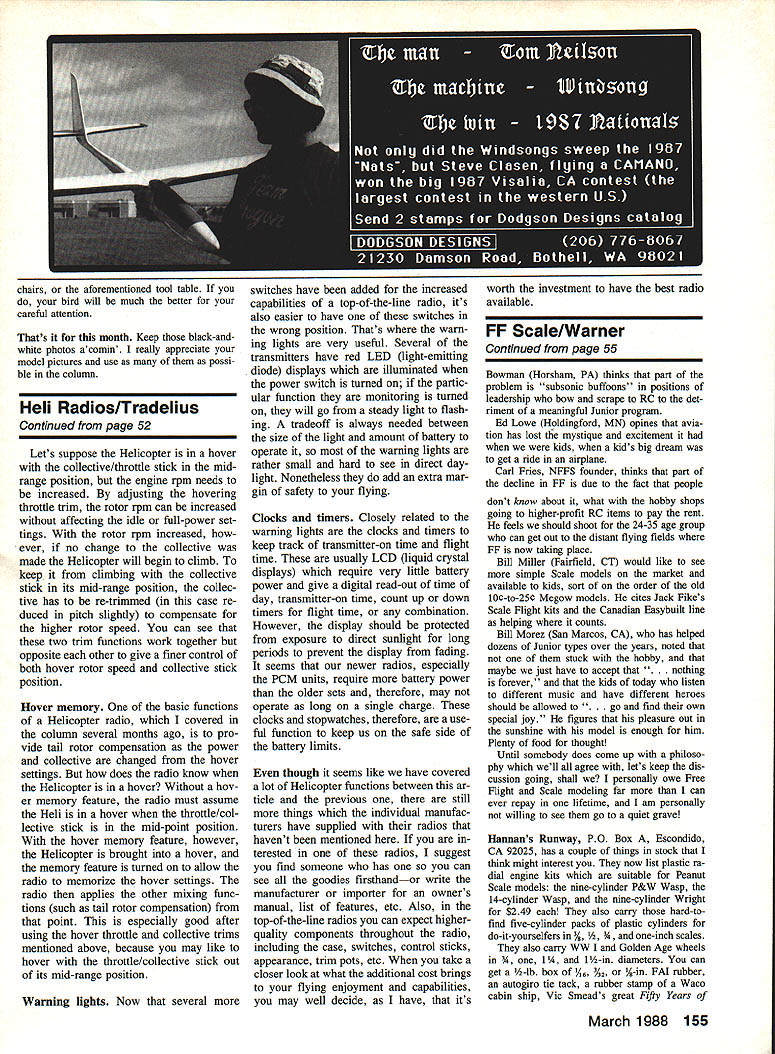
The exponential function softens control response around center while preserving full servo throw at the extremes. With exponential, initial stick movement produces very little servo movement (a "soft center"), and then the servo response increases during the latter part of stick travel. A trim adjustment lets you change the shape of the curve for more or less softness; a flatter curve approaches a straight line (more linear response), while increased curvature gives a softer center.
Futaba offers a similar neutral softness called Variable Trace Ratio (VTR). Instead of a smooth curve, VTR uses two straight lines with an adjustable angle between them to achieve an effect similar to exponential.
Hovering throttle and collective trims
Because much heli flight time is spent hovering, some radios offer two separate trims to fine-tune collective and throttle settings independently. Although these are two separate trim functions, there is a direct relationship between collective (pitch) and rotor RPM.
Having separate hover trims makes it easy to adjust rotor RPM without changing the basic pitch curve used for forward flight and aerobatics. One trim sets the hover collective pitch for a desired hover RPM; the other sets the hover throttle to provide the desired engine RPM. Adjust both for a smooth, accurate hover with good RPM without altering settings used for other flight modes.
If a heli is hovering with the collective/throttle stick in a mid-range position but the engine RPM needs to be increased, adjusting the hover throttle trim will raise rotor RPM without affecting idle or full-power settings. With the rotor RPM increased, the heli will tend to climb if collective is unchanged, so you must re-trim the collective slightly downward to compensate. These two trims work together—and opposite each other—to give finer control of hover rotor speed and collective stick position.
Hover memory
A basic heli-radio function is to provide rotor compensation as power and collective are changed from hover settings. Without hover memory, the radio assumes a hover when the throttle/collective stick is at mid-point. With hover memory, you bring the heli into a hover and switch the memory on so the radio memorizes the actual hover settings. The radio then applies other mixing functions (such as tail-rotor compensation) from that memorized point. This is especially useful when you hover with the throttle/collective stick out of its mid-range position.
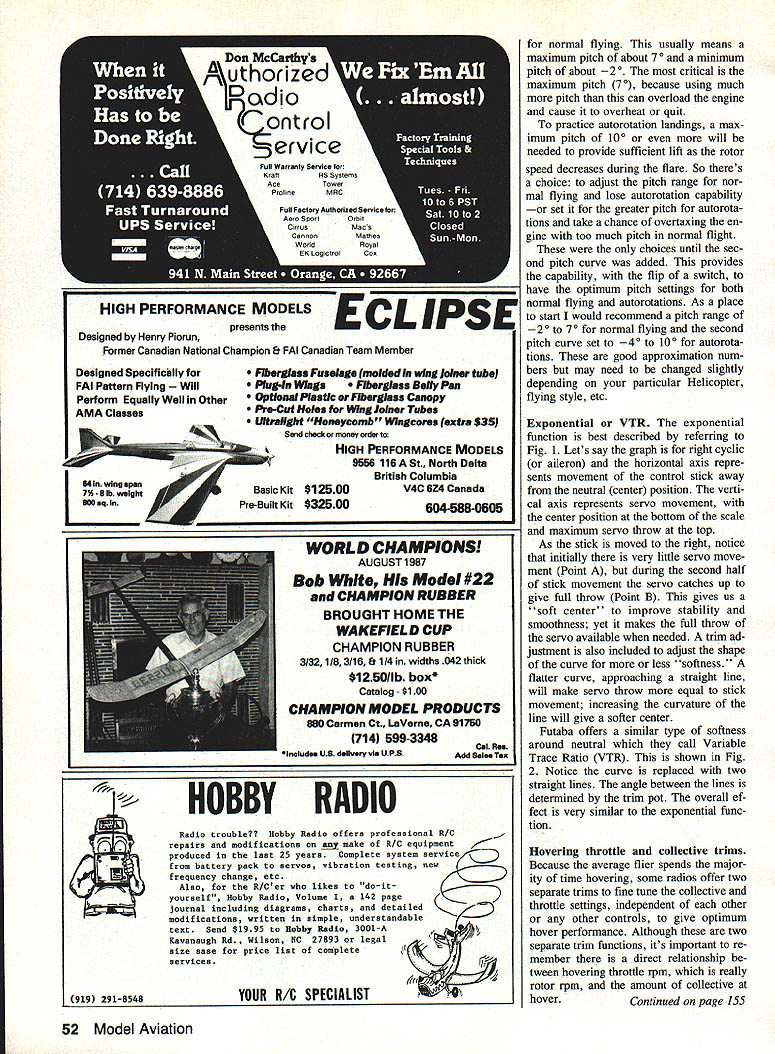
Warning lights
Top radios add more switches for increased capability, and it's easier to have a switch in the wrong position. Warning lights—usually small red LEDs—illuminate when power is on and change to flashing if the function they monitor is active. They add an extra margin of safety, though most are small and can be hard to see in direct daylight.
Clocks and timers
Clocks and timers (usually LCDs) track transmitter-on time, flight time, and provide count-up or count-down functions. They consume very little battery power but should be protected from prolonged direct sunlight to avoid display fading. Newer radios, especially PCM units, often require more battery power than older sets and may not operate as long on a single charge; timers help keep you on the safe side of battery limits.
Even though we've covered many heli-radio functions between this article and the previous one, manufacturers include additional features not mentioned here. If you're interested in one of these radios, find someone who has one so you can see the features firsthand, or request an owner's manual or feature list from the manufacturer or importer. In top-of-the-line radios you can also expect higher-quality components throughout the unit—case, switches, control sticks, trim pots, and appearance. When you take a closer look at what the additional cost brings to your flying enjoyment and capabilities, you may decide, as I have, that it's worth the investment to have the best radio available.
Transcribed from original scans by AI. Minor OCR errors may remain.

