
AETOS
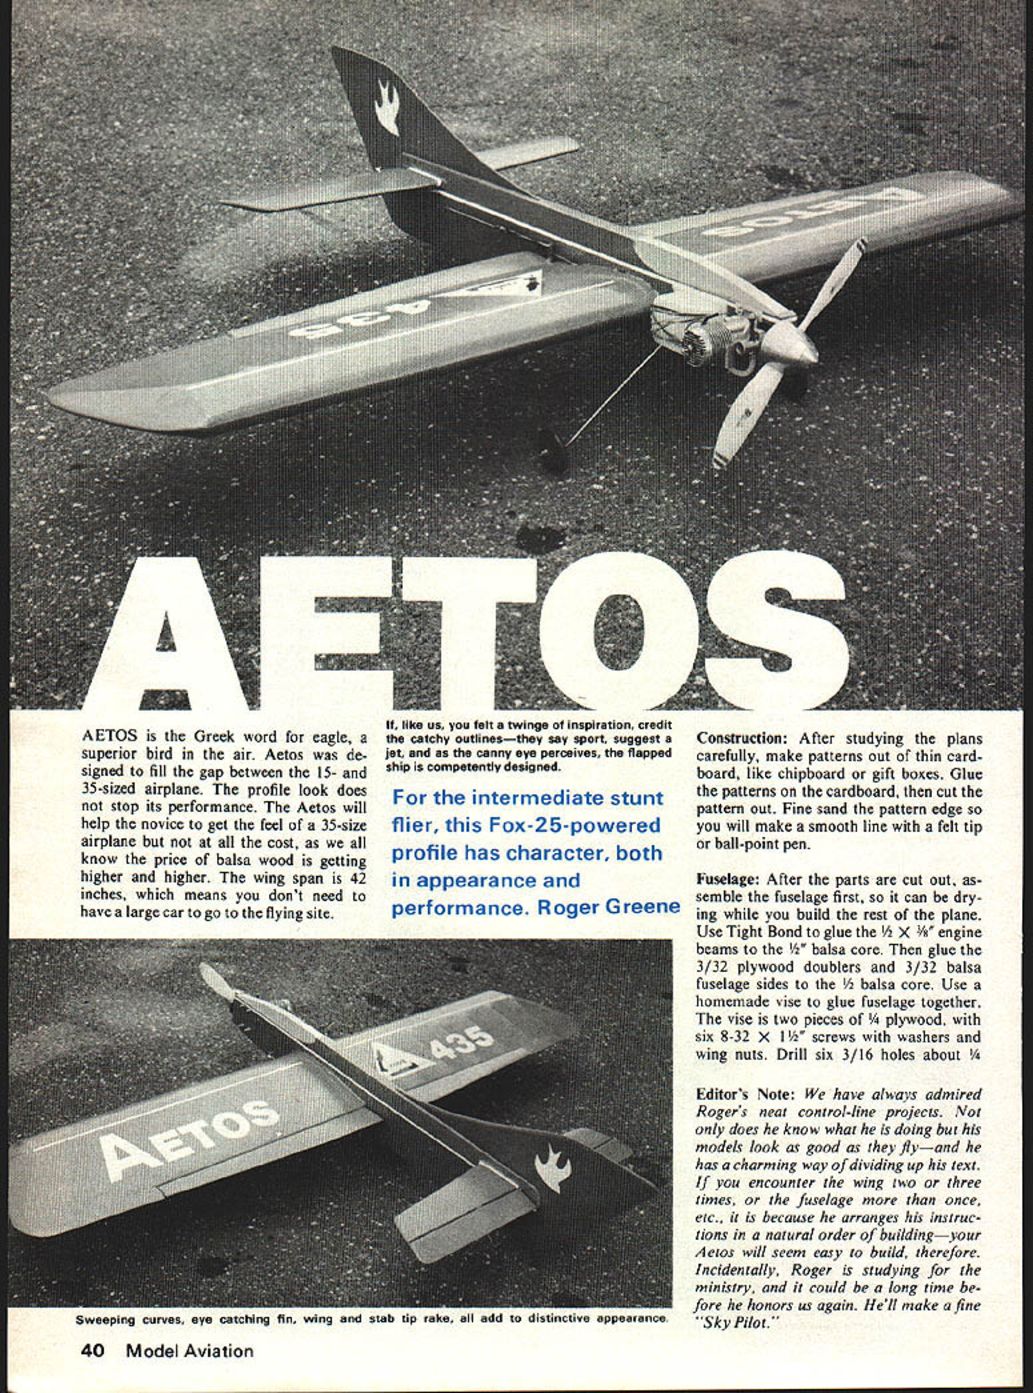
Aetos is the Greek word for eagle, a superior bird in the air. Aetos was designed to fill the gap between 15- and 35-size airplanes. The profile look does not stop its performance. The Aetos will help the novice get the feel of a 35-size airplane but not at the same cost—as we all know, the price of balsa is rising. The wingspan is 42 inches, so you don't need a large car to go to the flying site.
If, like us, you feel a twinge of inspiration, credit the catchy outlines—they say sport, suggest a jet, and, as the canny eye perceives, the flapped ship is competently designed. For the intermediate stunt flier, this Fox .25-powered profile has character, both in appearance and performance.
Happy flying. Mine weighs 26 oz; yours could weigh less with newer finishing techniques and careful wood selection.
Editor's Note
We have always admired Roger Greene's neat control-line projects. Not only does he know what he is doing, but his models look as good as they fly—and he has a charming way of dividing up his text. If you encounter the wing two or three times, or the fuselage more than once, it is because he arranges his instructions in the natural order of building—your Aetos will seem easy to build, therefore. Incidentally, Roger is studying for the ministry, and it could be a long time before he honors us again. He'll make a fine "Sky Pilot."
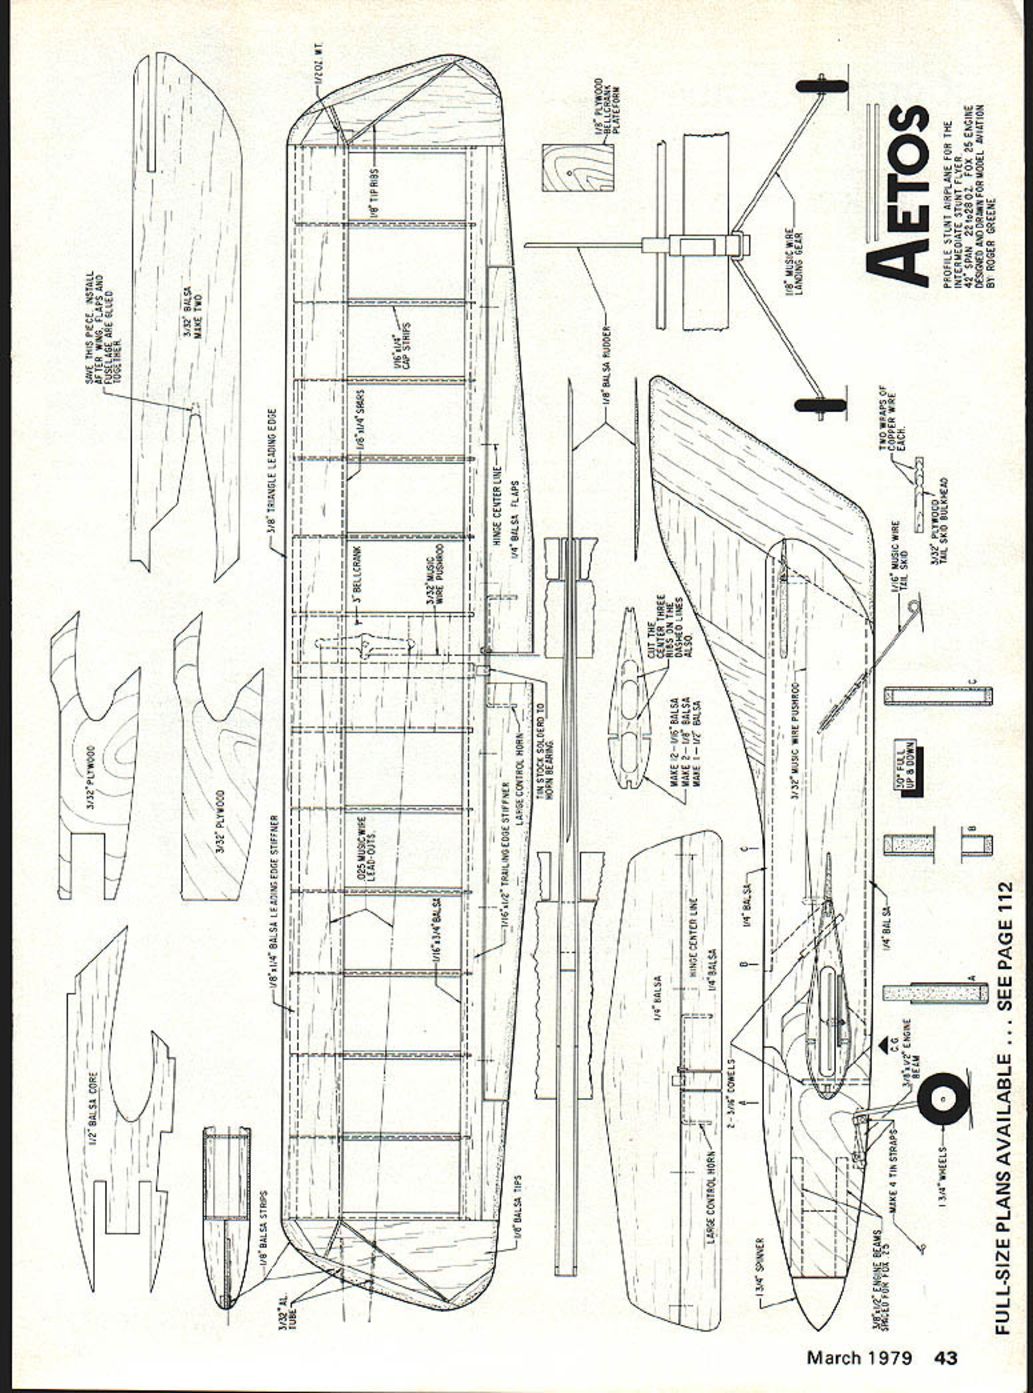
Construction
Patterns and Preparation
- Study the plans carefully.
- Make patterns out of thin cardboard (chipboard from gift boxes works well).
- Glue the paper patterns to the cardboard, cut them out, and fine-sand the pattern edges so you will make a smooth transfer line with a felt-tip or ball-point pen.
Fuselage (initial)
- After parts are cut out, assemble the fuselage first so it can dry while you build the rest of the plane.
- Glue the 1/2" x 3/8" engine beams to the 1/2" balsa core using Titebond (or another suitable wood glue).
- Glue the 3/32" plywood doublers and 3/32" balsa fuselage sides to the 1/2" balsa core (use a waterproof glue where required).
- Use a homemade vise to clamp the fuselage while glue dries:
- Two pieces of 1/4" plywood
- Six 8-32 x 1 1/4" screws with washers and wing nuts
- Drill six 3/16" holes for the screws
- Set the fuselage aside to dry about 24–48 hours.
Wing (construction)
- Cut 1" off the trailing edge from two 3" x 1/16" x 36" balsa sheets. The remaining 2" width from those sheets will be used for the leading-edge planking.
- Tape the wing plan to the bench and cover with wax paper or Saran Wrap.
- Pin the 1" x 1/16" x 36" balsa trailing edge over the plan.
- Space ribs over the plan on the 1/8" x 1/4" bottom spar.
- Install the top spar, ribs, 1/8" x 1/2" leading edge and trailing pieces; check alignment, glue, and pin to the trailing edge.
- Glue the top 1" x 1/16" x 36" trailing edge sheet.
- Epoxy the 1/8" bellcrank plywood mount in place.
- Set the wing aside to dry.
Notes: Use Sigment or Ambroid (glue must be waterproof).
Rudder
- Cut and glue the rudder pieces together over the plan (cover plan with wax paper or Saran Wrap).
- Sand the rudder to shape as shown on the plan.
- Glue the rudder to the fuselage with Sigment (or equivalent waterproof glue).
Flaps, Stabilizer, and Elevator (initial)
- Draw a hinge-line on the edge side of each surface at center to use as a guide.
- Sand the hinge area and each surface to the shape shown on the plan.
- Drill holes and insert epoxy into the holes for the control horns; push the horns in, align, and pin over the plan.
- Set the surfaces aside to dry.
Fuselage (continued)
- Remove the fuselage from the vise after the initial drying period.
- Glue the top 1/4" balsa piece in place, align, and pin until dry.
Wing (final assembly)
- Connect leadouts and pushrod to the bellcrank. Insert leadouts through the inboard ribs.
- Secure the bellcrank to the platform with the bolt provided; solder the nut so it will not come off in flight.
- Moisten the leading-edge planking with water, towel dry to remove excess, wrap it over the wing, and pin lightly. Be careful not to damage the wood with pins while wet.
- Glue wingtip pieces together, then glue to the end ribs.
- When planking is dry, glue with Sigment (or similar).
- Always check alignment by viewing from the trailing edge to ensure the top and bottom of the thickest part of the airfoil on both halves are parallel.
- Set the wing aside to dry.
Flaps, Stabilizer, Elevator (hinging)
- Cut slots to receive the hinges.
- Apply petroleum jelly (Vaseline) at the hinge pivot on each hinge to prevent epoxy from locking the pivot.
- For epoxy hinges, put epoxy into the slots and insert hinges; make sure the hinge line is aligned with the trailing edge.
- Do not epoxy hinges to the wing prematurely if other alignment checks are pending.
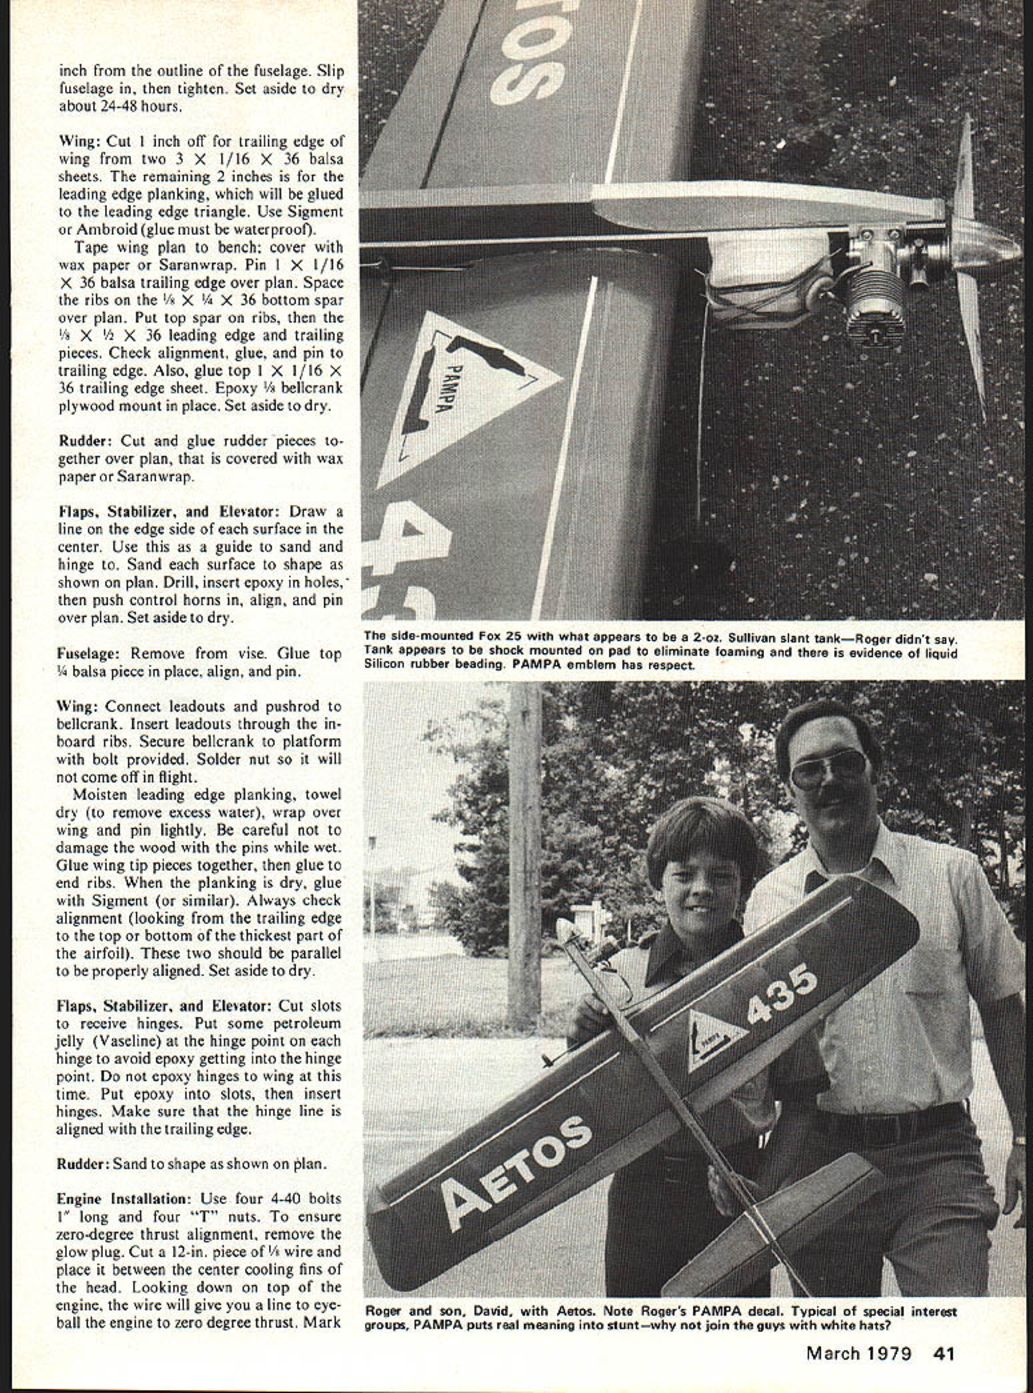
Engine Installation
- Use four 4-40 bolts, 1" long, and four T-nuts for mounting.
- To ensure zero-degree thrust alignment:
- Remove the glow plug.
- Cut a 12" piece of 1/16" wire and place it between the center cooling fins of the head.
- Looking down from above, the wire provides a straight line to eyeball the engine for zero-degree thrust.
- Mark and drill the holes, checking fit before final assembly.
Fuselage and Wing Final Assembly
- Make a mark on the leading-edge planking 3/32" from the 1/2" center rib—this indicates where the fuselage will align after you plank the center three ribs with 1/16" balsa.
- Sand shapes per the plans, being careful not to sand the canopy edge off.
- Insert the flaps into the wing slot in the fuselage, then insert the wing.
- Epoxy the flap hinges as before.
- Epoxy the wing to the fuselage by aligning the marks on the leading-edge planking to both sides of the fuselage. Use a drafting triangle to square the leading edge to the fuselage; let dry.
- Drill in the 3/16" dowels and epoxy them in place.
- Bind 1/16" music wire for the tail skid, wrap with copper wire, and epoxy as shown on the plans.
- Install the 1/4" balsa bottom piece and glue with Sigment.
Stabilizer Alignment and Attachment
- Epoxy the stabilizer to the fuselage.
- Align by measuring from hinge line to hinge line—measurements should be equal on both sides. Make adjustments before epoxy sets.
- Viewed from the front of the plane, the bottom of the stabilizer should be "sitting on top of the wing." Adjust as necessary before epoxy dries.
- Proper alignment here is critical for good flight characteristics.
Connecting Flaps and Elevator
- Overlap the flap and elevator pushrods about 1" and wrap the overlap with copper wire.
- Set elevator and flaps to zero degrees, solder the overlap, and secure the joint.
- Wrap and solder the pushrod connection from the bellcrank to the flap pushrod with the bellcrank in neutral and the flaps at zero degrees.
Leadouts
- Wrap the leadouts per the plan (some builders prefer to do this earlier).
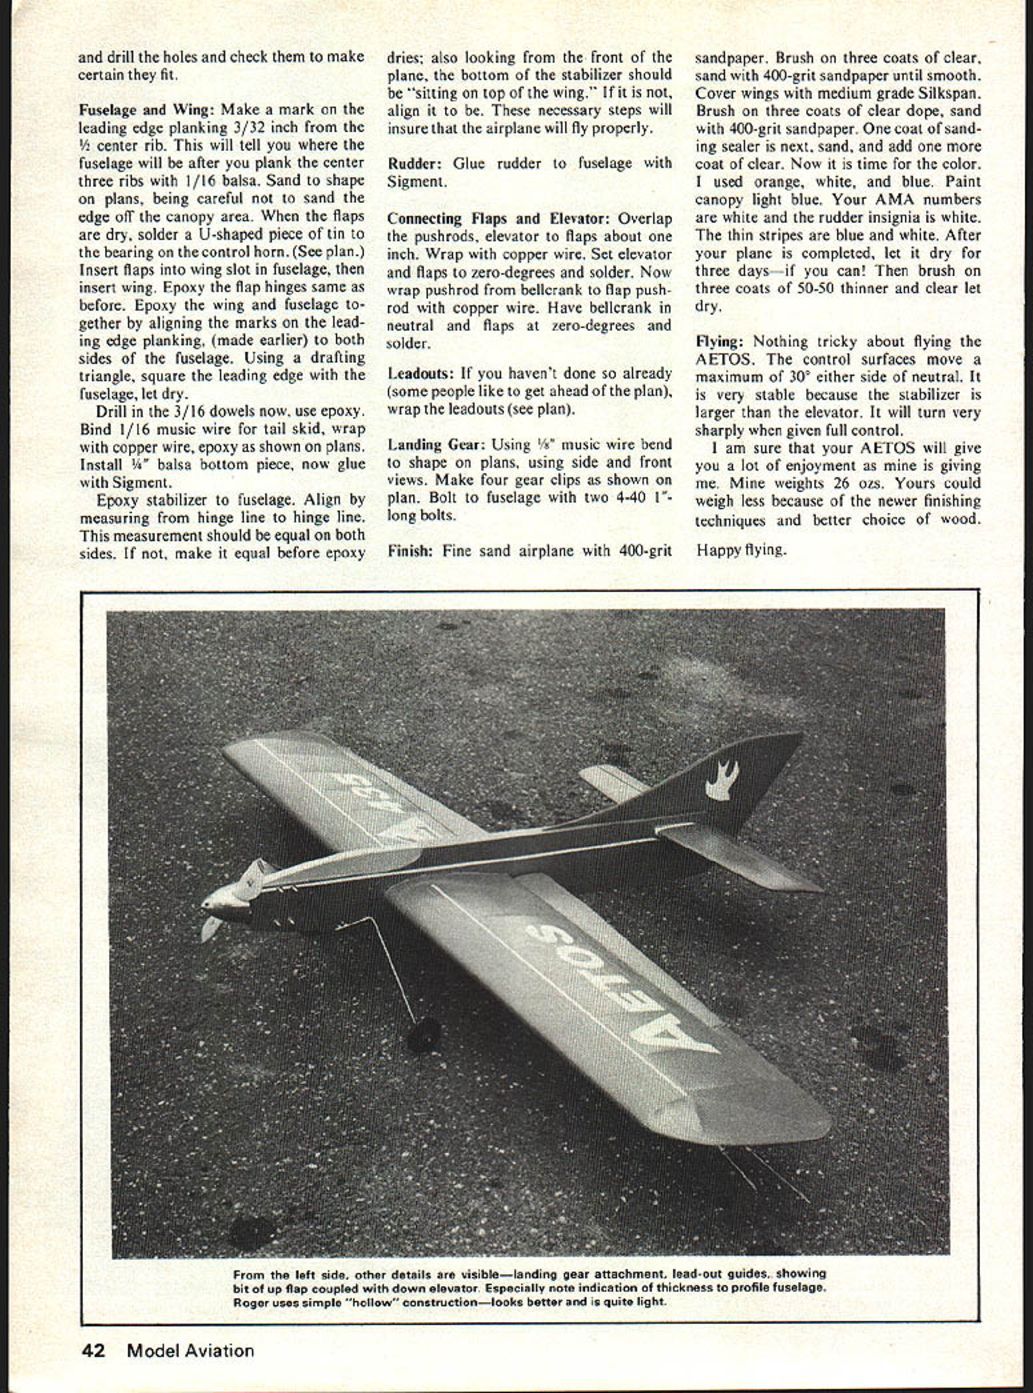
Landing Gear
- Bend 1/8" music wire to shape using the side and front views on the plan.
- Make four gear clips as shown on the plan.
- Bolt the gear to the fuselage with two 4-40 x 1" bolts.
Finish
- Fine-sand the airplane with 400-grit sandpaper.
- Brush on three coats of clear dope; sand with 400-grit between coats until smooth.
- Cover wings with medium-grade Silkspan.
- Brush on three coats of clear dope over the Silkspan; sand with 400-grit between coats.
- Apply one coat of sanding sealer; sand smooth, then add one more coat of clear dope.
- Paint as desired. Example used: orange, white, and blue. Paint canopy light blue. AMA numbers and rudder insignia white. Thin stripes in blue and white.
- After the plane is completed, let it dry for three days if possible. Then brush on three coats of 50/50 thinner-and-clear mixture; let dry.
Flying
- Control surfaces move a maximum of 30° each side of neutral.
- The Aetos is very stable because the stabilizer is larger than the elevator.
- It will turn very sharply when given full control.
- Expect good enjoyment; mine weighs about 26 oz.
Notes and tips:
- Use waterproof glues (Sigment, Ambroid, or similar) where the instructions specify.
- Solder nuts or hardware that must not back off in flight.
- Double-check alignment measurements before epoxy sets—small errors at this stage will affect flight.
Transcribed from original scans by AI. Minor OCR errors may remain.

