
Alco Sportplane
IN 1930 the Modern Mechanics Flying Manual ran a two-part construction article for a full-size, very simple home-built airplane called the Alco Sportplane. Plans and parts for the one-seater monoplane had been available from the Allison Airplane Co. in Lawrence, Kansas since 1920.
According to John Allison, the Alco's designer, hundreds of the little flivvers had been successfully built and flown by amateur craftsmen and fledgling aviators. No wonder. The Alco cost only $100 to build, and for another $35 a second-hand Harley V-twin motorcycle engine would get you into the air. If you wanted to go first class, $100 would buy a brand new Lawrence 28-hp twin-cylinder aircraft engine.
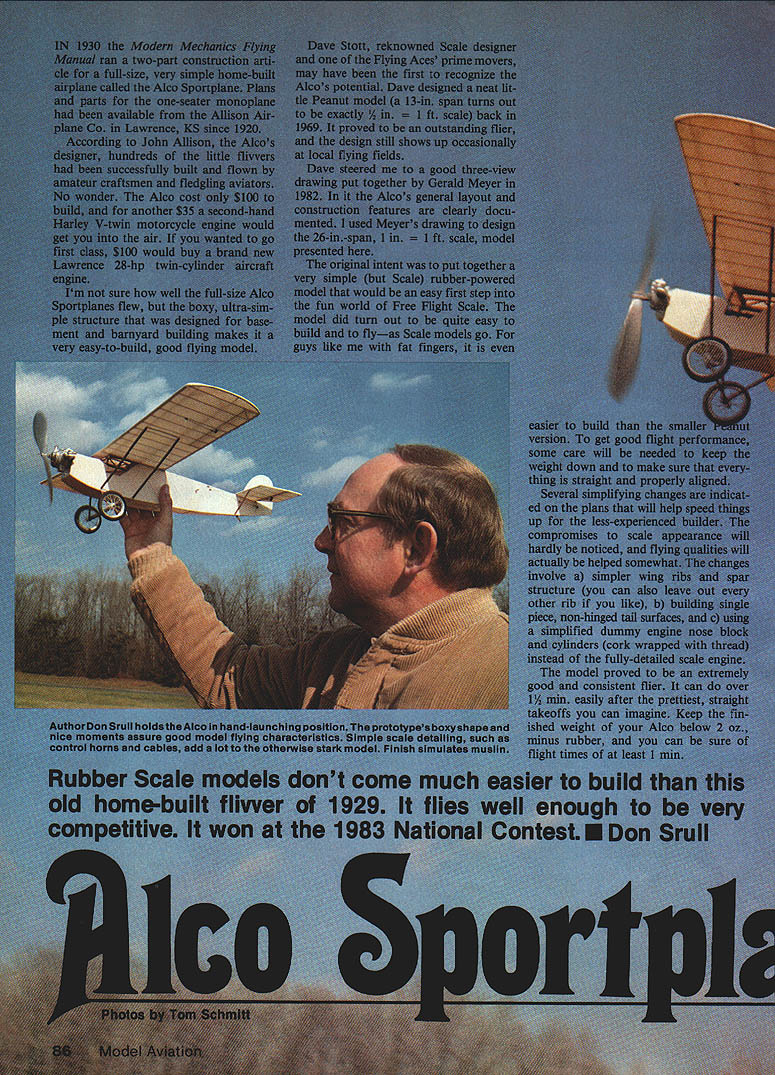
I'm not sure how well the full-size Alco Sportplane flew, but the boxy, ultra-simple structure that was designed for basement and barnyard building makes it a very easy-to-build, good-flying model.
Dave Stott, renowned scale designer and one of the Flying Aces' prime movers, may have been the first to recognize the Alco's potential. Dave designed a neat little Peanut model (a 13-in. span turns out to be exactly 1/2 in. = 1 ft. scale) back in 1969. It proved to be an outstanding flier, and the design still shows up occasionally at local flying fields.
Dave steered me to a good three-view drawing put together by Gerald Meyer in 1982. In it the Alco's general layout and construction features are clearly documented. I used Meyer's drawing to design the 26-in.-span, 1 in. = 1 ft. scale model presented here.
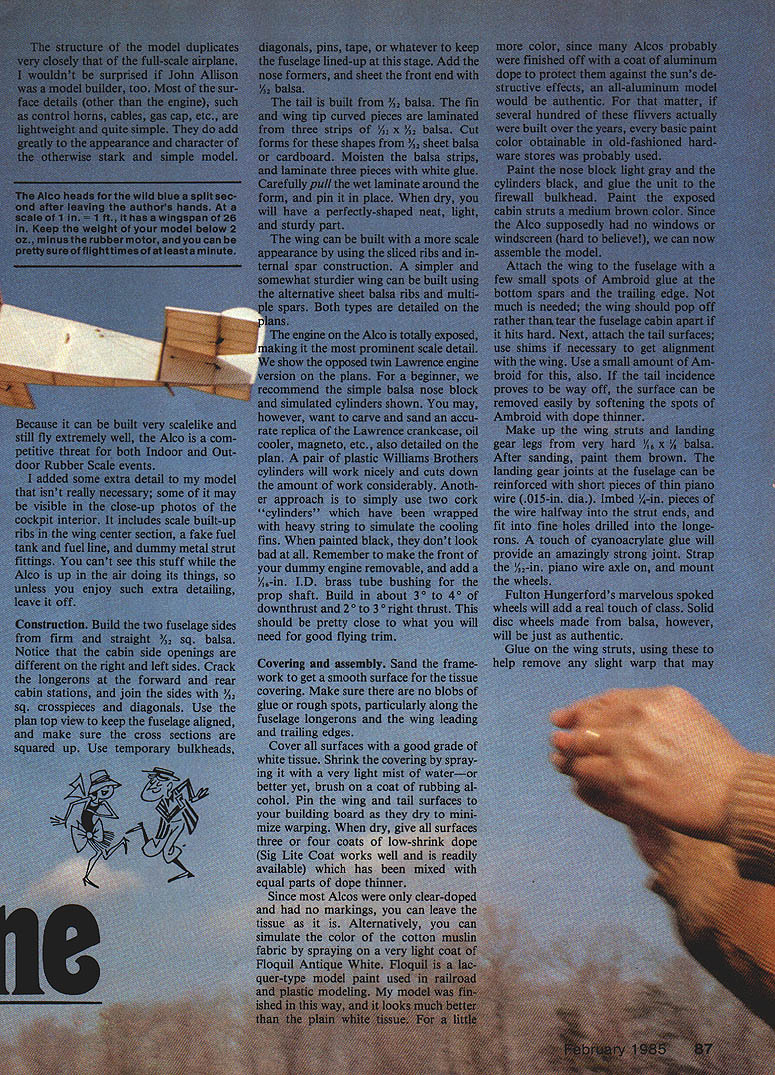
The original intent was to put together a very simple (but scale) rubber-powered model that would be an easy first step into the fun world of Free Flight Scale. The model did turn out to be quite easy to build and to fly—as scale models go. For guys like me with fat fingers, it is even easier to build than the smaller Peanut version. To get good flight performance, some care will be needed to keep the weight down and to make sure that everything is straight and properly aligned.
Simplifying changes (recommended)
- Simpler wing ribs and spar structure (you can also leave out every other rib if you like).
- Build single-piece, non-hinged tail surfaces.
- Use a simplified dummy engine nose block and cylinders (cork wrapped with thread) instead of a fully detailed scale engine.
These compromises to scale appearance will hardly be noticed, and flying qualities will actually be helped somewhat.
The model proved to be an extremely good and consistent flier. It can do over 1 1/2 minutes easily after the prettiest, straight takeoffs you can imagine. Keep the finished weight of your Alco below 2 oz., minus rubber, and you can be sure of flight times of at least 1 minute.
Rubber scale models don't come much easier to build than this old home-built flivver of 1929. It flies well enough to be very competitive — it won at the 1983 National Contest. ■ Don Srull
The structure of the model duplicates very closely that of the full-scale airplane. Most of the surface details (other than the engine), such as control horns, cables, gas cap, etc., are lightweight and quite simple. They add greatly to the appearance and character of the otherwise stark and simple model.
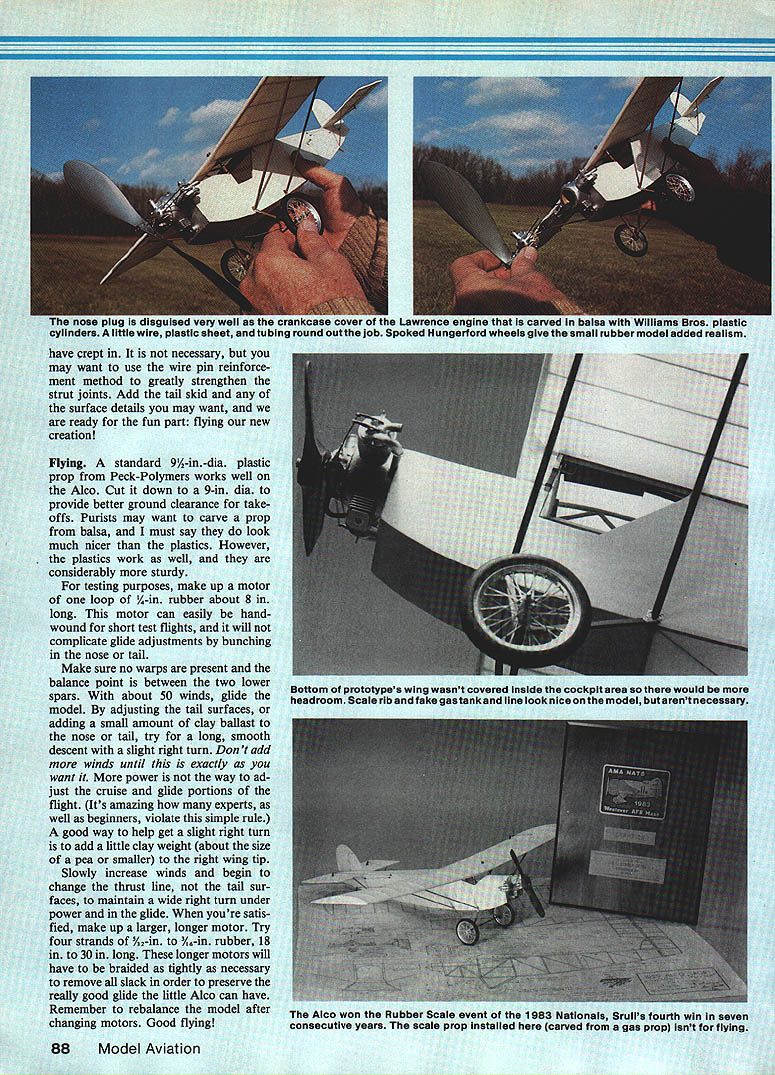
I added some extra detail to my model that isn't really necessary; some of it may be visible in the close-up photos of the cockpit interior. It includes scale built-up ribs in the center section, a fake fuel tank and fuel line, and dummy metal strut fittings. You can't see this stuff while the Alco is up in the air doing its thing, so unless you enjoy such extra detailing, leave it off.
Construction
Fuselage
- Build the two fuselage sides from firm, straight 3/32" square balsa.
- Note that the cabin side openings are different on the right and left sides.
- Crack the longerons at the forward and rear cabin stations, and join the sides with 1/8" square crosspieces and diagonals.
- Use the plan top view to keep the fuselage aligned, and make sure the cross sections are squared up.
- Use temporary bulkheads, diagonals, pins, tape, or whatever it takes to keep the fuselage lined up at this stage.
- Add the nose formers, and sheet the front end with 1/32" balsa.
Tail
- Build the tail from 1/8" balsa.
- The fin and wing-tip curved pieces are laminated from three strips of 1/16" x 3/32" balsa.
- Cut forms for these shapes from 1/32" sheet balsa or cardboard. Moisten the balsa strips and laminate three pieces with white glue. Carefully pull the wet laminate around the form and pin it in place. When dry, you will have a perfectly shaped, neat, light, and sturdy part.
Wing
- The wing can be built with a more scale appearance by using sliced ribs and internal spar construction.
- A simpler and somewhat sturdier wing can be built using the alternative sheet-balsa ribs and multiple spars.
- Both types are detailed on the plans.
Engine
- The engine on the Alco is totally exposed, making it the most prominent scale detail.
- The plans show the opposed twin Lawrence engine version. For a beginner, the simple balsa nose block and simulated cylinders are recommended.
- Options:
- Carve and sand an accurate replica of the Lawrence crankcase, oil cooler, magneto, etc., as detailed on the plan.
- Use a pair of Williams Brothers plastic cylinders to cut down work.
- Use two cork "cylinders" wrapped with heavy string to simulate cooling fins; painted black they look fine.
- Make the front of the dummy engine removable and add a 3/32" I.D. brass tube bushing for the prop shaft.
- Build in about 3°–4° downthrust and 2°–3° right thrust to start.
Covering and assembly
- Sand the framework to get a smooth surface for the tissue covering. Remove blobs of glue and rough spots, especially along the fuselage longerons and the wing leading and trailing edges.
- Cover all surfaces with a good grade of white tissue.
- Shrink the covering by spraying a very light mist of water or brush on a coat of rubbing alcohol.
- Pin the wing and tail surfaces to your building board as they dry to minimize warping.
- When dry, give all surfaces three or four coats of low-shrink dope (Sig Lite-Coat works well) mixed with equal parts dope thinner.
Finishing options:
- Most Alcos were clear-doped with no markings; you can leave the tissue plain.
- Simulate the color of cotton muslin by spraying a very light coat of Floquil Antique White (a lacquer-type model paint).
- For an authentic look, spray all-aluminum dope (many Alcos may have had aluminum finishes).
- Paint the nose block light gray and the cylinders black; glue the unit to the firewall bulkhead.
- Paint the exposed cabin struts a medium brown color.
Final assembly
- Attach the wing to the fuselage with a few small spots of Ambroid glue at the bottom spars and the trailing edge. Use only enough glue that the wing will pop off rather than tear the fuselage if necessary.
- Attach the tail surfaces with a small amount of Ambroid; use shims to get alignment with the wing. If the tail incidence is way off, soften the Ambroid with dope thinner to remove and reattach.
- Make up the wing struts and landing-gear legs from very hard 1/8" x 1/8" balsa. After sanding, paint them brown.
- Reinforce landing-gear joints at the fuselage with short pieces of thin piano wire (0.015" dia.).
- Imbed 1/8" pieces of the wing halfway into the strut ends, fit into fine holes drilled into the longerons, and add a touch of cyanoacrylate glue.
- Strap a 1/32" piano wire axle on and mount the wheels.
- Fulton Hungerford's marvelous spoked wheels add a real touch of class; solid disc balsa wheels are also authentic.
- Glue on the wing struts, using them to help remove any slight warp, and make final adjustments.
Motor, trimming, and flying
- Make up the motor loop from 1/8" rubber about 8" long. The motor can easily be hand-wound.
- Short test flights complicate glide adjustments because of bunching at the nose and tail. Make sure no warps are present.
- For glide adjustments:
- Add a small amount of clay ballast to the nose or tail and try long, smooth descents with a slight right turn.
- Do not add power until the cruise/glide portions of flight are satisfactory.
- A little clay weight about the size of a pea on the smaller right wing tip helps get a slight right turn.
- Slowly increase motor length and power, changing the thrust line and tail surfaces to maintain a wide right turn under power.
- When glide is satisfactory, make up a larger, longer motor. Try:
- Four strands of 1/2" x 6" rubber, or
- 18"–30" long motors (these must be braided tightly and slack removed to preserve good glide).
- Remember to rebalance the model after changing motors.
Good flying.
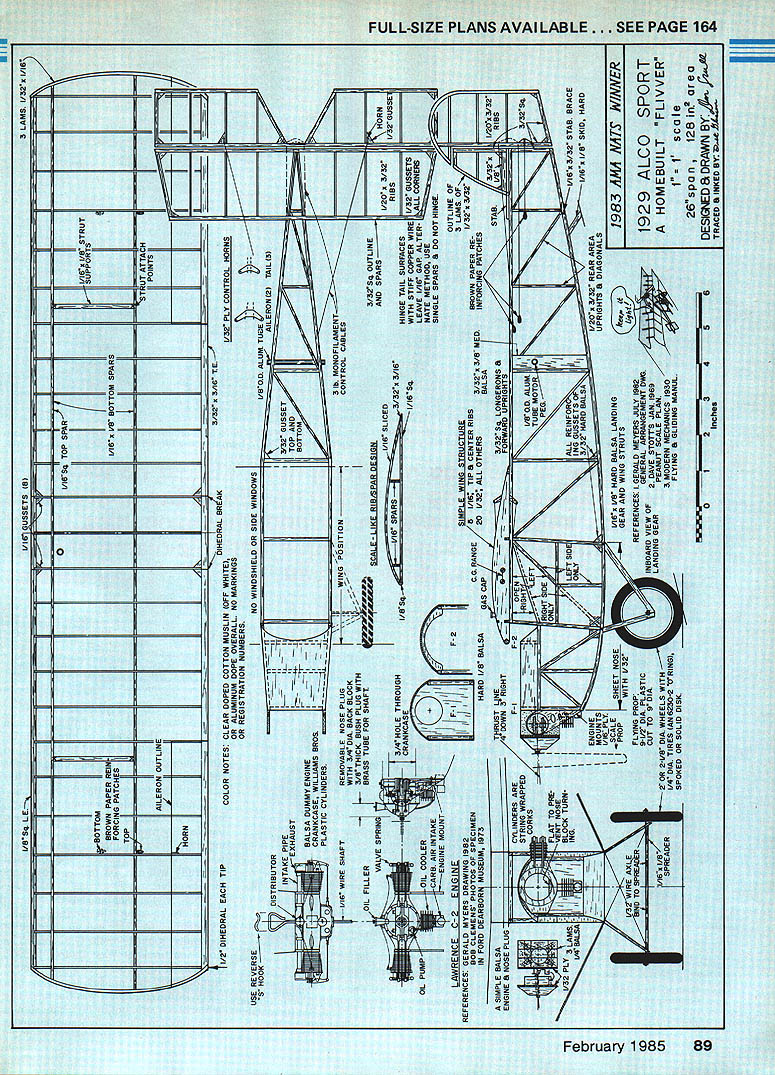
Plan notes and material sizes (labels from plan)
- LE 1/16" gussets
- 1/32" x 1/16" gussets
- 1/16" sq. top spar
- 1/16" x 1/8" strut supports
- Bottom — brown paper reinforcing
- 1/16" x 1/8" bottom spars
- Forcing patches
- Top strut attach
- Aileron outline
- Horn
- 1/2° dihedral each tip
- Color notes:
- Clear-doped cotton muslin or white or aluminum dope overall. No markings or registration numbers.
- Balsa dummy engine / crankcase — Williams Bros. plastic cylinders
- 1/16" wire shaft. Removable nose plug with 3/4" dia. back block. 3/8" thick bush plug with 1/8" ...
- Ribs: 1/32" gussets with stiff copper wire
- Pump / oil cooler (as detailed on plan)
- Single spars — do not hinge
- References: Gerald Meyer drawing 1982; Bob Clemens photos of specimen in Ford Dearborn Museum 1973.
- Hard balsa: gas ___ V32; all others 3/32" x 3/8"
- Reinforcing patches 3/32"
- Simple balsa engine
- Nose plug with back block
- Stab brace 1/16" x 3/32" hard balsa
- Skid: hard
- Scale sheet nose: 1/16" x 1/8" hard balsa
- Landing wheels: cut to 9" dia. (see drawing)
(Note: the page primarily contains plan labels, material sizes and notes for construction.)
Specifications / Title block
- 1983 AMA NATS WINNER
- 1929 ALCO SPORT — A HOME-BUILT FLYER
- Scale: 1 in. = 1 ft.
- 26" span — 128 sq. in. area
- Designed & drawn by: (signature on plan)
- Traced & inked by: _____
Transcribed from original scans by AI. Minor OCR errors may remain.

