
ARF Wing Repair
Don Brooks
One of the skills any serious RC pilot needs is the ability to repair a severely damaged wing — even that of an Almost Ready to Fly (ARF) model. Even if you don't like to build, sooner or later you will need to know how to repair the wing of your model. No frequently flown model maintains pristine, newly-built beauty without some attention. You may experience an event that leaves one wing shattered — as recently happened to me.
Here's how I repaired a broken wing and returned an ARF model to its original beauty and flyability. (This procedure also works for a kit-built wing.)
I am an AMA Introductory Pilot Instructor. My student brought his newly assembled Tiger Trainer 40 ARF to the field for instruction. While trying to keep the airplane from running off the runway, I took control a bit late and impaled the airplane on an irrigation stake. The left wing panel erupted into a shower of balsa and covering; the airplane spun; and an ugly yellow stake stuck out of the top of the remains of the left wing.
A quick survey showed a smashed and broken leading edge, broken top and bottom spar members at the third rib bay outboard from the center of the wing, and mostly intact trailing edge. So I had a wing repair job to do. The damage often looks worse than it really is, so don't lose heart. I completed the repair in five steps.
Step One: Expose the Damage
- Remove all plastic covering from the damaged wing panel.
- Remove most of the top center-section balsa sheeting and the leading-edge sheeting to expose cracked sheeting, broken ribs, spar breaks, and crushed wood.
- Salvage any sheeting or parts that are in reusable condition.
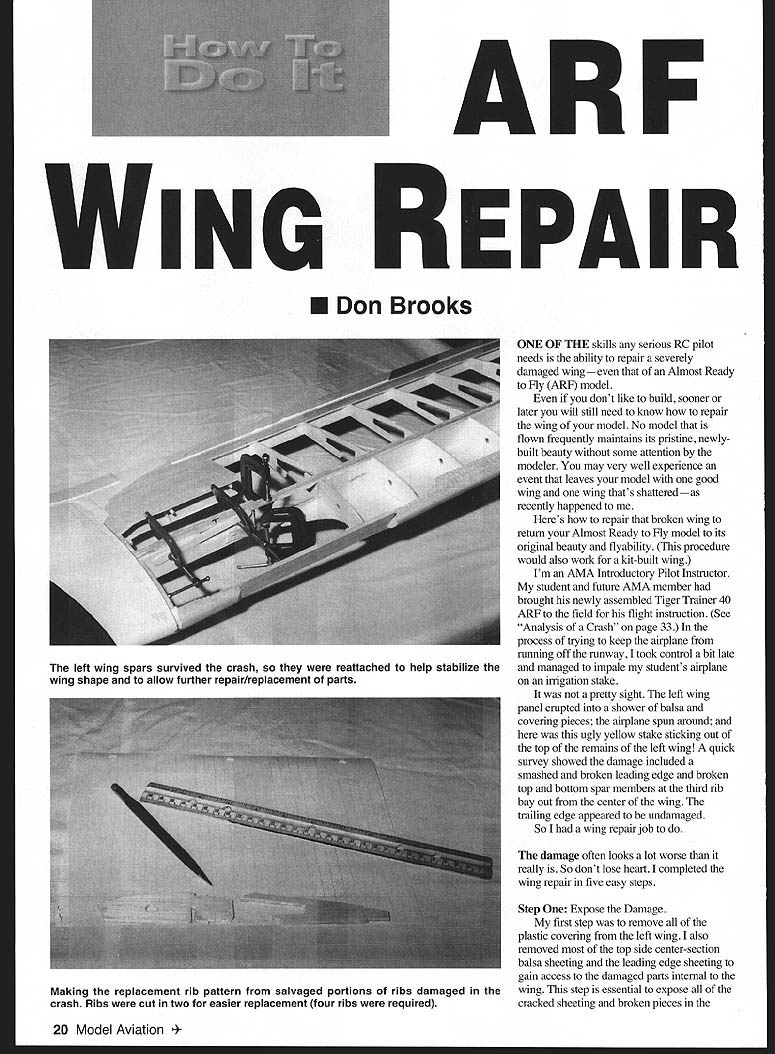
- Note that in this case the left wing spars survived the crash; I reattached them temporarily to help stabilize the wing shape and allow further repairs.
Throughout this step be gentle with remaining structure and remove all loose, crushed, or shattered pieces until you can clearly see what must be repaired or replaced.
Step Two: Stabilize Wing Dimensions
Since this was an ARF and there was no plan to rebuild from scratch, preserving the wing outline was necessary to fill in the broken structure.
- Prop the good wing at the correct angle so the damaged wing pieces can be laid flat on a building board and pinned to form the correct outline.
- Butt top and bottom spar pieces together and reconnect them temporarily using baking soda and cyanoacrylate (CyA). The baking soda + thin CyA combination sets up like a brick and provides a quick, rigid splice. Caution: use adequate ventilation when using CyA.
- With the wing pinned, cut away damaged/crushed ends of the leading edge. Make cuts at a 45° angle to the wood grain so the gap is wider toward the front.
- Glue a backing piece of 1/4 x 1/2" balsa behind the leading-edge gap with roughly a two-inch overlap on each end; cut and sand to fit.
- Partially fill the beveled gap in the leading edge with a wedge-shaped carved balsa insert; glue with CyA and fill small gaps with baking soda + CyA.
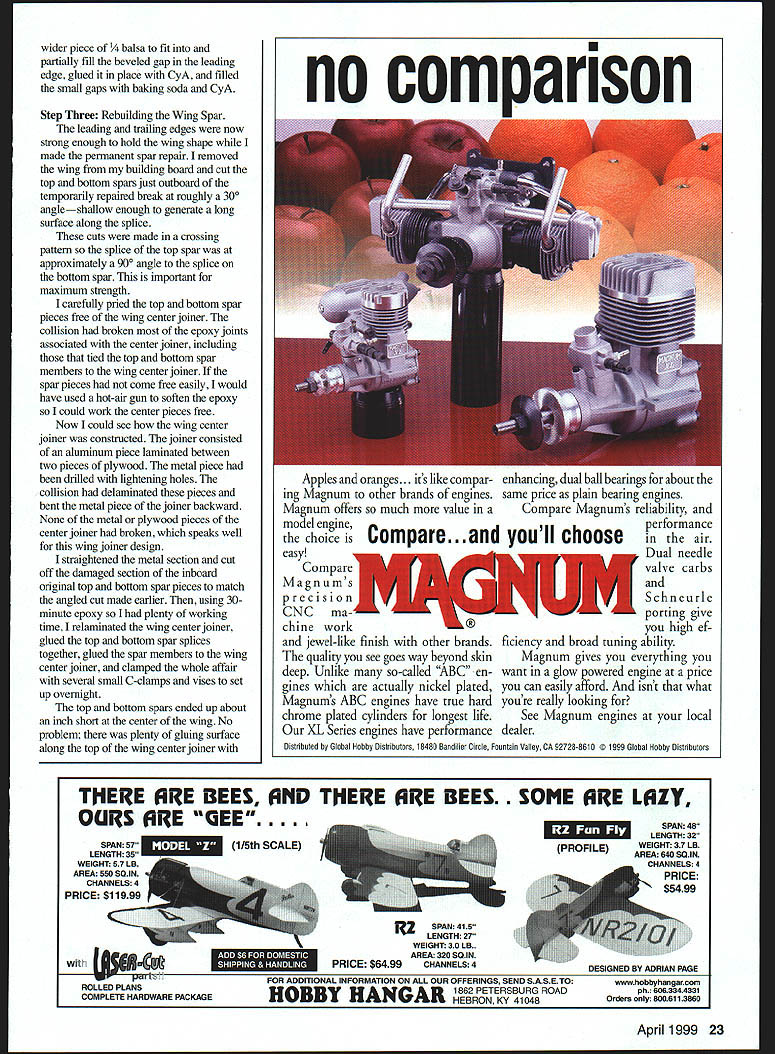
- Replace bottom sheeting, sand the leading edge to shape, and add center sheeting where appropriate.
- Replace ribs using half-rib sections sanded to fit and add shear webbing in damaged rib bays as required.
Be careful to put as little stress as possible on the trailing edge while working. In my repair the top and bottom sheeting of the trailing edge cracked and required repair.
Damage assessment for this crash included:
- Smashed leading edge over two rib bays
- Broken top and bottom spars
- Four broken or partly missing wing ribs
- Smashed center-section and bottom sheeting
- Cracked trailing-edge sheeting
I removed all damaged sheeting, salvaged parts that were reusable, and cleared loose rib pieces and smashed leading-edge sections.
Step Three: Rebuilding the Wing Spar
With the leading and trailing edges strengthened enough to hold the wing shape, I made the permanent spar repair.
- Remove the wing from the building board.
- Cut the top and bottom spars just outboard of the temporary splice at roughly a 30° angle to make a long bonding surface along the splice. Make the cuts in a crossing pattern so the top-spar splice is approximately 90° to the bottom-spar splice — this increases strength.
- Carefully pry the spar pieces free of the wing center joiner. If epoxy joints don't release easily, soften the epoxy with a hot-air gun before working the parts free.
- Inspect and straighten the center joiner. In my case the joiner was an aluminum piece laminated between two plywood faces; the collision had delaminated and bent the metal but not broken the parts. I straightened the metal section and trimmed damaged spar inboard ends to match the angled cuts.
- Using 30-minute epoxy (for ample working time), reattach the wing center joiner, glue the top and bottom spar splices, bond the spar members to the center joiner, and clamp with C-clamps and vises to set overnight.
- If the top and bottom spars are short at the center by an inch or so, fill those gaps with balsa blocks shaped and glued into the remaining gluing surface on the center joiner. Sand smooth once dry.
The resulting spar-to-center-joiner joints were at least as strong as the originals.
Step Four: Filling in Missing Structures
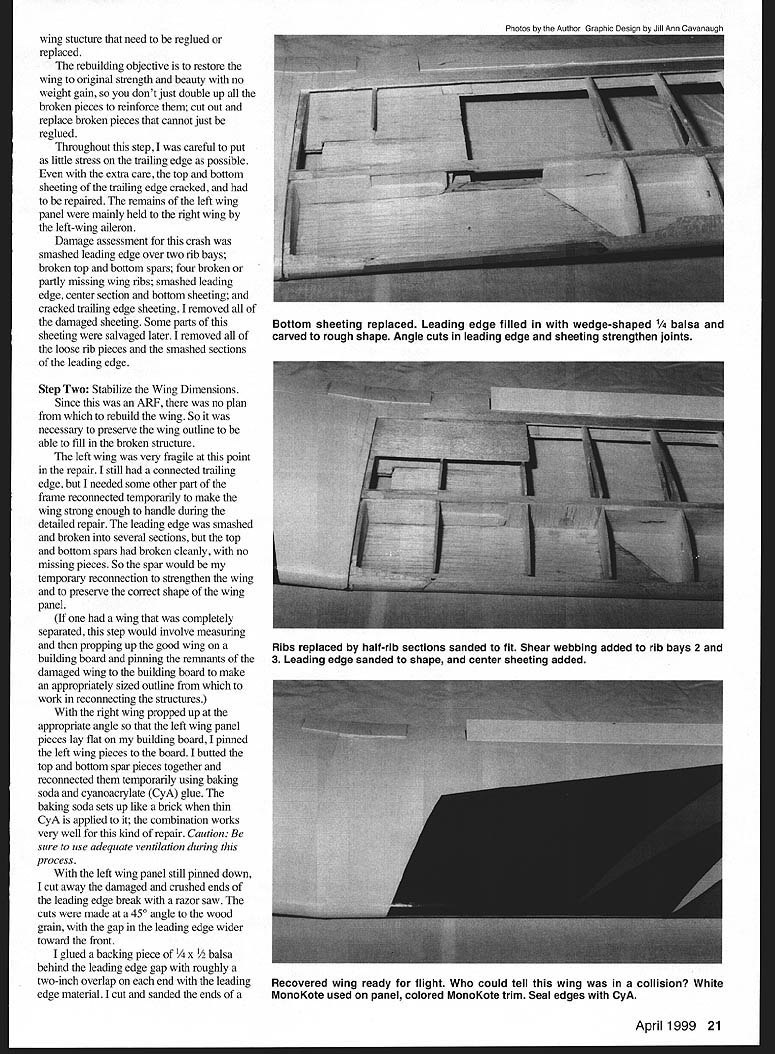
- Create replacement ribs: measure the wing chord and trace a rib pattern on paper; make a cardboard template; cut replacement ribs from 3/32" balsa.
- Cut the new ribs in half at the spar location and install them as forward and rear half-rib sections.
- Remove remaining top center-section sheeting on the damaged wing to access rib locations.
- Reinforce cracked trailing-edge balsa by gluing small pieces of 1/32" plywood inside the top and bottom trailing edges.
- After sanding spar joints smooth, bridge each spar joint on the inside surface with a layer of fiberglass cloth and CyA for additional security.
- Prior to reinstalling ribs, replace the bottom sheeting and complete the rest of the leading edge of the wing. Cut and fit sheeting pieces precisely.
- Pin the wing to the building board with the wingtip blocked up for 1/8" of washout (trailing edge high). Ensure the forward parts of the ribs to which the sheeting will be attached are the same height — some block-sanding may be needed.
- Cut the top leading-edge sheeting at a 45° angle to the wood grain and reattach undamaged portions with CyA and a little baking soda to fill hairline cracks.
- To help CyA penetrate the joint between sheeting and ribs, punch pinholes along the top of the sheeting above each rib and apply CyA through the holes while holding the sheeting tight against the ribs.
- Glue reinforcing balsa under and at the ends of the sheeting joints to strengthen and provide a gluing surface for new sheeting.
- When applying sheeting over a curved forward center section, wet the outside of the balsa to swell that side and help the wood take the curve with less bending stress.
- Remove the wing from the building board and sand all exposed structures in preparation for recovering.
Step Five: Recovering the Wing
The primary challenge in recovering this wing was sealing new MonoKote to the original factory covering. The manufacturer's covering was a low-temperature, low-tension film, so it was difficult to heat MonoKote enough to bond without scorching the original material where they overlapped.
- Use CyA to seal the edge of the new MonoKote to the original covering if heat bonding is unreliable.
- Apply white MonoKote to cover the whole repaired panel, then cut and iron in any colored decoration pieces (red, yellow, orange, etc.).
- Outline color boundaries with 1/16" trim tape. Tacking the trim tape ends with a small droplet of CyA helps keep them in place.
I estimate this repair cost about $10 in materials and glue and took about 7–8 hours in my workshop. The model was ready for flying the weekend after the accident.
Don Brooks 900 Bower Dr. Idaho Falls, ID 83404
Sources:
- Tiger Trainer 40 — Thunder Tiger USA, 2430 Lacey Ln. #120, Carrollton TX 75006
- MonoKote is sold by Top Flite through various distributors and hobby shops.
Transcribed from original scans by AI. Minor OCR errors may remain.

