


Baby Bird
Tom Dixon
What you see here was to be the "secret weapon" in 1/2A Stunt at a recent Nats. Alas, work responsibilities and the care and involvement with my new son meant the building schedule went out the window. Now it's finished and working well. Look out next time!
Background
The Baby Bird is a 0.6-scale version of my Phoenix (Model Aviation, February 1984). A modern bubble canopy is used to simplify fuselage construction; most people favor this style anyway. There is no separate cowl, again for simplicity and to allow ample airflow to carry away exhaust gases. If you want to get fancy, feel free to sculpt a cowl.
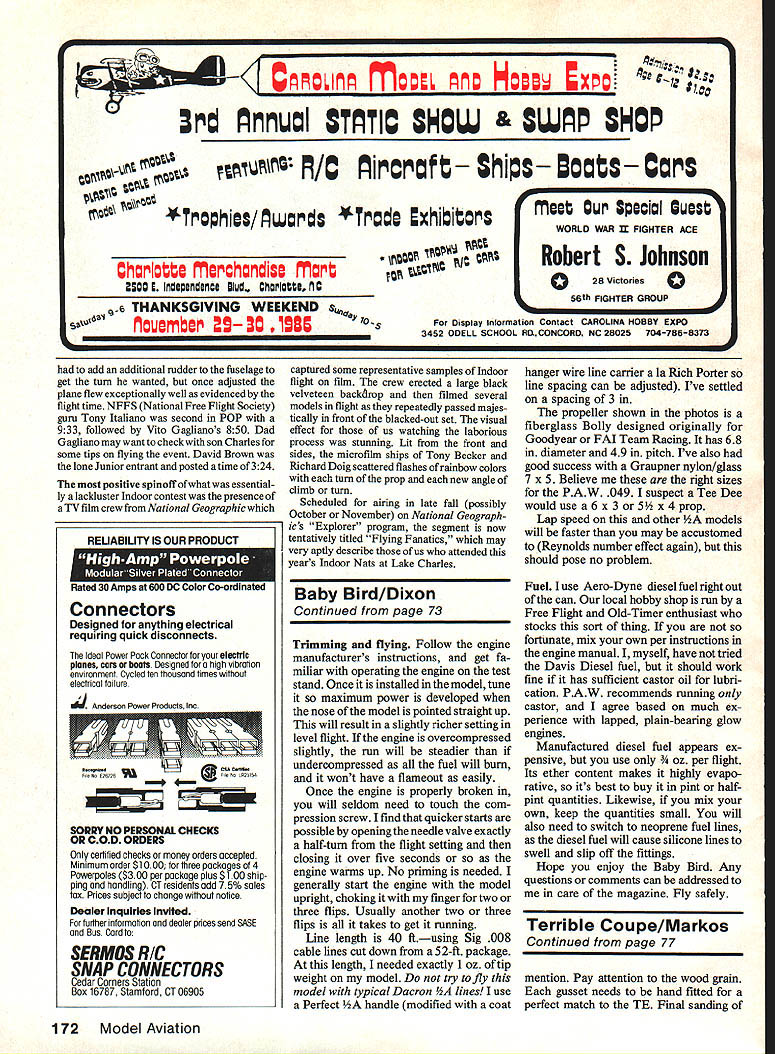
I opted for a clear, doped tissue finish (Sig Ply-Span) because no appearance points are given in 1/2A and much weight is saved this way. Small 1/2A models are more weight-critical than larger Stunters due to Reynolds-number effects, so every little bit of saving helps.
Engine choice and development
The most unusual aspect of the Baby Bird is the powerplant — a diesel. The Tee Dee .049/.051 has been a standard choice since Dick Mathis's Pinto (1972), and I experimented with it on earlier models, but without a bladder tank the Tee Dee was marginal for 1/2A Stunt. There seemed to be no truly acceptable powerplant until I saw Tony Eifflander (British F2B team) flying a P.A.W. .35 diesel at the 1984 World Championships. The PAW runs differently from the snarling .60s and Schnuerle .45s — quieter and with its own appeal — and Tony was running an 11 x 7-1/2 prop on his .35.
After returning from the Worlds I ordered P.A.W. .35 and .049 engines from Eric Clutton; delivery was very prompt (10 days). The idea for the Baby Bird began then. Note: diesels work best when loaded down; a prop that heavy would quickly destroy a glow-type .35.
Fuel-tank problem and solution
Initial flights were delayed until late August, three weeks too late for the 1985 Nats. It turned out to be fortunate, because the original tank — a scaled-down uniflow-vent stunt tank (3/4 oz capacity) — had terrible fuel draw. With needle and compression set for good level-flight speed the engine would quit in maneuvers; set rich enough to run maneuvers it would barely maintain level flight.
The problem: a diesel doesn't behave like the glow engines many are accustomed to. Add low Reynolds-number effects on the venturi (much the same as low-lift effects on a small plane) and you get marginal fuel draw. Research in European magazines (where diesels are common) showed a front-feed tank often cures fuel-draw and fuel-head-change problems. The best design I found was by Frank Coombs and Les Bollenhogen (published in Australia's Airborne). I soldered a Coombs/Bollenhogen chicken-hopper front-feed uniflow tank using a Perfect 3/4-oz wedge tank as a starting point.
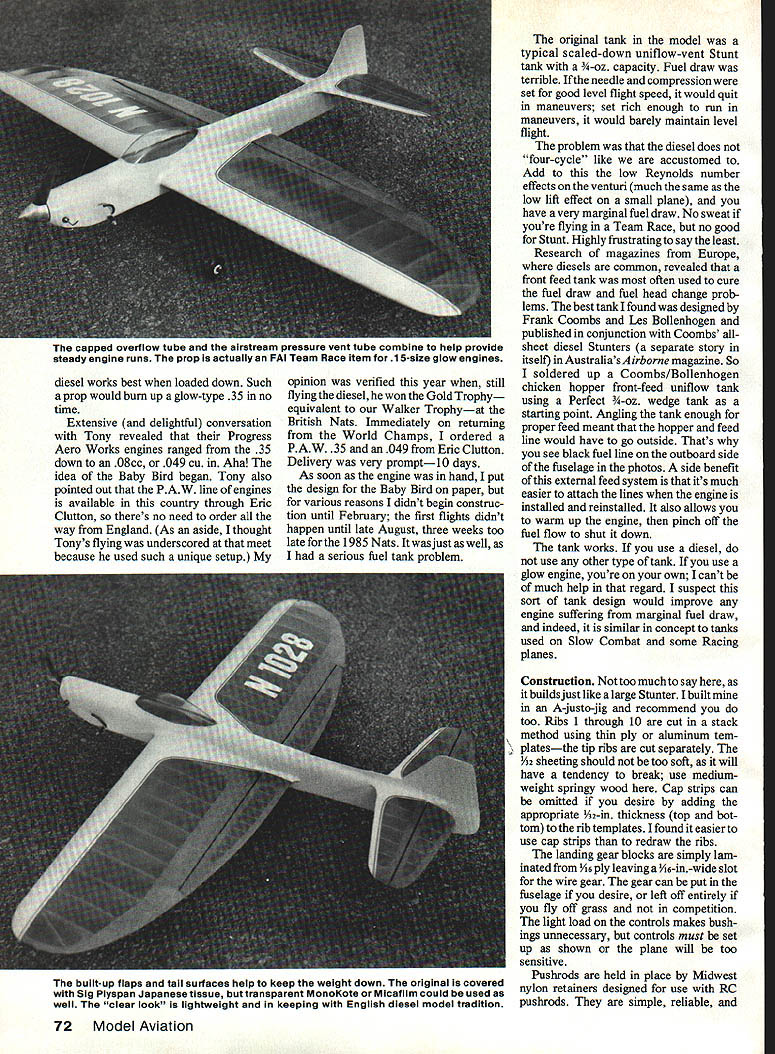
Angling the tank for proper feed required the hopper feed line to go outside, which is why you see the black fuel line on the outboard side of the fuselage in photos. Side benefits of the external feed: it's much easier to attach lines with the engine installed or reinstalled, and it allows warming up the engine and pinching off the fuel flow to shut down. The tank works. If you use a diesel, this tank is recommended; for glow engines, different tank types may be preferable.
Construction
Construction is much the same as building a large Stunter. I built mine in an A-justo-jig and recommend you do the same.
- Ribs 1 through 10 were cut by the stack method using thin-ply or aluminum templates; tip ribs are cut separately.
- Use 1/32-in. sheeting of medium-weight, springy wood — too-soft sheeting tends to break.
- Cap strips can be omitted by adding the appropriate 1/32-in. thickness to the rib templates, but I found it easier to use cap strips.
- Landing-gear blocks are laminated from 1/8-in. ply leaving a 1/16-in. slot for the wire gear. The gear can be installed in the fuselage or omitted entirely if flying from grass and not in competition.
- The light load on the controls makes bushings unnecessary, but set the controls as shown on the plans or the plane will be too sensitive.
- Pushrods are held in place by Midwest nylon retainers designed for RC pushrods — simple, reliable, and avoid soldering in tight confines.
- The flap horn is a standard full-size horn cut down as shown on the plan. The elevator horn is an old small Veco; an acceptable substitute can be fabricated from 1/16-in. brass and 1/16-in. wire. Use silver solder at the juncture of the upright and cross-wire joiner.
- I elected not to use adjustable lead-outs; experience with larger T-Birds indicates where the lead-outs should go. Use eyelets or tubing permanently installed at the plan locations.
Spinner and nose: I used an old 1-1/4-in. Veco spinner and adapted it to the engine using a C.B. Associates union nut re-tapped on the small end to match the engine shaft (10-28). The nut had to be cut down on the 3/8-28 end to fit inside the spinner, and the nose cap had to be cut to fit. Other spinners may work, or you can eliminate the spinner and shape the front end like an FAI Team Racer.
Finish: Sig Ply-Span tissue (orange) applied with Sig nitrate dope. The fuselage and rudder received a couple of coats of Sig nitrate with talc filler, then were wet-sanded with 400-grit paper. A thin coat of Sig Skybrite primer was applied after taping off the trim design; when dry, white Sig Skybrite was sprayed on the fuselage and leading edges. No additional fuel-proofing is needed over the nitrate clear if a diesel is used for power.
Trimming and flying
- Follow the engine manufacturer's instructions and get familiar with operating the engine on the test stand.
- Tune the engine so maximum power is developed with the model's nose pointed straight up — this results in a slightly richer setting in level flight.
- Slight overcompression produces a steadier run than undercompression; all the fuel will burn and flameouts are less likely.
- Once the engine is properly broken in you will seldom need to touch the compression screw.
- For quicker starts, keep the needle valve exactly a half-turn from the flight setting, then close it over five seconds as the engine warms up. No priming is needed.
- I generally start the engine with the model upright, choking it with a finger for 2–3 flips; usually another 2–3 flips gets it running.
Line length: 40 ft — using Sig .008 cable lines cut down from a 52-ft package. At this length I needed exactly 1 oz of tank weight on my model. Do not try to fly this model with typical Dacron .041 lines!
Fuel
I use Aero-Dyne diesel fuel straight from the can, or I buy from a local shop that stocks it. If you can't obtain manufactured diesel, mix your own per the engine manual. Davis Diesel should work if it contains sufficient castor oil. P.A.W. recommends running only castor, and I agree based on experience with lapped, plain-bearing glow engines.
Manufactured diesel appears expensive, but you use only about 3/4 oz per flight. Its ether content makes it highly evaporative, so buy in pint or half-pint quantities and keep mixed batches small. Also, switch to neoprene fuel lines, as diesel will cause silicone lines to swell and slip off fittings.
Hope you enjoy the Baby Bird. Any questions or comments can be addressed to me care of the magazine. Fly safely.
Transcribed from original scans by AI. Minor OCR errors may remain.

