


Back to the Ol' Drawing/Building Board
David Haught
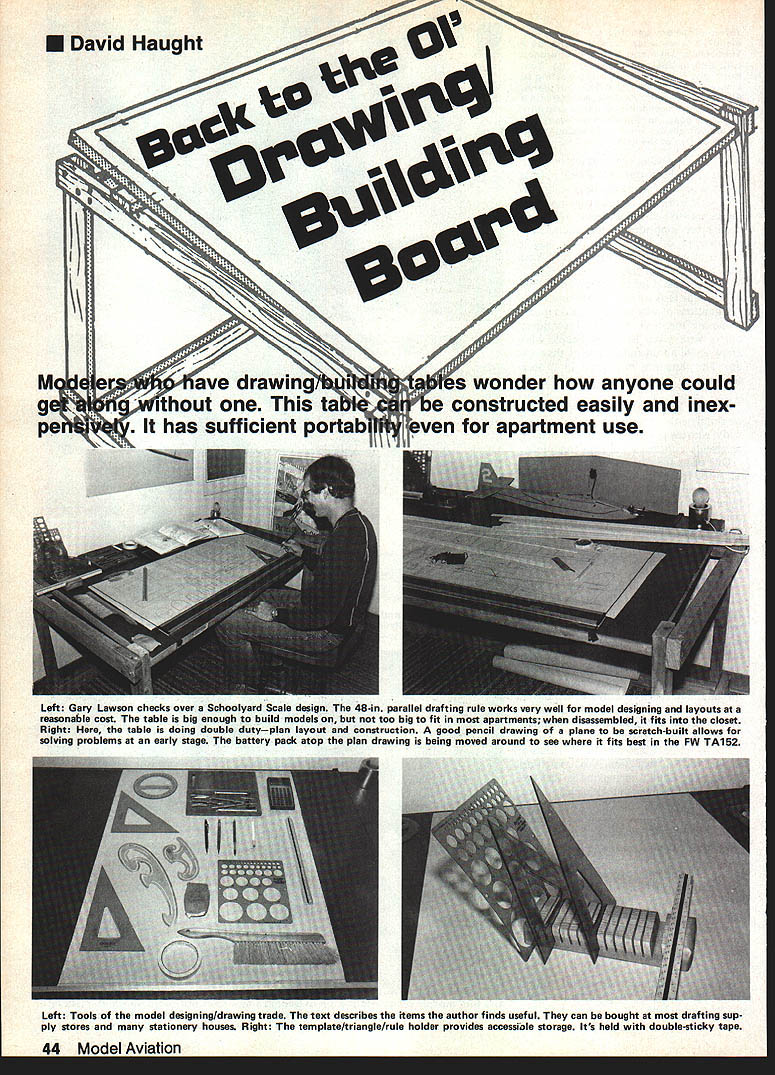
Modelers who have drawing/building tables wonder how anyone could get along without one. This table can be constructed easily and inexpensively. It has sufficient portability even for apartment use.
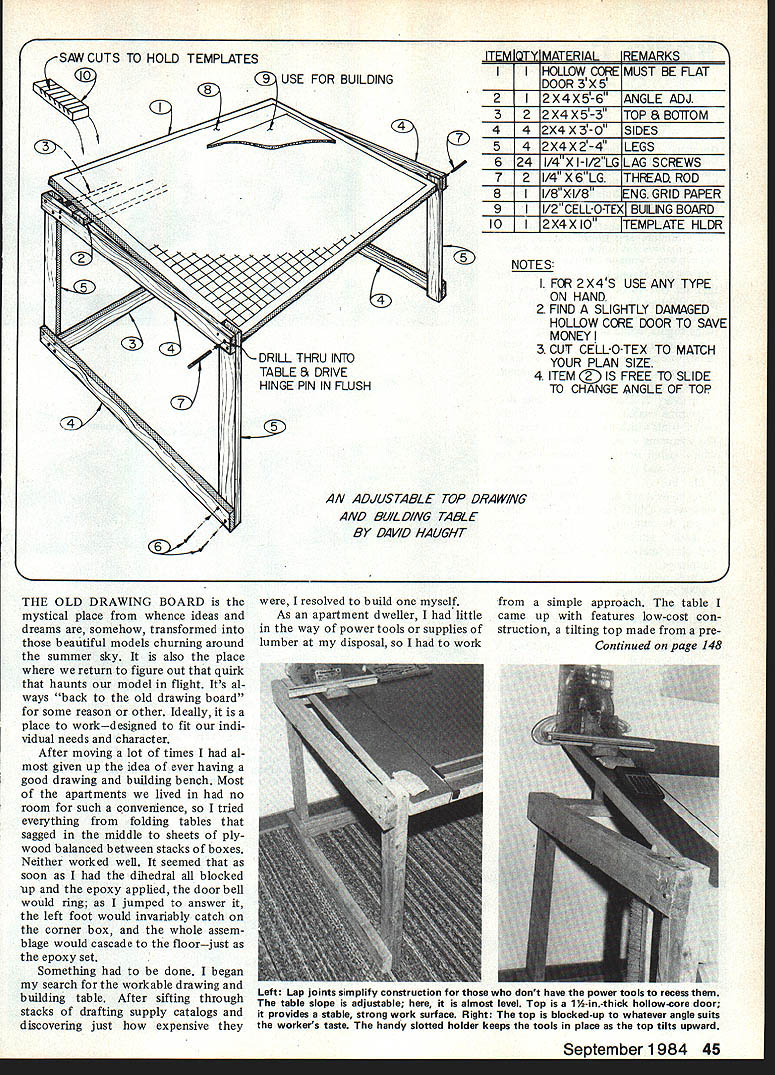
Adjustable Top Drawing and Building Table
The old drawing board — that mystical place whence ideas and dreams are somehow transformed into beautiful models churning around the summer sky — is also the place to return to to figure out the little quirk that haunts a model's flight. It's always back to the old drawing board for some reason or another. Ideally the place is a workbench designed to fit individual needs and character.
After moving a lot of times I had given up the idea of ever having a good drawing/building bench. Most apartments I've lived in had no room for such a convenience. I tried everything. Folding tables sagged in the middle; sheets of plywood balanced between stacks of boxes. Neither worked well. It seemed that as soon as dihedral was blocked up and epoxy applied the doorbell would ring. I jumped to answer and my left foot would invariably catch the corner of the box and the whole assemblage would cascade to the floor just as the epoxy set. Something had to be done.
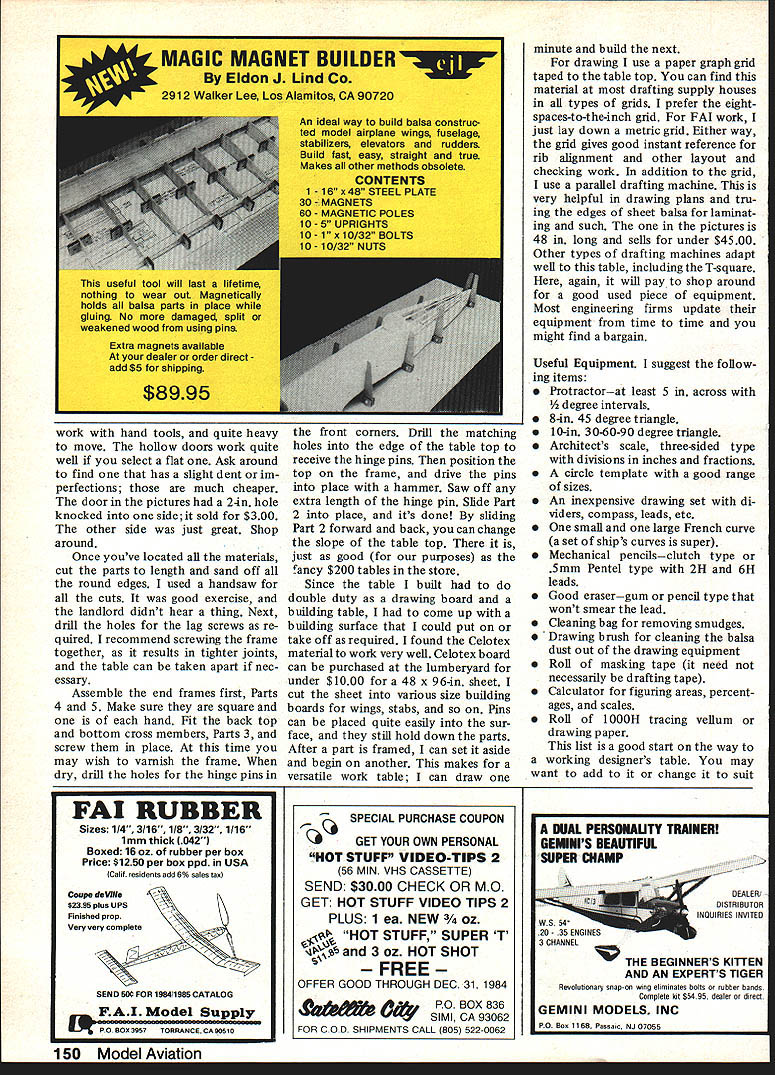
I began a search for a workable drawing/building table. After sifting through drafting-supply catalogs and discovering just how expensive some were, I resolved to build one myself. As an apartment dweller with little access to power tools, supplies, lumber or disposal service, a simple approach to the table came up. The table I came up with features low-cost construction, a tilting top made from a prefinished door, and quick construction. Being screwed together rather than nailed makes it easy to disassemble in a few minutes and stash away in the closet when the spare room needs to be used for guests. All of these items had to be incorporated to meet my requirements. So far, I am quite pleased with the results.
Construction
The drawing shows the materials required to build the table 36 in. wide and 60 in. long. This is a practical size for most models, but the size can easily be altered to fit your building program. When selecting the wood, keep in mind the finished product. If you want a sharp-looking table, buy clear 2 x 4s, and give them a varnish finish. If you are looking at a practical model, choose good pine stock. My table was built out of structural 2 x 4s which were very inexpensive and still good for a solid table.
The top is the most important part. Choose it with care. Doors can be found finished or unfinished, solid or hollow core. Solid doors are best, but they are more expensive, difficult to work with using hand tools, and quite heavy to move. Hollow-core doors will work well if properly supported; select a flat one. Ask around to find a door that has a slight dent or some imperfection — those are much cheaper. The door in the pictures had a 2-in. hole knocked into one side; it sold for $3.00. The other side was just fine. Shop around.
Once you've located all the materials, cut the parts to length and sand off all the round edges. I used a handsaw for all the cuts. It was good exercise, and the landlord didn't hear a thing. Next, drill the holes for the lag screws as required. I recommend screwing the frame together, as it results in tighter joints, and the table can be taken apart if necessary.
Assemble the end frames first (Parts 4 and 5). Make sure they are square and that you have one of each hand. Fit the back top and bottom cross members (Part 3) and screw them in place. At this time you may wish to varnish the frame. When dry, drill the holes for the hinge pins in the front corners. Drill the matching holes into the edge of the table top to receive the hinge pins. Then position the top on the frame, and drive the pins into place with a hammer. Saw off any extra length of the hinge pin. Slide Part 2 into place, and it's done! By sliding Part 2 forward and back, you can change the slope of the table top. For our purposes this is just as good as the fancy $200 tables in the stores.
Building Surface and Drawing Setup
Since the table I built had to do double duty as a drawing board and a building table, I had to come up with a building surface that I could put on or take off as required. I found Celotex material to work very well. Celotex board can be purchased at the lumberyard for under $10.00 for a 48 x 96-in. sheet. I cut the sheet into various size building boards for wings, stabs, and so on. Pins can be placed quite easily into the surface, and they still hold down the parts. After a part is framed, I can set it aside and begin on another. This makes for a versatile work table; I can draw one minute and build the next.
For drawing I use a paper graph grid taped to the table top. You can find this material at most drafting supply houses in all types of grids. I prefer the eight-spaces-to-the-inch grid. For FAI work, I just lay down a metric grid. Either way, the grid gives good instant reference for rib alignment and other layout and checking work.
In addition to the grid, I use a parallel drafting machine. This is very helpful in drawing plans and truing the edges of sheet balsa for laminating and such. The one in the pictures is 48 in. long and sells for under $45.00. Other types of drafting machines adapt well to this table, including the T-square. Here, again, it will pay to shop around for a good used piece of equipment. Most engineering firms update their equipment from time to time and you might find a bargain.
Useful Equipment
- Protractor — at least 5 in. across with 1/2 degree intervals.
- 8-in. 45° triangle.
- 10-in. 30°-60°-90° triangle.
- Architect's scale, three-sided type with divisions in inches and fractions.
- Circle template with a good range of sizes.
- Inexpensive drawing set with dividers, compasses, leads, etc.
- One small and one large French curve (a set of ship's curves is excellent).
- Mechanical pencils — clutch type or 0.5-mm Pentel type with 2H and 6H leads.
- Good eraser — gum or pencil type that won't smear the lead.
- Clean rag for removing smudges.
- Drawing brush for cleaning balsa dust out of the drawing equipment.
- Roll of masking tape (need not necessarily be drafting tape).
- Calculator for figuring areas, percentages, and scales.
- Roll of 100' tracing vellum or drawing paper.
This list is a good start on the way to a working designer's table. You may want to add to it or change it to suit your needs. I've also included a sketch of a template holder that helps keep the triangles and such in some form of order.
The one other item that I suggest you obtain is a good drafting textbook. Check college bookstores and used bookstores. The books can be very helpful when doing any layouts or drawing. Formulas for pentagons, areas, stringer lofting, etc., can be found in them as well.
What are you waiting for? Get back to the drawing board!
Transcribed from original scans by AI. Minor OCR errors may remain.

