
Balance Stand
Introduction
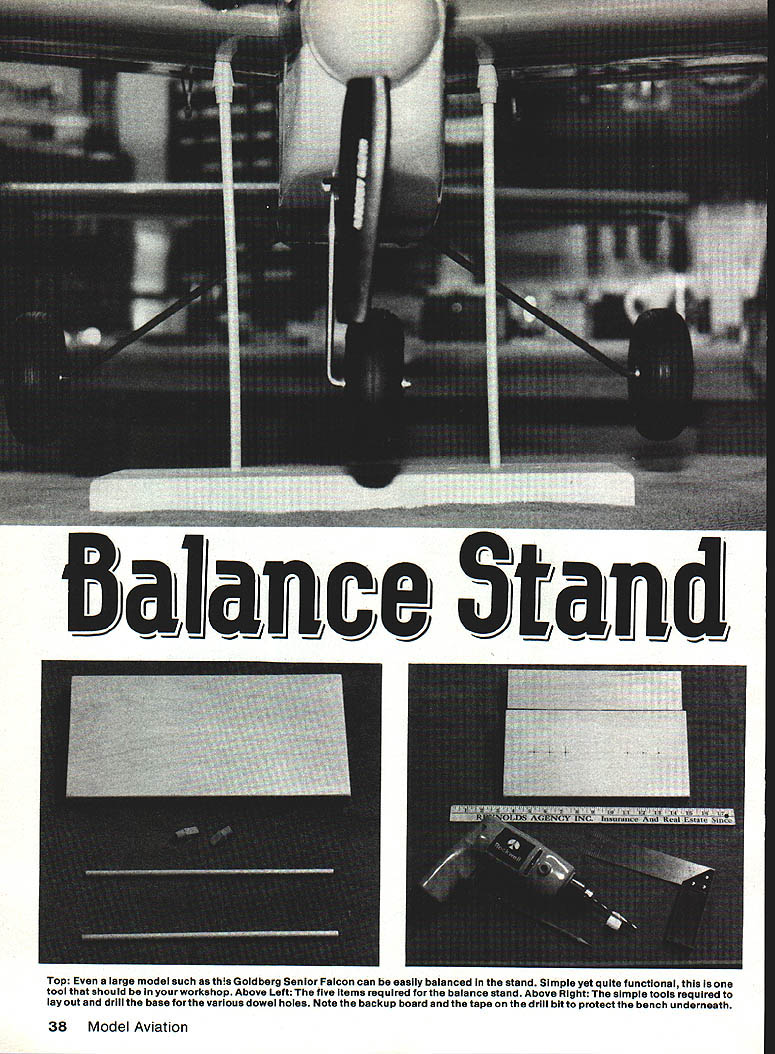
A friend called the other night and the usual conversation soon turned to model aircraft. Just out of curiosity I asked how he balanced his models. He told me he used his index fingers placed beneath the wing. Does that sound familiar? Modelers will spend a great deal of time and effort constructing a favorite model and then rely on crudely balancing the craft on their fingers. Enough.
Described below is an adjustable, inexpensive, easy-to-build balance stand. Use this simple building aid correctly and it will serve you a long time. It will locate the center of gravity (CG) and will produce stable, flyable models. It can be designed and built in about an hour and costs almost nothing. With convenient workshop tools found around the home and materials from a piece of scrap pine lumber, you too can have a balance stand. Once finished you'll be wondering why you hadn't thought of it yourself.
—Joseph M. Nunes, January 1986
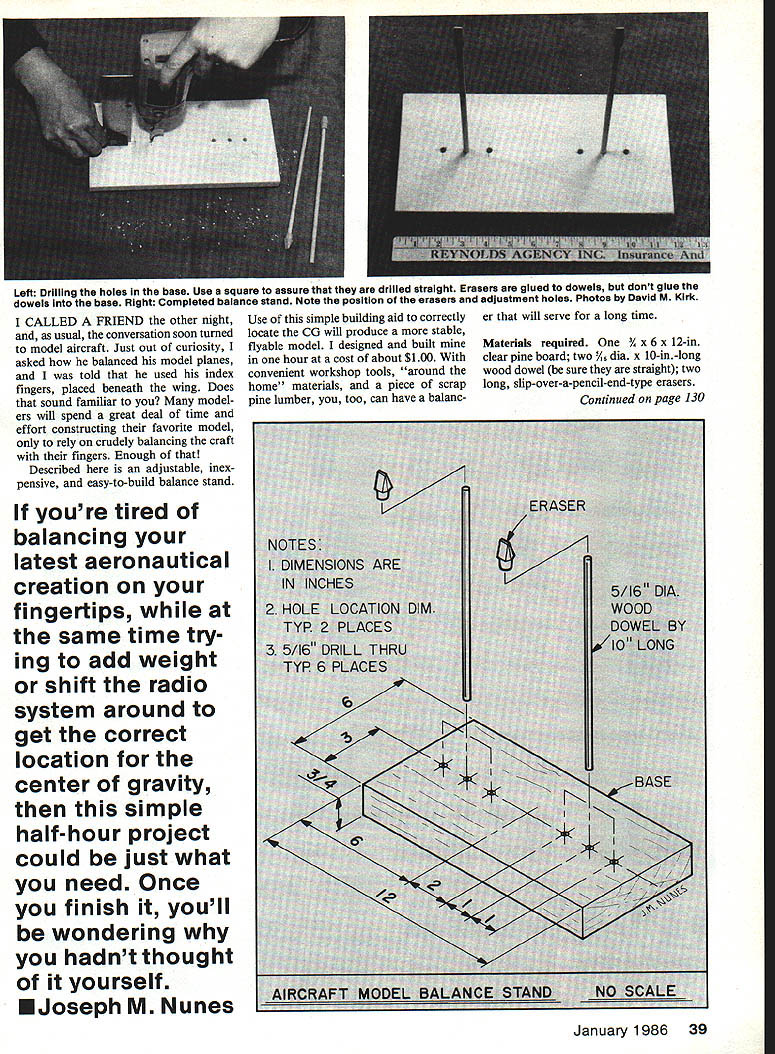
Materials required
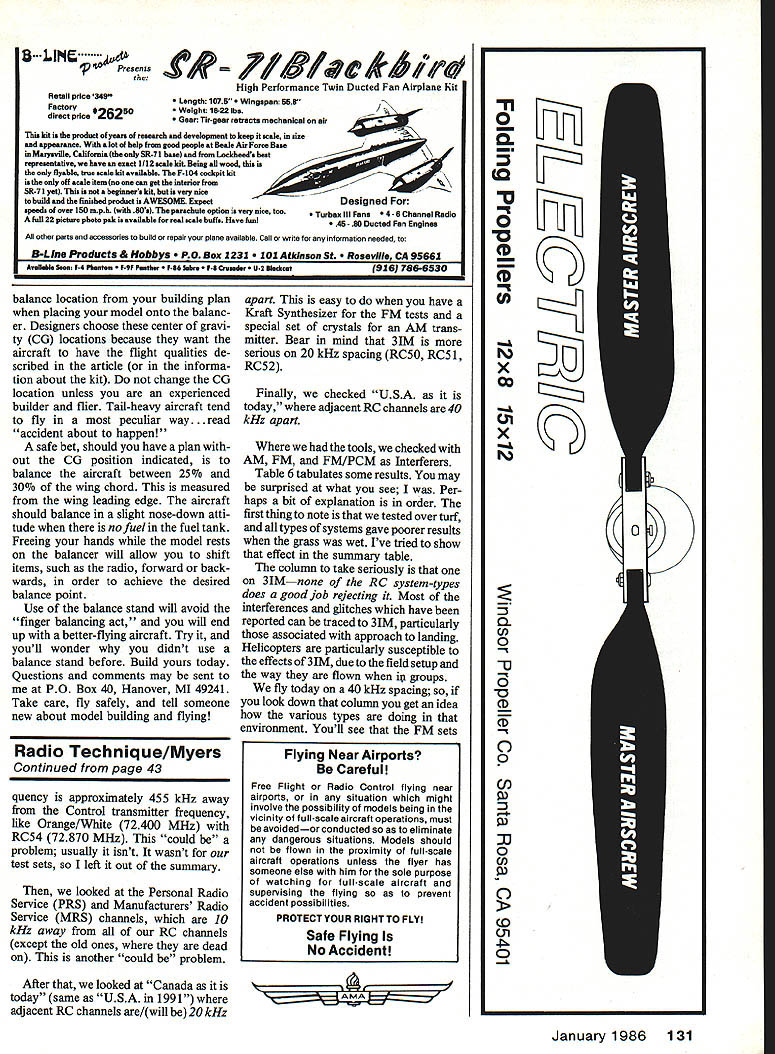
- 3/4" x 6" x 12" clear pine board
- two 5/16" dia. x 10" long wood dowels (be sure they are straight)
- two long slip-over-a-pencil-end-type erasers
Base construction
Cut the base from a piece of scrap lumber, making sure the base sits flat on the table. Sand the edges, top and bottom smooth. Chamfer the top edges if desired.
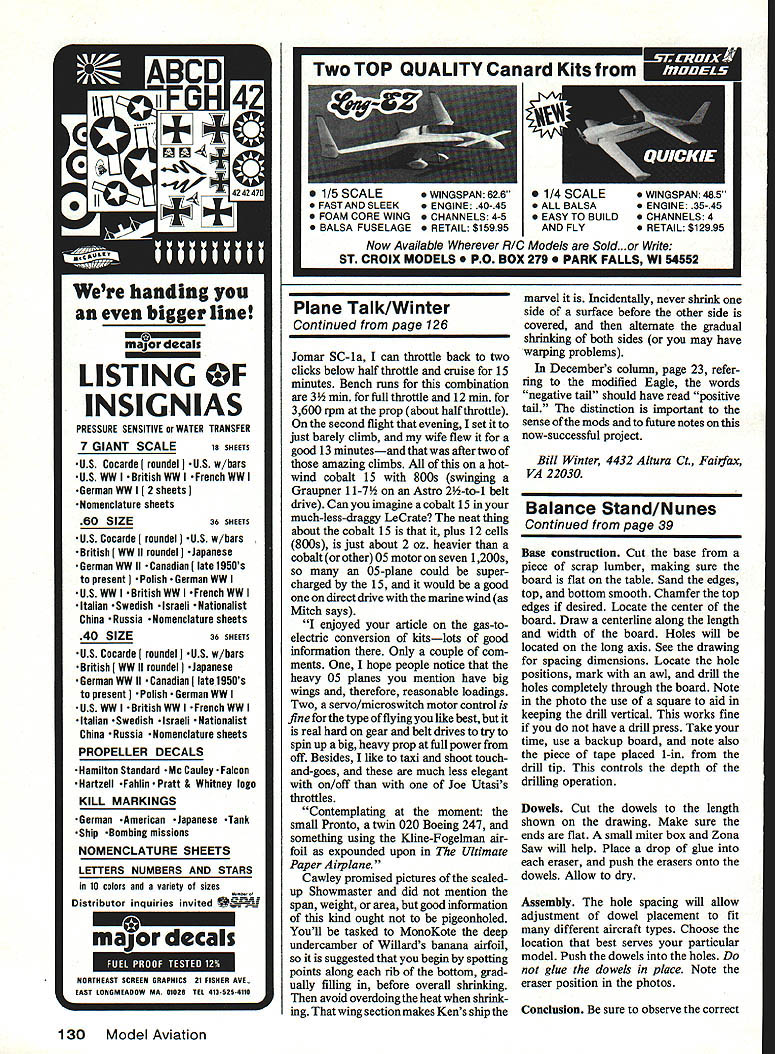
Locate the center of the board and draw a centerline along the length and width of the board. Holes for the dowels will be located on the long axis. See the drawing for spacing dimensions. Mark the hole positions with an awl and drill the holes completely through the board.
If you do not have a drill press, use a square to help keep the drill vertical. Take your time, use a backup board, and place a piece of tape 1" from the drill tip to control the drilling depth.
Dowels
Cut the dowels to the length shown on the drawing. Make sure the ends are flat; a small mitre box and a fine saw will help. Place a drop of glue into each eraser and push the erasers onto the dowel ends. Allow to dry.
Assembly
The hole spacing will allow adjustment of dowel placement to fit many different aircraft types. Choose the location that best serves your particular model. Push the dowels into the holes — do not glue them in place so you can reposition them as needed. Note the eraser position: the erasers protect the model and provide slight friction.
Be sure to observe the correct position of the dowels and erasers for your particular model and mark the dowel locations so they can be easily returned to the proper positions.
Conclusion
If you're tired of balancing your latest aeronautical creation on your fingertips while trying to add weight or shift the radio system to get the correct CG location, this simple half-hour project could be just what you need. Once you finish it, you'll be wondering why you hadn't thought of it yourself.
—Joseph M. Nunes, January 1986
Transcribed from original scans by AI. Minor OCR errors may remain.

