
Bebe Jodel D.9
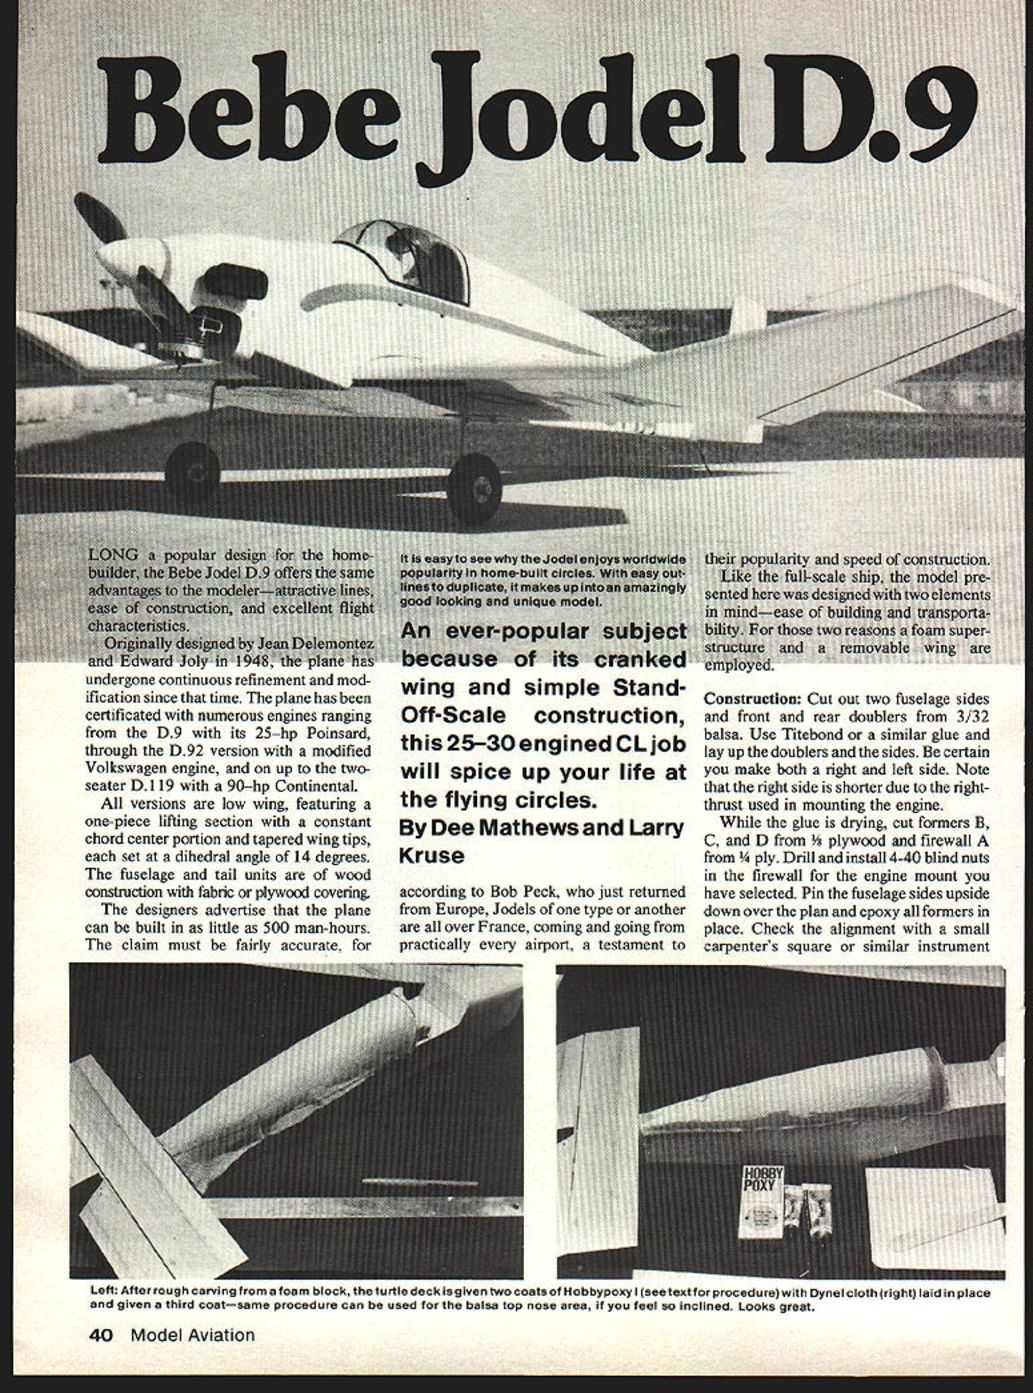
Long a popular design for the homebuilder, the Bebe Jodel D.9 offers the same advantages to the modeler — attractive lines, ease of construction, and excellent flight characteristics.
Originally designed by Jean Delemontez and Édouard Joly in 1948, the plane has undergone continuous refinement and modification since that time. The plane has been certificated with numerous engines ranging from the D.9 with its 25-hp Poinsard, through the D.92 version with a modified Volkswagen engine, and on up to the two-seater D.119 with a 90-hp Continental.
All versions are low wing, featuring a one-piece lifting section with a constant-chord center portion and tapered wing tips, each set at a dihedral angle of 14 degrees. The fuselage and tail units are of wood construction with fabric or plywood covering.
The designers advertise that the plane can be built in as little as 500 man-hours. The claim must be fairly accurate, for it is easy to see why the Jodel enjoys worldwide popularity in home-built circles. With easy outlines to duplicate, it makes up into an amazingly good-looking and unique model.
Overview
An ever-popular subject because of its cranked wing and simple stand-off-scale construction, this 25–30 cc engined CL job will spice up your life at the flying circles.
By Dee Mathews and Larry Kruse
According to Bob Peck, who just returned from Europe, Jodels of one type or another are all over France, coming and going from practically every airport — a testament to their popularity and speed of construction.
Like the full-scale ship, the model presented here was designed with two elements in mind — ease of building and transportability. For those two reasons a foam superstructure and a removable wing are employed.
Construction
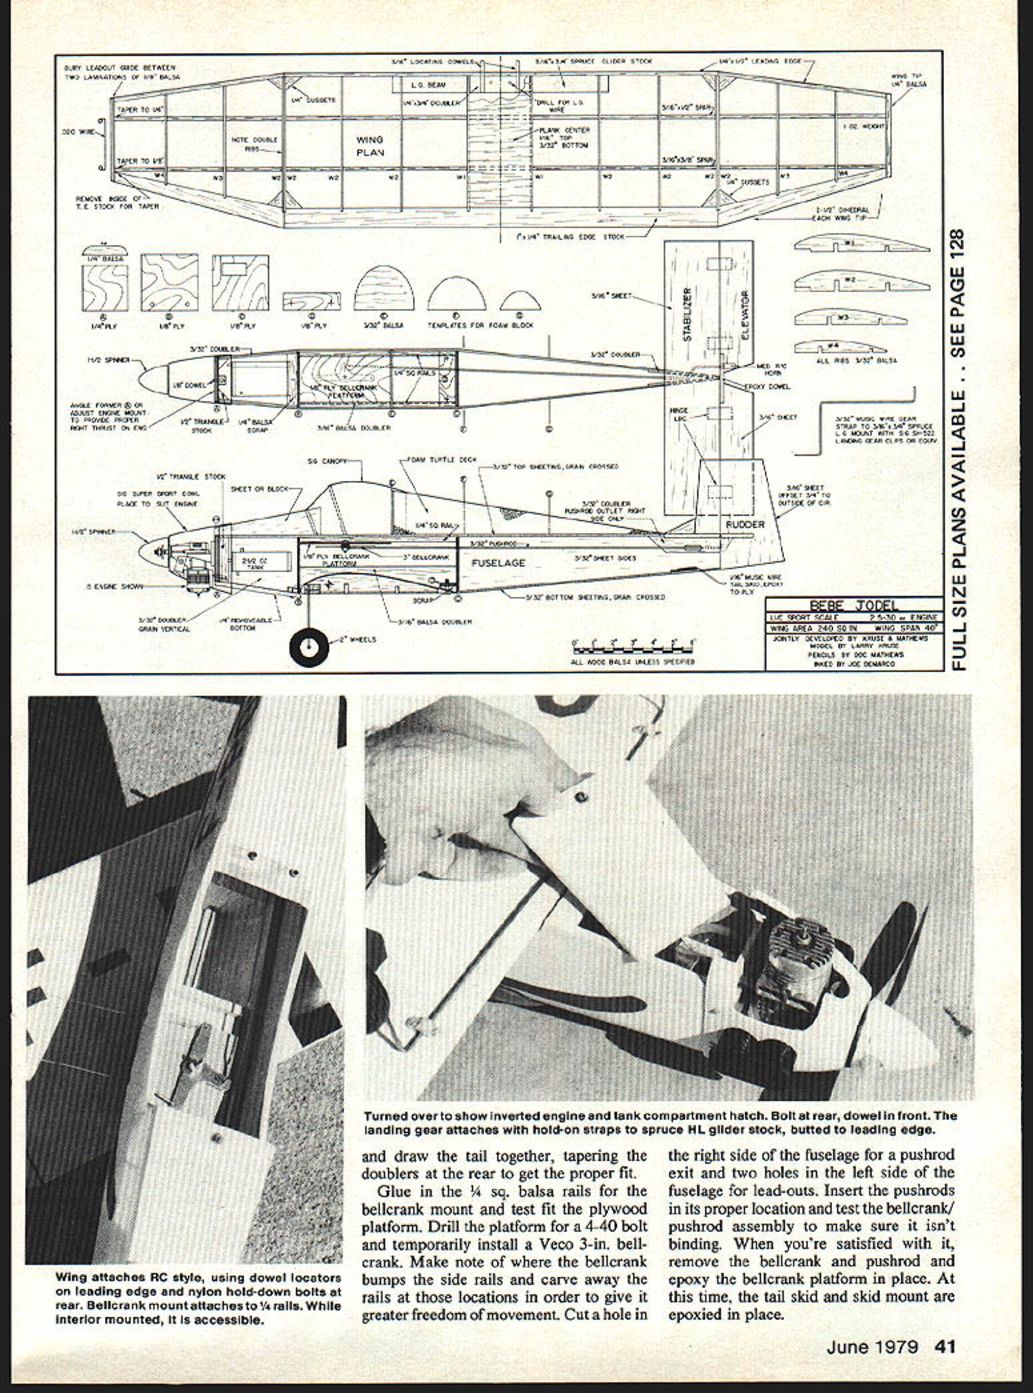
Cut out two fuselage sides and front and rear doublers from 3/32" balsa. Use Titebond or a similar glue and lay up the doublers and the sides. Be certain you make both a right and left side. Note that the right side is shorter due to the right-thrust used in mounting the engine.
While the glue is drying, cut formers B, C, and D from 1/8" plywood and firewall A from 1/4" plywood. Drill and install 4-40 blind nuts in the firewall for the engine mount you have selected. Pin the fuselage sides upside down over the plan and epoxy all formers in place. Check the alignment with a small carpenter's square or similar instrument and draw the tail together, tapering the doublers at the rear to get the proper fit.
Glue in the 1/4" sq. balsa rails for the bellcrank mount and test-fit the plywood platform. Drill the platform for a 4-40 bolt and temporarily install a Veco 3" bellcrank. Make note of where the bellcrank bumps the side rails and carve away the rails at those locations to give it greater freedom of movement. Cut a hole in the right side of the fuselage for a pushrod exit and two holes in the left side of the fuselage for lead-outs. Insert the pushrods in their proper location and test the bellcrank/pushrod assembly to make sure it isn't binding. When you're satisfied with it, remove the bellcrank and pushrod and epoxy the bellcrank platform in place. At this time, the tail skid and skid mount are epoxied in place.
Cover the entire top of the fuselage and the bottom aft of the wing cut-out with 3/32" balsa. The tank is installed as shown on the plans and the tank compartment block tack-glued in place and sanded to shape. A single bolt holds it in place at the rear, with a single dowel keeping the block in place in the front.
The turtledeck is rough-carved from a foam block and sanded to shape. One coat of Hobbypoxy I is applied, allowed to dry, and then followed by a second coat. Dynel cloth, as per the photos, is then rough-cut to size and laid in place. When cured, a third coat of Hobbypoxy I is applied rather liberally and allowed to flow out to a smooth surface. The top of the nose area is carved and hollowed from balsa because it is available, but there would be no reason why the nose couldn't be done in the same fashion as the turtledeck. The results are quite satisfactory.
Tail surfaces are of 3/16" balsa and need only care in wood selection and adequate sanding. The stabilizer can be hinged with any commercial hinge, although Du-Bro hinges were used on the prototype.
The wing is pretty much standard in construction, with only the landing-gear mount requiring comment. The landing gear is one of the simplest and most effective methods of sticking the wheels on that you'll encounter. Its main component is 3/16" x 3/4" spruce land-launch glider stock from Sig. It's located against the leading edge and glued into notches in the ribs. The landing-gear wire is bent from 3/32" music wire, inserted in the pre-drilled holes, and held in place with Sig nylon landing-gear clips screwed into the spruce gear beam.
Since the wing is removable, it employs dowel locators on the leading edge and wing hold-down bolts at the back. Former D is located carefully to ensure a snug fit and the proper angle of incidence. The prototype used Sig blind-nuts and 6-32 bolts. Standard nylon hold-down bolts would probably be preferable, but expediency dictated that the author use what was on hand.
The wing lead-out guide is bent from .020" music wire and sandwiched in the left tip, permitting the lead-outs to be disconnected from the wing for transporting the model. It is also unobtrusive, both in flight and when the model is static-judged.
Finishing
The wing of the prototype was sanded after the center section was planked, given two coats of Balsarite, and then covered with white MonoKote. Coverite or Silkspan and dope would probably be acceptable alternatives, depending on your preference.
The fuselage and tail group should be given two coats of Hobbypoxy "Stuff" and sanded thoroughly. "Stuff" permits "patching in" of bare spots or noticeable grain, so go at it until everything is smooth and no wood grain or cloth texture is evident.
Use a tack rag to clean off all the sanding residue and brush on a coat of Hobbypoxy white. After it cures thoroughly, wet-sand it carefully with 400 wet-or-dry paper and brush on an additional coat of white Hobbypoxy.
When you're satisfied with the finish and the fuselage matches the wing for gloss, apply numerals and fuselage stripes with MonoKote red trim and aileron and rudder lines with black striping tape. The wing walk is black MonoKote trim. Black wet-or-dry sandpaper held in place with contact cement might be an even better choice.
The "dress-up" portions of the plane are then added. The full-size Jodel's cowl shape is matched very nicely by Sig's Super Sport ABS plastic cowl No. SH-232, available from Sig by mail. Use two screws on each side to hold it in place.
The canopy is Sig's 12" size, cut down to match the model's contours and held in place with Wilhold RC-56 glue. The pilot figure is from Williams Bros.; it adds a great deal of realism to the plane, particularly in flight. The spinner is a white 1-1/2" Goldberg snap-on, which complements the Sig cowl very nicely. Dummy cylinders are carved from balsa or adapted from any of several made by Williams Bros. Additional details can be added to suit the builder's taste. Although the D.9 was designed for stand-off-scale competition, it employs scale outlines and could be modified for AMA scale very easily by merely increasing the amount of detail included.
Flight Performance
The model is extremely easy to fly due to its light wing loading and is capable of inside loops and wing-overs for maneuver points. It excels in realistic takeoffs and landings and will stay out on the lines even in windy conditions. Initially, the author had some fears about the effect of tip dihedral on an undercarriage (U/C) model in the wind, but those fears proved groundless the first time the Jodel was flown in a contest. It hangs out very well.
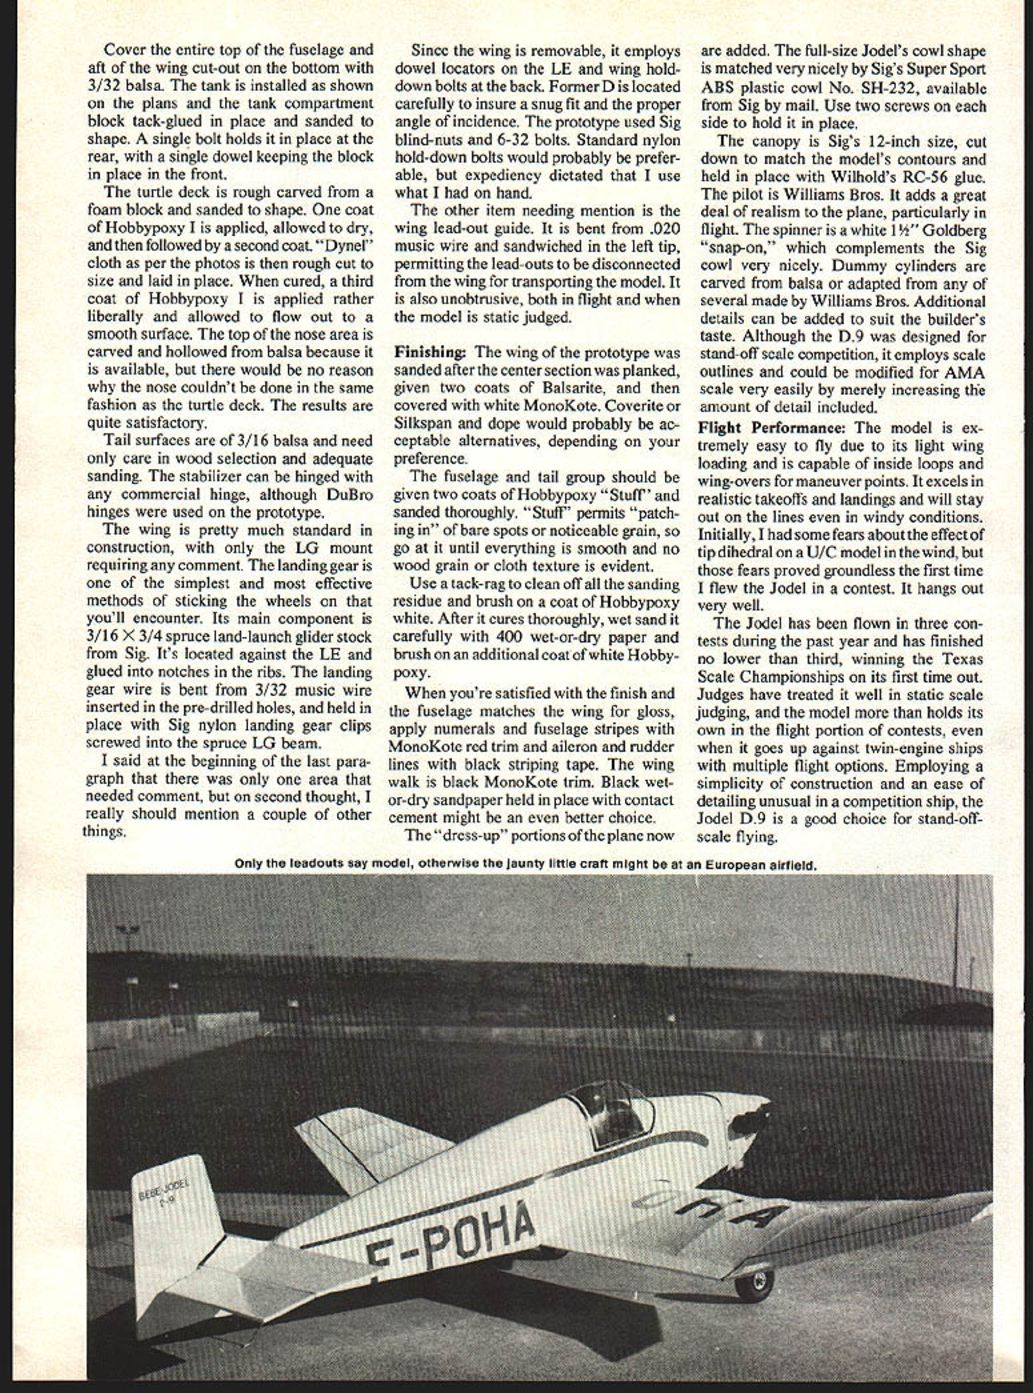
The Jodel has been flown in three contests during the past year and has finished no lower than third, winning the Texas Scale Championships on its first time out. Judges have treated it well in static scale judging, and the model more than holds its own in the flight portion of contests, even when it goes up against twin-engine ships with multiple flight options. Employing a simplicity of construction and an ease of detailing unusual in a competition ship, the Jodel D.9 is a good choice for stand-off-scale flying.
Transcribed from original scans by AI. Minor OCR errors may remain.

