
The Boeing F4B-2
John Tanzer
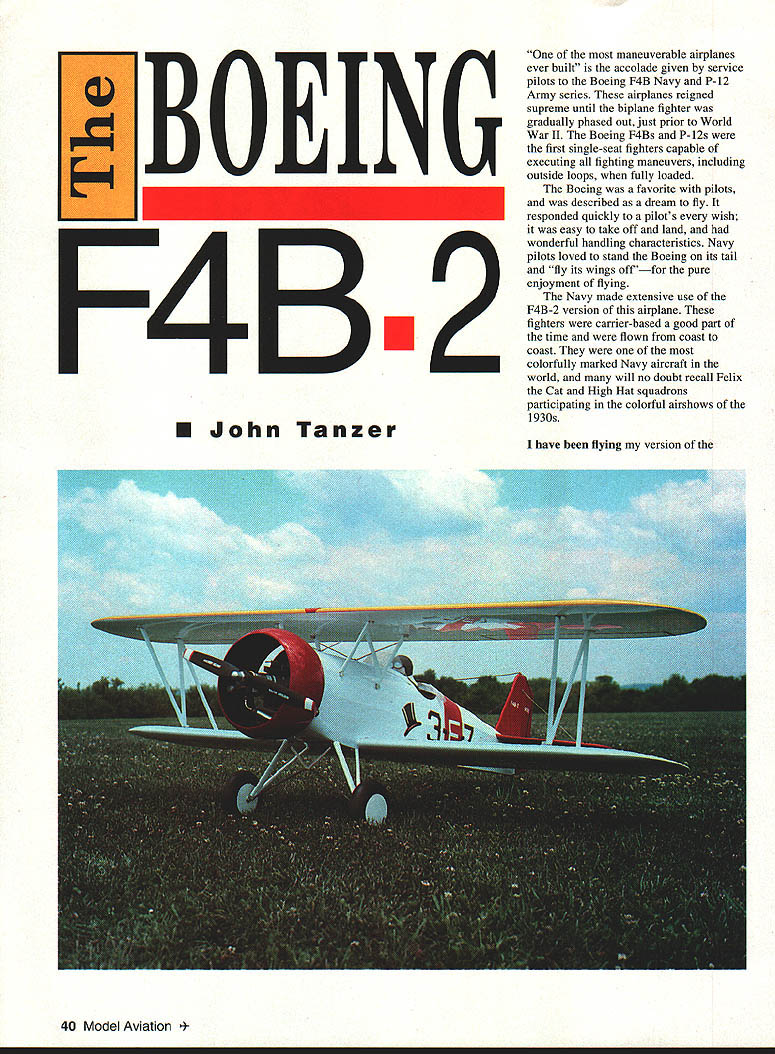
"One of the most maneuverable airplanes ever built" is the accolade given by service pilots to the Boeing F4B Navy and P-12 Army series. These airplanes reigned supreme until the biplane fighter was gradually phased out just prior to World War II. The Boeing F4Bs and P-12s were the first single-seat fighters capable of executing all fighting maneuvers, including outside loops, when fully loaded.
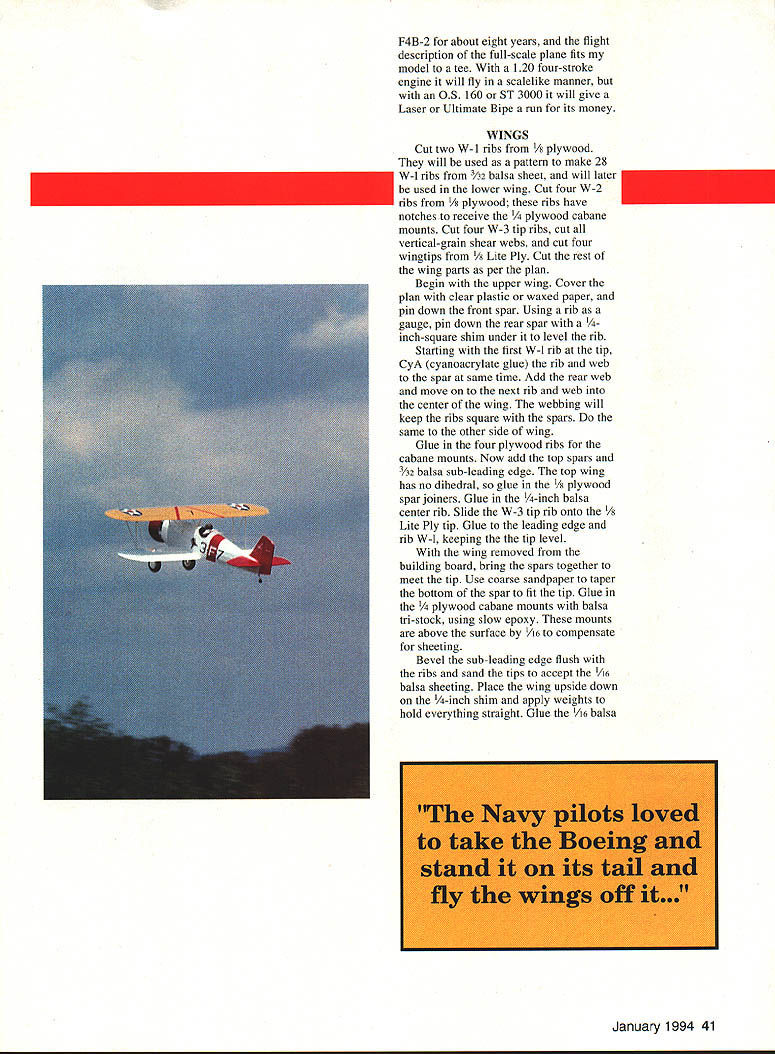
The Boeing was a favorite with pilots and was described as a dream to fly. It responded quickly to a pilot's every wish; it was easy to take off and land, and had wonderful handling characteristics. Navy pilots loved to stand the Boeing on its tail and "fly its wings off"—for the pure enjoyment of flying.
The Navy made extensive use of the F4B-2 version of this airplane. These fighters were carrier-based a good part of the time and were flown from coast to coast. They were one of the most colorfully marked Navy aircraft in the world; many will recall Felix the Cat and High Hat squadrons participating in the colorful airshows of the 1930s.
I have been flying my version of the F4B-2 for about eight years, and the flight description of the full-scale plane fits my model to a tee. With a .120 four-stroke engine it will fly in a scale-like manner, but with an O.S. 160 or S.T. 3000 it will give a Laser or Ultimate bipe a run for its money.
WINGS
- Cut two W-1 ribs from 1/8-inch plywood. Use them as patterns to make 28 W-1 ribs from 3/32-inch balsa sheet; they will later be used in the lower wing.
- Cut four W-2 ribs from 1/8-inch plywood; these ribs have notches to receive the 1/4-inch plywood cabane mounts.
- Cut four W-3 tip ribs. Cut all vertical-grain shear webs and four wingtips from 1/8-inch Lite Ply. Cut the rest of the wing parts as per the plan.
Begin with the upper wing. Cover the plan with clear plastic or waxed paper, and pin down the front spar. Using a rib as a gauge, pin down the rear spar with a 1/4-inch-square shim under it to level the rib.
Starting with the first W-1 rib at the tip, CyA (cyanoacrylate glue) the rib and web to the spar at the same time. Add the rear web and move on to the next rib and web toward the center of the wing. The webbing will keep the ribs square with the spars. Do the same to the other side of the wing.
Glue in the four plywood ribs for the cabane mounts. Now add the top spars and 3/32-inch balsa sub–leading edge. The top wing has no dihedral, so glue in the 1/8-inch plywood spar joiners. Glue in the 1/4-inch balsa center rib. Slide the W-3 tip rib onto the 1/8-inch Lite Ply tip and glue to the leading edge and rib W-1, keeping the tip level.
With the wing removed from the building board, bring the spars together to meet the tip. Use coarse sandpaper to taper the bottom of the spar to fit the tip. Glue in the 1/4-inch plywood cabane mounts with balsa tri-stock, using slow epoxy. These mounts are above the surface by 1/16 inch to compensate for sheeting.
Bevel the sub–leading edge flush with the ribs and sand the tips to accept the 1/16-inch balsa sheeting. Place the wing upside down on the 1/4-inch shim and apply weights to hold everything straight. Glue the 1/16-inch balsa sheeting to the front wing tip. Glue 1/16-inch sheet to the rear wing and fill the wing center. 1/16 x 1/8-inch capstrips can be added now.
Remove the wing from the board and trim the tip sheeting. Bevel the sheeting at the rear ribs to accept the 3/32 x 3/8-inch balsa leading edge. Using tri-stock and epoxy, glue in the 1/8-inch plywood interplane strut mounts, keeping them flush with the wing skin. Sand the wing to satisfaction.
The lower wing is built the same way except the panel is raised 1/4 inch. Epoxy 1/8-inch plywood dihedral brackets in place; add balsa blocks at center ribs. Sheeting is applied one side at a time with the panel weighted down. When the wing has been sheeted and sanded carefully, cut out the ailerons. Glue 3/32-inch balsa sheet to the rear spars. Fit the front aileron leading edge with 3/8 x 3/8-inch balsa.
Optional upper ailerons: if desired, use the same procedure to make shorter, full-scale F4B-2 upper ailerons. Upper wing ailerons have been found inefficient—too much adverse yaw and aileron differential is required. Use full-length ailerons on the lower wing; the model then rolls and banks like a monoplane. If a faster roll rate is desired, use both lower and upper ailerons. Use servo torque rods — a servo in the wing would be better.
FUSELAGE
- Cut 11 fuselage parts using the wood sizes indicated on the plan.
- Cover the plan; pin down 1/16-inch balsa side pieces, 1/8-inch-square longerons, and crosspieces. Glue in place.
- Using small pieces of plastic film to cover glue joints, build the second fuselage side (top first). Remove the plan when dry.
- Glue 1/32-inch doubler and 1/64-inch plywood gussets inside the fuselage sides, left and right.
Pin 1/8-inch-square crosspieces to the top-view plan (F-2 back to F-5). Pin the fuselage sides upside down on the top view. Glue crosspieces keeping the sides square to the work surface. Glue landing gear plate and balsa crosspiece rear wing saddle; use triangular stock at both locations.
Now pull the rear of the fuselage together. Bevel mating surfaces for a good fit. Clamp together and glue in 1/4-inch-square crosspieces. Glue in the 1/4-inch plywood tailwheel plate. Glue in the 1/8-inch plywood wing dowel plate and wing bolt plates.
With the fuselage still flat on the bench, lay the lower wing in the saddle. Align it perfectly, then drill the front of the wing to accept a 1/4-inch dowel. Take the wing off and glue in the dowel. Return the wing to the fuselage, drill two mounting holes, and tap the hold-down plates for 1/4-20 bolts. Remove the wing from the fuselage and put it aside for now.
Remove the fuselage from the plan. Glue the firewall and all formers in their proper locations. Glue 1/4-inch balsa fuselage outside doublers, then 1/4-inch-square stringers. Fair in the stringers at the rear of the fuselage. Using tri-stock, epoxy in 1/4-inch plywood cabane mounts and the 1/8-inch plywood cabane brace bolt plate to the top of the fuselage.
Glue in the 1/8-inch balsa sheet cockpit floor, then sheet the top of the fuselage and the lower front of the nose. Fair in the sides at the nose and wing saddle. Glue two balsa blocks to former F-8 using a 3/8-inch balsa spacer to form a slot for the fin. Spot-glue a 3/32-inch spacer at the rear for the stabilizer slot. Note: place a 3/32-inch shim under the front of the stabilizer for 1½° positive incidence. Plane and sand the block to shape, then remove the 3/8-inch spacer at the rear.
The tail can now be built using 3/16 x 1/2-inch hard balsa and some 3/32-inch balsa sheet parts. Round off the edges and cut the hinge slots.
A 1/8-inch music wire elevator joiner can be used, or a Y pushrod or two pushrods and two servos. Trial-fit the stab and fin in the fuselage slots. I did not glue the tail in until the fuselage and tail were covered and finished.
CABANES, BRACES AND LANDING GEAR
To make the 1/8-inch music wire cabane, cut four pieces of 1/8-inch music wire five inches long. Using a piece of plywood as a jig, mark solder lug locations, then screw them down to hold in alignment for soldering. Bend the diagonal brace, wrap with copper wire and solder. Make one left and one right. I use steel soldering lugs from Balsa USA, large and small. They last a lot longer than copper lugs.
Mount the cabanes to the fuselage. Now make the 1/16-inch music wire cabane braces. Using measurements from the plan, solder on small lugs to the ends of the braces. Mount at center with 4-40 bolts and blind nuts. Wrap and solder at the top of the cabane.
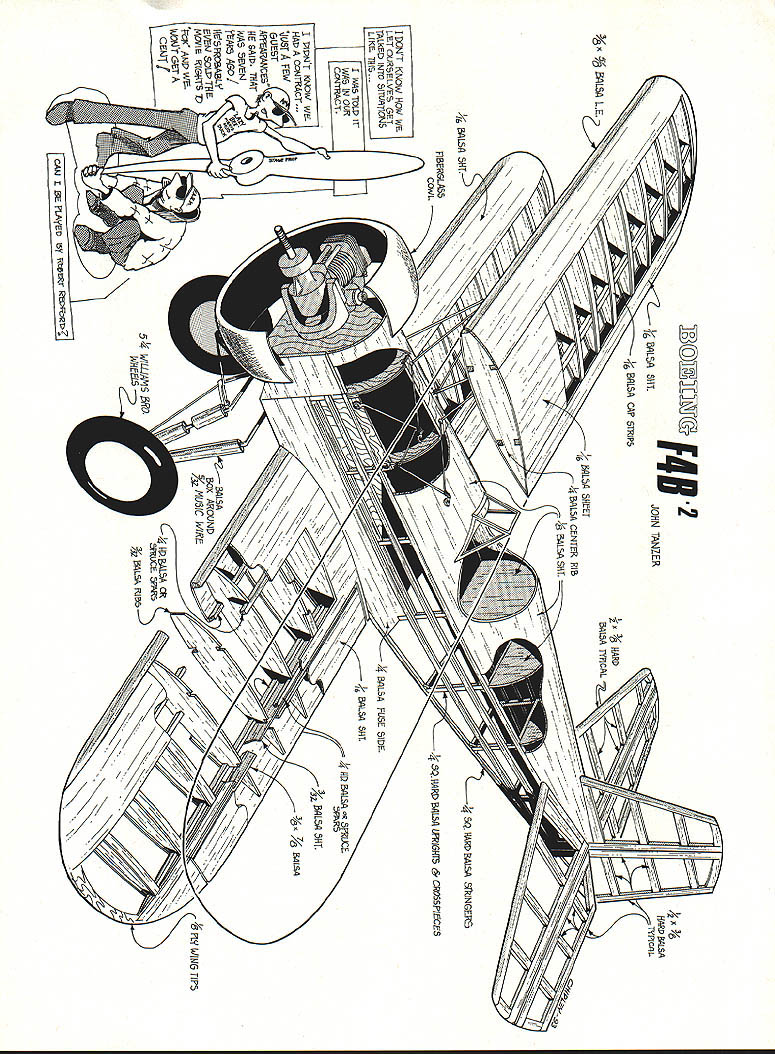
Place the upper wing flat on the bench with the fuselage upside down and in alignment with the wing. Drill and tap mounts for 1/4-20 bolts and mount the wings. Turn the plane over, and using a Robart incidence meter on the lower wing, block the fuselage for a reading of 0°. Now check the top wing. If it does not read 0°, use plywood washers to bring it to that point. Glue the washers to the bottom of the top wing to make them permanent.
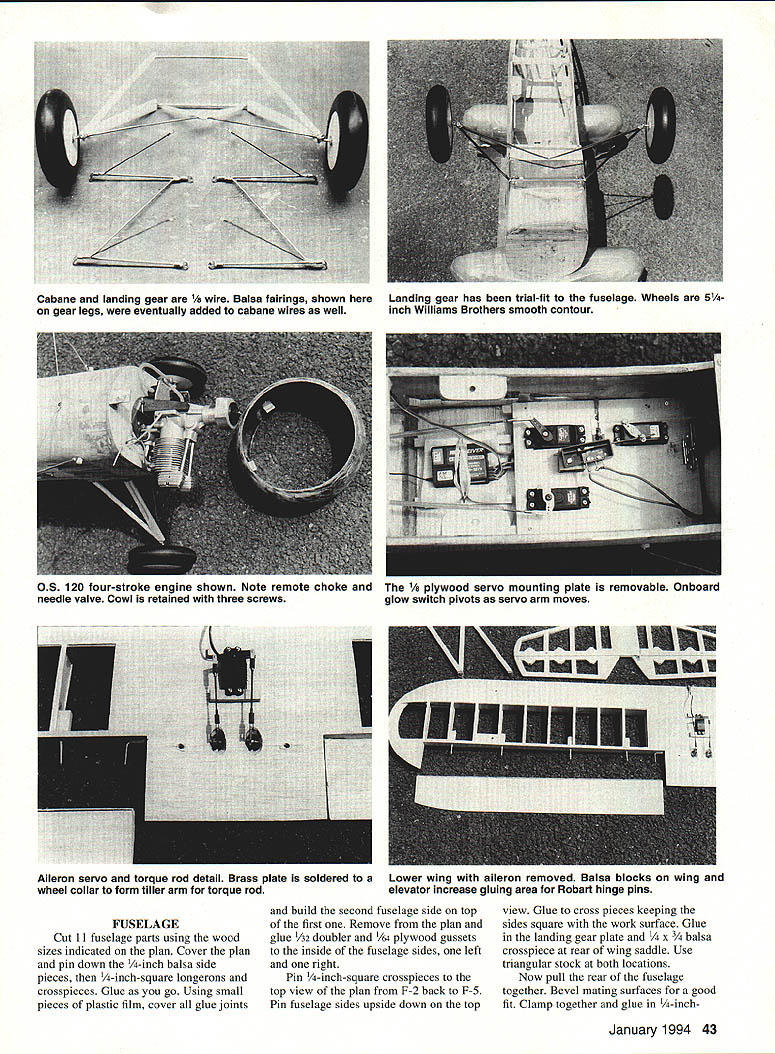
With the wings still mounted, cut and fit the interplane struts. Slit the ends for .032-inch aluminum brackets, then glue and pin in place. Drill and tap the mounting plates in the wing. Make the 1/8-inch music wire landing gear and mount it to the fuselage with landing gear straps. As a spacer bar and rubber bands work very well, I used balsa to fair in the landing gear and cabane wire for a scale appearance.
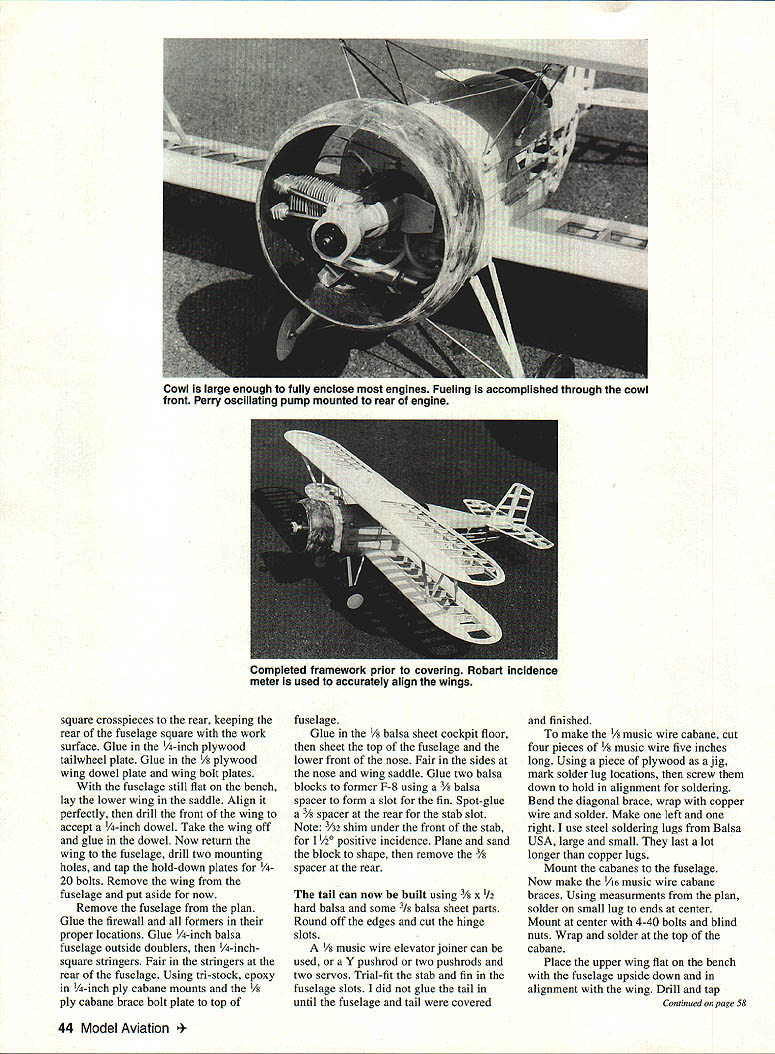
Mount the engine with two degrees right thrust and two degrees downthrust. The fiberglass cowl is being made by R & D Fiberglass Specialties, 3624 Kisco Drive, Sterling Heights, Michigan 48310.
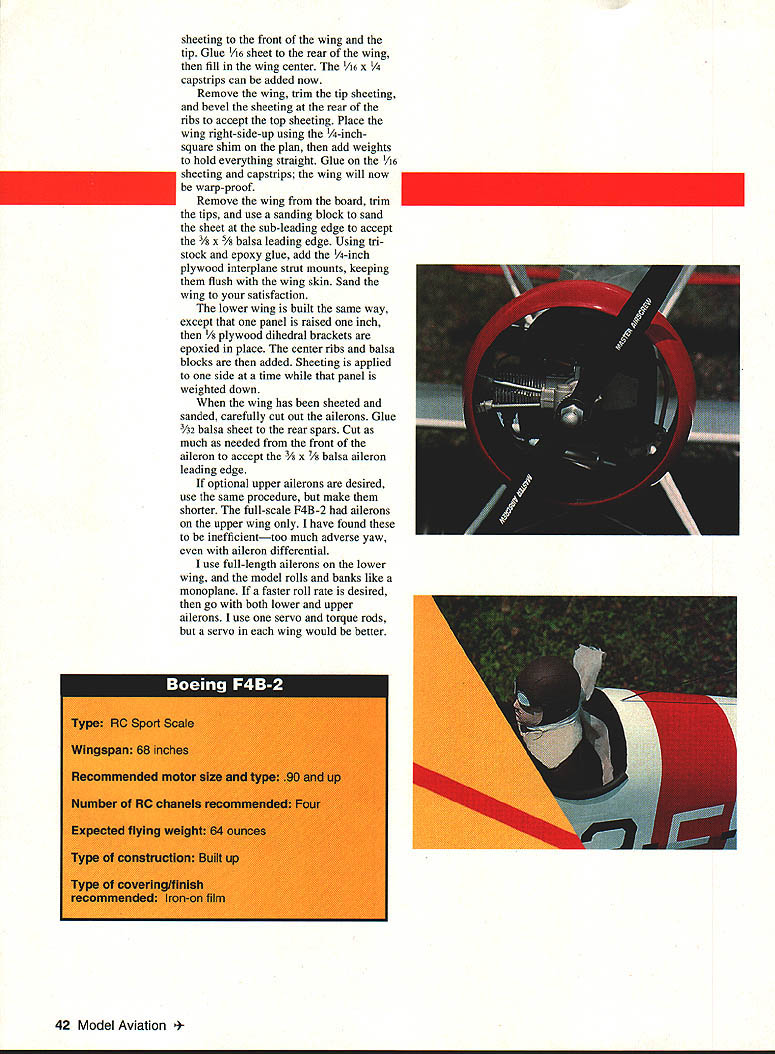
Boeing F4B-2 (Specifications)
- Type: RC Sport Scale
- Wingspan: 68 inches
- Recommended motor size and type: .90 and up
- Number of RC channels recommended: Four
- Expected flying weight: 64 ounces
- Type of construction: Built up
- Type of covering/finish recommended: Iron-on film
FINISH
I covered my F4B with plastic film using the top hat, red tail, and cowl from the aircraft carrier Yorktown. The top of the upper wing is yellow and the rest is white. Other carrier colors are: Enterprise blue tail, Wasp black tail, Ranger green tail, Lexington yellow tail, and Saratoga white tail — a lot of color combinations to pick from. If you want to finish yours as a P-12, the Army has some good combinations, too.
The U.S. stars are Major Decal's water transfers applied to plastic film — it works. Hobbypoxy H65 red matches MonoKote and EconoKote red. The only painted parts are the cowl, the struts and the landing gear.
"U.S. NAVY" in large letters on the bottom of the lower wing was cut from a Presto Trim Sheet. The red band around the fuselage is EconoKote, applied at low heat. The numbers and top hat were cut from a Trim Sheet. The small letters and numbers are the pressure-sensitive type — available at any art store.
I glued in the tail after the fuselage was covered in white and the tail in red. Makes for a neat job. Install the tail wire, braces, tail wheel, windshield, and 5/64-inch Williams Brothers smooth contour wheels. Use your favorite control system.
FLYING
You are going to like this! Add power — it will come up on the mains — a little right rudder — a little up elevator — and it's off! Now you're a Navy pilot and can do all the things described in the beginning.
Then it is time to land — no sweat. A piece of cake. Line up with the runway, make a slow descent to a perfect three-point landing.
If you don't like to build from plans and can wait, the F4B is going to be kitted in the near future by Balsa Products Engineering, Elkton, New Jersey.
If you can't wait — send for a set of plans and make your own kit. It's not too difficult — I do it all the time.
Happy landings!
Transcribed from original scans by AI. Minor OCR errors may remain.

