
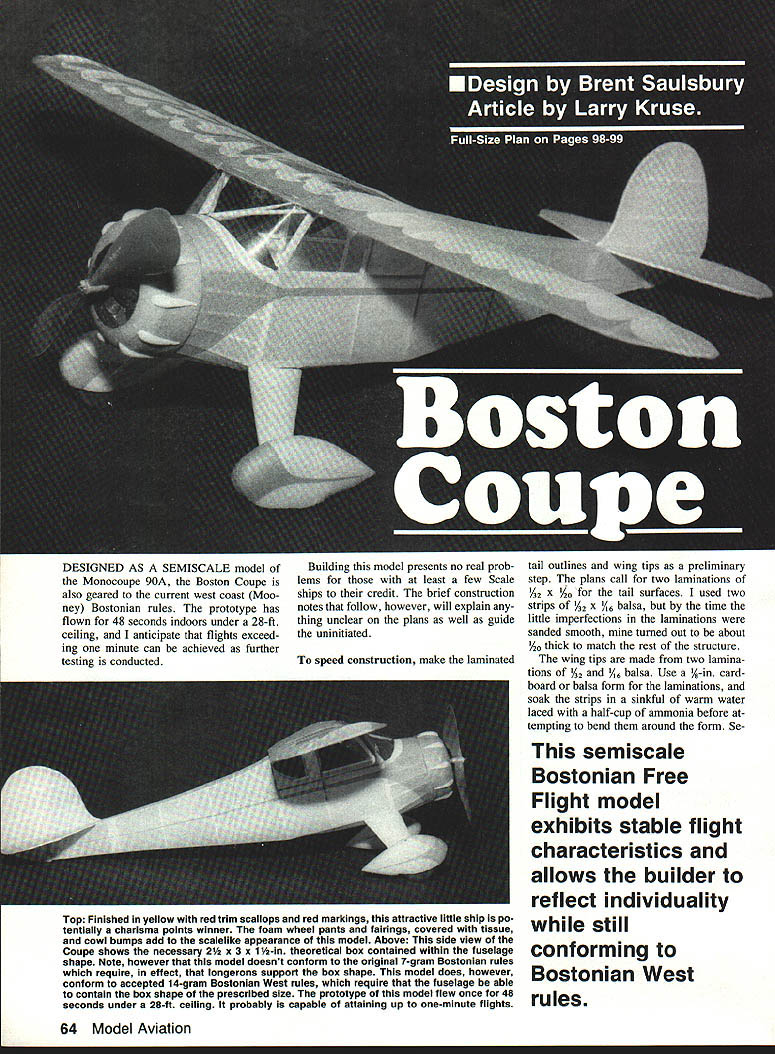
Boston Coupe
Credits
- Design by Brent Saulsbury
- Article by Larry Kruse
- Full-size plan on pages 98–99
Overview
Designed as a semi-scale model of the Monocoupe 90A, the Boston Coupe is also geared to the current West Coast (Mooney) Bostonian rules. The prototype has flown for 48 seconds indoors under a 28-ft. ceiling, and I anticipate flights exceeding one minute as further testing is conducted.
Building this model presents no real problems for those with at least a few scale ships to their credit. The construction notes that follow explain anything unclear on the plans and will guide the uninitiated.
Materials and preliminaries
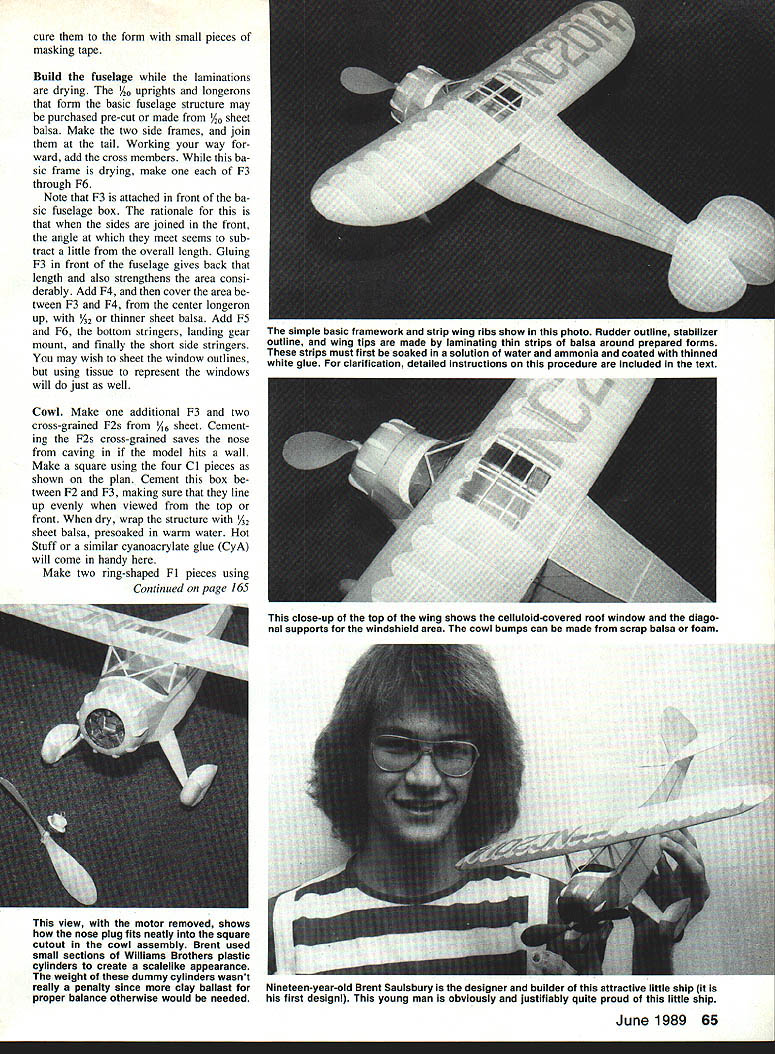
- Make laminated tail outlines and wing tips as a preliminary step.
- Plans call for two laminations of 1/32-in. x 1/2-in. for the tail surfaces. I used two strips of 1/32-in. x 1/16-in. balsa, but by the time the little imperfections in the laminations were sanded smooth, mine turned out to be about 1/20-in. thick to match the rest of the structure.
- Wing tips are made from two laminations of 1/32-in. and 1/16-in. balsa. Use a 3/16-in. cardboard or balsa form for the laminations, and soak the strips in warm water laced with a half-cup of ammonia before attempting to bend them around the form. Use small pieces of masking tape to secure the form while the laminations dry.
Fuselage
- Build fuselage laminations. While drying, make the laminated uprights/longerons to form the basic fuselage structure.
- Fuselage sides may be purchased pre-cut from 1/2-sheet balsa. Make two side frames and join at the tail. Working forward, add cross members to form the basic frame.
- While drying, make F3 through F6. Note: F3 is attached to the front of the basic fuselage box; when the sides are joined the front angle will meet and this seems to subtract a little overall length. Gluing F3 to the front of the fuselage restores the length and strengthens the area considerably.
- Add F4 (cover area between F3 and F4); center longeron up 1/32-in. thinner sheet balsa. Add F5 and F6 bottom stringers, landing-gear mount, and finally short side stringers.
- You may wish to sheet window outlines; using tissue to represent windows will work well.
Cowl
- Make an additional F3 and two cross-grained F2s from 1/16-in. sheet. Cementing F2s cross-grained helps prevent nose caving when the model hits a wall.
- Make the square using four C1 pieces shown on the plan. Cement the box between F2 and F3, making sure they line up evenly when viewed from top and front.
- Dry-wrap the structure with 1/32-in. sheet balsa presoaked in warm water. "Hot Stuff" or a similar cyanoacrylate glue will come in handy.
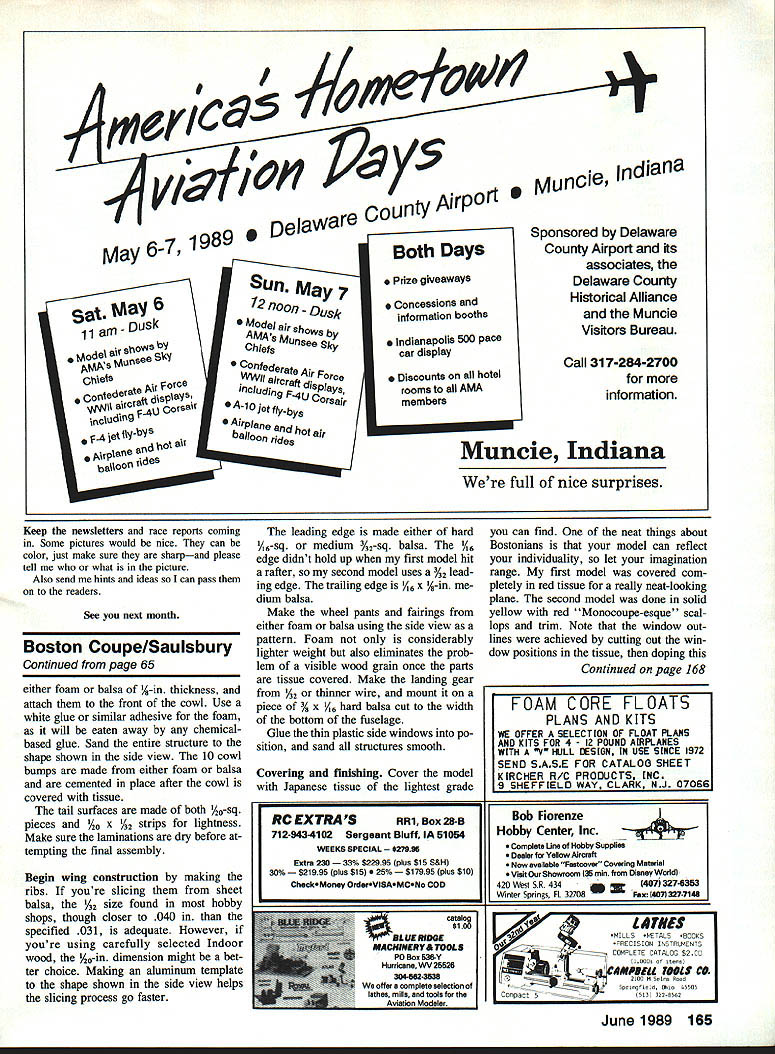
- Make two ring-shaped F1 pieces using 1/32-in. sheet balsa. Cure them to the form with small pieces of masking tape.
- Use either foam or balsa of 1/8-in. thickness and attach them to the front of the cowl. Use white glue or a similar adhesive for foam, as chemical-based glues will eat foam away. Sand the entire structure to the shape shown in the side view.
- The 10 cowl bumps are made from either foam or balsa and are cemented in place after the cowl is covered with tissue.
Tail surfaces
- The tail surfaces are made from both 1/16-in.-sq. pieces and 1/16-in. x 3/32-in. strips for lightness.
- Make sure the laminations are fully dry before attempting the final assembly.
Wing
- Begin wing construction by making the ribs. If slicing them from sheet balsa, the 1/32-in. size found in most hobby shops, though closer to .040 in. than the specified .031 in., is adequate. If using carefully selected indoor balsa, the .020-in. dimension might be a better choice.
- Making an aluminum template to the shape shown in the side view helps speed the slicing process.
- The leading edge is either hard 1/8-in.-sq. or medium 3/32-in.-sq. balsa. The 1/8-in. edge didn't hold up when my first model hit a rafter, so my second model uses a 3/32-in. leading edge.
- The trailing edge is 1/16-in. x 1/8-in. medium balsa.
Landing gear and wheel pants
- Make the wheel pants and fairings from either foam or balsa using the side view as a pattern. Foam is considerably lighter and eliminates visible wood grain once tissue covered.
- Make the landing gear from 1/32-in. or thinner wire, and mount it on a piece of 3/16-in. x 1/16-in. hard balsa cut to the width of the bottom of the fuselage.
- Glue thin plastic side windows into position, and sand all structures smooth.
Covering and finishing
- Cover the model with the lightest grade of Japanese tissue you can find.
- One neat thing about Bostonians is that your model can reflect your individuality. My first model was covered completely in red tissue for a striking look. The second model was solid yellow with red "Monocoupe-esque" scallops and trim.
- Window outlines were achieved by cutting out the window positions in the tissue, then doping this section to the plastic window area.
Flight performance
- The original model flew right off the board. As longer motors were installed, however, a small amount of clay was needed in the nose.
- At its first informal contest, the Boston Coupe took first place with a flight time of 48 seconds. It is a stable flier despite its lack of dihedral and looks very appealing in the air.
- For outdoor flying, add 1/4 to 1/2 in. of dihedral per tip for stability.
- For first flights, I used a loop of 3/32-in. rubber about twice the width of the plane.
Conclusion
Build a Boston Coupe and let me know how it performs for you. I'm sure you'll be more than pleased with the results.
Transcribed from original scans by AI. Minor OCR errors may remain.

