

Bostonaire
By Perry Peterson
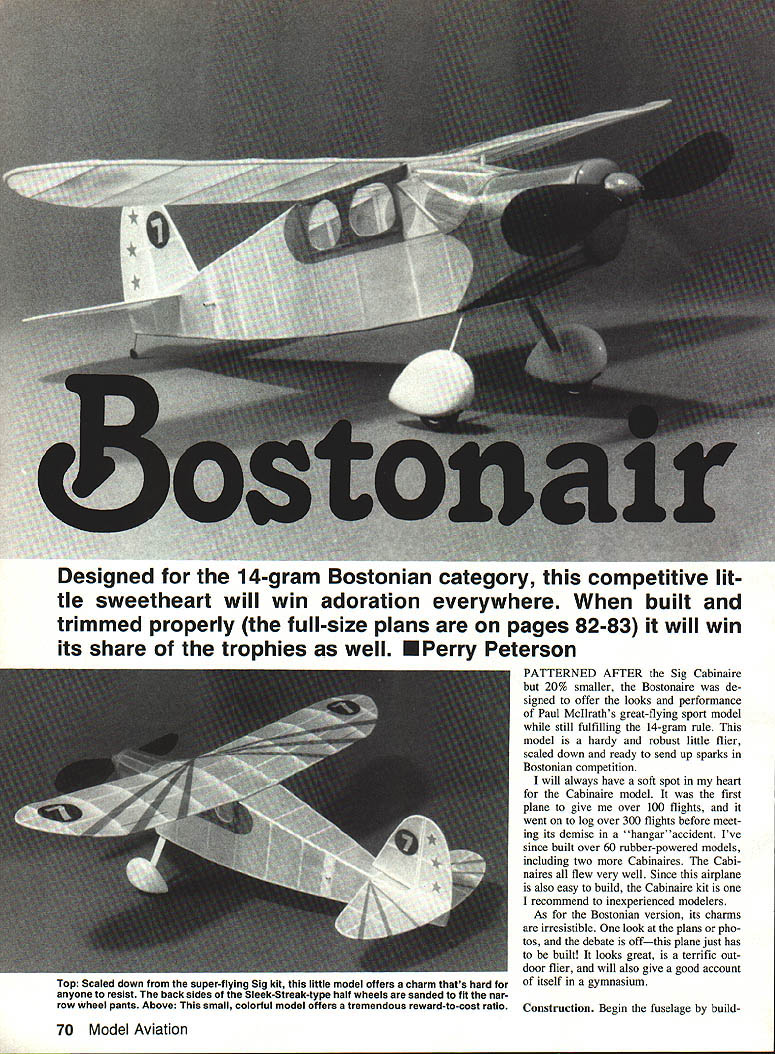
Designed for the 14‑gram Bostonian category, this competitive little sweetheart will win adoration everywhere. When built and trimmed properly (the full‑size plans are on pages 82–83) it will win its share of the trophies as well.
Patterned after the Sig Cabinaire but about 20% smaller, the Bostonaire was designed to offer the looks and performance of Paul McIlrath's great‑flying sport model while still fulfilling the 14‑gram rule. This model is a hardy and robust little flier, scaled down and ready to send up sparks in Bostonian competition.
I will always have a soft spot in my heart for the Cabinaire model. It was the first plane to give me over 100 flights, and it went on to log over 300 flights before meeting its demise in a "hangar" accident. I've since built over 60 rubber‑powered models, including two more Cabinaires. The Cabinaires all flew very well. Since this airplane is also easy to build, the Cabinaire kit is one I recommend to inexperienced modelers.
As for the Bostonian version, its charms are irresistible. One look at the plans or photos, and the debate is off—this plane just has to be built! It looks great, is a terrific outdoor flier, and will also give a good account of itself in a gymnasium.
Construction
Fuselage
- Begin by building the side frames over the plan, pinning them down. Use a sheet of thin plastic wrap taped over the plans.
- Select medium‑weight, straight‑grained 1/16"‑sq. balsa strips for the longerons. Use lighter weight strips for uprights aft of the landing gear.
- Make motor‑peg retainers from medium‑weight balsa; harden them with cyanoacrylate (CyA) glue after drilling the holes.
- After the side frames are completed, glue them together at the tail post.
- Working over the top plan view, add top and bottom crosspieces and move forward, keeping both sides flat on the workbench.
- Add bulkheads F‑2 through F‑4; test‑fit the bulkhead between F‑2 and F‑3 as you build.
- Add top and bottom stringers, cutting notches where the stringers pass.
Nose and landing gear:
- Use the cutout F‑1 and F‑2 pattern to make the plug‑in portion of the nose block.
- Make the removable nose by laminating two 1/32" sheet balsa pieces together and gluing them to the rear nose block.
- Drill a 1/8" hole in the nose block for a small plastic nose button; the installation should allow about 2° downthrust and 2° right thrust.
- Make the landing gear by bending 0.025" music wire over the pattern on the plan and sandwiching it between 1/16" sheet balsa retainers.
- Wheel pants: cut and laminate from very light‑weight balsa as shown on the plans. Center sections: two pieces of 1/32" sheet; outside pieces: 1/16" sheet. Sand to streamlined shape.
- Wheels can be made from two cross‑grained laminations of 1/32" sheet balsa. Sleek‑Streak‑type plastic half‑wheels may be used but sand the rear until they fit the wheel pants with clearance.
- After wheel pants and wheels are shaped, slide the landing‑gear wire through the rear of the wheel pants and trap the wheels inside. Cut a slight notch in the rear of the wheel pants (about half the vertical section) to recess the wire. Apply five‑minute epoxy sparingly at the recessed wire—avoid adding unnecessary weight.
Flying surfaces
- Outlines are laminated from four strips of basswood cut 0.012" × 1/16" (available from Peck‑Polymers).
- Make a template by tracing the inside outline on poster board and coat the template outline with wax to prevent glue sticking during laminating.
- Mix about 60% white glue and 40% water in the lid of a plastic tub. Drag each basswood strip individually through the solution and let the lid edge wipe off excess glue. Stack on a clean area of the bench.
- Tape the stack at one end to the template with masking tape and pull around the form, keeping some tension. Tape the other end and let dry. Sand the strips before removing the template.
- Build the wing over the plan using 1/16" sheet ribs cut to the plan pattern. Use 1/16"‑sq. balsa for leading and trailing edges. Use 1/8" dihedral at each wing tip.
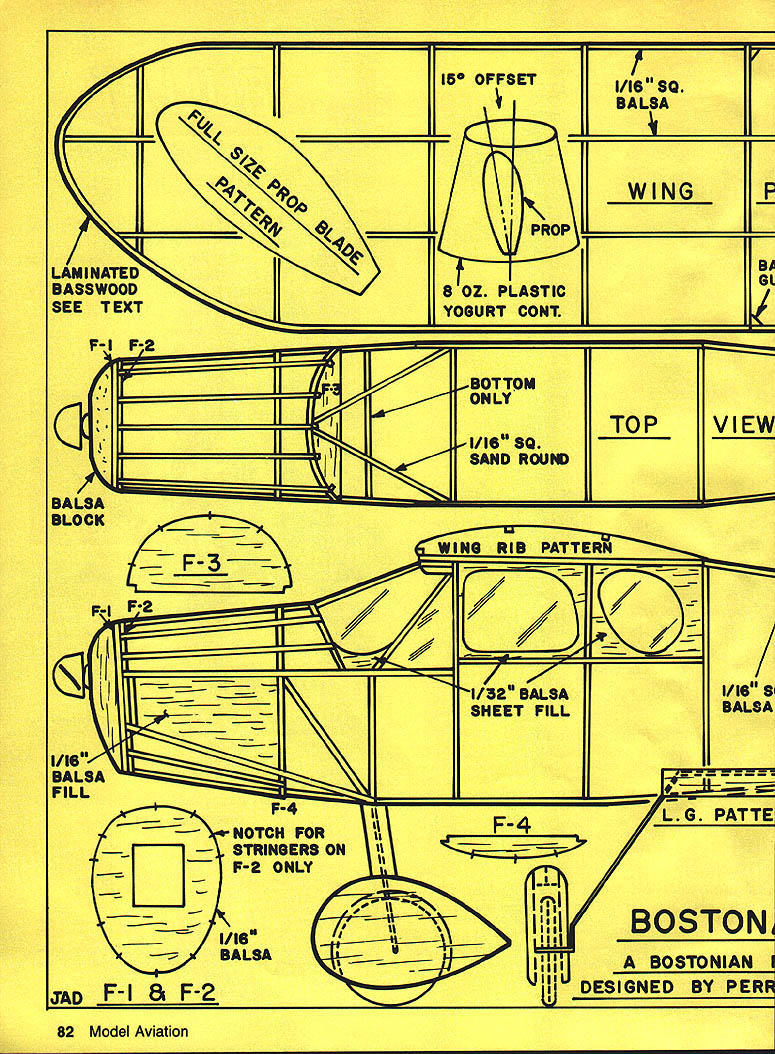
Prop
- Make the spinner from a balsa block. Cut blade slots at 45° angles.
- Razor saw blades will cut plastic from an 8‑oz. yogurt container as shown on the plan. Slip these plastic spinner slots into the balsa spinner for a fast, easy, lightweight, efficient prop.
- Slots should be narrow enough for a tight press‑fit; blades will need glue. Leave the spinner free so you can experiment with different blade sizes.
Covering and finishing
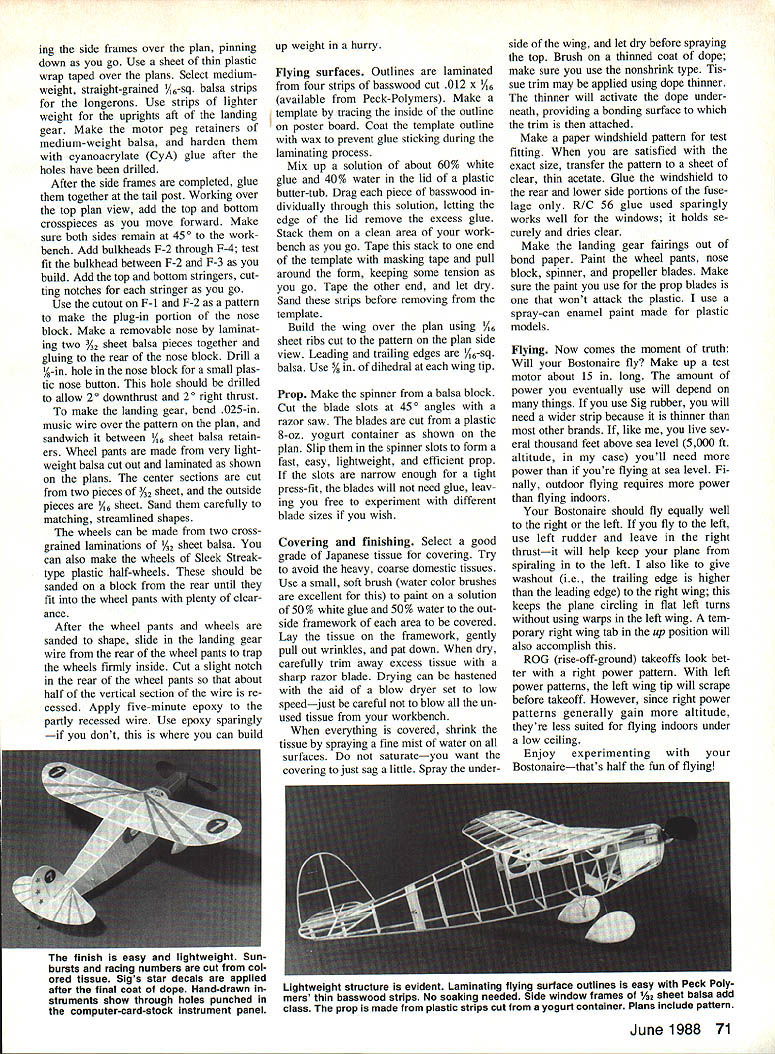
- Select a good grade of Japanese tissue for covering. Avoid heavy, coarse domestic tissues.
- Use a small soft watercolor brush.
- Mix a paint solution of 50% white glue and 50% water. Brush the thinned glue on the framework areas and cover the wing and surfaces; let dry before spraying the top.
- Brush on a thinned coat of nonshrinking dope. Tissue trim may be applied using dope thinner—the thinner will reactivate the dope underneath, providing a bonding surface for the trim.
- Make a paper windshield pattern for test fitting. When satisfied with size, transfer the pattern to a sheet of clear thin acetate. Glue the windshield to the rear and lower sides of the fuselage canopy. Use R/C‑56 glue sparingly; it holds securely and dries clear.
- Make landing gear fairings from bond paper. Paint the wheel pants, nose block, spinner, and propeller with paint made for plastic models. Paint wheel parts and prop blades as recommended.
Plan notes (from the drawing):
- Windshield pattern: clear plastic (acetate)
- 1/16" sq. balsa used in various structural areas
- 5/8" dihedral each wing tip (note: 1/8" dihedral at each wing tip is specified in the text)
- 3/32" O.D. aluminum tube motor peg
- Laminated basswood outlines for flying surfaces
- Elevators, stabilizer, fin and rudder indicated on plan
- Music wire sizes noted: .010" and .025" where applicable
Flying
- Make up a test motor about 15 in. long. The amount of rubber power you need depends on many factors: rubber brand (Sig rubber may require a wider strip because it is thinner), altitude (higher elevation requires more power), and whether you're flying outdoors (outdoor flying requires more power than indoors).
- Your Bostonaire should fly equally well to the right or the left. For left‑hand flying, use left rudder and retain some right thrust—this helps keep the plane from spiraling in to the left.
- At launch, give the plane a slight right wing‑tip up (trailing edge higher than the leading edge). This encourages flat left turns without warping the left wing. A properly set right wing tab in the up position will also accomplish this.
- R.O.G. (rise‑off‑ground) takeoffs look better with a light power pattern. With left power patterns, the left wingtip may scrape before takeoff. Right power patterns generally gain more altitude and are less suited for flying indoors under a low ceiling.
- Trim carefully and enjoy experimenting—tuning and testing are half the fun of flying!
Enjoy your Bostonaire—it's a delightful little model that rewards careful building and trimming.
Transcribed from original scans by AI. Minor OCR errors may remain.

