
BUDLIGHT LASER
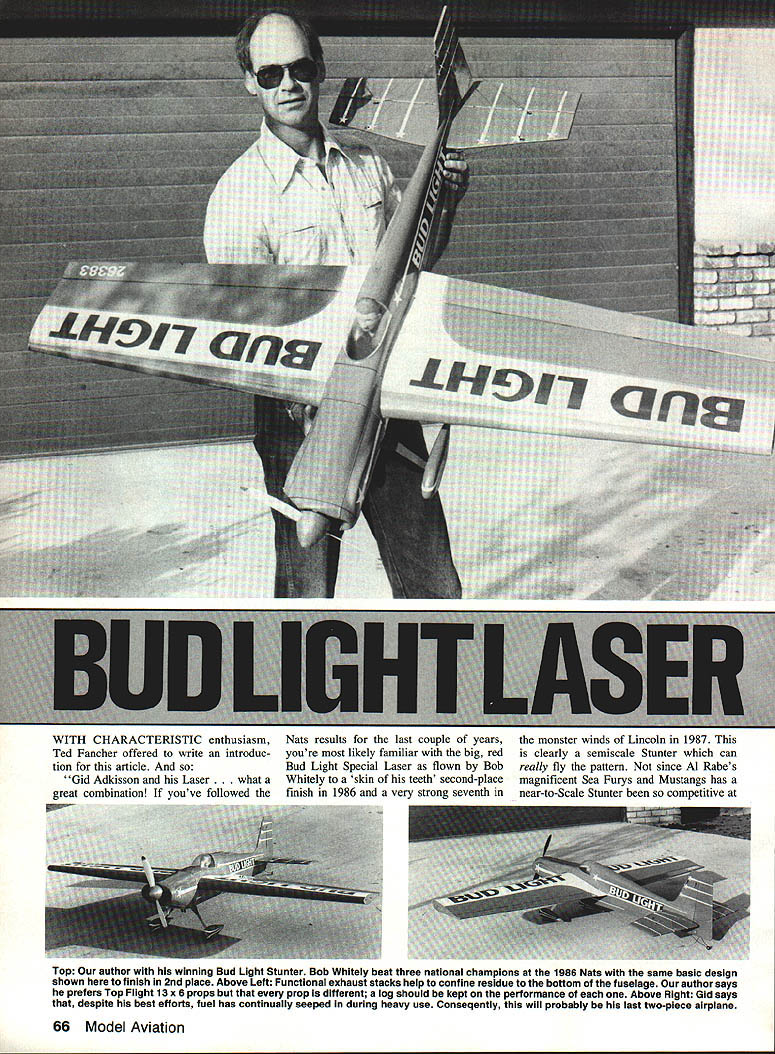
"Gid Adkisson and his Laser . . . what a great combination! If you've followed the Nats results for the last couple of years, you're most likely familiar with the big red Bud Light Special Laser as flown by Bob Whitely to a 'skin of his teeth' second-place finish in 1986 and a very strong seventh in the monster winds at Lincoln in 1987. This is clearly a semiscale Stunter which can really fly the pattern. Not since Al Rabe's magnificent Sea Furys and Mustangs has a near-to-scale Stunter been so competitive at the highest levels of Precision Aerobatics competition. I believe this ship may be the best breed to date. Gid's name might be a little new to some, but I predict the situation will be short-lived; the guy can fly. He flew his own Bud Light Laser at Lincoln and, despite his inexperience—he lost Pattern points on the second flight of finals day which kept him from possibly edging out Mike Rogers for the prestigious Rookie of the Year award (highest-placing first-time qualifier)."
— Ted Fancher
INTRODUCTION / BACKGROUND
As Ted Fancher says, Control Line Stunt is a real aerobatics airplane. My story began in 1984. For some time I had been asking myself why contemporary stunt ships looked like space-age works of art instead of piloted airplanes. If you study full-size aerobatic airplanes, you can see styles to adapt, but the question was which direction to take.
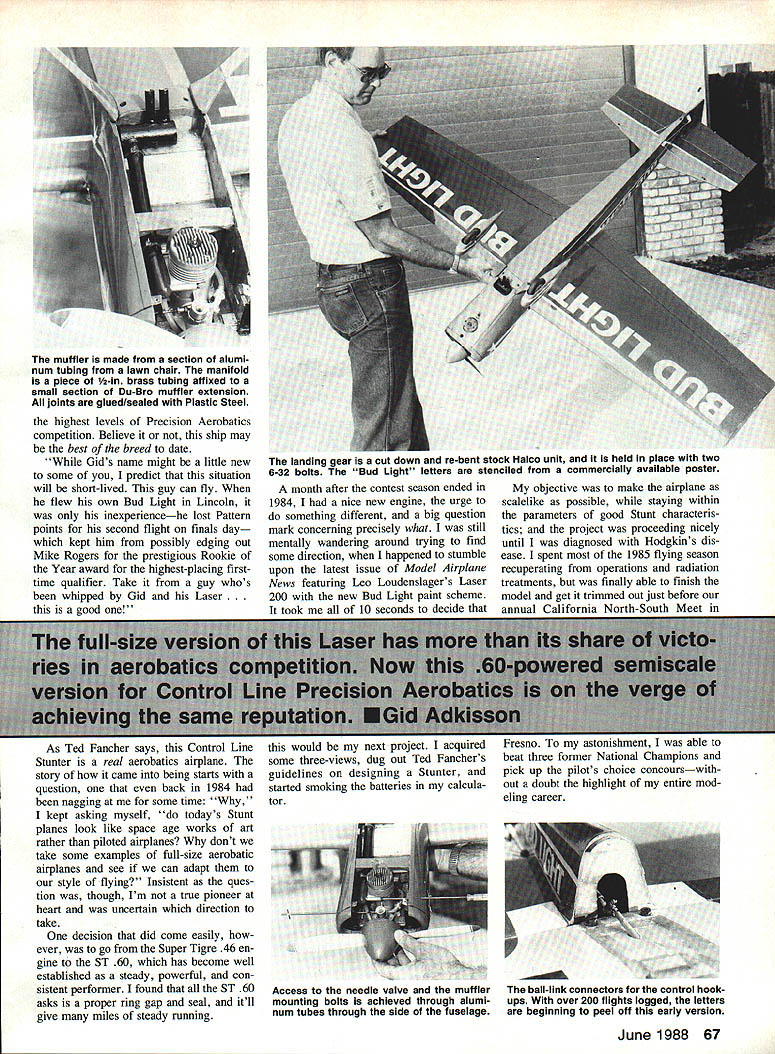
After considerable thought, and inspired by a Model Airplane News feature on Leo Loudenslager's Laser 200 in a new Bud Light paint scheme, I decided to build a semiscale Laser. I acquired three-views, dug out Ted Fancher's guidelines for designing a Stunter, and started smoking the batteries in my calculator. The objective was straightforward: make the airplane as scale-like as possible while staying within the parameters of good stunt characteristics.
ENGINE CHOICE
I moved from the Super Tigre .46 to the Super Tigre ST .60. The ST .60 has proven to be a steady, powerful, and consistent performer. Given the proper ring gap and seal, it will run reliably for many hours.
DEVELOPMENT AND RESULTS
The project proceeded until I was diagnosed with Hodgkin's disease. I spent the 1985 season recuperating with operations and radiation, but I was able to finish the model and trim it out just before the annual Nats at Fresno. To my astonishment I beat three former National Champions and took Pilot's Choice concours—without doubt the highlight of my modeling career.
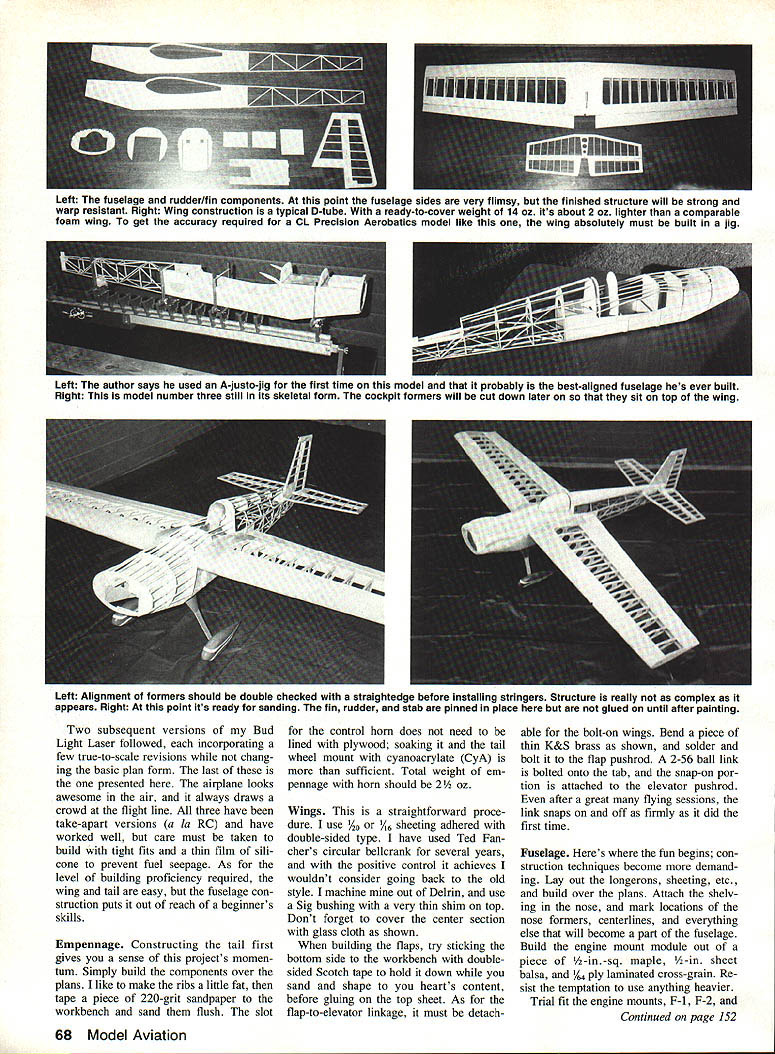
Two subsequent versions of my Bud Light Laser followed, each incorporating a few true-to-scale revisions while not changing the basic plan form. The last of these is the one presented here. The airplane looks awesome in the air and always draws a crowd at the flight line. All three have been take-apart versions (a la RC) and have worked well, but care must be taken to build with tight fits and a thin film of silicone to prevent fuel seepage. The wing and tail are straightforward, but the fuselage construction is demanding and not for beginners.
PLANS / SHEET INFORMATION
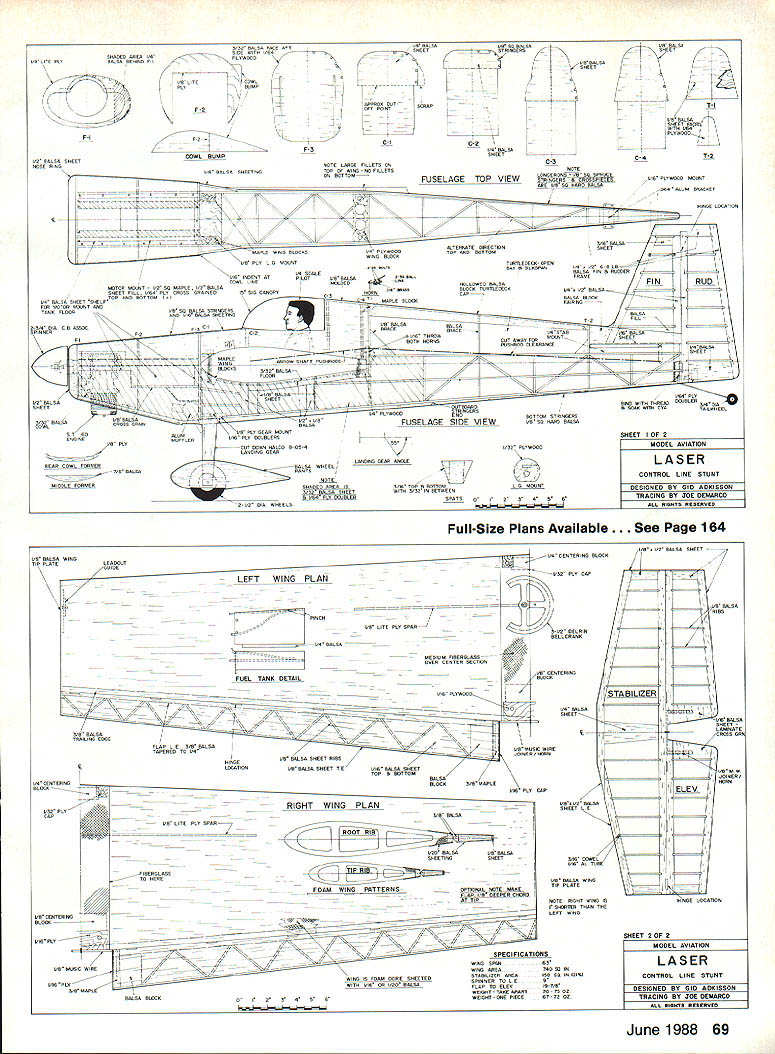
- LASER
- MODEL AVIATION — CONTROL LINE STUNT
- DESIGNED BY GID ADKISSON
- TRACING BY JOE DeMARCO
- ALL RIGHTS RESERVED
- SHEET 1 OF 2
- FUSELAGE TOP VIEW
- FUSELAGE SIDE VIEW
- SHEET 2 OF 2
- LEFT WING PLAN
- RIGHT WING PLAN
- STABILIZER
- ELEVATOR
- Full-Size Plans Available — See Page 164
CONSTRUCTION
Empennage
Construct the tail first to gain momentum on the project. Build the components over the plans. I prefer ribs slightly oversize, then tape 220-grit sandpaper to the bench and sand them flush. The slot for the control horn does not need plywood lining; soaking it and the tail-wheel mount with cyanoacrylate (CyA) is sufficient. Total weight of the empennage with horn should be about 2-1/2 oz.
Wings
The wing build is straightforward. Use 1/16" or 3/32" sheeting adhered with double-sided tape. I use Ted Fancher's circular bellcrank for positive control; I machine mine from Delrin and use a Sig bushing with a very thin shim on top. Cover the center section with fiberglass cloth as shown on the plans.
When building the flaps:
- Stick the bottom side to the workbench with double-sided tape while sanding and shaping before gluing the top sheet.
- Make the flap-to-elevator linkage detachable for bolt-on wings. Bend a piece of thin K&S brass as shown, solder and bolt it to the flap pushrod.
- Bolt a 2-56 ball link onto the tab and attach the snap-on portion to the elevator pushrod. The link should snap on and off firmly even after many flights.
Fuselage
Fuselage construction is the most demanding part. Lay out the longerons and sheeting and build over the plans. Attach nose sheeting and mark locations of the nose formers, centerlines, and other reference points.
Build the engine-mount module from:
- 1/2" sq. maple,
- 1/2" sheet balsa, and
- 1/16" ply laminated cross-grain.
Resist the temptation to use heavier materials.
Trial-fit the engine mounts and formers F-1 through F-3; ensure proper fit. Tack appropriate scrap onto the front of the engine mounts, drill mounting holes, and install blind nuts. I use no engine offset.
Build a jig, slip F-2 and F-3 into place temporarily, and glue in crosspieces while maintaining alignment. Use a right triangle to check accuracy. Raise the front of the fuselage to let F-3 fit fully, ensure alignment, then glue F-1, F-2, and F-3 permanently. Glue in wing mounting blocks and the 1/4" stab mount. Align the wing and drill mounting holes. Bolt the engine to its plate and, using an incidence meter, shim as needed to make sure the engine, wing, and stab are at zero settings. Install the flap-to-elevator pushrod and leave it in place.
Remove the wing and slide C-1 through C-4 into place. Check alignment with a straightedge, then install stringers in the nose, cockpit, and rear fuselage. Sheet the nose and cockpit with 1/16" balsa. Install the turtledeck top using a hollowed block or rolled sheet, corresponding to the prototype. Glue on 1/8" hard balsa stringers, tapering to 1/16" at the tail. Use hard balsa on the bottom, as this area takes abuse.
Cover the nose and cockpit with sheeting and fiberglass cloth. Cut and bend the Halco landing gear as shown. Make wheel pants from balsa and epoxy them to the gear with 1/2" plywood reinforcement (Duro plastic steel or similar). Typical weights:
- Fuselage: ~10 oz.
- Cockpit: ~2 oz.
- Landing gear with Dave Brown wheels: ~5 oz.
MUFFLER AND NEEDLE VALVE
The muffler is unique but easy to construct:
- Make the manifold from a small piece of Du-Bro muffler extension epoxied onto 1/2" brass tubing. Close one end of the tubing and cut the exhaust hole.
- Make the muffler body from thin aluminum (lawn-chair material), capped at both ends.
- Form the stacks from very thin aluminum sheet (dryer ducting material). Wrap two pieces around a small X-Acto handle and epoxy the seam.
- Solder a 1/8" brass tube pressure tap onto the manifold and run the pressure line over the crankcase.
- Connect manifold and muffler with 1/2" neoprene tubing.
Needle valve:
- Use a standard ST-style needle, cut off and slotted with a Dremel emery disc.
- Solder a short piece of 3/32" wire into the slot.
- For access, slot a piece of 1/8" brass tubing about 8" long and solder a music-wire feeler through the other end. The brass slips through a length of aluminum tubing installed during nose sheeting.
To align muffler mounting bolts for 4-40 screws:
- Remove the spraybar from the venturi, bolt the engine in place on the aluminum pads with drill bits in the spraybar and muffler holes.
- Use fingers to drill through the side sheeting, then glue in aluminum tubing.
- Use a pencil eraser to choke the engine for fine tuning.
FINISHING
I use silkspan and nitrocellulose dope for the base and Super Poxy for finishing coats. For the proper red:
- Mix three parts orange to two parts red.
- Prime with a silver base coat because the red has little covering power.
For the blue: mix three parts blue to one part black.
For the Bud Light logo:
- Obtain a poster with 3" letters. Reduce to 5/8" for the wings and to 1/8" height for the fuselage.
- My method has been cutting letters from MonoKote trim and sealing with Super Poxy; heavy use can cause peeling. Next time I will mask with frisket and spray.
Being nearly quarter-scale, a quarter-scale DGA pilot figure (with narrowed shoulders) fits well.
For brace wires:
- The brace wires can be 1/32" music wire, or feed .018" flying wire through attach points and back to the start.
FLYING
I have yet to get one of these airplanes below 70 oz., but that does not dampen its flying prowess. Recommended equipment and settings:
- Fuel: 15% nitro
- Prop: 13x6 Top Flite Super M, blades thinned
- Lines: 65 ft.
- Leadouts: stay fairly far forward
The rudder is very effective; only a small offset is necessary to counter engine power. The airplane pulls hard and appears to fly more slowly than it does because of its size.
ACKNOWLEDGEMENTS
I want to thank those who've helped:
- Ted Fancher for his help and influence over the years.
- Bob Whitely for flying the same basic Laser design to second place at the 1986 Nats.
- Members of the Clovis Control Line Club for help with design, construction, engines, coaching, and camaraderie.
Half the enjoyment of this hobby comes from friendships and shared enthusiasm. I hope you get as much pleasure out of building and flying your Laser as I have. Being competitive in Control Line Stunt while flying a scale model is double the fun.
Transcribed from original scans by AI. Minor OCR errors may remain.

