
Build a Precision Sander
William Weaver
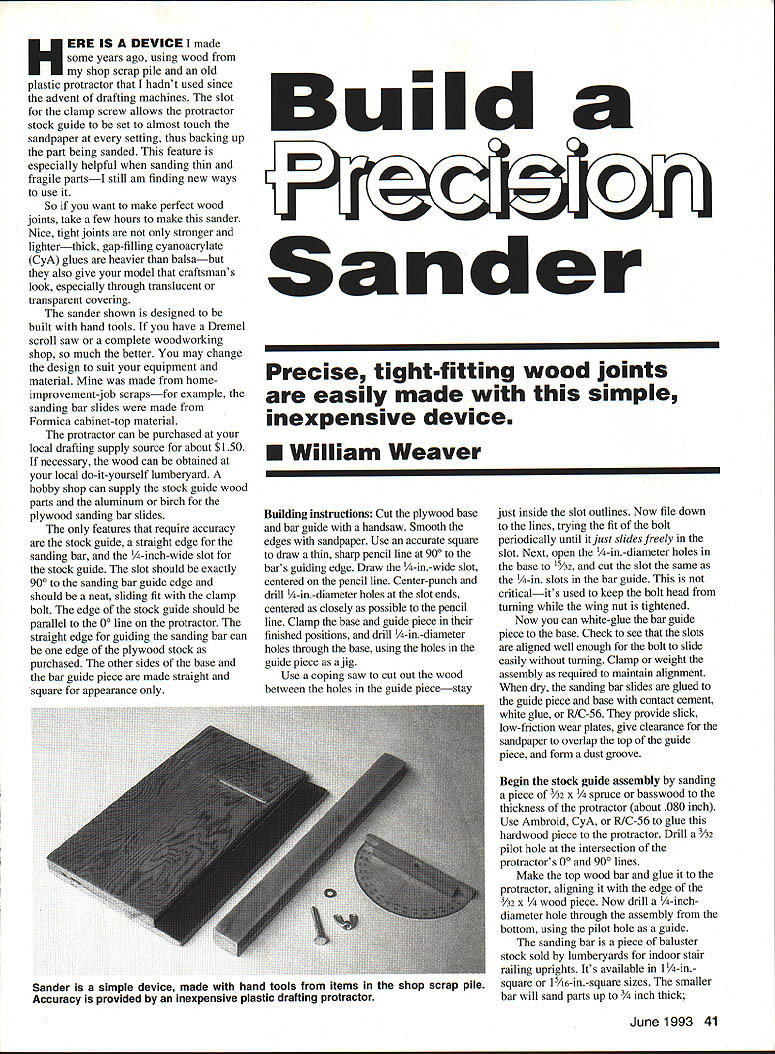
Precise, tight-fitting wood joints are easily made with this simple, inexpensive device. I made this sander years ago from shop scraps and an old plastic protractor that I hadn't used since drafting machines became common. The slot for the clamp screw lets the protractor stock guide be set almost touching the sandpaper at every setting, thereby backing up the part being sanded. That backing is especially helpful when sanding thin and fragile parts. I still find new ways to use it.
If you want perfect wood joints, take a few hours to make this sander. Nice, tight joints are stronger and lighter (thick, gap-filling cyanoacrylate glues are heavier than balsa) and give your model a craftsman's look, especially under translucent or transparent covering.
The sander shown is designed to be built with hand tools. If you have a Dremel, scroll saw, or a complete woodworking shop, so much the better. Change the design as needed to suit your equipment and material. Mine was made from home-improvement job scraps—for example, the sanding-bar slides were cut from Formica cabinet-top material.
The protractor can be bought at a drafting supply for about $1.50. If necessary, get the wood at a do-it-yourself lumberyard. A hobby shop can supply stock-guide wood parts and the aluminum or birch for the plywood sanding-bar slides.
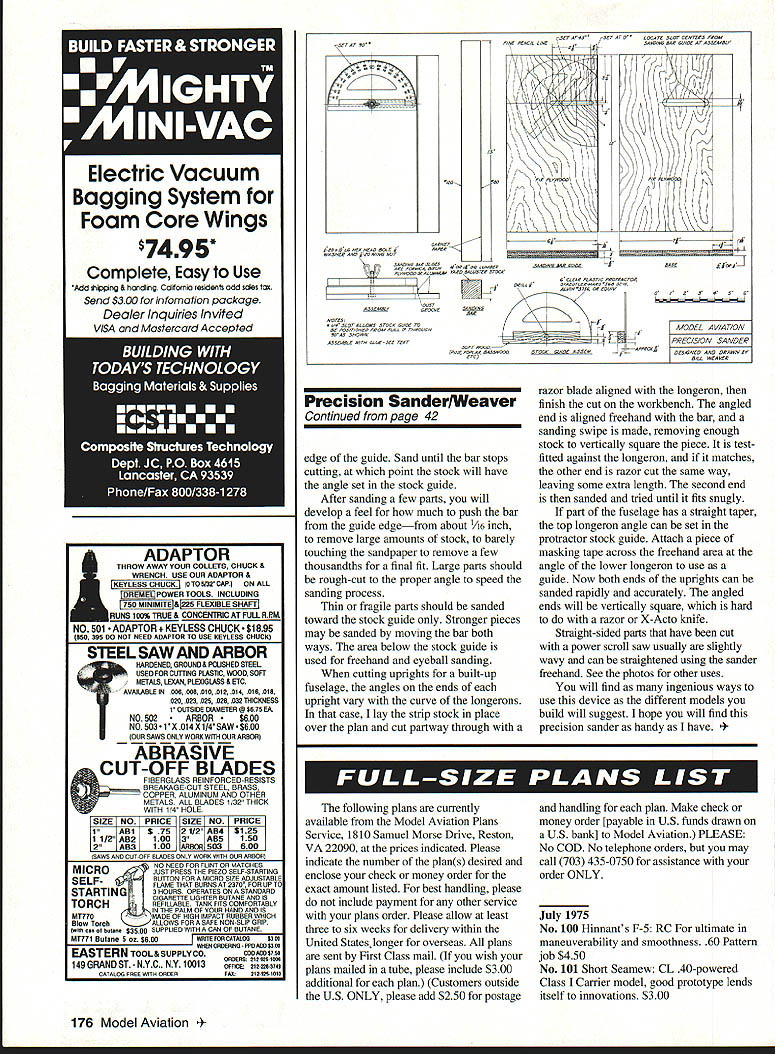
Only a few features require accuracy: the stock guide, a straight edge for the sanding bar, and the 1/4-inch-wide slot for the stock guide. The slot should be exactly 90° to the sanding-bar guide edge and be a neat sliding fit with the clamp bolt. The edge of the stock guide should be parallel to the protractor's 0° line. The straight edge for guiding the sanding bar can be one edge of the plywood stock as purchased; the other sides of the base and the bar-guide piece are made straight and square for appearance only.
Building instructions
- Cut the plywood base and bar guide with a handsaw and smooth the edges with sandpaper.
- Use an accurate square to draw a thin, sharp pencil line at 90° to the bar's guiding edge. Draw a 1/4-inch-wide slot centered on this pencil line.
- Center-punch and drill 1/4-inch-diameter holes at the slot ends, centered as closely as possible on the pencil line.
- Clamp the base and guide piece in their finished positions, and drill 1/4-inch-diameter holes through the base using the holes in the guide piece as a jig.
- Use a coping saw to cut out the wood between the holes in the guide piece—stay just inside the slot outlines. File down to the lines, trying the bolt periodically until it just slides freely in the slot.
- Enlarge the 5/32-inch-diameter holes in the base to 15/32 inch to provide clearance for the bolt head. Cut this slot the same as the 1/4-inch slots in the bar guide. This is not critical; it prevents the bolt head from turning while the wing nut is tightened.
- White-glue the bar-guide piece to the base. Check that the slots align well enough for the bolt to slide easily without turning. Clamp or weight the assembly as required to maintain alignment while drying.
- Glue the sanding-bar slides to the guide piece and base with contact cement, white glue, or RC-56. They provide slick, low-friction wear plates, give clearance for the sandpaper to overlap the top of the guide piece, and form a dust groove.
Stock guide assembly
- Sand a piece of 3/32 x 1/4-inch spruce or basswood to the thickness of the protractor (about .080 inch).
- Glue this wood piece to the protractor with Ambroid, cyanoacrylate (CyA), or RC-56.
- Drill a 3/32-inch pilot hole at the intersection of the protractor's 0° and 90° lines.
- Make the top wood bar and glue it to the protractor, aligning it with the edge of the 3/32 x 1/4 wood piece.
- Drill a 1/4-inch hole through the assembly from the bottom, using the pilot hole as a guide.
The sanding bar and paper
- The sanding bar is made from baluster stock sold for stair railing uprights. It is available in 1-1/4-inch-square or 1-3/16-inch-square sizes. The smaller bar will sand parts up to 3/8 inch thick; the taller bars allow sanding thicker stock. Extra bars can be made.
- Cut garnet-paper strips from a sheet with a straightedge and an old razor blade. The example shows 80-grit on one side and 120-grit on the other; I use 80-grit most.
- Emery-cloth facing strips can be attached almost without glue by using Coverite's Balsarite fast-drying hot-melt liquid adhesive (used for model airplane covering). Coat the back of the garnet paper, allow it to dry, then hot-iron it in place using a piece of paper over the sandbar to protect the iron. The paper lasts surprisingly long and can be peeled off when it needs replacing. Rubbing a hot iron over the bar softens Balsarite in the same way.
Calibrating
Assemble the stock guide, bolt, and wing nut. Use a square to locate the guide in the 90° position, and check that the 0° pencil line and the protractor 0° line match perfectly. If they don't, erase the pencil line and redraw it to match. This calibrates the sander at the most critical 90° position.
Using the sander
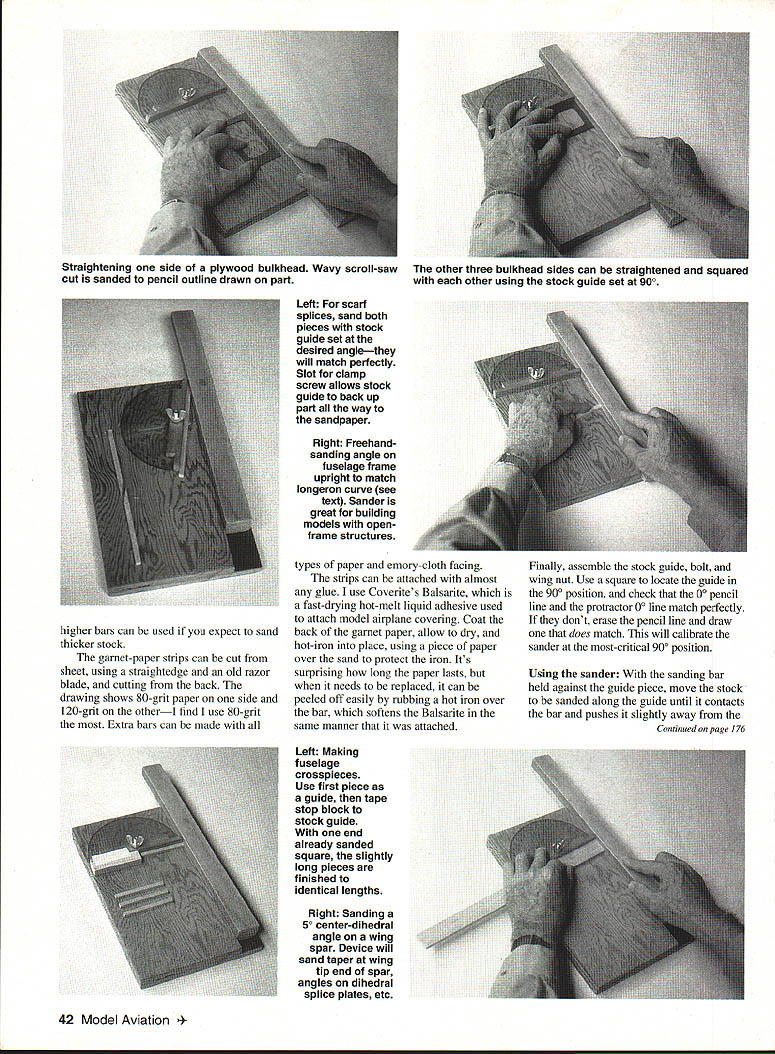
With the sanding bar held against the guide piece, move the stock to be sanded along the guide until it contacts the bar and pushes it slightly away from the edge of the guide. Sand until the bar stops cutting; at that point the stock will have the angle set in the stock guide.
After sanding a few parts you'll develop a feel for how much to push the bar from the guide edge—about 1/16 inch to remove large amounts of stock, down to barely touching the sandpaper to remove a few thousandths for a final fit. Rough-cut large parts to the proper angle to speed sanding.
- Thin or fragile parts should be sanded toward the stock guide only.
- Stronger pieces may be sanded by moving the bar both ways.
- The area below the stock guide is good for freehand and eyeball sanding.
When cutting uprights for a built-up fuselage, the end angles vary with the curve of the longerons. I lay the strip stock in place over the plan and cut partway through with a razor blade aligned with the longeron, then finish the cut on the workbench. Align the angled end freehand with the bar and make a sanding swipe, removing enough stock to vertically square the piece. Test-fit against the longeron; if it matches, razor-cut the other end the same way, leaving some extra length. Sand and try the second end until it fits snugly.
If part of the fuselage has a straight taper, set the top longeron angle in the protractor stock guide. Attach a piece of masking tape across the freehand area at the angle of the lower longeron to use as a guide. Now both ends of the uprights can be sanded rapidly and accurately; the angled ends will be vertically square, which is hard to achieve with a razor or X-Acto knife.
Straight-sided parts cut with a power scroll saw are often slightly wavy and can be straightened using the sander freehand.
You will find as many ingenious ways to use this device as there are different models to build. I hope you find this precision sander as handy as I have.
Transcribed from original scans by AI. Minor OCR errors may remain.

