
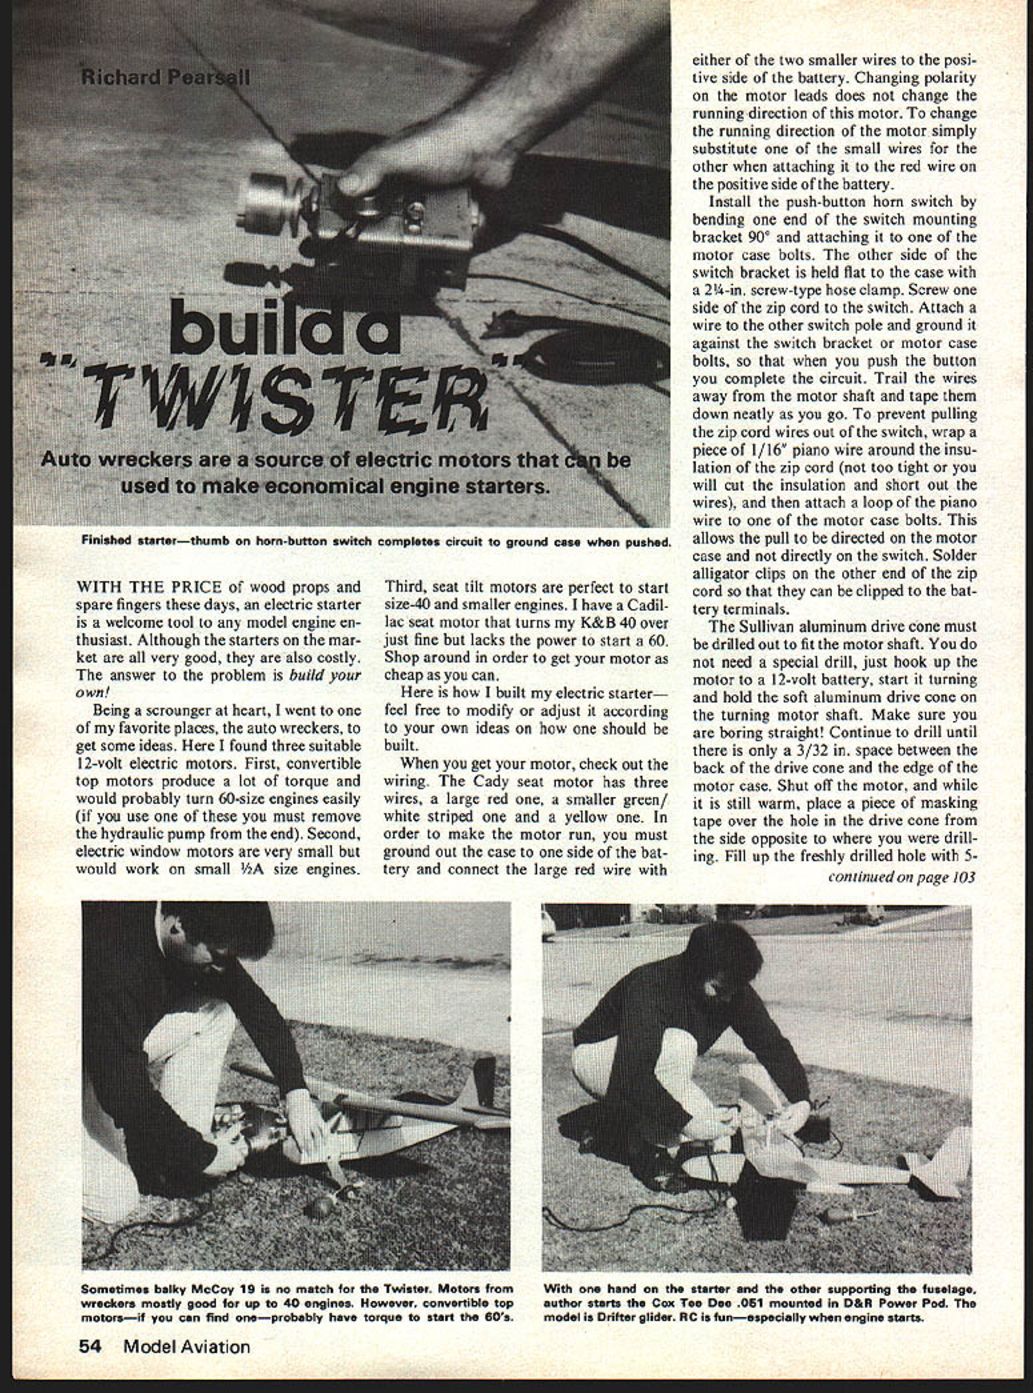
Build a "Twister"
Richard Pearsall
WITH THE PRICE of wood props and spare fingers these days, an electric starter is a welcome tool to any model engine enthusiast. Although the starters on the market are all very good, they are also costly. The answer to the problem is build your own!
Being a scrounger at heart, I went to one of my favorite places, the auto wreckers, to get some ideas. Here I found three suitable 12-volt electric motors. First, convertible top motors produce a lot of torque and would probably turn 60-size engines easily (if you use one of these you must remove the hydraulic pump from the end). Second, electric window motors are very small but would work on small 1/2A size engines. Third, seat tilt motors are perfect to start size-40 and smaller engines. I have a Cadillac seat motor that turns my K&B 40 over just fine but lacks the power to start a 60. Shop around in order to get your motor as cheap as you can.
Here is how I built my electric starter—feel free to modify or adjust it according to your own ideas on how one should be built.
When you get your motor, check out the wiring. The Cady seat motor has three wires, a large red one, a smaller green/white striped one and a yellow one. In order to make the motor run, you must ground out the case to one side of the battery and connect the large red wire with either of the two smaller wires to the positive side of the battery. Changing polarity on the motor leads does not change the running direction of this motor. To change the running direction of the motor simply substitute one of the small wires for the other when attaching it to the red wire on the positive side of the battery.
Install the push-button horn switch by bending one end of the switch mounting bracket 90° and attaching it to one of the motor case bolts. The other side of the switch bracket is held flat to the case with a 2¼-in. screw-type hose clamp. Screw one side of the zip cord to the switch. Attach a wire to the other switch pole and ground it against the switch bracket or motor case bolts, so that when you push the button you complete the circuit. Trail the wires away from the motor shaft and tape them down neatly as you go. To prevent pulling the zip cord wires out of the switch, wrap a piece of 1/16" piano wire around the insulation of the zip cord (not too tight or you will cut the insulation and short out the wires), and then attach a loop of the piano wire to one of the motor case bolts. This allows the pull to be directed on the motor case and not directly on the switch. Solder alligator clips on the other end of the zip cord so that they can be clipped to the battery terminals.
The Sullivan aluminum drive cone must be drilled out to fit the motor shaft. You do not need a special drill, just hook up the motor to a 12-volt battery, start it turning and hold the soft aluminum drive cone on the turning motor shaft. Make sure you are boring straight! Continue to drill until there is only a 3/32 in. space between the back of the drive cone and the edge of the motor case. Shut off the motor, and while it is still warm, place a piece of masking tape over the hole in the drive cone from the side opposite to where you were drilling. Fill up the freshly drilled hole with 5-minute epoxy. Insert the motor shaft and glue, allowing excess flow out under the masking-tape dam. Wipe off excess glue; push tape back in place holding parts alignment until dry. After the glue has dried, insert the Sullivan rubber starter adapter inside the drive cone. The electric starter is now complete and ready to use.
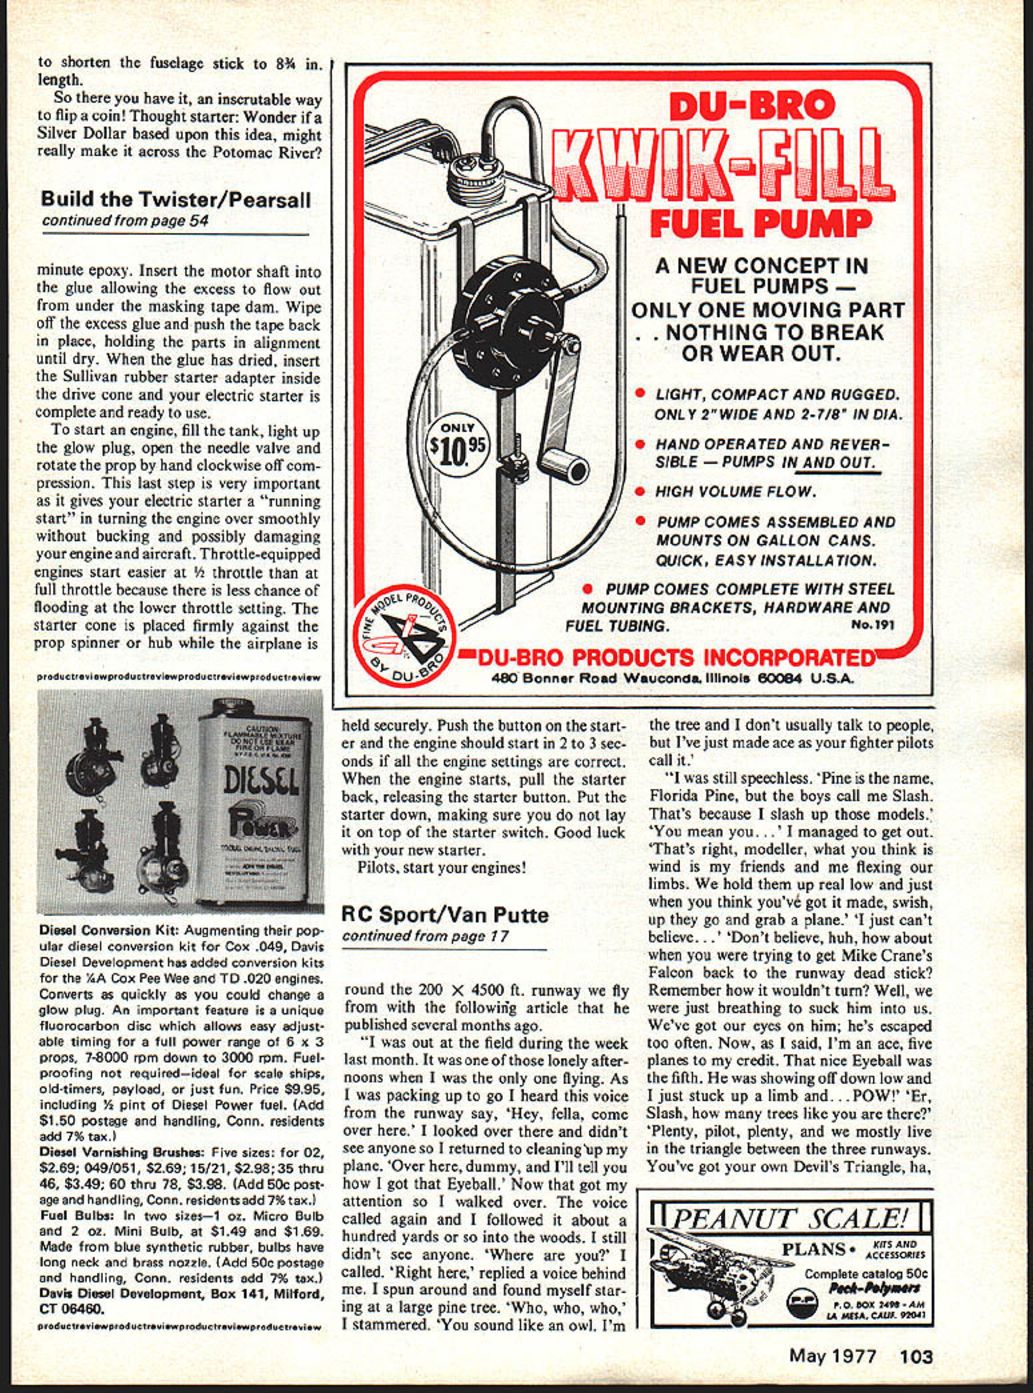
To start the engine: fill the tank, light the glow plug, open the needle valve, and rotate the prop by hand clockwise off compression. This last step is very important — it gives the electric starter a running start and helps prevent the starter from turning the engine over on compression and possibly damaging the engine or aircraft. Throttle-equipped engines start easier with the throttle full open because there is less chance of flooding than at a lower throttle setting. Place the starter cone firmly against the prop spinner hub of the airplane. held securely. Push the button on the starter and the engine should start in 2 to 3 seconds if all the engine settings are correct. When the engine starts, pull the starter back, releasing the starter button. Put the starter down, making sure you do not lay it on top of the starter switch. Good luck with your new starter. Pilots, start your engines!
Transcribed from original scans by AI. Minor OCR errors may remain.

