

Burnished Metal
Bud Chappell
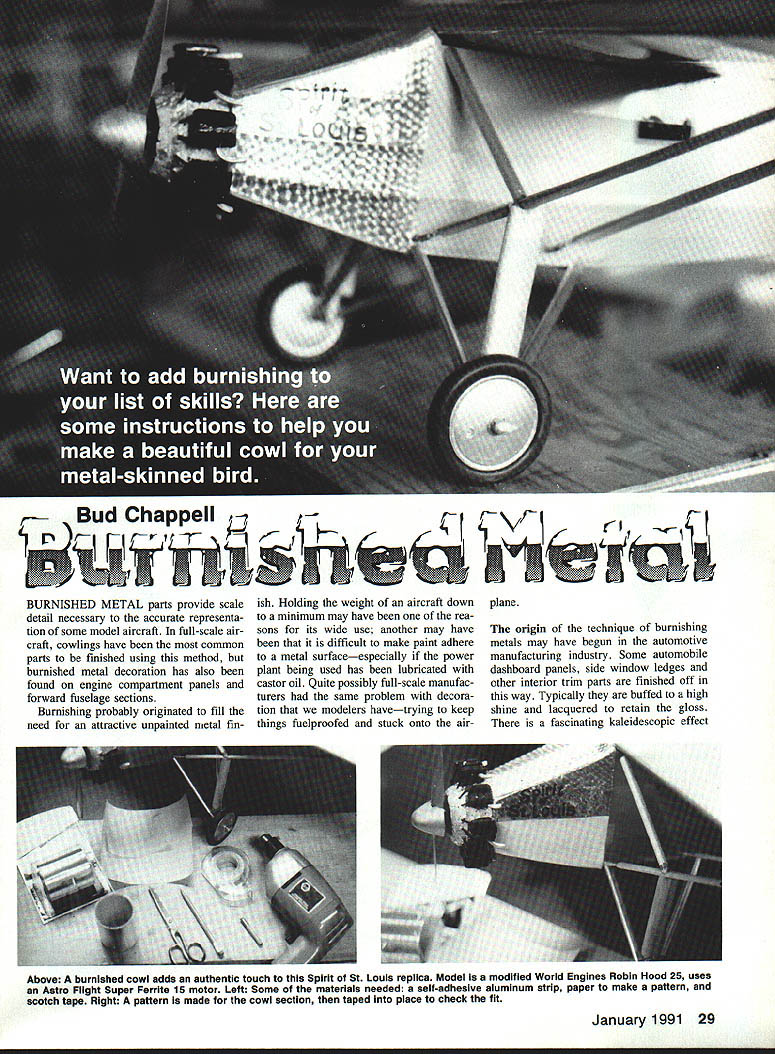
Burnished metal parts provide the scale detail necessary to the accurate representation of some model aircraft. In full-scale aircraft, cowlings have been the most common parts to be finished using this method, but burnished metal decoration has also been found on engine compartment panels and forward fuselage sections.
Burnishing probably originated to fill the need for an attractive unpainted metal finish. Keeping the weight of an aircraft down may have been one reason for its wide use; another is that paint can be difficult to make adhere to metal—especially if the power plant was lubricated with castor oil. Full-scale manufacturers had some of the same problems we modelers do: keeping decoration fuelproofed and firmly attached.
The technique may have begun in the automotive industry. Some automobile dashboard panels, side window ledges and other interior trim parts are finished this way. Typically they are buffed to a high shine and lacquered to retain the gloss, producing a fascinating kaleidoscopic effect.
I was surprised to learn aircraft manufacturers have used the method. Sopwith in England used it on the Pup, Camel, Salamander and Triplane. Fokker used it on the D-series, B-2, and E-1 through E-5 (1916–1918), and on some Albatros series. The French used the technique on some Nieuport airplanes. A widely known example is Charles Lindbergh's Ryan Spirit of St. Louis: burnished panels on sheet aluminum, part of the forward wing leading edge, became a trademark. The trim panel attached at the end was gradually smoothed toward the rear to prevent trapped air bubbles.
Materials
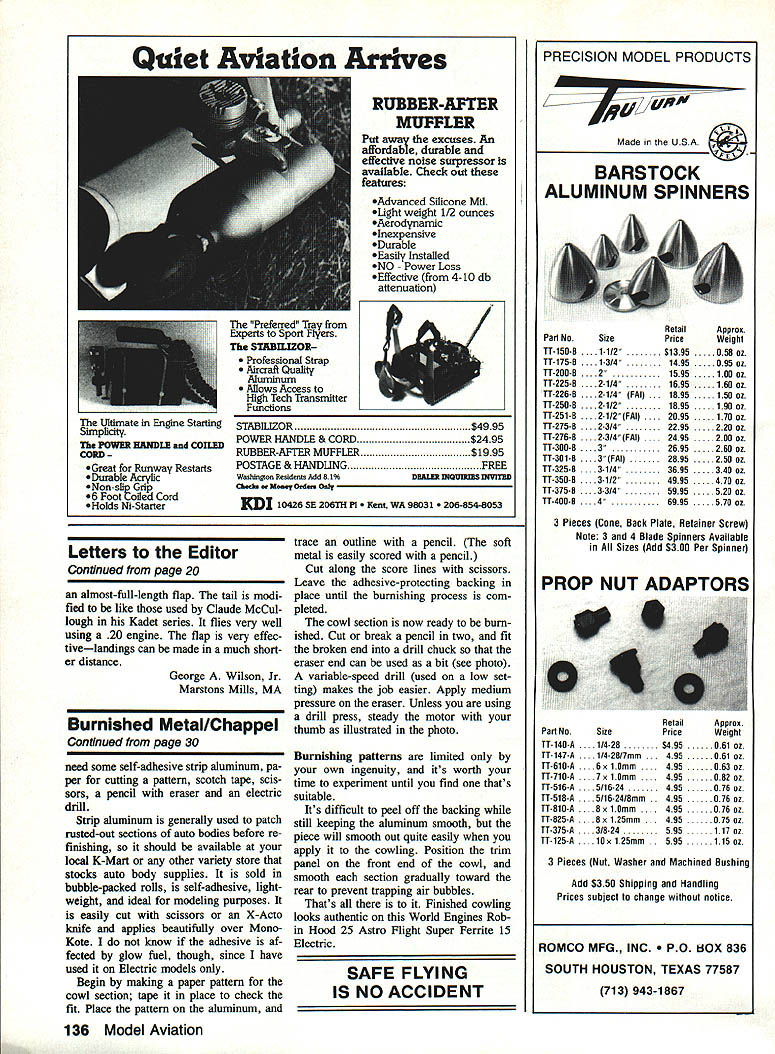
- Self-adhesive aluminum strip (lightweight, sold in bubble-packed rolls for auto-body patching)
- Paper for a cutting pattern
- Scotch tape
- Scissors or X-Acto knife
- Pencil and eraser
- Electric drill (variable-speed)
- Drill chuck or adapter to hold a pencil cut to use the eraser as a burnishing bit
Strip aluminum is generally used to patch rusted auto-body sections before refinishing and should be available at variety stores that stock auto-body supplies. Self-adhesive, lightweight aluminum is ideal for modeling: it cuts easily and applies well over MonoKote. I don't know if the adhesive is affected by glow fuel, though I have used it on electric models.
How to do it
- Make a paper pattern of the area to be covered. Place the pattern on the cowl and tape it in place to check the fit.
- Place the pattern on the aluminum and trace the outline. Soft metal can be scored with a pencil.
- Cut the aluminum along the score lines with scissors or an X-Acto knife. Leave the adhesive backing on until burnishing is complete.
- Prepare the burnishing tool by breaking a pencil in two and fitting the broken end into a drill chuck so the eraser end can be used as a bit.
- Set the drill to a low speed. Apply medium pressure with the eraser while the drill turns to burnish the aluminum surface.
- Unless you are using a drill press, steady the drill motor with your thumb.
- Peel off the backing and apply the aluminum trim panel to the cowl. Smooth each section gradually toward the rear to prevent trapping air bubbles. It is difficult to peel off the backing while keeping the aluminum perfectly smooth, but the piece will smooth out quite well when applied.
Burnishing patterns are limited only by your own ingenuity; experiment until you find one you like.
That's all there is to it. Finished cowlings look authentic on models such as the World Engines Robin Hood 25, Astro Flight Super Ferrite 15 electric, and similar aircraft.
Transcribed from original scans by AI. Minor OCR errors may remain.

