
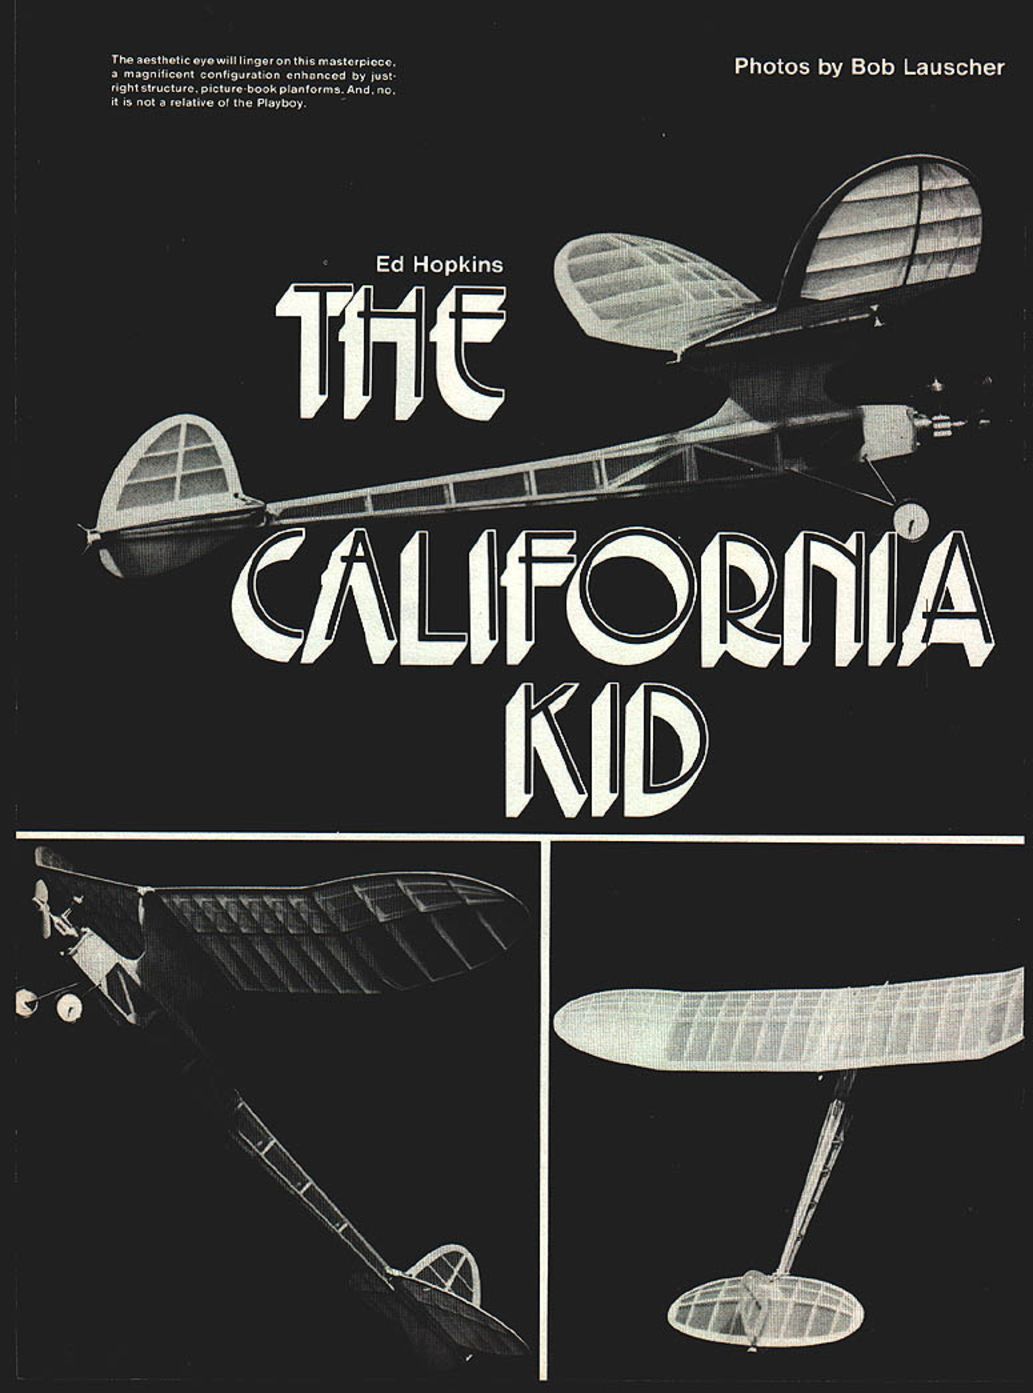
The California Kid
Ed Hopkins
Photos by Bob Lauscher
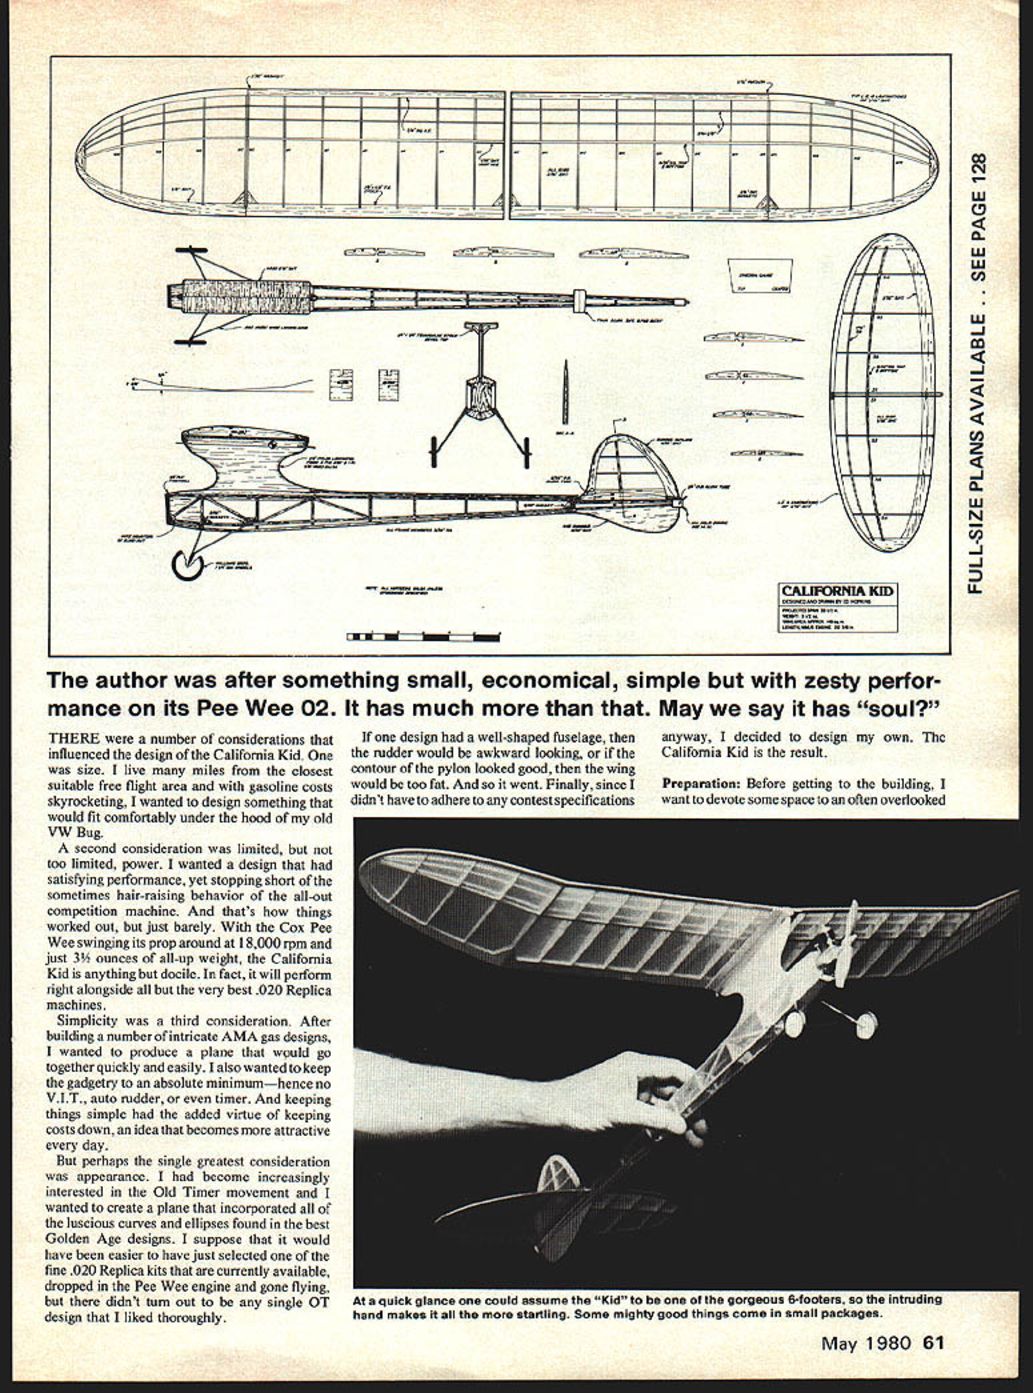
I was after something small, economical, simple but with zesty performance on its Pee Wee .020. It has much more than that. May we say it has "soul"?
There were a number of considerations that influenced the design of the California Kid. One was size. I live many miles from the closest suitable free-flight area and with gasoline costs skyrocketing, I wanted to design something that would fit comfortably under the hood of my old VW Bug.
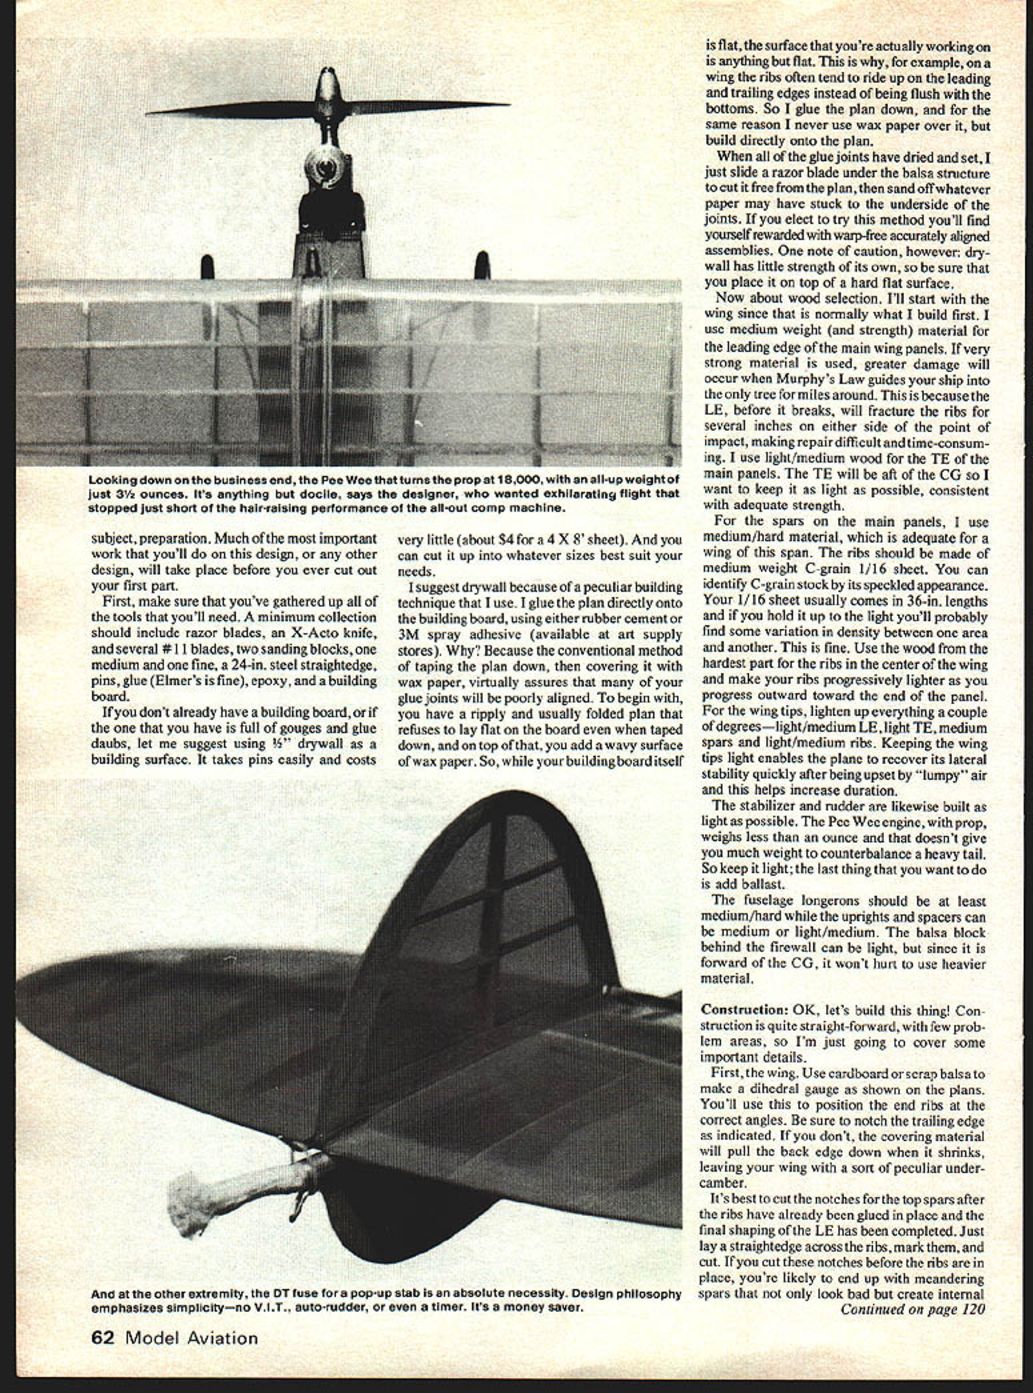
A second consideration was limited, but not too limited, power. I wanted a design that had satisfying performance, yet stopped short of the sometimes hair-raising behavior of the all-out competition machine. And that's how things worked out, but just barely. With the Cox Pee Wee swinging its prop around at 18,000 rpm and just 3½ ounces all-up weight, the California Kid is anything but docile. In fact, it will perform right alongside all but the very best .020 Replica machines.
Simplicity was a third consideration. After building a number of intricate AMA gas designs, I wanted to produce a plane that would go together quickly and easily. I also wanted to keep the gadgetry to an absolute minimum—hence no V.I.T., auto rudder, or even timer. Keeping things simple had the added virtue of keeping costs down, an idea that becomes more attractive every day.
But perhaps the single greatest consideration was appearance. I had become increasingly interested in the Old Timer movement and I wanted to create a plane that incorporated all of the luscious curves and ellipses found in the best Golden Age designs. I suppose it would have been easier to select one of the fine .020 Replica kits currently available, drop in the Pee Wee engine, and go flying, but there didn't turn out to be any single OT design that I liked thoroughly.
If one design had a well-shaped fuselage, the rudder would be awkward looking; or if the contour of the pylon looked good, the wing would be too fat. Finally, since I didn't have to adhere to any contest specifications anyway, I decided to design my own. The California Kid is the result.
Preparation
Tools and materials
Make sure you've gathered all the tools you'll need. A minimum collection should include:
- razor blades and an X-Acto knife with several #11 blades
- two sanding blocks (medium and fine)
- a 24‑in. steel straightedge
- pins
- glue (Elmer's is fine) and epoxy
- a building board
If you don't already have a building board, or if the one you have is full of gouges and glue daubs, consider using 1/2" drywall as a building surface. It takes pins easily and costs very little (about $4 for a 4 x 8' sheet). Cut it into whatever sizes suit your needs. Note: drywall has little strength of its own, so be sure to place it on top of a hard, flat surface.
Building the plan to the board
I glue the plan directly onto the building board using rubber cement or 3M spray adhesive. Why? The conventional method of taping the plan down and covering it with wax paper virtually assures that many of your glue joints will be poorly aligned. Taping produces a ripply plan and wax paper adds a wavy surface. Building directly on the glued plan yields warp-free, accurately aligned assemblies.
When the glue joints have dried and set, slide a razor blade under the balsa structure to cut it free from the plan, then sand off any paper that stuck to the underside of the joints.
Wood selection
Start with the wing, since that is normally built first.
- Leading edges (main wing panels): use medium weight (and strength) material. If very strong material is used, the LE may fracture ribs when the wing impacts, making repair difficult.
- Trailing edges (main panels): use light/medium wood. The TE will be aft of the CG, so keep it as light as possible consistent with adequate strength.
- Spars (main panels): use medium/hard material appropriate for the span.
- Ribs: make from medium-weight C-grain 1/16" sheet. Identify C-grain by its speckled appearance. Your 1/16" sheet usually comes in 36‑in. lengths; use the hardest wood for ribs in the center of the wing and progressively lighter stock toward the tips.
- Wing tips: lighten everything a couple of degrees—light/medium LE, light TE, medium spars, and light/medium ribs. Lighter tips help lateral stability and increase duration.
- Stabilizer and rudder: build as light as possible. The Pee Wee engine with prop weighs less than an ounce and you won't want a heavy tail.
- Fuselage longerons: at least medium/hard. Uprights and spacers can be medium or light/medium. The balsa block behind the firewall can be light, although heavier material forward of the CG is acceptable.
Construction
Construction is straightforward with few problem areas. Below are the important details.
Wing
- Use cardboard or scrap balsa to make a dihedral gauge as shown on the plans. Use this to position the end ribs at the correct angles.
- Be sure to notch the trailing edge as indicated; if you don't, the covering material will pull the back edge down when it shrinks, leaving your wing with a peculiar undercamber.
- Cut the notches for the top spars after the ribs are glued in place and the final shaping of the LE is completed. Lay a straightedge across the ribs, mark, and cut. Cutting notches before the ribs are in place can lead to meandering spars that look bad and create internal stresses.
- Use 1/16" gussets top and bottom to help prevent diagonal wrinkles that frequently appear in the corners of the top surface after covering.
Stabilizer and rudder
- The front spar on the stabilizer was made from 1/32" square spruce (available at hobby shops that deal in model railroad equipment). If unavailable, 1/16" square balsa works fine.
- Take extra care cutting the notches where the stab ribs overlay the trailing edge; these joints must be snug.
- When the stabilizer is built and the glue has set thoroughly, remove it from the board, sand it to its finished shape, and cover it with the material of your choice.
- Cut holes between the center ribs for the rudder LE, TE, and spar and build the rudder separately. Do not attempt to build the stab and rudder as a single unit—the covering will be a nightmare.
- The hole in the rudder is made by using 5/32" o.d. aluminum tubing as a drill, twisting it back and forth until it cuts through. Cut a 3/32" ring off the end of the tube and epoxy it into the hole.
Fuselage and pylon
- Laminate the hard 1/16" sheet and two sheets of medium-hard 1/32" sheet together into balsa plywood for the pylon. A mixture of 50% white glue and 50% water makes a fine bonding agent. Note grain direction (1/16" vertical) and pin thoroughly to dry free of warps. Allow to dry overnight.
- Cut out the firewall, drill the four holes for mounting screws, and epoxy the blind nuts onto the back as indicated on the plan. To ensure perfect alignment, bolt the engine to the firewall and allow the epoxy to dry thoroughly.
- Pin the longerons of the first side into place over the plan, cut out and glue uprights, then add diagonal braces (cut ends as shown on the plan). Build the second side directly over the first. When glue on both sides has dried, cut them apart by sliding a razor blade between them.
- Place the sides on their top edges, pin them in place over the plan, then glue bulkheads #1 and #2 into position, keeping sides aligned. When dry, glue the sides together at the rear and add the top dowel spacers behind bulkhead #2.
- Carve and sand the balsa noseblock to shape and glue it in place between the two sides in front of bulkhead #1.
- After these joints dry, remove the partially completed fuselage from the board and glue the two pieces of TE stock to the top of the structure. Check that you've left enough (but not too much) room for the pylon to slip through.
- Glue the firewall in place, ensuring it is set at the left and down thrust angles shown on the plan.
- While glue is drying, cut the pylon and subrudder to final shapes, add tiny spacer blocks and the bottom stringer, glue the pylon assembly into position, add top spacer blocks and stringer, then add the subrudder.
- With a few bits and final sanding completed, you're ready to cover.
Landing gear
The landing gear is always a pain. You can bend it from two pieces of wire, or assemble it from four pieces into two units that "plug into" aluminum tubes on each side of the fuselage and are secured with epoxy.
Recommended fastening method:
- Bend the wires to the correct shapes and glue them together with a dab of epoxy.
- When the epoxy has dried, bind the joints thoroughly with copper wire.
- Rub more epoxy over and through the wire. This technique works fine for a plane of this weight.
Covering
I used transparent MonoKote on mine. I frequently fly in a brush-covered riverbed and felt the puncture resistance was worth the slight added weight. MonoKote also works easily over the compound curves at the outer ends of the wing and stabilizer. If you fly in a more favorable environment, use lightweight Silkspan (00) or Japanese tissue to save a few grams.
Cover the fuselage in this sequence: bottom first, then sides, then top, and finally the pylon. If you cover in this order, the overlaps will all face downward, leaving no ridges for fuel to settle into.
When the fuselage is covered, temporarily stick round toothpicks into the holes in the firewall and paint the whole front end with epoxy so it will be completely fuelproof.
You built the wing panels flat, so it's during covering that you induce the warps. If you use MonoKote, iron them in by twisting the panel, applying heat, then cooling it rapidly. If you cover with paper, set the warps by shimming after each coat of 50/50 dope while the rest of the panel is pinned or weighted down.
Flying
Before you leave home:
- Verify the wing warps match the plan.
- Confirm the CG is in the correct location.
- Ensure incidence of the wing and stabilizer is built to the correct angle.
- Run engine tests at home to determine fuel consumption.
Fuel/run test procedure:
- Warm the engine thoroughly.
- Use an eyedropper with a short length of fuel line to draw a small amount of fuel from the can and squeeze it into an empty tank. The .020s are misers, so it doesn't take much.
- Adjust the needle valve to the flight setting, start the engine, and time how long it runs.
- When you determine what amount of fuel gives, say, a 20-second run, mark the dropper neck for future reference.
This procedure works about 50% of the time; reed-valve engines often start and run backwards. If you use the starting spring supplied with the engine, your odds improve considerably.
At the flying field:
- Do some test glides. Expect a smooth, flat glide that will land about 25 feet in front of you.
- If the plane dives short of the mark, shim up the rear of the stab 1/32" at a time until the diving tendency disappears. Keep adding negative incidence to the stab until the plane begins to stall, then back off slightly.
- Ensure your release is correct: the plane should leave your hand at a slight downward angle. If you release with the nose high, it will stall no matter how well adjusted.
- If the plane dives or stalls during testing, try again; the first result may have been due to a bad launch or a gust.
First powered flights:
- Begin with reduced power and short engine runs. Observe carefully, make minute adjustments, and slowly work up to optimum trim.
- On the California Kid you can reduce thrust by placing the prop on backwards and richen the mixture to both reduce power and shorten the run.
- In final trim, under full power, the Kid will want to fly in a fairly tight right spiral, followed by a transition to a more open right-hand circle.
- If it hangs by the prop, shim in a bit more down-thrust. A straight-up climb looks sensational but usually results in a horrible transition.
- If it dips to the right on its first spiral, add a hair more left thrust. If it flies left, you may need more balsa—pylon planes rarely fly left more than once.
Good luck with your California Kid, and be sure to light the DT fuse every flight. At 3-1/4 ounces there's just not much reason for it to ever come down.
Transcribed from original scans by AI. Minor OCR errors may remain.

