
Cerrito: Mini HLG
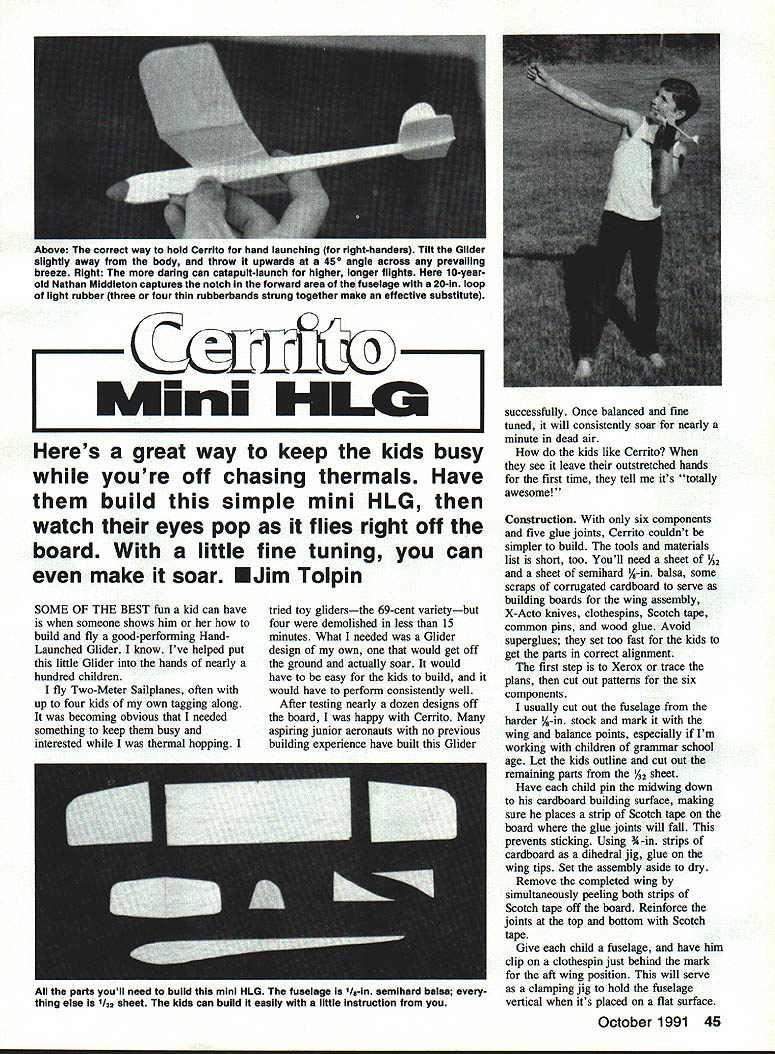
Here's a great way to keep the kids busy while you're off chasing thermals. Have them build this simple mini hand-launched glider (HLG), then watch their eyes pop as it flies right off the board. With a little fine tuning, you can even make it soar. — Jim Tolpin
Some of the best fun a kid can have is when someone shows him or her how to build and fly a good-performing HLG. I've helped put this little glider into the hands of nearly a hundred children. After testing nearly a dozen designs off the board, I was happy with Cerrito. Many aspiring junior aeronauts with no previous building experience have built this glider successfully. Once balanced and fine tuned, it will consistently soar for nearly a minute in dead air.
How do the kids like Cerrito? When they see it leave their outstretched hands for the first time, they tell me it's "totally awesome!"
Materials and tools
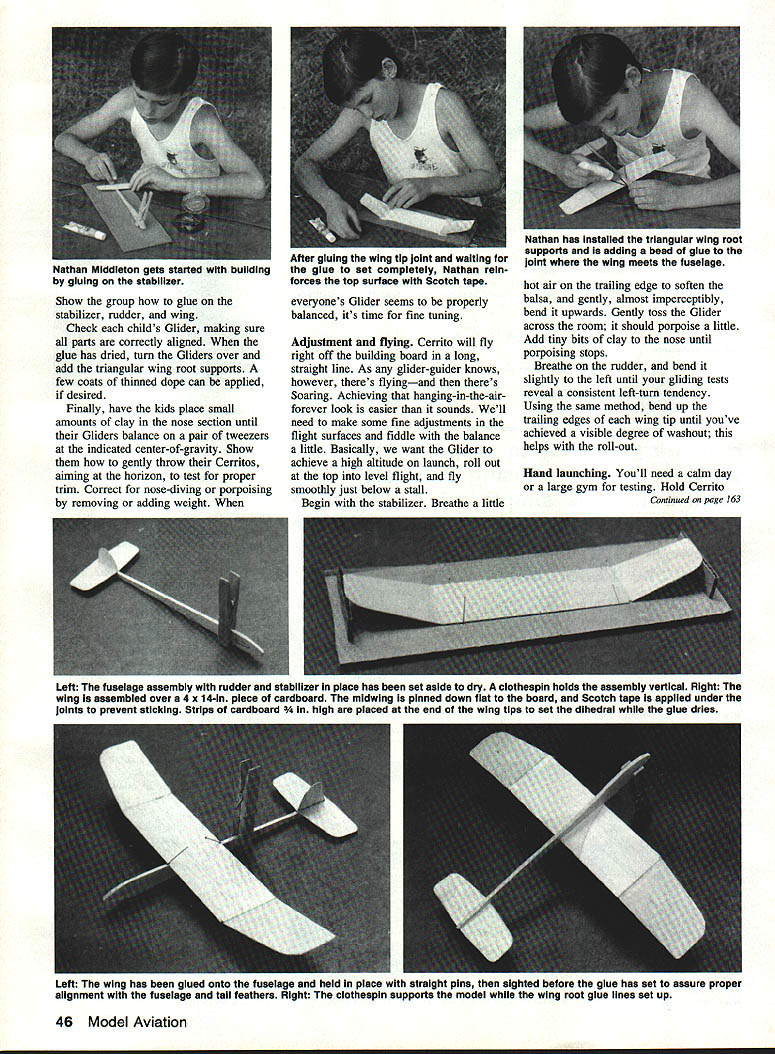
- 1 sheet semihard 1/8-inch balsa
- 1 sheet 1/32-inch balsa
- Scraps of corrugated cardboard (building boards)
- X‑Acto knife (or similar)
- Clothespins
- Scotch tape
- Common pins
- Wood glue (avoid superglues; they set too fast)
- Small amounts of modeling clay
- A pair of tweezers (for balancing)
- Optional: a few coats of thinned dope for finishing
Optional useful item: a 20‑inch loop of light rubber, or three or four thin rubber bands strung together.
Construction
Six components, five glue joints — Cerrito couldn't be simpler to build. The tools and materials list is short, and the parts are quick to cut and assemble.
Patterns and cutting
- Xerox or trace the plans and cut out patterns for the six components.
- Cut the fuselage from semihard 1/8‑inch stock and mark the wing and balance points, especially if you're working with younger children.
- Let the kids outline and cut the remaining parts from the 1/32‑inch sheet.
Wing assembly
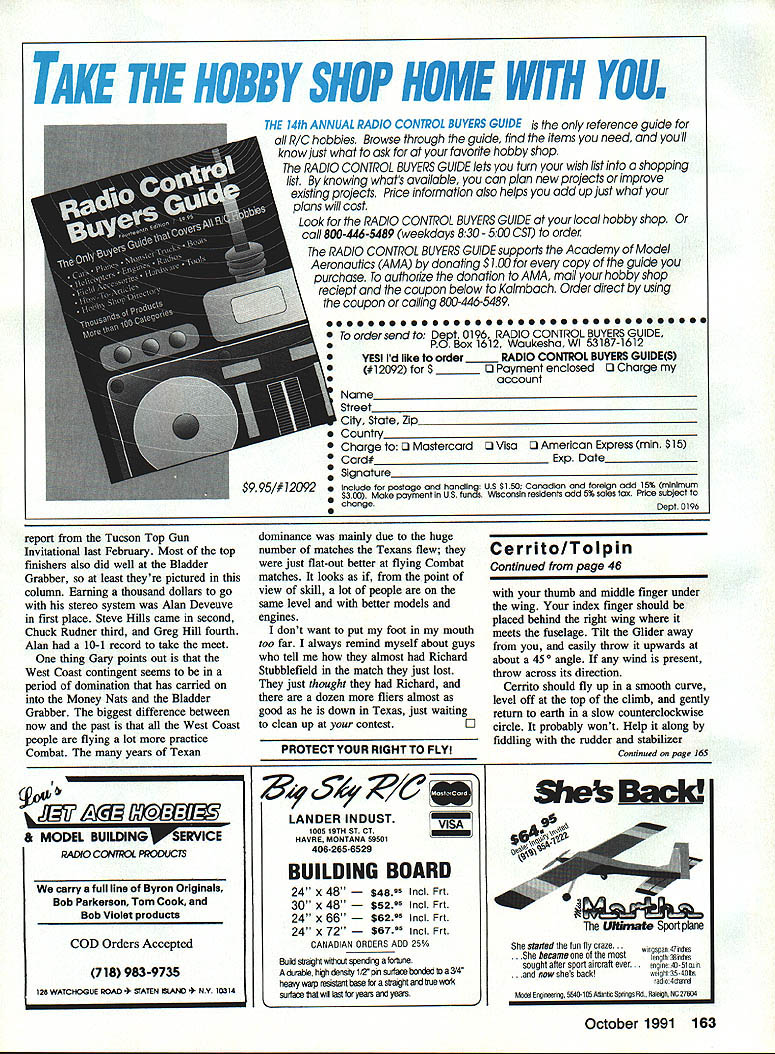
- Pin the midwing to the cardboard building surface. Place strips of Scotch tape on the board where the glue joints will fall; this prevents the parts from sticking to the board.
- Using 3/4‑inch strips of cardboard as a dihedral jig, glue on the wing tips. Set the assembly aside to dry.
- Remove the completed wing by simultaneously peeling both strips of Scotch tape off the board. Reinforce the joints at the top and bottom with Scotch tape.
- Add triangular wing‑root supports to the wing after glue has dried.
Fuselage and tail
- Give each child a fuselage and have them clip a clothespin just behind the aft wing position. The clothespin serves as a clamping jig to hold the fuselage vertical when placed on a flat surface.
- Glue in the stabilizer and rudder. Check alignment carefully before the glue sets.
- Once dry, a few coats of thinned dope can be applied if desired.
Balancing and initial trim
- Place small amounts of clay in the nose section until the glider balances on a pair of tweezers at the indicated center of gravity.
- Show the kids how to gently throw the glider, aiming at the horizon, to test for proper trim.
- Correct nose‑diving by removing weight; correct porpoising by removing or adding weight.
When everyone's glider seems properly balanced, it's time for fine tuning.
Adjustment and flying
Cerrito will fly right off the building board in a long, straight line. To make it soar (hang in the air near a stall), make small, incremental adjustments to the flight surfaces and the balance. The goal is a high launch altitude, a roll‑out at the top into level flight, and smooth flight just below a stall.
- Stabilizer: Soften the trailing edge with warm breath to make the balsa pliable, and very gently bend it upwards a hair. Toss the glider; if it porpoises, add tiny bits of clay to the nose until porpoising stops.
- Rudder: Soften and bend the rudder slightly to the left (or right as needed) until gliding tests show a consistent turning tendency.
- Wing washout: Soften and bend up the trailing edge of each wing tip until you achieve a visible degree of washout; this helps with the roll‑out from the climb.
Make only tiny changes and test frequently.
Hand launching
You'll need a calm day or a large gym for testing.
- Hold Cerrito with your thumb and middle finger under the wing. Place your index finger behind the right wing where it meets the fuselage.
- Tilt the glider away from you and throw it smoothly upward at about a 45° angle. If wind is present, throw across the wind.
- The glider should climb in a smooth curve, level off at the top, and gently return to earth in a slow counterclockwise circle. If it doesn't, continue to tweak the rudder, stabilizer, and nose weight until it does. Release cleanly and keep your fingers clear of the glider's path.
May all your flights be "totally awesome," with a few out‑of‑sights thrown in! Organize a club at school or with the Scouts, hold contests, and award prizes. Best of all, the little monsters will have something to do while your Two‑Meter is spilling out of that giant thermal—the one that just got away.
Transcribed from original scans by AI. Minor OCR errors may remain.

