
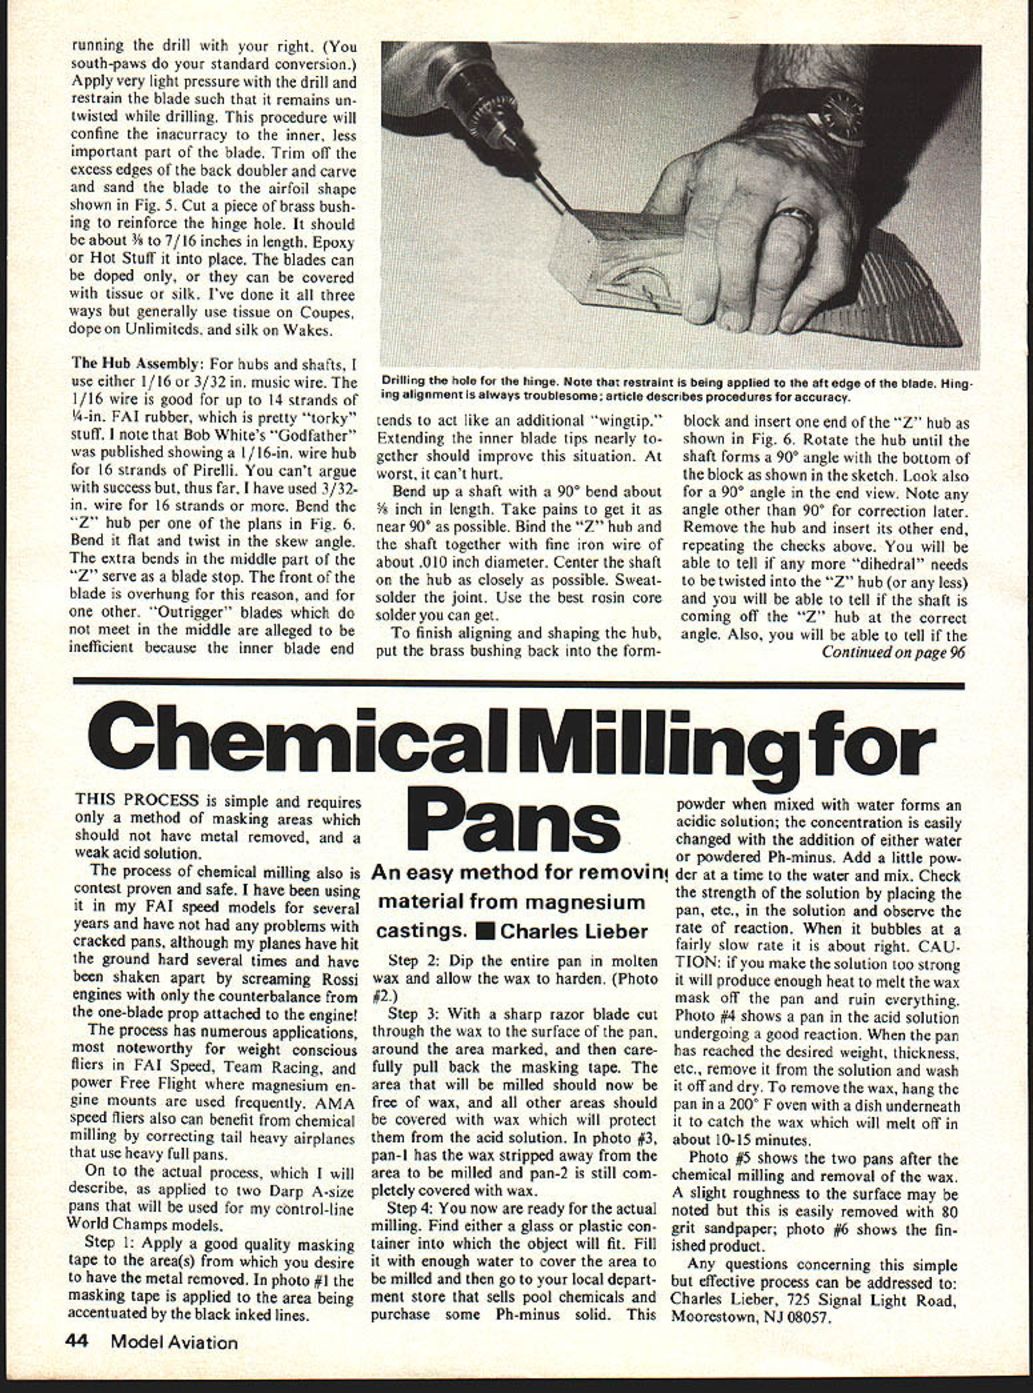
Chemical Milling for Pans
THIS PROCESS is simple and requires only a method of masking areas which should not have metal removed, and a weak acid solution.
The process of chemical milling also is contest proven and safe. I have been using it in my FAI speed models for several years and have not had any problems with cracked pans, although my planes have hit the ground hard several times and have been shaken apart by screaming Rossi engines with only the counterbalance from the one-blade prop attached to the engine!
The process has numerous applications, most noteworthy for weight conscious fliers in FAI Speed, Team Racing, and power Free Flight where magnesium engine mounts are used frequently. AMA speed fliers also can benefit from chemical milling by correcting tail heavy airplanes that use heavy full pans.
On to the actual process, which I will describe, as applied to two Darp A-size pans that will be used for my control-line World Champs models.
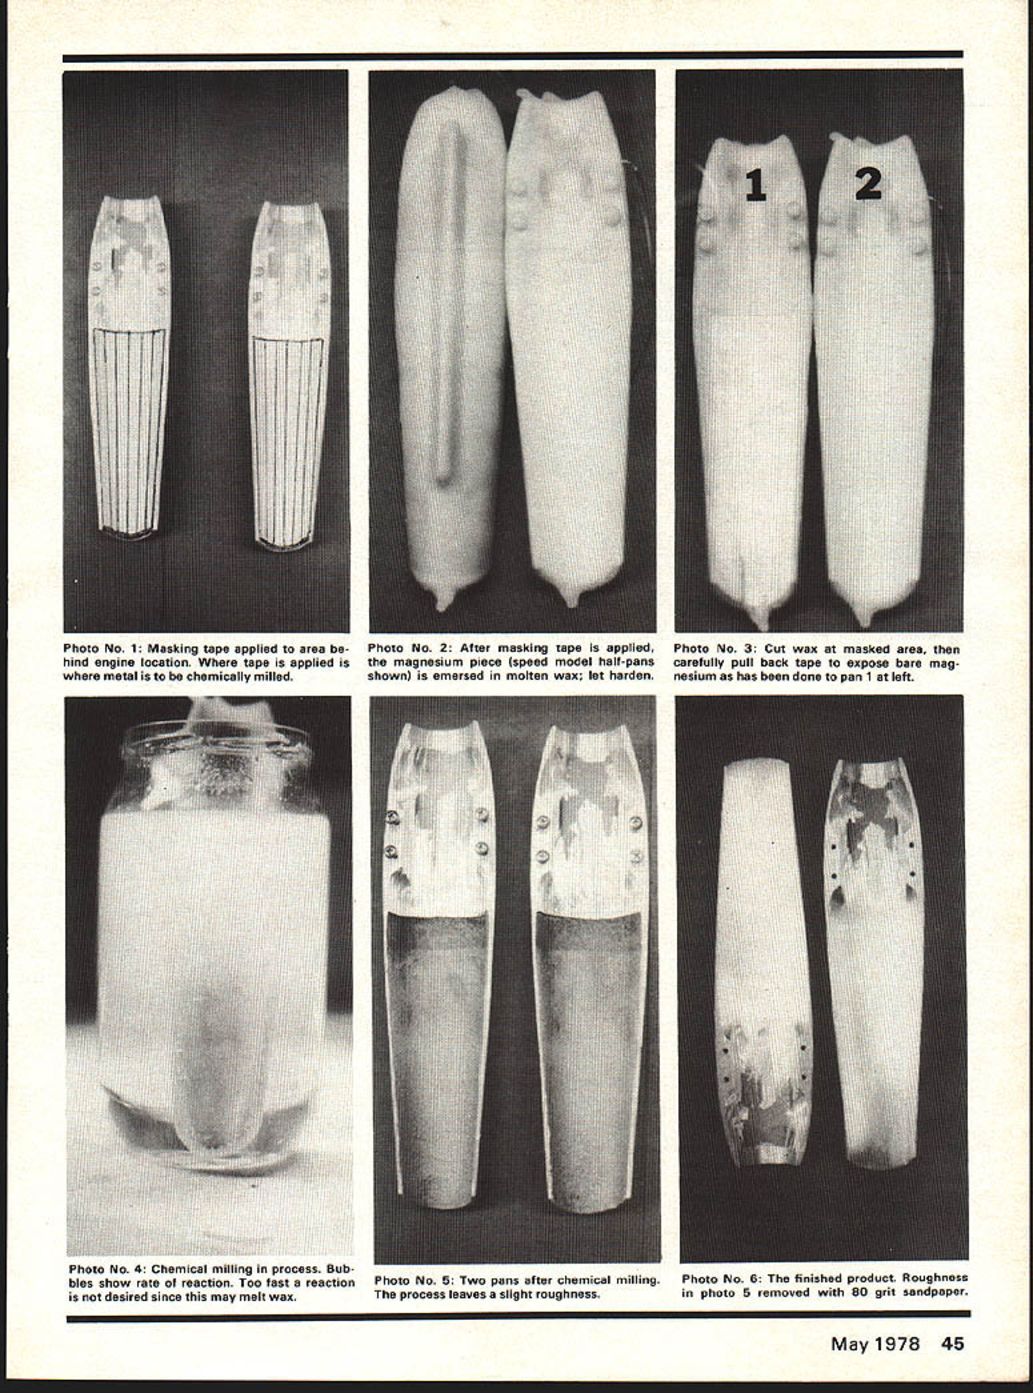
Step 1: Apply a good quality masking tape to the area(s) from which you desire to have the metal removed. In photo #1 the masking tape is applied to the area being accentuated by the black inked lines.
An easy method for removing material from magnesium castings. ■ Charles Lieber
Step 2: Dip the entire pan in molten wax and allow the wax to harden. (Photo #2.)
Step 3: With a sharp razor blade cut through the wax to the surface of the pan, around the area marked, and then carefully pull back the masking tape. The area that will be milled should now be free of wax, and all other areas should be covered with wax which will protect them from the acid solution. In photo #3, pan-1 has the wax stripped away from the area to be milled and pan-2 is still completely covered with wax.
Step 4: You now are ready for the actual milling. Find either a glass or plastic container into which the object will fit. Fill it with enough water to cover the area to be milled and then go to your local department store that sells pool chemicals and purchase some Ph-minus solid. This powder when mixed with water forms an acidic solution; the concentration is easily changed with the addition of either water or powdered Ph-minus. Add a little powder at a time to the water and mix. Check the strength of the solution by placing the pan, etc., in the solution and observe the rate of reaction. When it bubbles at a fairly slow rate it is about right. CAUTION: if you make the solution too strong it will produce enough heat to melt the wax mask off the pan and ruin everything. Photo #4 shows a pan in the acid solution undergoing a good reaction. When the pan has reached the desired weight, thickness, etc., remove it from the solution and wash it off and dry. To remove the wax, hang the pan in a 200°F oven with a dish underneath to catch the wax which will melt off in about 10-15 minutes.
Photo #5 shows the two pans after the chemical milling and removal of the wax. A slight roughness to the surface may be noted but this is easily removed with 80 grit sandpaper; photo #6 shows the finished product.
Any questions concerning this simple but effective process can be addressed to: Charles Lieber, 725 Signal Light Road, Moorestown, NJ 08057. No primary article text appears on this page — it contains only photographs with captions.
Transcribed from original scans by AI. Minor OCR errors may remain.

