
Civy Boy 74
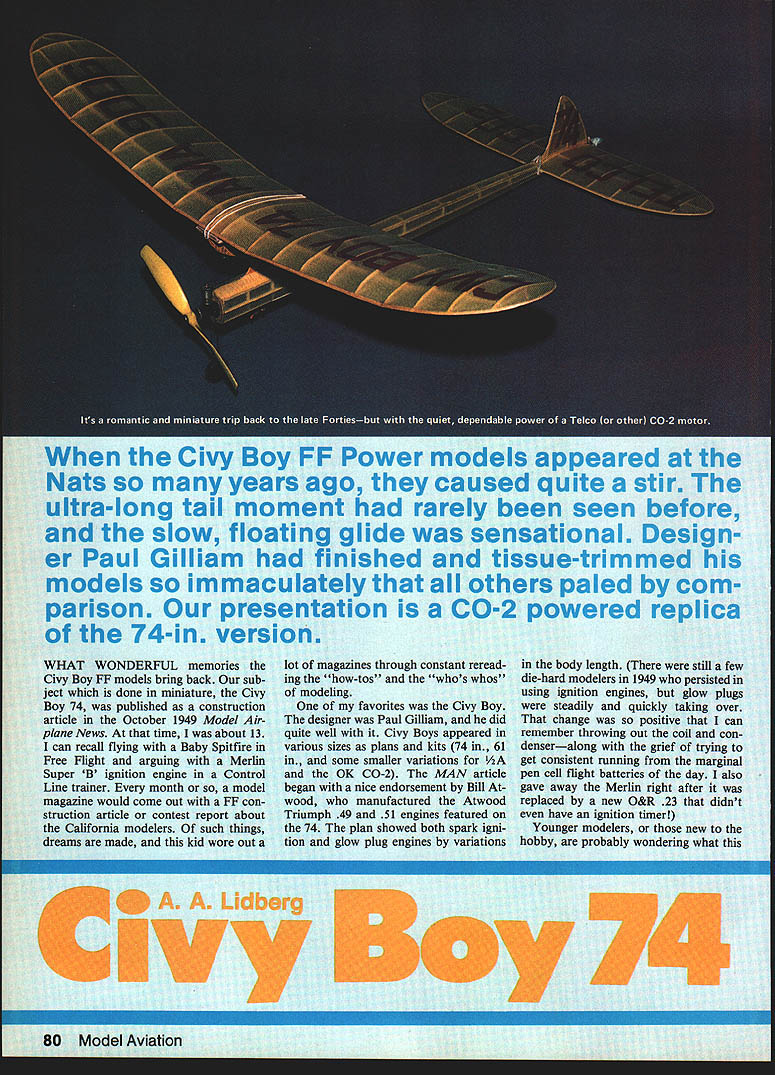
When the Civy Boy FF Power models appeared at the Nats so many years ago, they caused quite a stir. The ultra-long tail moment had rarely been seen before, and the slow, floating glide was sensational. Designer Paul Gilliam had finished and tissue-trimmed his models so immaculately that all others paled by comparison. Our presentation is a CO-2 powered replica of the 74-in. version.
What wonderful memories the Civy Boy FF models bring back. The Civy Boy 74 was published as a construction article in the October 1949 Model Airplane News. I was about 13 then and remember reading model magazines constantly—construction articles, contest reports, and the "who's who" of modeling. One of my favorites was the Civy Boy, designed by Paul Gilliam. Civy Boys appeared in various sizes as plans and kits (74-in., 61-in., and smaller variations for 1/2 A and the OK CO-2). The MAN article included a nice endorsement by Bill Atwood, who manufactured the Atwood Triumph .49 and .51 engines featured on the 74. The plan showed both spark-ignition and glow-plug engine installations by variations in body length.
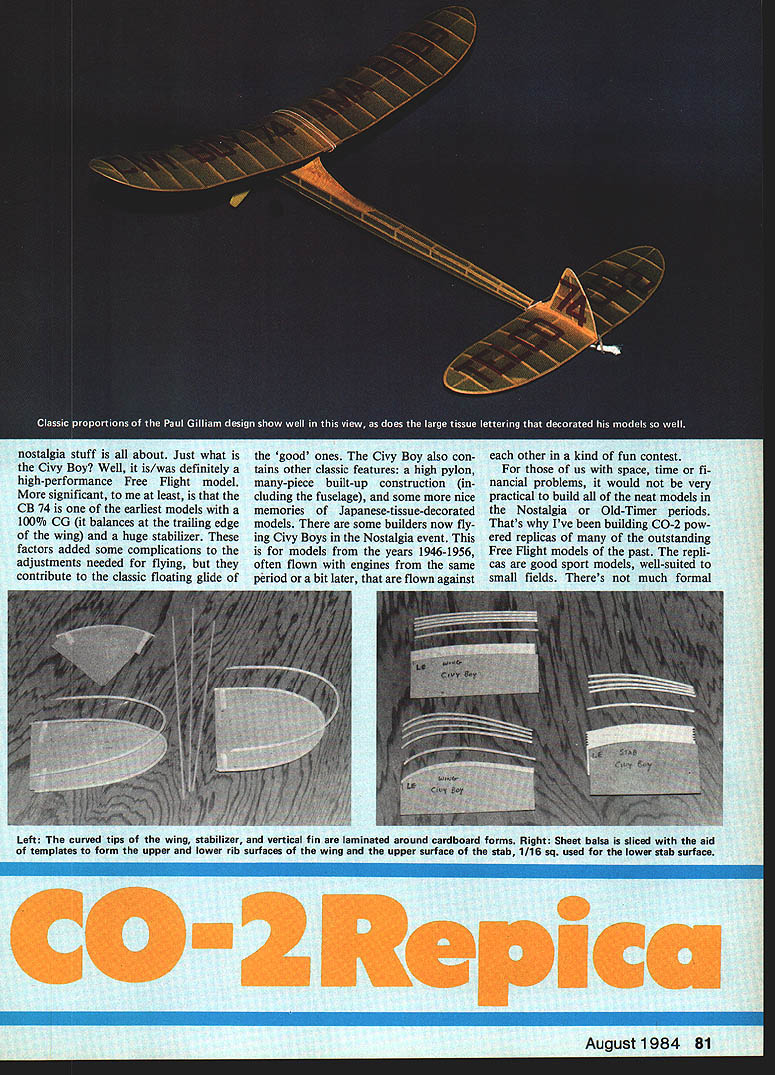
Younger modelers or those new to the hobby may wonder what a Civy Boy is. It was definitely a high-performance Free Flight model: 100% center-of-gravity balances, trailing-edge wing, and a huge stabilizer—factors that added some flying complications yet contributed to the classic floating glide when properly trimmed. The Civy Boy also featured a high pylon and many-piece built-up construction, including the fuselage. Many original models were decorated with Japanese tissue. Some builders now fly Civy Boys in Nostalgia events; models from the 1946–1956 era are often flown on engines of the same period or in old-time contests. They are practical to build and well suited to Nostalgia/Old-Timer periods.
CO-2 Replicas
For those with limited space, time, or funds, building full-scale Nostalgia models may be impractical. That's why I build CO-2 powered replicas of outstanding Free Flight models of the past. These replicas are good sport models, well-suited to small fields. CO-2 replicas can be flown for fun and in CO-2 events listed in the AMA rule book. As of this writing, one of my replicas (Hal deBolt's 1946 Airfoiler) holds the AMA CO-2 record.
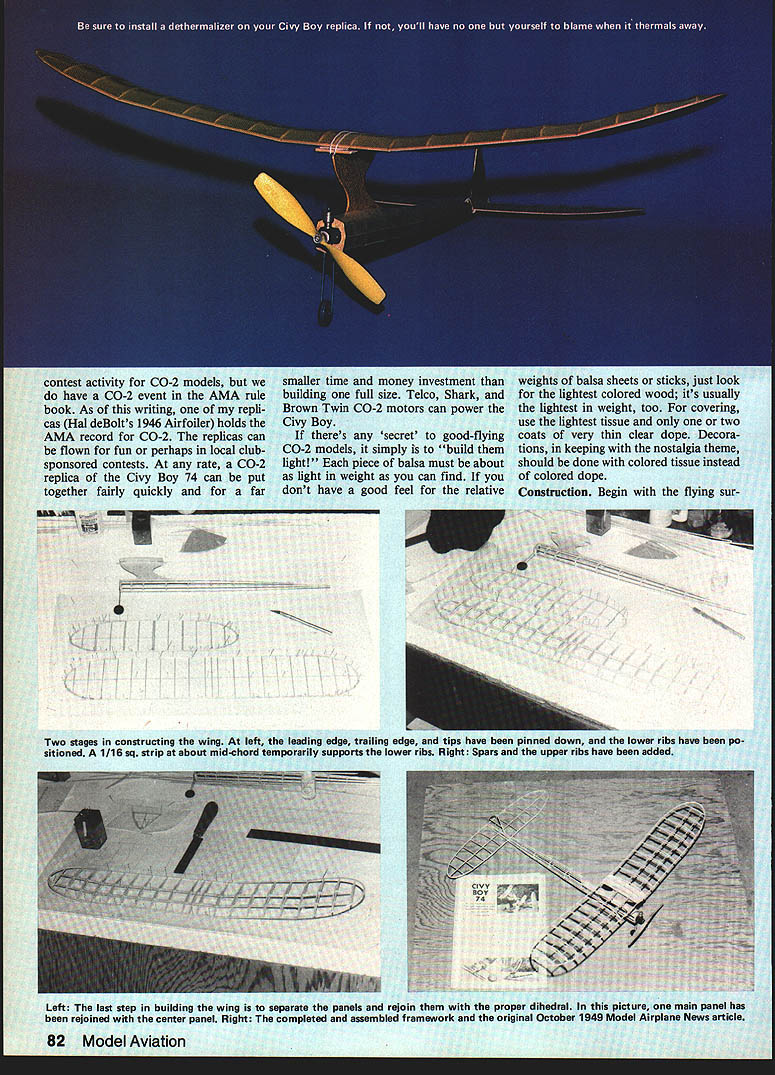
A CO-2 replica Civy Boy 74 can be built fairly quickly and with far less expense than full-size construction. Telco, Shark, and Brown Twin CO-2 motors can power the Civy Boy. The secret to good-flying CO-2 models is simple: build light. Use the lightest balsa possible—lighter-colored wood is usually lighter in weight. For covering, use the lightest tissue and apply one or two coats of very thin clear dope. Decorations, to keep the nostalgia theme, should be done with colored tissue rather than colored dope.
Construction
Begin building the wing in two stages. Pin down the leading edge, trailing edge, and tips and position the lower ribs. A 1/16" sq. strip about mid-chord temporarily supports the lower ribs. Add the spars and upper ribs. The last step in building the wing is to build separate panels and rejoin them with the proper dihedral. The photo in the original article shows the main panel rejoined to the center panel and the completed assembled framework.
Start with the wing and pin down the leading edge (LE), trailing edge (TE), and tip pieces on the building board. Put pins alongside the wood, not through it. Make up the rib templates from cardboard or thin plywood.
- Make the lower rib template and slice the required pieces. Fit and glue these in place, trimming them from the TE end to fit at the tips.
- Cut out the same number of upper rib pieces. These should be tapered at each end so they will mate correctly with the lower ribs.
- Using some of the upper rib pieces, check how tall the spars should be. Carefully sand the spar strips to the correct width and glue them in place. Note the spars need quite a bit of taper at the tips.
- Fit and trim the upper ribs and glue them in place.
- After the wing is assembled, use a razor saw or sharp knife to separate it into panels. Sand the mating ends and block up the tip panels so they can be joined to the main panels at the proper angle.
- Use scrap pieces of spar stock as joiners to reinforce the spars where they were cut. When the tips are dry, cut, sand, and rejoin the main panels at the proper angle to the flat center section.
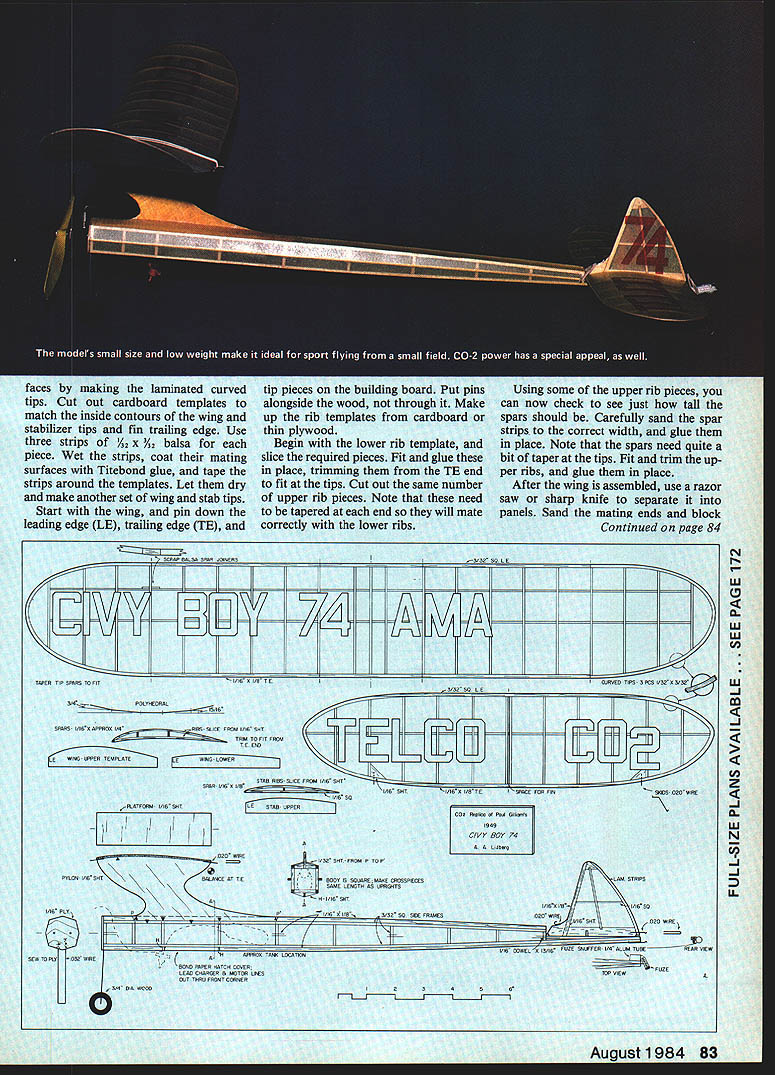
Making laminated curved tips
- Cut cardboard templates to match the inside contours of the wing and stabilizer tips and the fin trailing edge.
- Use three strips of 3/32 x 3/32 balsa. Wet the strips, coat mating surfaces with Titebond glue, and tape the strips around the templates. Let dry; make another set.
Stabilizer and fin
Build the stabilizer in a similar manner to the wing, but use 1/16" sq. for the lower portions of the ribs. Build the fin now, too, and you'll be nearly finished with the flying surfaces.
Fuselage and pylon
- Make up a fuselage side frame in the traditional manner. When dry, make another identical side.
- Because the basic fuselage is square, join the sides over the plan side view using crosspieces of the same length as the uprights.
- Cut the pylon from a stiff piece of 1/4" sheet. Notch it to fit over the body crosspieces, glue it in place, and fit the 1/32" sheet brace pieces.
- Add 1/8 x 1/8 strips forward and aft of the pylon, and on the sides and bottom of the fuselage. Taper the side strips from about the middle of the body to the rear before gluing on.
Motor mount, landing gear, and hatch
- Cut out the ply motor mount.
- Bend the landing gear wire (with wheel in place) and sew the wire to the back of the mount with heavy thread.
- Cut out the wing platform and glue it on, followed by the wire hold-downs.
- Cut away the lower body strip for the hatch and glue on the small "H" pieces.
Motor installation
- Fit the CO-2 motor. Carefully bend the copper tube leading to the tank so that the tank will fit about where shown on the plan. The forward end of the tank must be higher than the rest for best performance.
- Lead the tubes out near a front corner of the hatch opening, and bend the motor tube to lead up toward the top of the mount.
- If there's excess tubing, carefully wind it into a 1/2-in. diameter coil.
- Mount the motor with small wood screws.
Sanding, covering, and decoration
- Sand each part to final shape and smoothness to prepare for covering.
- Cover each part with separate pieces of tissue as necessary to prevent wrinkles. On my model, five pieces of tissue were required on the wing's lower surface (one for each panel), and the upper surface required a separate piece between each pair of ribs on the tip panels. The fuselage was covered with eight long thin strips—one for each pair of lengthwise sticks. (To save time I dyed the pylon with a yellow highlighter to match the body tissue.)
- Lightly water-shrink the tissue covering and apply just one coat of Sig Lite-Cote or some other non-tautening nitrate dope.
- Part of the charm of the original Civy Boy comes from extensive tissue decoration. You can duplicate this by photocopying the wing and stabilizer plans and using the copies as tissue-cutting guides. On a sheet of thin cardboard, tape down dark tissue, tape the copies over the tissue, and cut out letters using a metal straightedge and a sharp #11 X-Acto blade.
- Adhere the letters with thinner applied with a small brush. The original Civy Boy 74 featured "Atwood Triumph" lettering on the wing's underside; my model says "Telco CO-2" in the same tradition.
Dethermalizer (DT) and final setup
You don't have to install a dethermalizer (DT), but it would be a shame to lose the model needlessly in a thermal. Install the 1/4" dowel, the fuse snuffer tube, and the wire hooks as shown on the plan. Use a piece of strong thread or .008 to .012-in. control-line wire as a limit string so the tail will pop up to about 40°. If you use thread, be sure it won't contact the fuselage, or the tail will pop off instead of up.
- Check each panel of the wing and tail for warps and steam them flat if necessary.
- Assemble the model. It must balance at the wing's TE. For adjustment, move the tank forward or aft. Small bits of clay ballast may also be used.
- When the tank is located correctly, brace it in place and make the bond-paper hatch cover.
Flight testing and trimming
- Begin test glides with a 1/2-in. shim under the stab TE. A bit more thickness will probably be needed for a good glide.
- Move the tail assembly so there's just a hint of a left glide turn; then add some 1/8" sq. by 4-in. long keys to position the stab on the platform. Make sure the keys are glued to the stab and that the stab is still free to pop up.
- Try some low-power flights. The Civy Boy should climb gently to the right even at a low setting. If it won't, check for a warp or engine/rudder offset that needs correction.
- Work up slowly to more power using the throttle. Most CO-2 models fly best with less than full power.
Hope you enjoy the Civy Boy replica. It is a relaxing and rewarding type of modeling.
Transcribed from original scans by AI. Minor OCR errors may remain.

