
CL Flying, Phase Two: Improving the Airplane
James M. Petro
Improving the Airplane
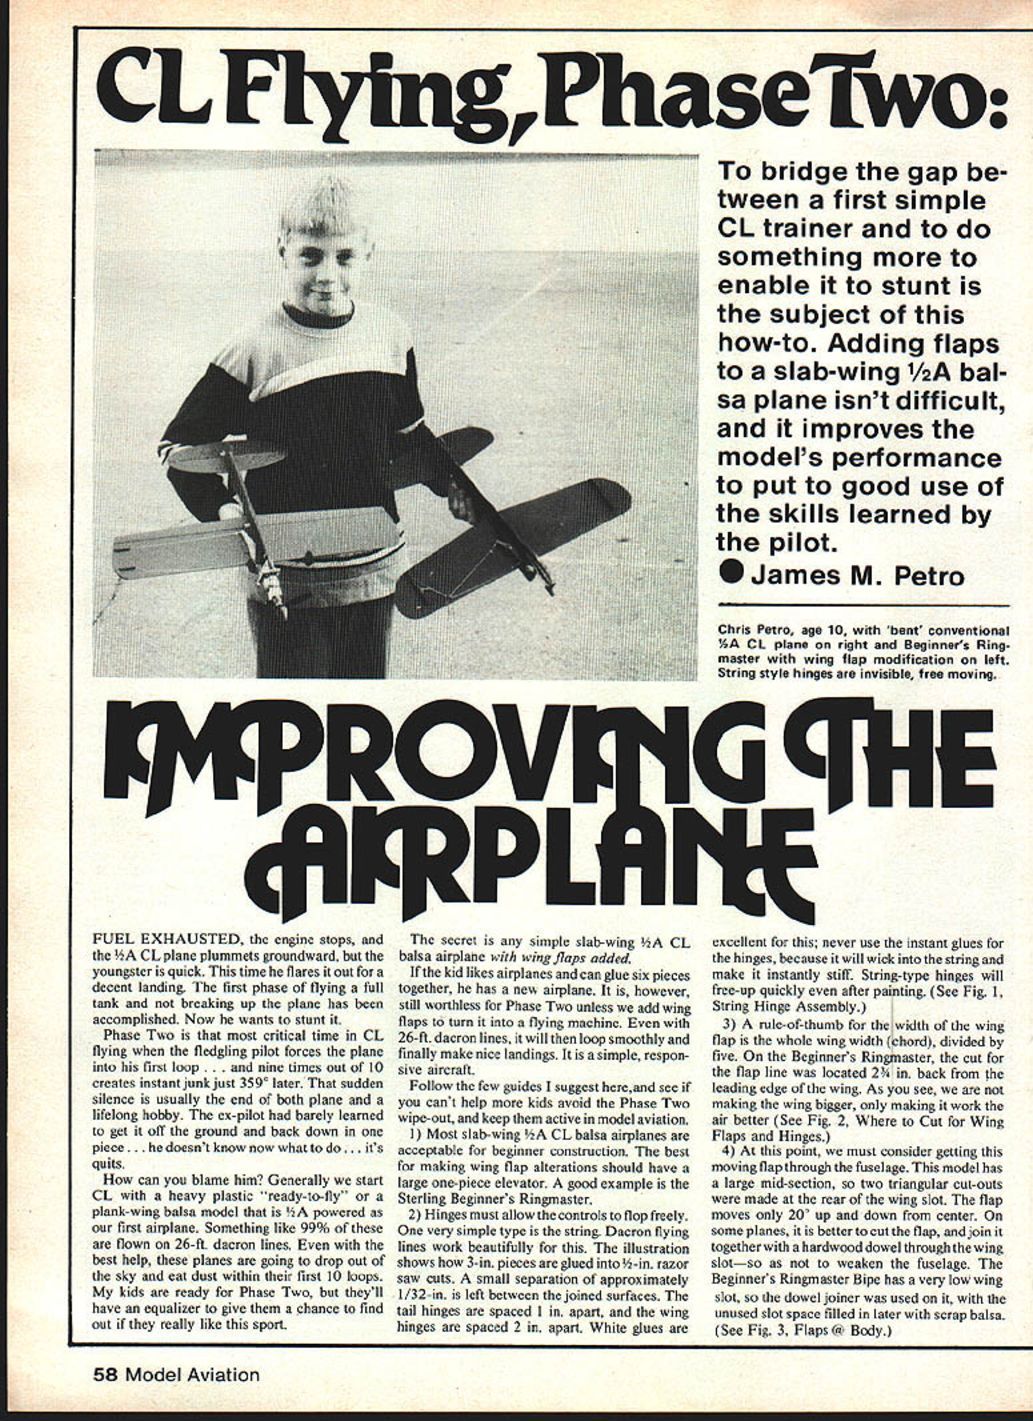
Fuel exhausted, the engine stops, and the 1/2A CL plane plummets groundward, but the youngster is quick. This time he flares it out for a decent landing. The first phase of flying — getting a full tank and not breaking the plane — has been accomplished. Now he wants to stunt it.
Phase Two is that most critical time in CL flying when the fledgling pilot forces the plane into his first loop... and nine times out of ten creates instant junk just seconds later. That sudden silence is usually the end of both plane and a lifelong hobby. The ex-pilot had barely learned to get it off the ground and back down in one piece... he doesn't know now what to do... it quits.
How can you blame him? Generally we start CL with a heavy plastic "ready-to-fly" or a plank-wing balsa model that is 1/2A powered as our first airplane. Something like 99% of these are flown on 26 ft Dacron lines. Even with the best help, these planes are going to drop out of the sky and eat dust within their first ten loops. My kids are ready for Phase Two, but they'll have an equalizer to give them a chance to find out if they really like this sport.
The secret is any simple slab-wing 1/2A CL balsa airplane with wing flaps added.
If the kid likes airplanes and can glue six pieces together, he has a new airplane. It is, however, still worthless for Phase Two unless we add wing flaps to turn it into a flying machine. Even with 26 ft Dacron lines, it will then loop smoothly and finally make nice landings. It is a simple, responsive aircraft.
Follow the few guides suggested here, and see if you can't help more kids avoid the Phase Two wipe-out and keep them active in model aviation.
- Most slab-wing 1/2A CL balsa airplanes are acceptable for beginner construction. The best for making wing-flap alterations should have a large one-piece elevator. A good example is the Sterling Beginner's Ringmaster.
- ### Hinges
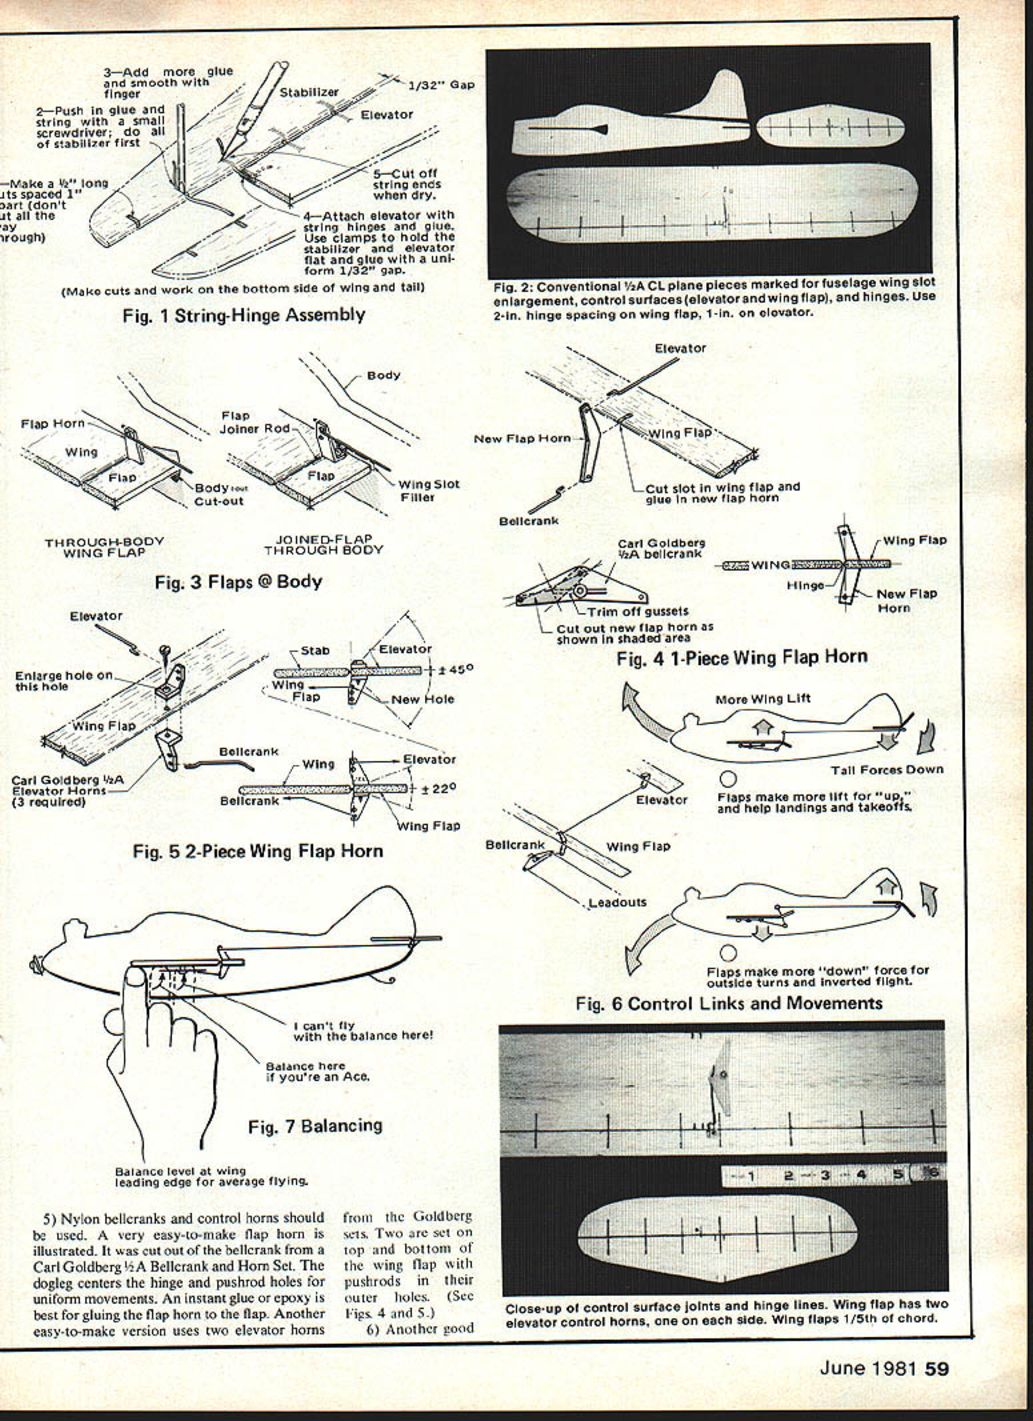
Hinges must allow the controls to flop freely. One very simple type is the string hinge. Dacron flying line works beautifully for this. Cut 1/2 in. slots with a razor saw and glue in 3 in. pieces of string. Leave a small separation of approximately 1/32 in. between the joined surfaces. Space the tail hinges about 1 in. apart and the wing hinges about 2 in. apart. White glues are excellent for this; never use instant glues for the hinges because they will wick into the string and make it stiff. String-type hinges will free up quickly even after painting. (See Fig. 1, String Hinge Assembly.)
- ### Where to cut for wing flaps
A rule of thumb for the width of the wing flap is the whole wing chord divided by five. On the Beginner's Ringmaster, the cut for the flap line was located 2 1/4 in. back from the leading edge of the wing. We are not making the wing bigger, only making it work the air better. (See Fig. 2, Where to Cut for Wing Flaps and Hinges.)
- ### Flap clearance at the fuselage
At this point, consider getting the moving flap through the fuselage. This model has a large mid-section, so two triangular cutouts were made at the rear of the wing slot. The flap moves only about 20° up and down from center. On some planes, it is better to cut the flap and join it together with a hardwood dowel through the wing slot so as not to weaken the fuselage. The Beginner's Ringmaster Bipe has a very low wing slot, so the dowel joiner was used on it, with the unused slot space filled later with scrap balsa. (See Fig. 3, Flaps @ Body.)
- ### Bellcranks and flap horns
Use nylon bellcranks and control horns. A very easy-to-make flap horn was cut from the bellcrank in a Carl Goldberg 1/2A Bellcrank and Horn Set. The dogleg centers the hinge and pushrod holes for uniform movement. Instant glue or epoxy is best for attaching the flap horn to the flap. Another easy version uses two elevator horns from Goldberg sets: place one on top and one on the bottom of the wing flap with pushrods in their outer holes. (See Figs. 4 and 5.)
- ### Control movement ratios
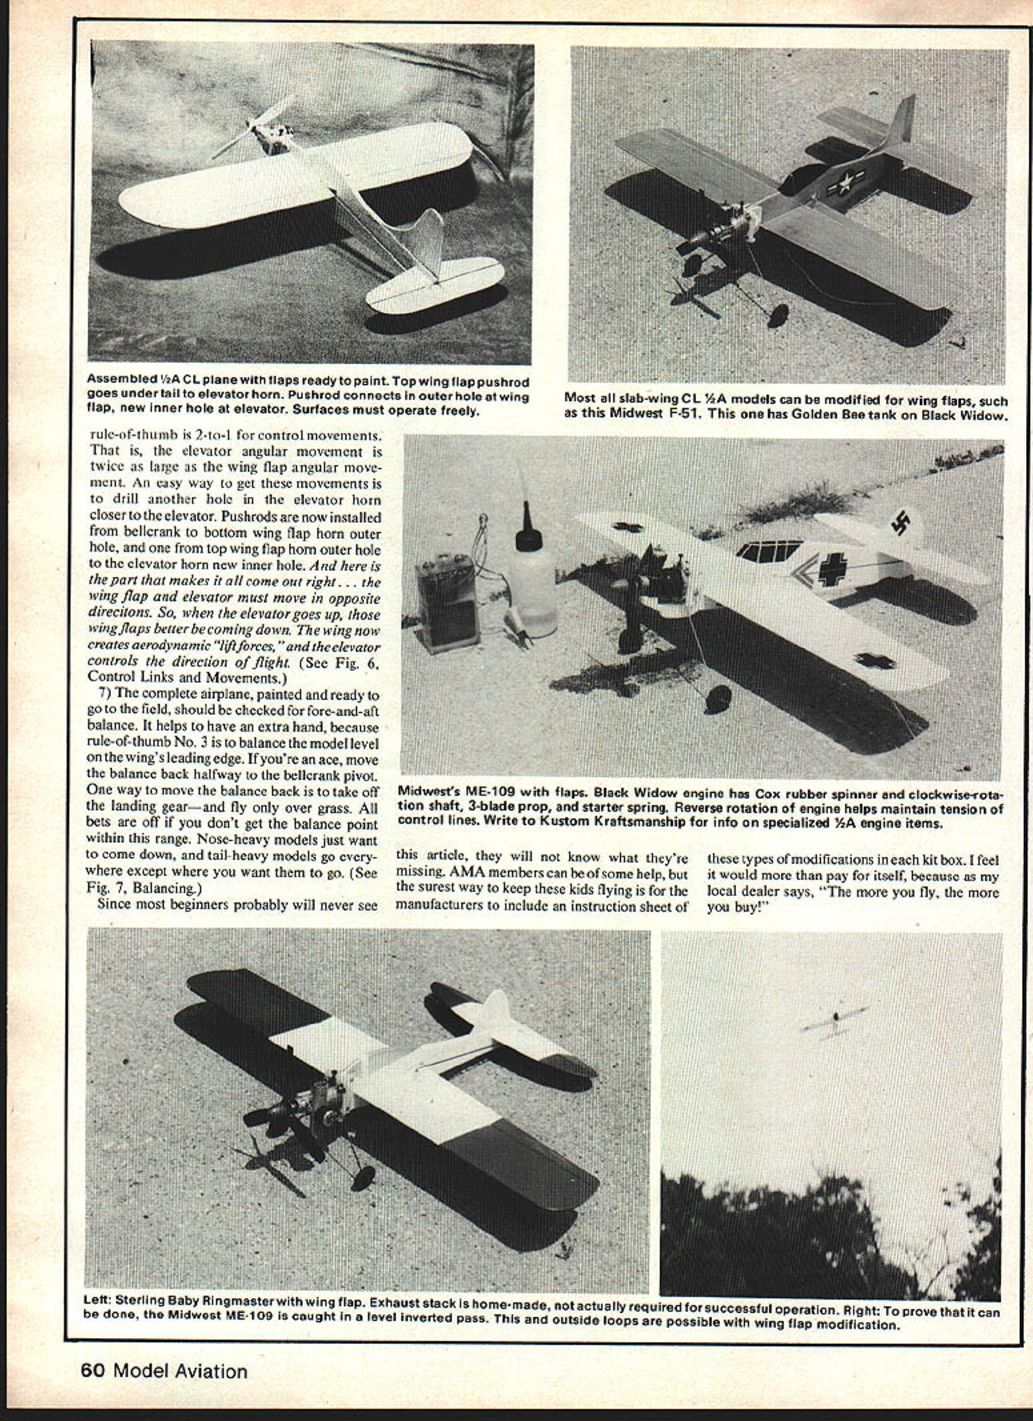
Another good rule of thumb is 2-to-1 for control movements. That is, the elevator angular movement should be twice the wing flap angular movement. An easy way to get these movements is to drill another hole in the elevator horn closer to the elevator. Install pushrods from the bellcrank to the bottom wing flap horn outer hole, and one from the top wing flap horn outer hole to the elevator horn new inner hole. The wing flap and elevator must move in opposite directions: when the elevator goes up, the wing flaps should come down. The wing then creates aerodynamic lift forces while the elevator controls the direction of flight. (See Fig. 6, Control Links and Movements.)
- ### Balancing
With the complete airplane painted and ready to go to the field, check fore-and-aft balance. It helps to have an extra hand. A rule of thumb is to balance the model level on the wing's leading edge. If you're experienced, move the balance back halfway to the bellcrank pivot. One way to move the balance back is to remove the landing gear and fly only over grass. All bets are off if you don't get the balance point within this range. Nose-heavy models tend to come down; tail-heavy models go everywhere except where you want them to go. (See Fig. 7, Balancing.)
Since most beginners probably will never see this article, they will not know what they're missing. AMA members can be of some help, but the surest way to keep these kids flying is for manufacturers to include an instruction sheet of these types of modifications in each kit box. It would more than pay for itself, because as my local dealer says, "The more you fly, the more you buy!"
Transcribed from original scans by AI. Minor OCR errors may remain.

