
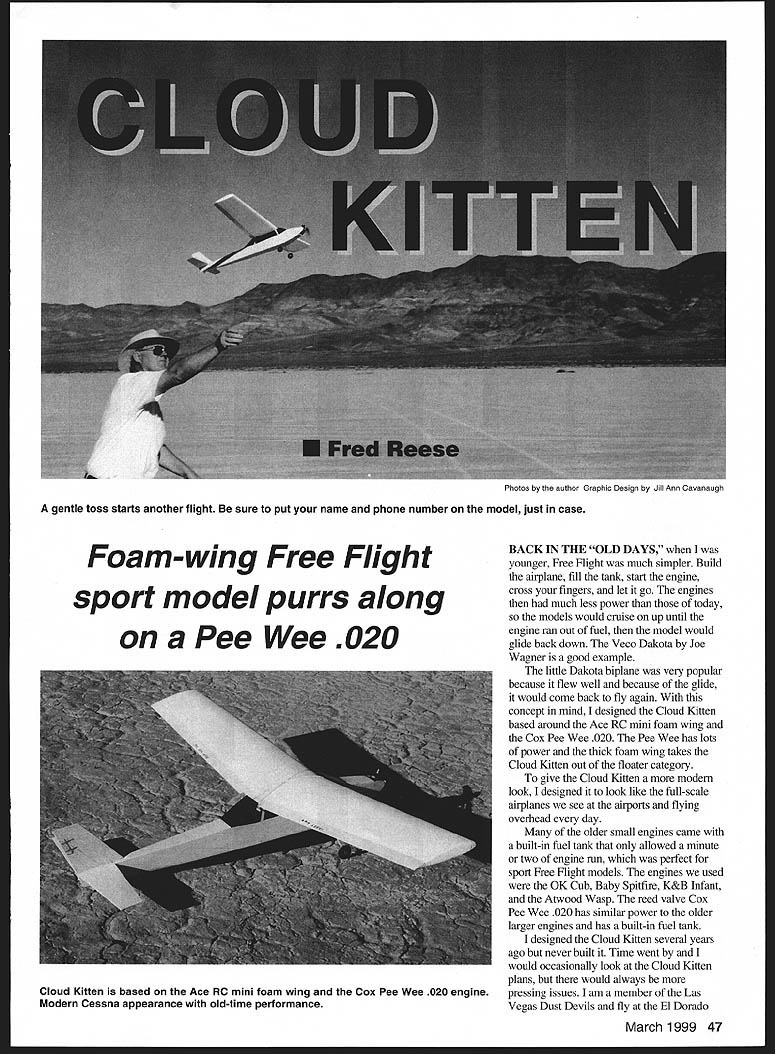
CLOUD KITTEN
Foam-wing Free Flight sport model purrs along on a Cox Pee Wee .020
Back in the "old days," when I was younger, Free Flight was much simpler. Build the airplane, fill the tank, start the engine, cross your fingers, and let it go. The engines then had much less power than those of today, so the models would cruise up until the engine ran out of fuel, then the model would glide back down. The Veco Dakota by Joe Wagner is a good example.
The little Dakota biplane was very popular because it flew well and because of the glide, it would come back to fly again. With this concept in mind, I designed the Cloud Kitten based around the Ace RC mini foam wing and the Cox Pee Wee .020. The Pee Wee has lots of power and the thick foam wing takes the Cloud Kitten out of the floater category.
To give the Cloud Kitten a more modern look, I designed it to resemble the full-scale airplanes we see at the airports and flying overhead every day.
Many of the older small engines came with a built-in fuel tank that only allowed a minute or two of engine run, which was perfect for sport Free Flight models. The engines we used included the OK Cub, Baby Spitfire, K&B Infant, and the Atwood Wasp. The reed-valve Cox Pee Wee .020 has similar power to the older larger engines and has a built-in fuel tank.
I designed the Cloud Kitten several years ago but never built it. Time went by and I would occasionally look at the Cloud Kitten plans, but there would always be more pressing issues. I am a member of the Las Vegas Dust Devils and fly at the El Dorado dry lake. This is a huge site—flat and open, with only an occasional starter stooge sticking up to attract a low-flying model.
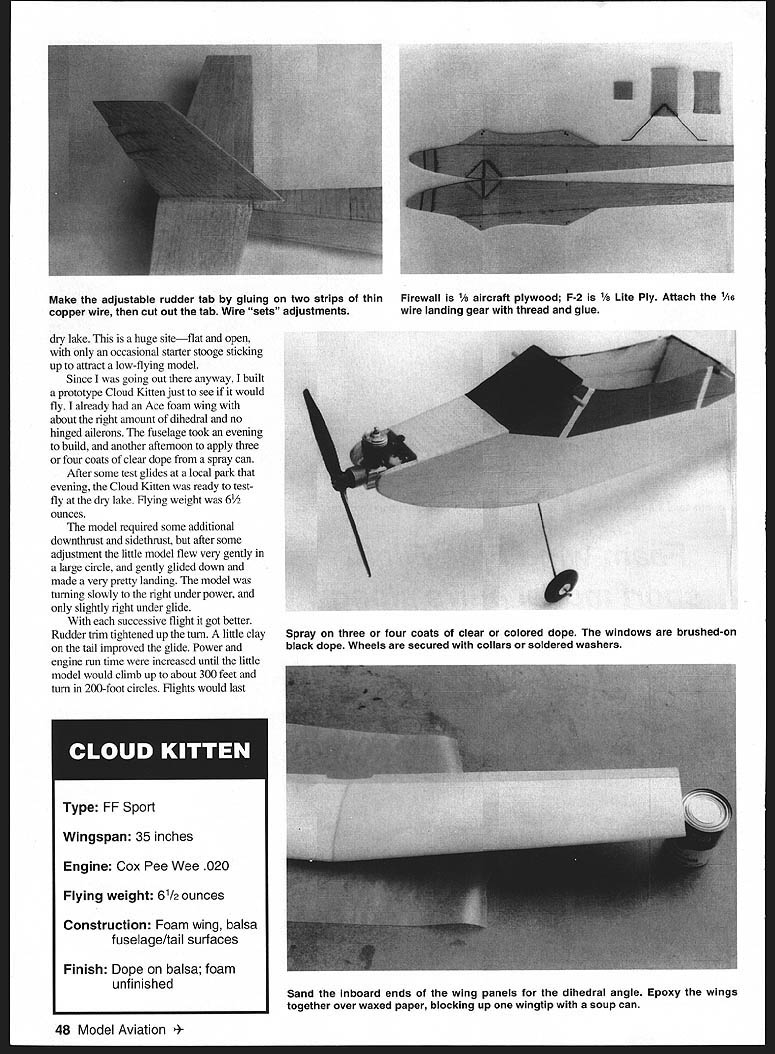
Since I was going out there anyway, I built a prototype Cloud Kitten just to see if it would fly. I already had an Ace foam wing with about the right amount of dihedral and no hinged ailerons. The fuselage took an evening to build, and another afternoon to apply three or four coats of clear dope from a spray can.
After some test glides at a local park that evening, the Cloud Kitten was ready to test-fly at the dry lake. Flying weight was 6 1/2 ounces.
The model required some additional downthrust and sidethrust, but after some adjustment the little model flew very gently in a large circle, gently glided down, and made a very pretty landing. The model was turning slowly to the right under power, and only slightly right under glide.
With each successive flight it got better. Rudder trim tightened up the turn. A little clay on the tail improved the glide. Power and engine run time were increased until the little model would climb up to about 300 feet and turn in 200-foot circles. Flights would last three to four minutes between power and glide. Kind of fun—just sit back and watch the little Cloud Kitten fly.
I built another Cloud Kitten with the changed wing and engine incidence, and took some pictures as I built it. I was really pleased; it flew very well, just like the first one, after just a couple of trim flights.
A year later, I am still flying both models and enjoy flight as much as ever.
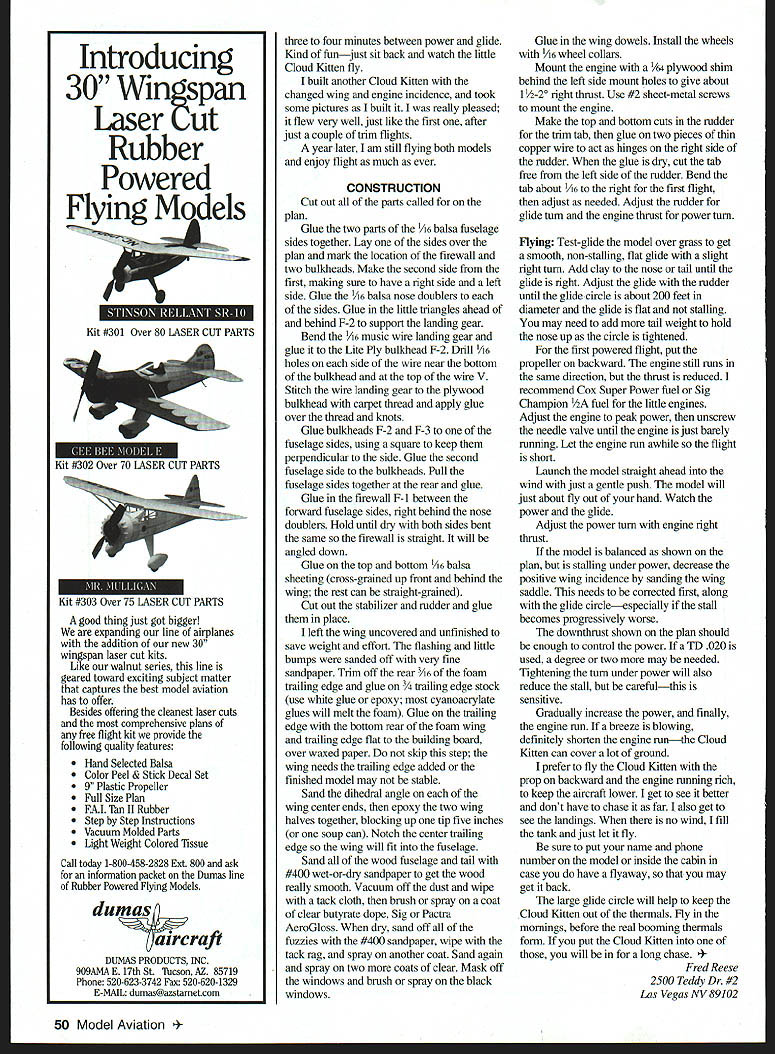
SPECIFICATIONS
- Type: Free Flight Sport
- Wingspan: 35 inches
- Engine: Cox Pee Wee .020
- Prop: 4.5 x 2
- Flying weight: 6 1/2 ounces
- Construction: Foam wing; balsa fuselage and tail surfaces
- Finish: Clear dope on balsa; foam left unfinished
CONSTRUCTION
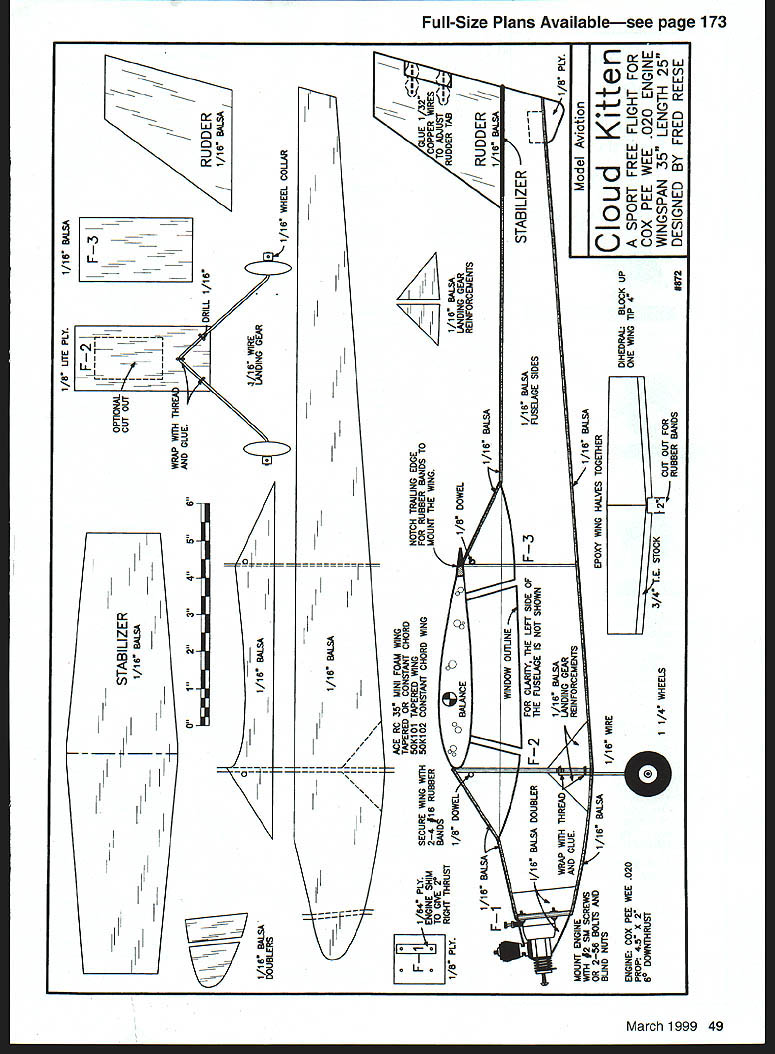
Cut out all of the parts called for on the plan.
- Fuselage sides and bulkheads
- Glue the two parts of the 1/16" balsa fuselage sides together.
- Lay one side over the plan and mark the location of the firewall and two bulkheads. Make the second side from the first, ensuring a right and left side.
- Glue the 1/16" balsa nose doublers to each side.
- Glue in the little triangles ahead of and behind F-2 to support the landing gear.
- Landing gear
- Bend the 1/16" music wire landing gear and glue it to the Lite Ply bulkhead F-2.
- Drill 1/16" holes on each side of the wire near the bottom of the bulkhead and at the top of the wire V.
- Stitch the wire landing gear to the plywood bulkhead with carpet thread and apply glue over the thread and knots.
- Glue 1/16" balsa landing gear reinforcements as shown on the plan.
- Assemble fuselage
- Glue bulkheads F-2 and F-3 to one fuselage side, using a square to keep them perpendicular.
- Glue the second fuselage side to the bulkheads.
- Pull the fuselage sides together at the rear and glue.
- Glue in the firewall F-1 between the forward fuselage sides, right behind the nose doublers. Hold until dry with both sides bent the same so the firewall is straight; it will be angled down.
- Glue on top and bottom 1/16" balsa sheeting (cross-grained up front and behind the wing; the rest can be straight-grained).
- Tail surfaces
- Cut out the stabilizer and rudder and glue them in place.
- Sand the wood fuselage and tail with #400 wet-or-dry sandpaper to get the wood very smooth. Vacuum off the dust and wipe with a tack cloth.
- Finishing
- Brush or spray on a coat of clear butyrate dope (Sig or Pactra AeroGloss). When dry, sand off any fuzzies with #400 sandpaper, wipe with a tack rag, and spray on another coat. Sand again and spray on two more coats of clear dope.
- Mask off the windows and brush or spray on the black windows.
- I left the foam wing uncovered and unfinished to save weight and effort. Sand off flashing and little bumps with very fine sandpaper.
- Wing preparation
- Trim off the rear 3/16" of the foam trailing edge and glue on 3/4" trailing edge stock. Use white glue or epoxy; most cyanoacrylate glues will melt the foam.
- Glue on the trailing edge with the bottom rear of the foam wing and trailing edge flat to the building board, over waxed paper. Do not skip this step; the wing needs the trailing edge added or the finished model may not be stable.
- Sand the dihedral angle on each wing center end. Epoxy the two wing halves together over waxed paper, blocking up one wingtip about five inches (one soup can).
- Notch the center trailing edge so the wing will fit into the fuselage.
- Sand inboard ends of wing panels to the dihedral angle before epoxying.
- Wing mounting and reinforcement
- Notch the trailing edge for rubber bands to mount the wing.
- Epoxy wing halves together over waxed paper; block up one wingtip.
- Glue the 1/16" balsa doublers where shown on the plan.
- Drill 1/16" holes as required for dowels and fittings.
- Glue in the wing dowels.
- Secure the wing with rubber bands; wrap with thread and glue where indicated.
- Cut out for rubber bands and wrap thread/glue as shown on the plan.
- Engine and firewall
- Use a 1/8" ply firewall.
- Mount the engine with a 1/4" plywood shim behind the left-side mount holes to give about 1-1/2° right thrust (secure with #2 sheet-metal screws). Alternatively, mount with two #2 small screws or 2-56 bolts and 1/16" balsa blind nuts.
- If using a T.D. .020, a degree or two more downthrust may be needed.
- Use a 1/8" dowel for alignment or reinforcement as shown.
- Wheels and gear details
- Install the wheels with 1/16" wheel collars.
- Use 1/16" wire landing gear and 1/16" balsa landing gear reinforcements where shown.
- Rudder trim tab
- Make the top and bottom cuts in the rudder for the trim tab, then glue on two pieces of thin copper wire to act as hinges on the right side of the rudder.
- When the glue is dry, cut the tab free from the left side of the rudder.
- Bend the tab about 1/8" to the right for the first flight, then adjust as needed.
- Glue a 1/32" shim to adjust the rudder tab if required.
Notes:
- Use white glue or epoxy on foam joints; most CA glues will melt foam.
- Sand all wood smooth before finishing.
- Wrap and glue thread at key joints for reinforcement as shown on the plan.
FLYING
- Test glides
- Test-glide the model over grass to get a smooth, non-stalling, flat glide with a slight right turn.
- Add clay to the nose or tail until the glide is right.
- Adjust the glide with the rudder until the glide circle is about 200 feet in diameter and the glide is flat and not stalling.
- You may need to add more tail weight to hold the nose up as the circle is tightened.
- First powered flight
- For the first powered flight, put the propeller on backward. The engine still runs in the same direction, but thrust is reduced for a gentler, safer first flight.
- I recommend Cox Super Power fuel or Sig Champion 1/2A fuel for these little engines.
- Adjust the engine to peak power, then unscrew the needle valve until the engine is just barely running. Let the engine run awhile so the flight is short.
- Launch the model straight ahead into the wind with just a gentle push. The model will almost fly out of your hand.
- Watch both power and glide, and adjust engine right thrust to set the power turn.
- Troubleshooting stalls and incidence
- If the model is balanced as shown on the plan but stalls under power, decrease positive wing incidence by sanding the wing saddle. Correcting incidence and the glide circle is essential, especially if the stall becomes progressively worse.
- The downthrust shown on the plan should be enough to control the power. Tightening the turn under power will also reduce the stall, but this is not a cure-all.
- Gradually increase the power and then the engine run. If a breeze is blowing, shorten the engine run—the Cloud Kitten can cover a lot of ground.
- Operational tips
- I prefer to fly the Cloud Kitten with the prop on backward and the engine running rich to keep the aircraft lower. This makes it easier to watch and reduces how far you have to chase it; you also see the landings better.
- When there is no wind, fill the tank and just let it fly.
- Be sure to put your name and phone number on the model or inside the cabin in case you have a flyaway so it may be returned.
- The large glide circle will help keep the Cloud Kitten out of thermals. Fly in the mornings, before strong thermals form—if you put the Cloud Kitten into a thermal, you'll be in for a long chase.
Author: Fred Reese 2500 Teddy Dr. #2 Las Vegas, NV 89102
Transcribed from original scans by AI. Minor OCR errors may remain.

