
CO2 Messerschmitt Me-163B
A.A. Lidberg
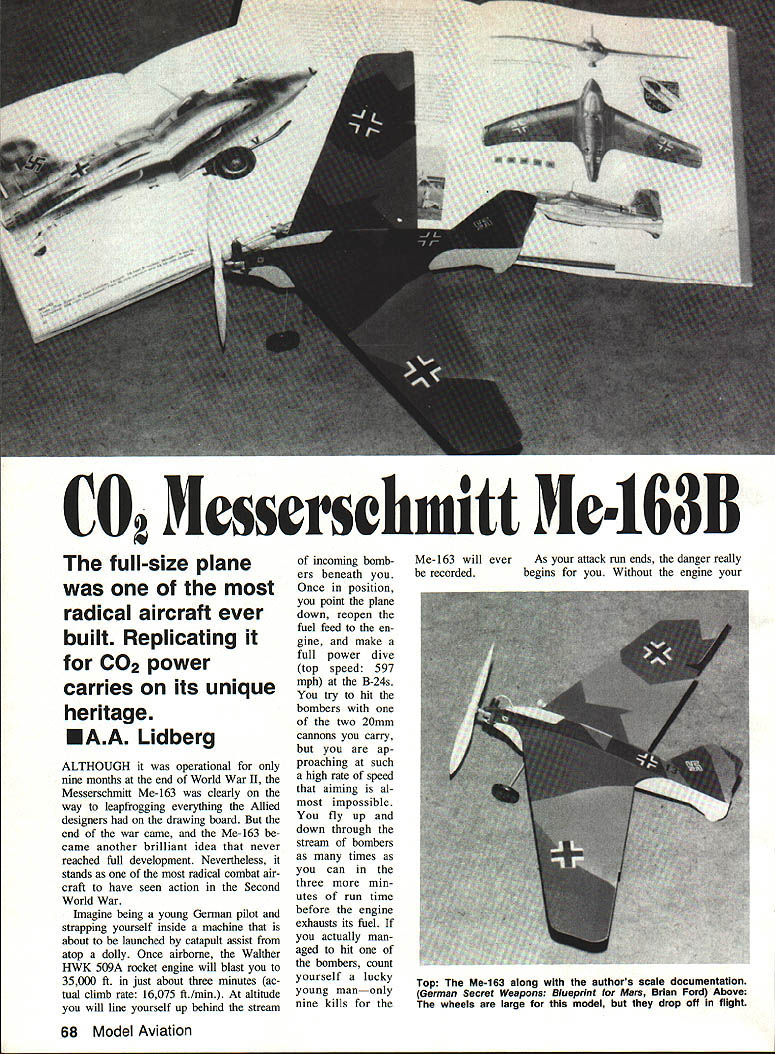
Although it was operational for only nine months at the end of World War II, the Messerschmitt Me-163 was clearly on the way to leapfrogging everything the Allied designers had on the drawing board. The full-size plane was one of the most radical combat aircraft to see action in the Second World War.
Imagine being a young German pilot and strapping yourself inside a machine launched by catapult from atop a dolly. Once airborne, the Walther HWK 509A rocket engine would blast you to about 35,000 ft in roughly three minutes (actual climb rate: about 16,075 ft/min). At altitude you would line up behind the stream of incoming bombers beneath you, reopen the fuel feed, and make a full-power dive (top speed: about 597 mph) at the B-24s. You carried two 20 mm cannons, but at such closing speeds aiming was almost impossible. The rocket engine had only a few minutes' run time; only nine kills for the Me-163 were ever recorded.
The real danger came after the engine cut out. The rocket plane became a slow, vulnerable glider, easy prey for conventional fighters. If you avoided enemy contact and managed to glide back to the field, the hypergolic engine fuel remaining in the tanks made landing hazardous—bumping or bouncing could cause an explosion. Survive the launch, the attack, the glide and the landing, and you had the ride of a lifetime.
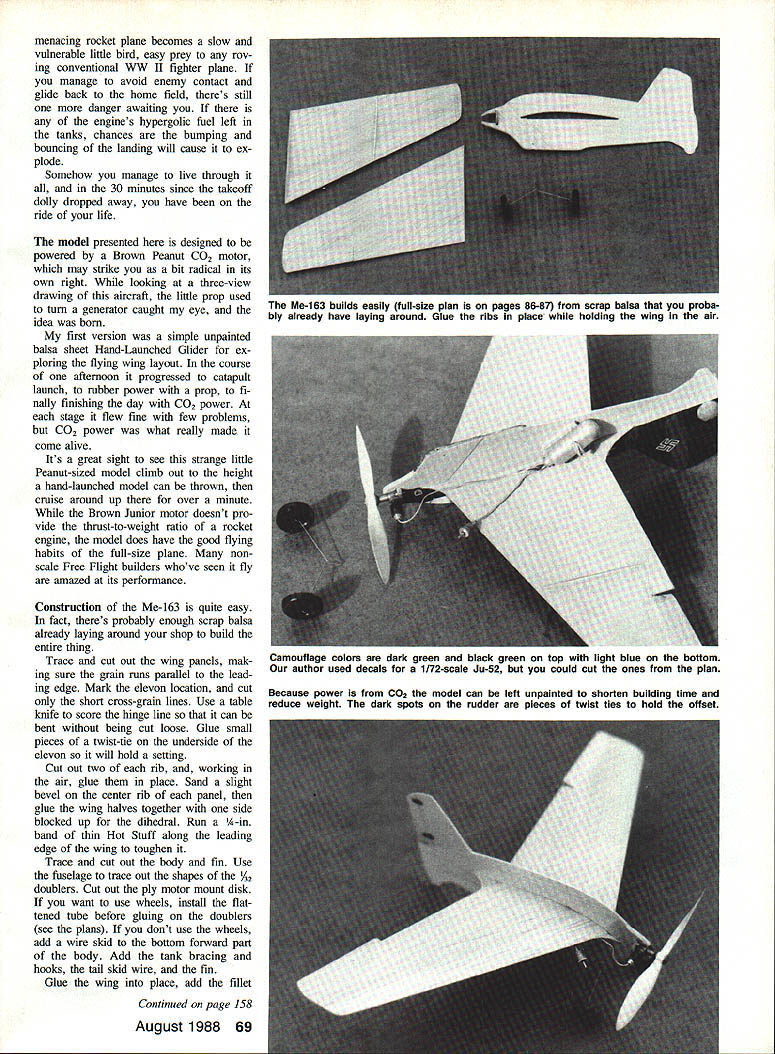
The model presented here is designed to be powered by a Brown Junior CO2 motor. A small prop used on the full-size plane to turn a generator inspired the idea of adding a prop to this flying-wing layout. The initial version was a simple unpainted balsa-sheet hand-launched glider used to explore the layout; that same airframe progressed through catapult launch, rubber power with a prop, and finally CO2 power. CO2 propulsion really made it come alive. It is a striking sight to see the Peanut-sized model climb out and cruise for well over a minute. While the Brown Junior motor doesn't provide the thrust-to-weight ratio of a rocket engine, the model displays very good flying habits and has surprised many free-flight builders with its performance.
Construction
Construction is straightforward; you can probably build the entire model from scrap balsa.
Wing
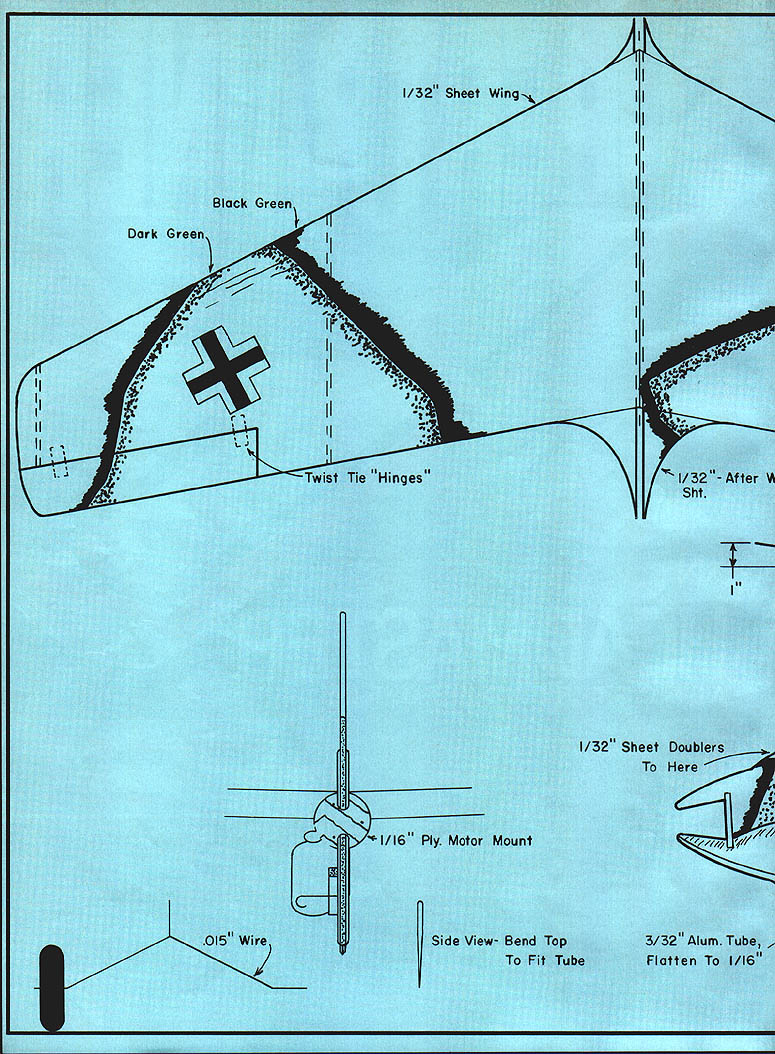
- Trace and cut out the wing panels, keeping the grain parallel to the leading edge.
- Mark elevon locations and cut short cross-grain relief lines.
- Use a table knife to score the hinge line so it can be bent before being cut loose.
- Glue small pieces of twist-tie to the underside of each elevon to hold the setting.
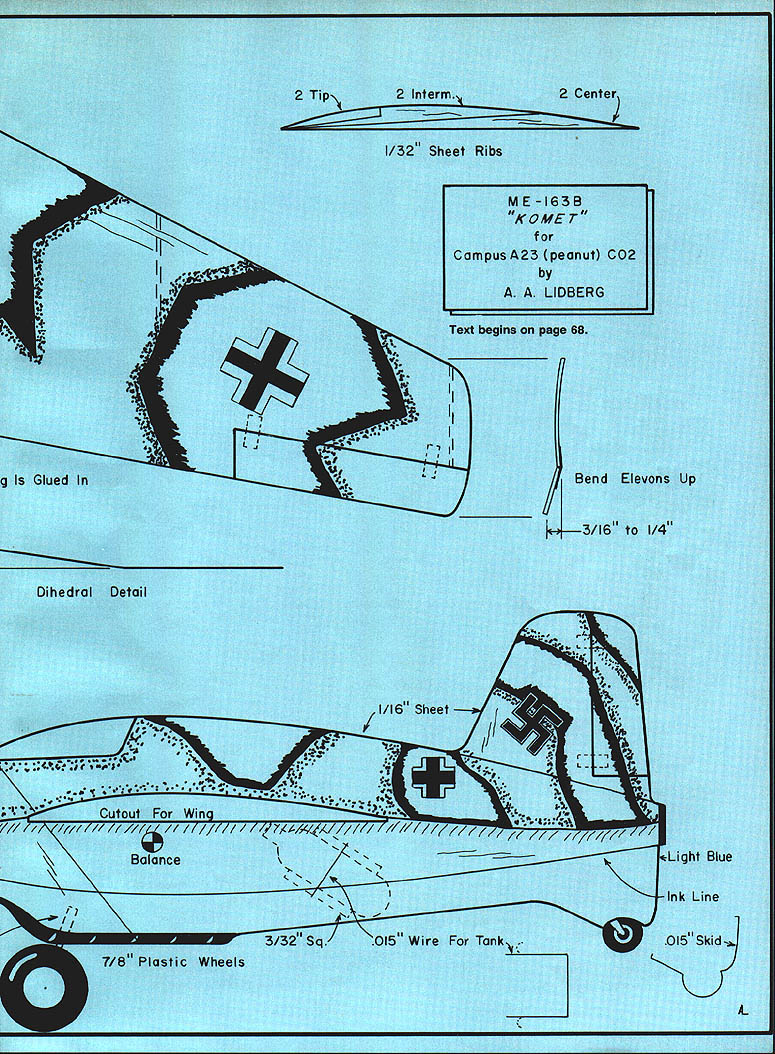
- Cut and glue two ribs in place. Sand a slight bevel on the center rib panel.
- Glue the wing halves together, blocked up to the proper dihedral.
- Run a 1/8 in. band of thin Hot Stuff along the leading edge to toughen it.
Fuselage, motor mount and undercarriage
- Trace and cut out the fuselage and fin.
- Use the fuselage tracing to lay out 1/32 in. sheet doublers and cut them out.
- Cut out a 1/16 in. ply motor-mount disk.
- If you want wheels, install a flattened aluminum tube (see plans) before gluing the doublers. If not using wheels, add a wire skid to the lower forward fuselage.
- Add tank-bracing hooks, tail-skid wire and rudder/fin assembly.
- Glue the wing into the fuselage and add fillets. Glue ribs and other parts, keeping everything true until dry.
Tank and motor installation
- Attach the motor to the motor mount and locate the charge fitting just behind the motor.
- Slip the CO2 tank into the fuselage and secure it with the bracing hooks.
- Add the tail-skid and rudder assembly.
- Balance the model at the CG point shown on the plan; a light nose weight may be required.
Preflight and launch notes
- Charge the Brown Junior motor with CO2 and make a bench test to ensure pushrod movement is free.
- Launch by hand-throw or use the catapult shown on the plan. When using the catapult, remove the dolly as soon as possible after takeoff.
- The author recommends flying in calm conditions until familiar with the model's handling.
Detail labels from plans
- 1/32" Sheet Wing
- Dark Green
- Black Green
- Twist-Tie "Hinges"
- 1/16" Ply Motor Mount
- .015" Wire
- Side View — Bend Top To Fit Tube
- 1/32" Sheet Doublers To Here
- 3/32" Alum. Tube, Flatten To 1/16"
- 2 Tip 2 Intermediate 2 Center
- 1/32" Sheet Ribs
- Bend Elevons Up 3/16" to 1/4"
- Dihedral Detail
- 1/16" Sheet Cutout For Wing
- Balance 3/32" Sq.
- .015" Wire For Tank
- 7/8" Plastic Wheels
- Light Blue
- Ink Line
- .015" Skid
(Plan label: ME-163B "KOMET" for Campus A23 (Peanut) CO2 by A. A. Lidberg — text originally appears on page 68 of the source.)
Flying
- Check that the plane balances at the point indicated on the plans before flying; add clay to nose or tail as necessary.
- Preset elevons with about 3/16 in upward bend.
- Begin with test glides over thick grass. The 163 likes to glide fast, so give it a good solid push. Adjust clay placement and elevon deflection for proper trim.
- Charge the motor and hand-launch with a gentle push. If the glide trim is close, the model should climb out nicely.
- With the thrust line shown on the plans and a moderate power setting, the 163 will climb in a series of gentle power stalls to roughly 75–100 ft, cruise for a while, then come down quickly. For a steeper, more scale-like climb, add a slight downthrust to the motor.
- The model is capable of ROG (rise-off-ground) flights from a fairly smooth surface; it can ROG in 2–5 ft with moderate power. For ROG, trim to fly without wheels; you can experiment with mounting the flattened tube so the wheels drop off at takeoff.
- When launching from the catapult, remove the dolly as soon as possible after takeoff. Fly in calm conditions until you know the model's handling.
Finishing
- Paint with very thin coats to avoid weight buildup. The author used an airbrush with nitrocellulose dope mixed with pigment from Floquil model paint.
- To thin Floquil pigment: pour off the liquid carrier from a new bottle, refill with thinner for your dope, and shake to mix. For spraying, use one part pigment mix to 5–10 parts clear dope (Sig's Lite Coat works well).
- One thin coat of color is sufficient and adds little weight.
- Use clear Contact shelf paper for masking camouflage patterns; flat spray enamels can also be used.
- For insignia, photocopy the symbols and glue them on, or use a set of ESCI 1/72-scale decals for a Ju-52 as the author did.
- Because the model is CO2 powered, you may choose to leave it unpainted to shorten building time and reduce weight.
The Me-163 has been an exciting project for the author. Flying wings have long been intriguing, and this design offers a fun, challenging build and an impressive flying experience.
Transcribed from original scans by AI. Minor OCR errors may remain.

