
Commodore
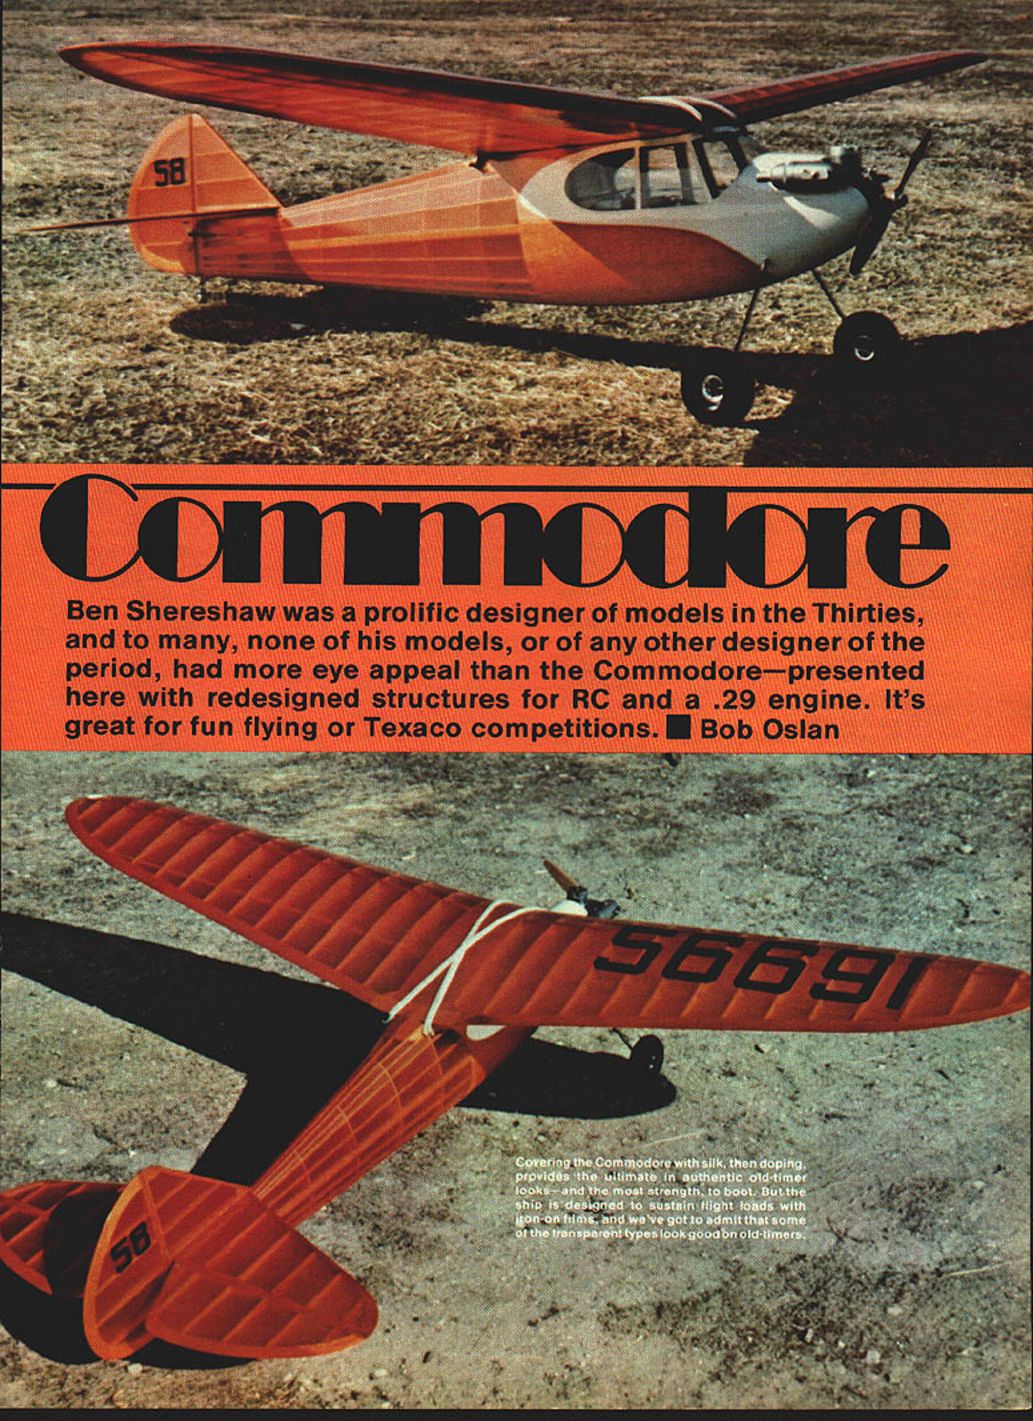
Ben Shereshaw was a prolific designer of models in the Thirties, and to many, none of his models—or of any other designer of the period—had more eye appeal than the Commodore. Presented here with redesigned structures for RC and a .29 engine, it's great for fun flying or Texaco competitions. — Bob Oslan
The Commodore was introduced in 1938 by the Scientific Model Airplane Company. It was a Ben Shereshaw design and, in the eyes of many, his very best. Shereshaw turned out a string of classics—the Cavalier, Nimbus, Mercury and Cloud Cruiser, to name only a few. None of these, however, capture the essence of the era with the elegance of the Commodore—the classic of the classics.
Originally the kit was offered in two versions, standard and deluxe, priced $6.95 and $7.95 respectively. The difference was that the deluxe version contained a pair of 3½-in. pneumatic air wheels. Inside the box were two plan sheets, a lumberyard of strip wood, printed sheets, music wire, ignition wire, glue, dope, metal fittings, and miscellaneous other goodies. Some of its advertised features were:
- Mono-strut landing gear—designed to ensure against nose-overs in the roughest of fields.
- Stressed to withstand loads 12 times in excess of that occurring in the severest crackups.
- Absence of spiral-dive tendencies.
- Flat glide and low sinking speed.
- Trim tabs for fine adjustments.
The obvious conclusion: in the unlikely event of a crash, whatever was in the airplane's way would come out on the short end of the stick. Grandiose claims didn't begin with TV!
The Commodore's market life was relatively short; it was replaced by the Mercury. Speculation is that the degree of construction difficulty was a sales damper—the Mercury was much simpler, having a box fuselage. If you should happen to run across a set of the original Scientific Commodore plans, or a reproduction of them, you'll quickly see that the fuselage structure was overly involved, and some of the aesthetic touches were a bit impractical even for free flight in 1938.
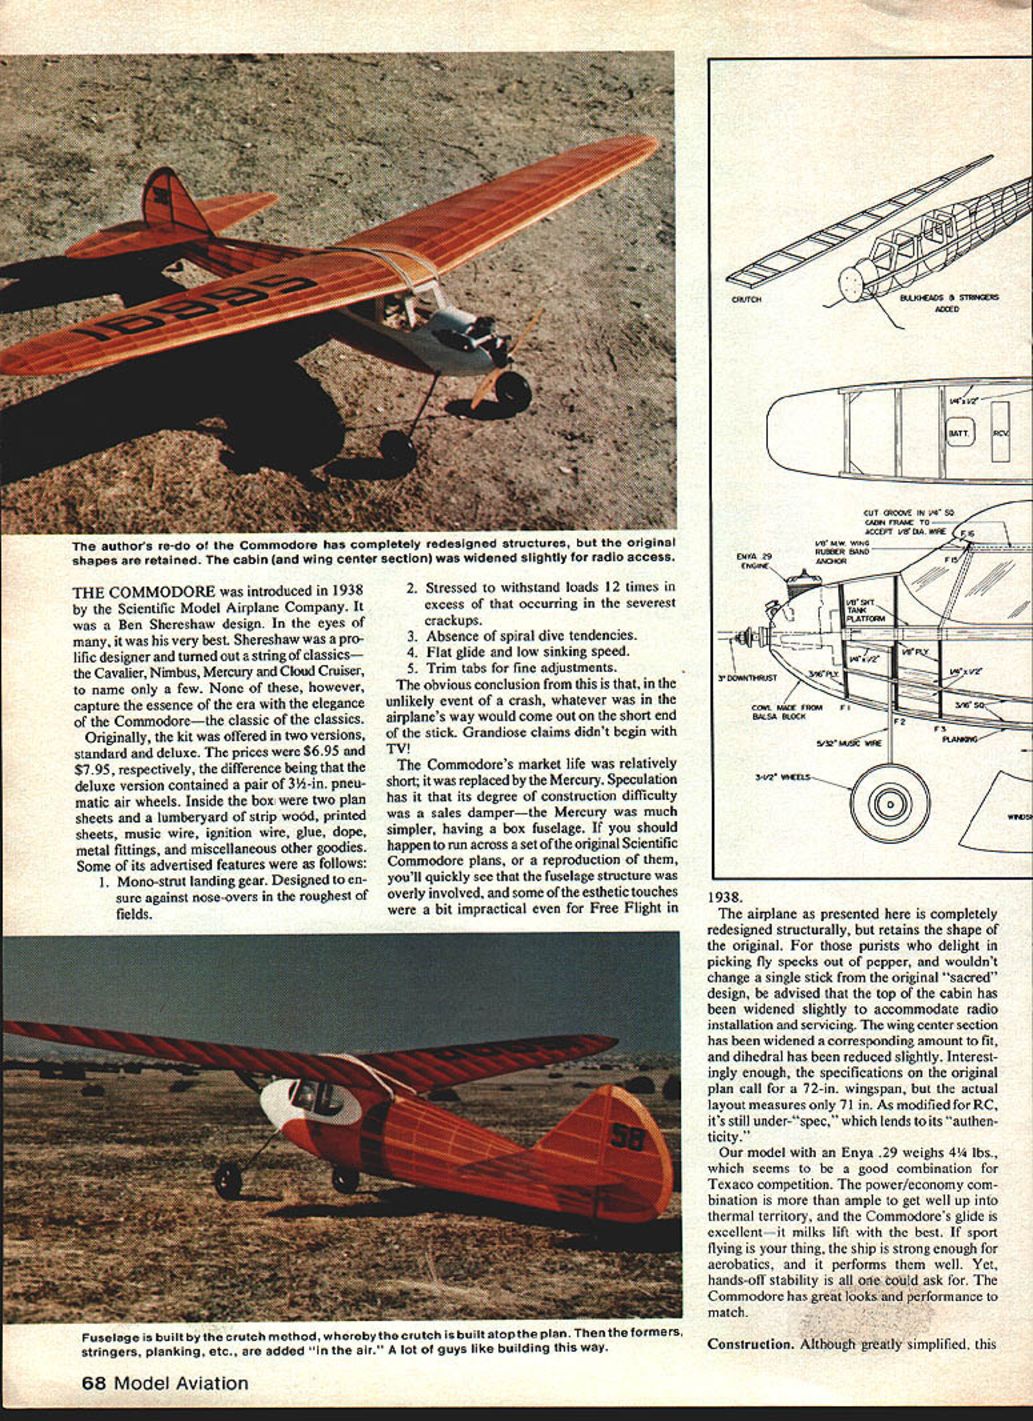
The airplane as presented here is completely redesigned structurally but retains the shape of the original. For purists who delight in picking flyspecks out of pepper and wouldn't change a single stick of the original "sacred" design: note that the top of the cabin has been widened slightly to accommodate radio installation and servicing. The wing center section has been widened a corresponding amount, and dihedral has been reduced slightly. Interestingly, the specifications on the original plan call for a 72-in. wingspan, but the actual layout measures only 71 in. As modified for RC, it's still under-"spec," which tends to its "authenticity."
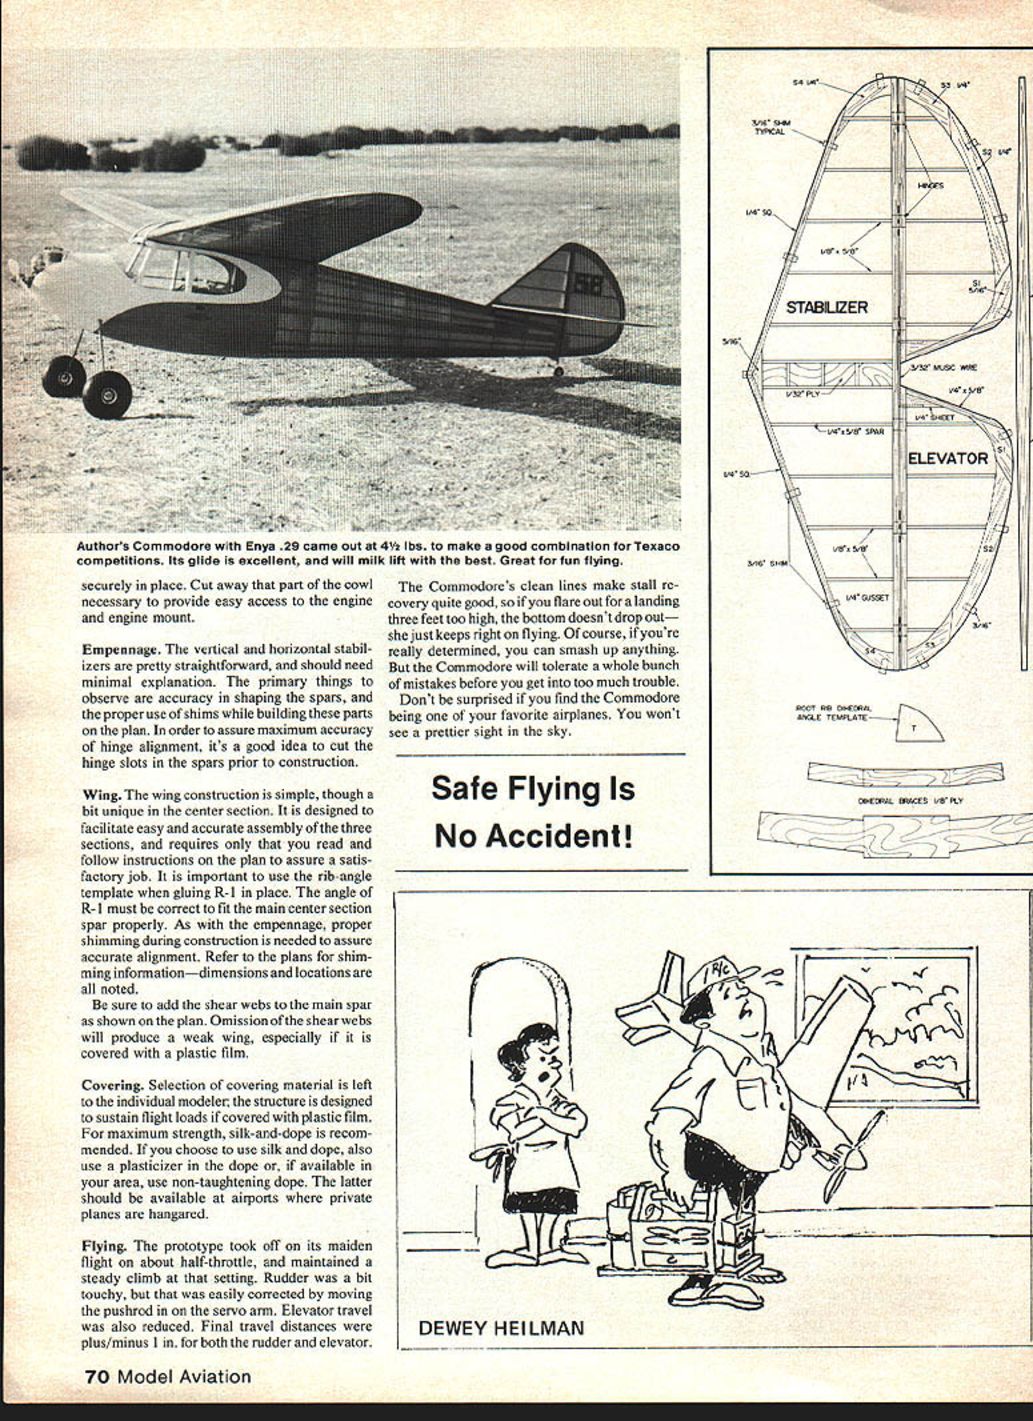
Our model with an Enya .29 weighs 4-1/4 lb., which seems to be a good combination for Texaco competition. The power/economy combination is more than ample to get well up into thermal territory, and the Commodore's glide is excellent—it milks lift with the best. If sport flying is your thing, the ship is strong enough for aerobatics and performs them well. Yet hands-off stability is all one could ask for. The Commodore has great looks and performance to match.
Construction
Although greatly simplified, this re-do of the Commodore has completely redesigned structures while retaining the original shapes. The cabin and wing center section are widened slightly to allow radio access. The crutch method is used for the fuselage: the crutch is built atop the plan, then formers, stringers, planking, etc., are added "in the air." Many builders prefer this method.
#### Fuselage
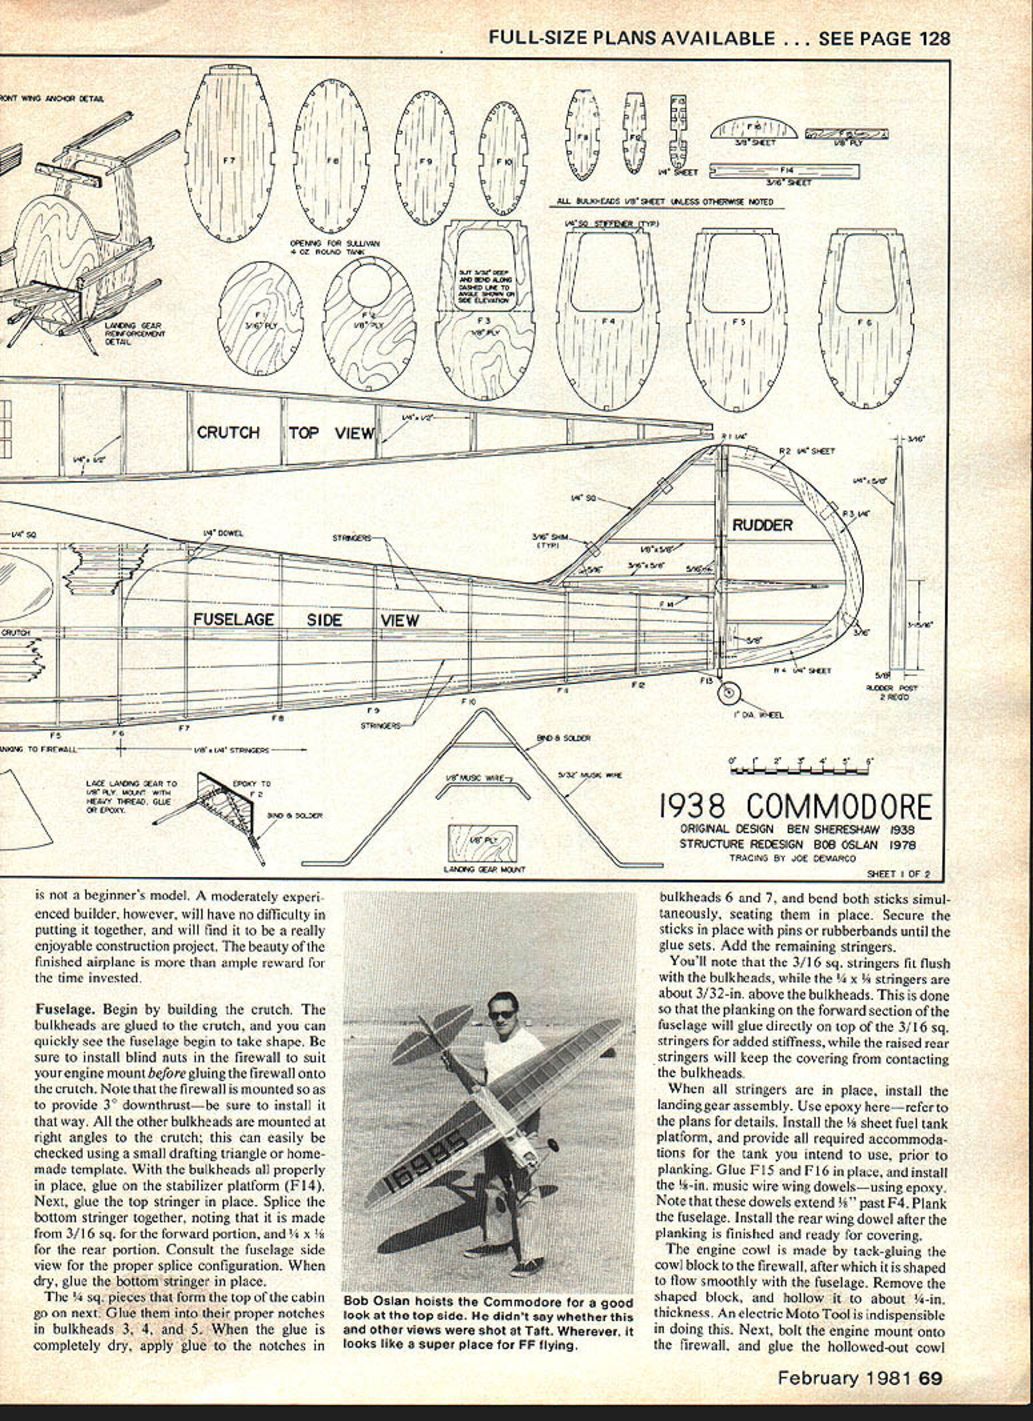
Begin building the crutch. When the bulkheads are glued to the crutch you can quickly see the fuselage begin to take shape. Be sure to install blind nuts in the firewall to suit the engine mount before gluing the firewall onto the crutch. Note: the firewall is mounted to provide 3° downthrust; be sure to install it that way. Other bulkheads should be mounted at right angles. The crutch can easily be checked using a small drafting triangle or a homemade template.
With the bulkheads properly in place, glue on the stabilizer platform (F14). Next, glue the top stringer in place. Splice the bottom stringer together, noting that it is made from 3/16 sq. for the forward portion and 1/4 x 1/8 for the rear portion. Consult the fuselage side view for the proper splice configuration. When dry, glue the bottom stringer in place.
The 3/4-in. pieces that form the top of the cabin go on next. Glue them into their proper notches in bulkheads 3, 4, and 5. When the glue is completely dry, apply glue to the notches in bulkheads 6 and 7, and bend both sticks simultaneously, seating them in place. Secure the sticks with pins or rubber bands until the glue sets. Add the remaining stringers.
Note that the 3/16 sq. stringers fit flush with the bulkheads, while the 1/4 x 1/8 stringers are about 3/32 in. above the bulkheads. This is done so the planking on the forward section of the fuselage will glue directly on top of the 3/16 sq. stringers for added stiffness, while the raised rear stringers will keep the covering from contacting the bulkheads.
When all stringers are in place, install the landing gear assembly—use epoxy here and refer to the plans for details. Install the 1/8-in. sheet fuel tank platform and provide all required accommodations for the tank you intend to use prior to planking. Glue F15 and F16 in place, and install the 1/8-in. music-wire wing dowels using epoxy. Note that these dowels extend 1/8 in. past F4. Plank the fuselage. Install the rear wing dowel after the planking is finished and the fuselage is ready for covering.
The engine cowl is made by tack-gluing the cowl block to the firewall, shaping it to flow smoothly with the fuselage, then removing the block and hollowing it out to about 1/8-in. thickness. An electric Moto-Tool is most indispensable for this. Next, bolt the engine mount onto the firewall, glue the hollowed-out cowl in place, and cut away the portions of the cowl necessary to provide easy access to the engine and mount.
#### Empennage
The vertical and horizontal stabilizers are straightforward and should need minimal explanation. The primary concerns are accuracy in shaping the spars and using proper shims while building these parts on the plan. To assure maximum accuracy of hinge alignment, cut the hinge slots in the spars prior to construction.
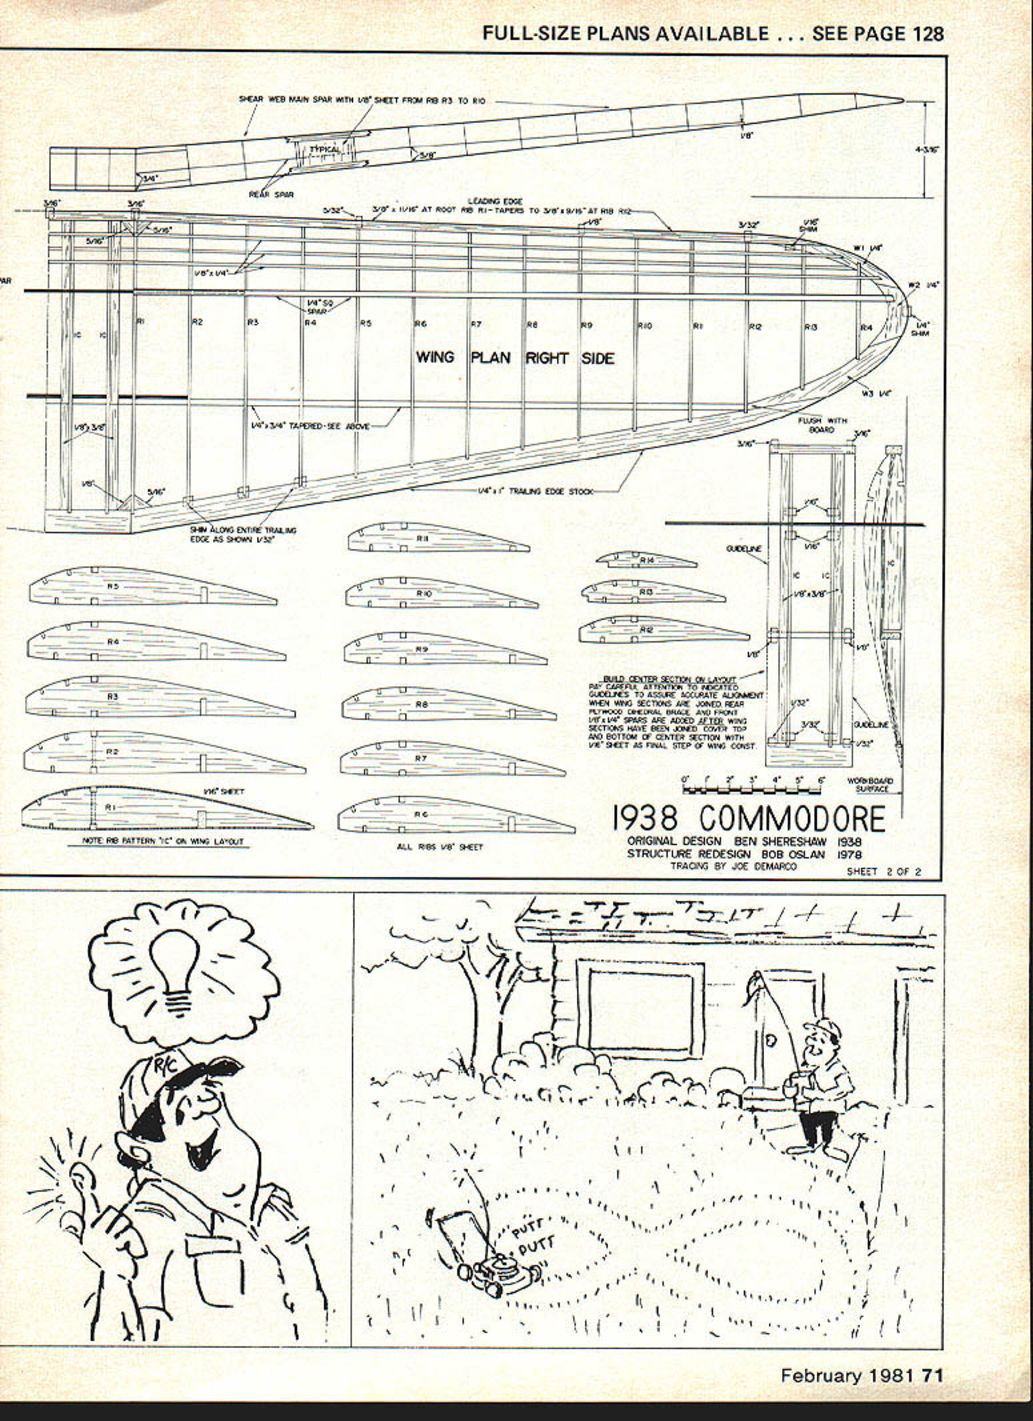
#### Wing
Wing construction is simple, though the center section is a bit unique. It is designed to facilitate easy and accurate assembly of the three sections—read and follow the plan instructions carefully. It is important to use the rib-angle template when gluing R-1 in place; the angle of R-1 must be correct to fit the main center-section spar properly. As with the empennage, proper shimming during construction is needed to assure accurate alignment. Refer to the plans for shimming information—dimensions and locations are noted there.
Be sure to add the shear webs to the main spar as shown on the plan. Omission of the shear webs will produce a weak wing, especially if it is covered with plastic film.
Covering
Selection of covering material is left to the individual modeler; the structure is designed to sustain flight loads if covered with plastic film. For maximum strength, silk-and-dope is recommended. If you choose silk and dope, also use a plasticizer in the dope or, if available in your area, use non-tautening dope. The latter should be available at airports where private planes are hangared.
Flying
The prototype took off on its maiden flight on about half-throttle and maintained a steady climb at that setting. Rudder was a bit touchy, but that was easily corrected by moving the pushrod in on the servo arm. Elevator travel was also reduced. Final travel distances were ±1 in. for both the rudder and elevator.
The Commodore's clean lines make stall recovery quite good—if you flare out for a landing three feet too high, the bottom doesn't drop out; she just keeps right on flying. Of course, with enough determination you can smash up anything, but the Commodore will tolerate a whole bunch of mistakes before you get into too much trouble.
Don't be surprised if the Commodore becomes one of your favorite airplanes. You won't see a prettier sight in the sky.
Transcribed from original scans by AI. Minor OCR errors may remain.

