
Computer-Generated Graphics
J.J. Robinson
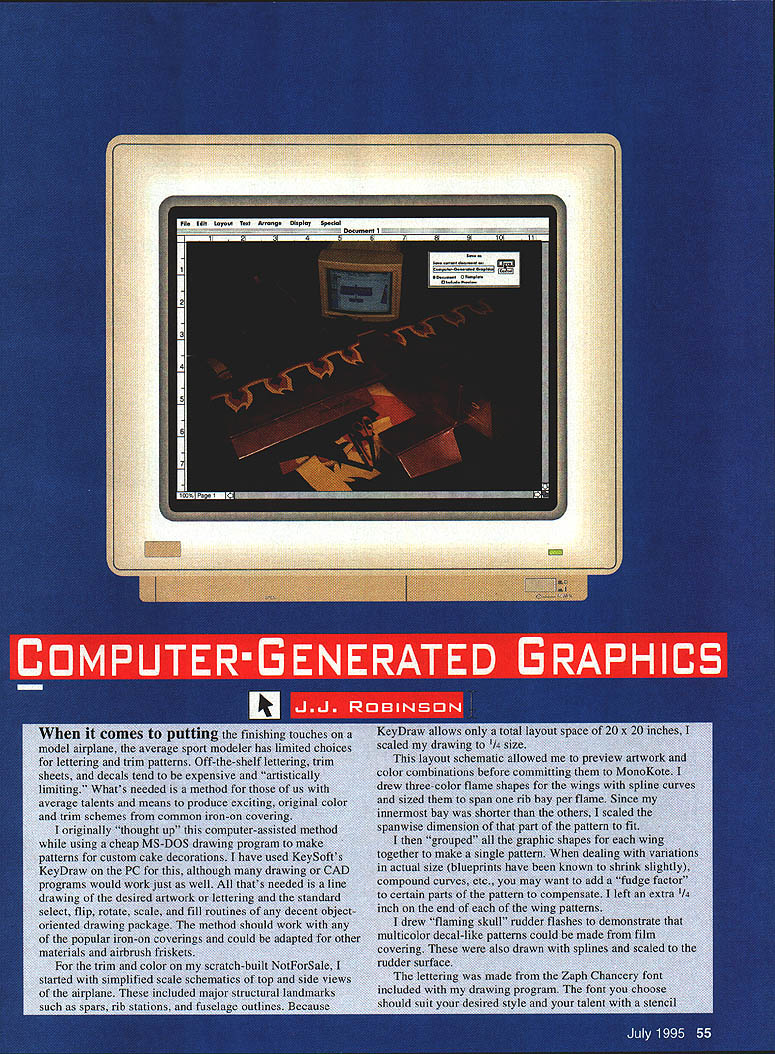
When it comes to putting the finishing touches on a model airplane, the average sport modeler has limited choices for lettering and trim patterns. Off-the-shelf lettering, trim sheets, and decals tend to be expensive and artistically limiting. What's needed is a method for those of us with average talents and means to produce exciting, original color and trim schemes from common iron-on covering.
I originally conceived this computer-assisted method while using a cheap MS-DOS drawing program to make patterns for custom cake decorations. I have used KeySoft's KeyDraw on the PC for this, although many drawing or CAD programs would work just as well. All that's needed is a line drawing of the desired artwork or lettering and the standard select, flip, rotate, scale, and fill routines of any decent object-oriented drawing package. The method should work with any of the popular iron-on coverings and could be adapted for other materials and airbrush friskets.
For the trim and color on my scratch-built NotForSale, I started with simplified scale schematics of top and side views of the airplane. These included major structural landmarks such as spars, rib stations, and fuselage outlines. Because KeyDraw allows only a total layout space of 20 x 20 inches, I scaled my drawing to 1/4 size. This layout schematic allowed me to preview artwork and color combinations before committing them to MonoKote.
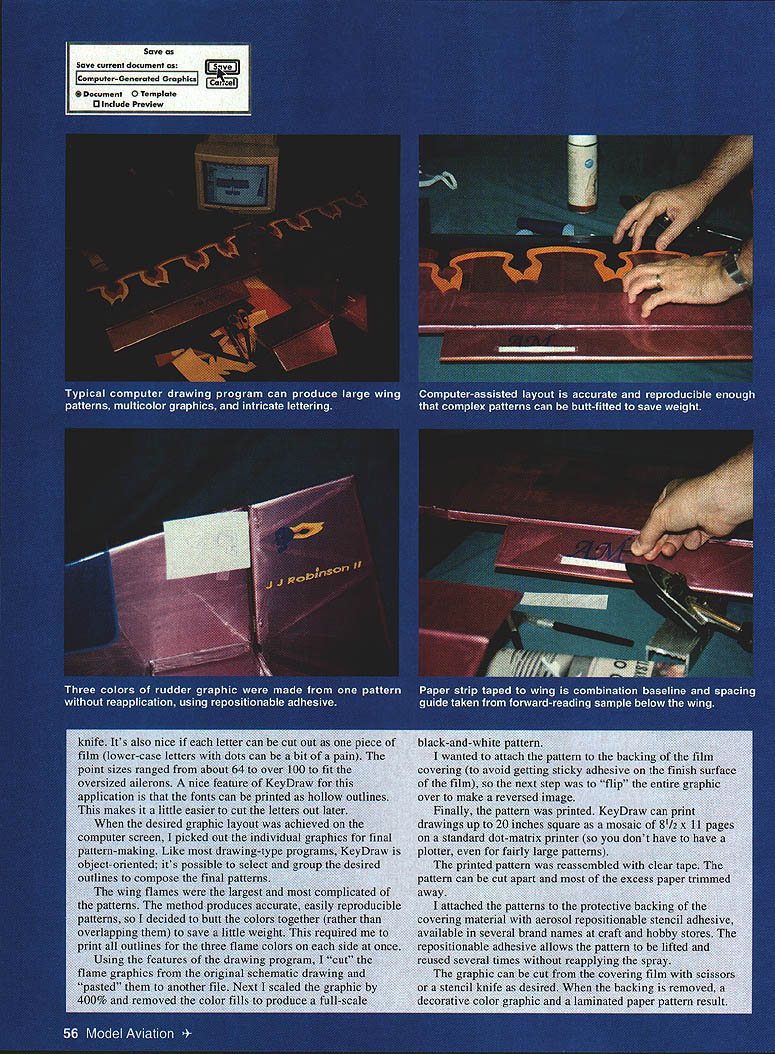
I drew three-color flame shapes for the wings with spline curves and sized them to span one rib bay per flame. Since my innermost bay was shorter than the others, I scaled the spanwise dimension of that part of the pattern to fit. I then grouped all the graphic shapes for each wing together to make a single pattern. When dealing with variations in actual size (blueprints have been known to shrink slightly), compound curves, etc., you may want to add a "fudge factor" to certain parts of the pattern to compensate; I left an extra 1/4 inch on the end of each wing pattern.
I drew "flaming skull" rudder flashes to demonstrate that multicolor decal-like patterns could be made from film covering. These were also drawn with splines and scaled to the rudder surface.
The lettering was made from the Zaph Chancery font included with my drawing program. The font you choose should suit your desired style and your talent with a stencil knife. It's also nice if each letter can be cut out as one piece of film (lower-case letters with dots can be a bit of a pain). The point sizes I used ranged from about 64 to over 100 to fit the oversized ailerons. A nice feature of KeyDraw for this application is that the fonts can be printed as hollow outlines, which makes cutting the letters out later a little easier.
When the desired graphic layout was achieved on the computer screen, I picked out the individual graphics for final pattern-marking. Like most drawing programs, KeyDraw is object-oriented; it's possible to select and group the desired outlines to compose the final patterns.
The wing flames were the largest and most complicated of the patterns. The method produces accurate, easily reproducible patterns, so I decided to butt the colors together (rather than overlapping them) to save a little weight. This required me to print all outlines for the three flame colors on each side at once.
Using the features of the drawing program, I cut the flame graphics from the original schematic drawing and pasted them to another file. Next I scaled the graphic by 400% and removed the color fills to produce a full-scale black-and-white pattern. I wanted to attach the pattern to the backing of the film covering (to avoid getting sticky adhesive on the finish surface of the film), so the next step was to flip the entire graphic over to make a reversed image.
Finally, the pattern was printed. KeyDraw can print drawings up to 20 inches square as a mosaic of 8-1/2 x 11 pages on a standard dot-matrix printer (so you don't have to have a plotter, even for fairly large patterns). The printed pattern was reassembled with clear tape. The pattern can be cut apart and most of the excess paper trimmed away.
I attached the patterns to the protective backing of the covering material with aerosol repositionable stencil adhesive (available in several brand names at craft and hobby stores). The repositionable adhesive allows the pattern to be lifted and reused several times without reapplying the spray. The graphic can be cut from the covering film with scissors or a stencil knife as desired. When the backing is removed, a decorative color graphic and a laminated paper pattern result.
The natural static attraction of the materials helps positioning. For the three-part flame graphic, the parts fit the finished wing almost perfectly. Working with large abutted color lines, the flexibility of the materials helps get everything lined up. For intricate letters and graphics, keep the iron on the cool side of the material's heat range so the graphic won't distort and so you don't accidentally activate the adhesive backing when you don't want to (or shrink the film).
The "flaming skull" rudder graphic needed some detailed work with a stencil knife. I attached the entire three-part pattern, cut out the front part of the pattern, removed the remaining two parts, then stuck down the orange EconoKote. I repeated the process; the last part of the pattern was re-adhered and opaque yellow EconoKote was used to make the third color. The three-color graphic was applied to the side and rudder much like the wing graphics.
Lettering presents a few extra problems. Proper stroke angle, spacing, and kerning need to be reproduced so the finished text looks right. I printed both a forward-reading sample and a reversed pattern. The whole block of text on the wing was marked with the forward sample; a line across the bases of the letters and vertical lines marking a convenient start point position each character. Slanted lines show stroke angle—especially helpful for italics. Cut a strip of paper with the baseline down and use it as a lettering guide; use the forward sample as a visual reference when positioning letters on the model surface.
Typical Equipment and Materials Used
- Iron-on coverings: Coverite Black Baron Dark Blue metal flake; Opaque Yellow and Orange Top Flite EconoKote for trim. (Upper background color on the airplane pictured: Pearlescent Wine Super MonoKote.)
- Repositionable stencil adhesive (available at most craft and hobby stores).
- A personal computer with a draw-type program (I used KeyDraw Plus on a PC) and a suitable printer or plotter (I printed on a dot-matrix printer).
- Scissors, stencil knife, MonoKote iron, ruler.
Transcribed from original scans by AI. Minor OCR errors may remain.

