
Control Line: Aerobatics
Ted Fancher 158 Flying Cloud Isle Foster City, CA 94404
Introduction
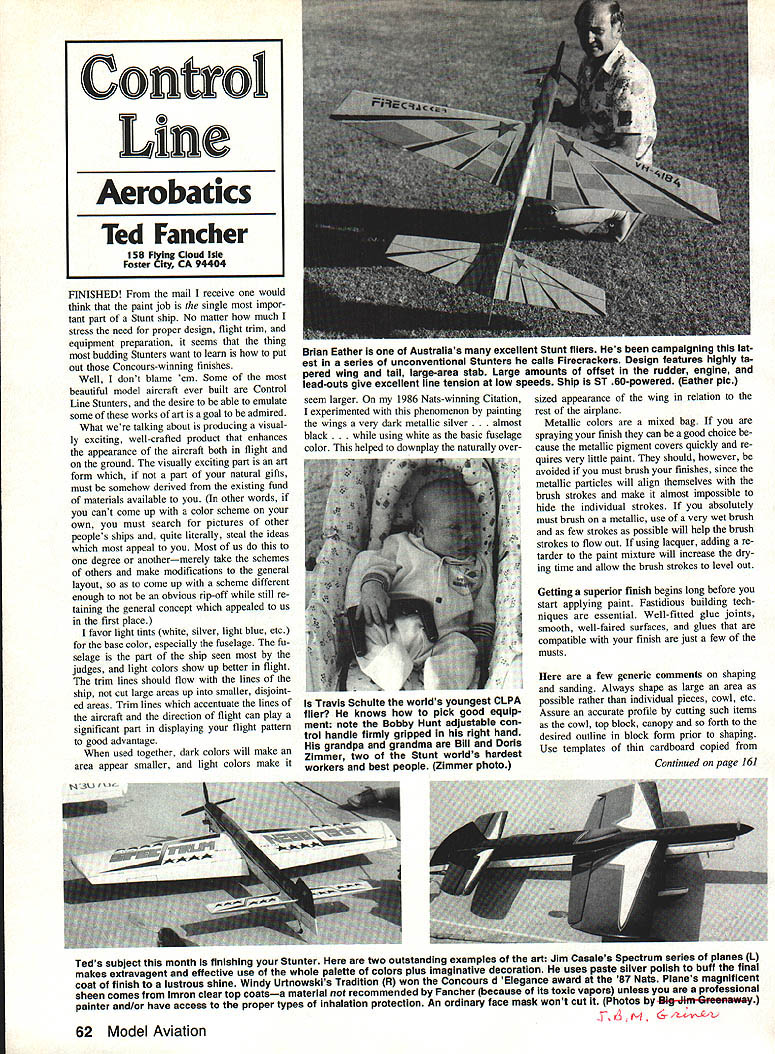
From the mail I receive one would think that the paint job is the single most important part of a Stunt ship. No matter how much I stress the need for proper design, flight trim, and equipment preparation, it seems that the thing most budding Stunters want to learn is how to put out Concours-winning finishes.
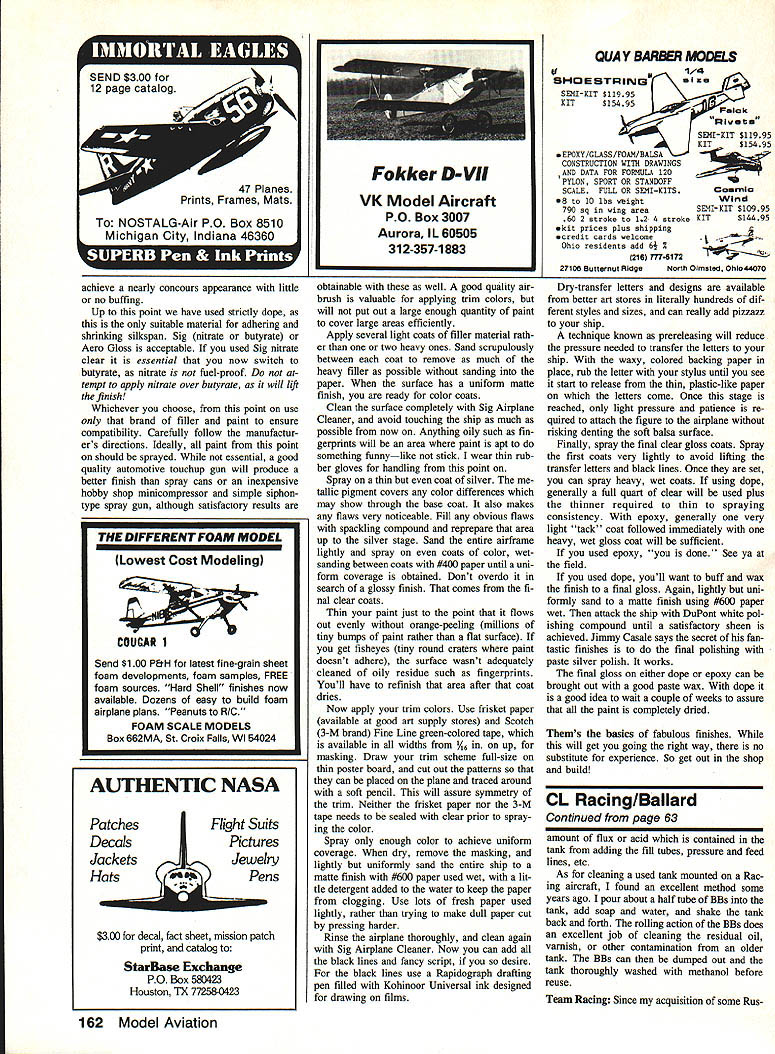
I don't blame them. Some of the most beautiful model aircraft ever built are Control Line Stunters, and the desire to emulate these works of art is a goal to be admired. What we're talking about is producing a visually exciting, well-crafted product that enhances the appearance of the aircraft both in flight and on the ground.
If visual design is not one of your natural gifts, derive ideas from existing sources. Search pictures of other ships and adapt schemes that appeal to you. Most of us borrow concepts and modify them enough to keep the general idea while avoiding an obvious rip-off.
Visual Design
Color choices
I favor light tints (white, silver, light blue, etc.) for the base color, especially the fuselage. The fuselage is what judges see most, and light colors show up better in flight. When used together, dark colors make an area appear smaller and light colors make an area appear larger. Use this phenomenon to correct proportions—for example, painting wings a very dark metallic while keeping the fuselage white can downplay an oversized wing.
Trim lines and flow
Trim lines should flow with the lines of the ship, not cut large areas up into smaller, disjointed parts. Trim lines that accentuate the aircraft's lines and the direction of flight can help display your flight pattern to good advantage.
Metallic colors
Metallics are a mixed bag:
- They cover quickly and require little paint if sprayed.
- Avoid metallics if you must brush them on—metallic particles align with brush strokes and reveal them.
- If brushing a metallic is unavoidable, use as few wet brush strokes as possible and add a retardant to increase drying time so strokes can level.
Preparation & Construction
Getting a superior finish begins long before you start applying paint. Fastidious building techniques are essential:
- Well-fitted glue joints.
- Smooth, well-faired surfaces.
- Use glues compatible with your chosen finish.
Shaping and sanding
- Always shape as large an area as possible rather than individual pieces. Prepare the cowl, top block, canopy, etc., cut to the desired outline in block form prior to shaping.
- Use templates of thin cardboard copied to your plan to duplicate the desired shape.
- Tack-glue the fuselage parts together (prior to installing the wing and tail) so the entire fuselage can be shaped as one unit. Protect areas you don't wish to sand with masking tape.
- Use a modeling/razor plane and shape from nose to tail in long, sweeping strokes. Count the number of passes on any segment and repeat the number on its symmetrical counterpart to ensure reasonable symmetry.
- When the shape is nearly as desired, refine with coarse sandpaper and work down to fine paper as the shape and surface finish are finalized.
- Glue sandpaper to various-sized dowels for shaping concave areas. Whenever possible, use a coarser sanding block to ensure uniform pressure.
Covering
For convenience, cover the wing and tail before final assembly:
- If using silkspan for a full-bore Pro Stunt finish or MonoKote-type coverings, do this prior to final assembly.
- If papering, overlap the center section to provide uniform rigidity for the full span.
- MonoKote coverings should be attached in 1/2- to 1-inch strips to avoid warping. Allow the leading and trailing edges to overlap the covering to assure sealing the edge.
Reinforcing the Nose and Fuel Areas
After assembling major components into a recognizable Stunt ship, cover the nose back to the high point of the wing with ultralight-weight fiberglass cloth, using Hobbypoxy Formula II glue thinned to brushing consistency with Hobbypoxy thinner. Use any excess to fuel-proof the engine and tank compartments. When the epoxy is thoroughly cured, sand lightly with medium paper to remove oily residue, then apply two full-strength coats of clear dope.
Cover the fuselage and vertical tail with lightweight silkspan. Apply paper one side at a time, using a spray bottle of water to moisten the paper as you mold it to the body.
Fillets (Epoxolite)
- Cut the tip off a large nylon glue gun, leaving about a 1/8-inch nozzle, and use this to apply the Epoxolite.
- Use a wet dowel for rough-shaping the fillet, and do the final modeling with a finger kept very wet to prevent dragging the fillet material.
- Epoxolite should be completely shaped while still uncured. Once cured, it is too hard to shape.
- Allow fillets to cure for two full days, then sand the fillet lightly with 400 paper used dry.
Finishes and Painting Tools
Decide on the type of finish:
- Clear lacquers such as Kleer or Aero Gloss are common.
- K&B Super-Poxy is a durable epoxy option I favor.
- Dope finishes are somewhat lighter and can be buffed to a high luster.
- Epoxy finishes are infinitely more durable and resist fuel and oil.
- Test all finishes on scrap prior to using them on your ship to check reaction to sun, fuel, or oil.
A good quality airbrush is valuable for applying trim colors, though it is not efficient for covering large areas.
Surface Preparation and Painting Steps
- Apply several light coats of filler material rather than one or two heavy ones. Sand scrupulously between each coat to remove as much heavier filler as possible without sanding into the paper.
- When the surface has a uniform matte finish, clean the surface completely with Sig Airplane Cleaner and avoid touching the ship. Anything oily (fingerprints, etc.) will prevent paint adhesion. Thin rubber gloves are useful from this point on.
- Spray on a thin but even coat of silver. Metallic pigment covers underlying color differences and makes the surface noticeable.
- Fill any obvious flaws with spackling compound and reprepare that area up to the silver stage.
- Sand the entire airframe lightly and spray two even coats of color, wet-sanding between coats with #400 paper until uniform coverage is obtained. Don't overdo it chasing gloss—final clear coats supply the gloss.
- Thin paint so it flows out evenly without orange-peeling. If you get fish-eyes (tiny round craters where paint doesn't adhere), the surface wasn't adequately cleaned of oily residue; refinish that area after the coat dries.
Masking, Trim Colors, and Fine Detail
- Use frisket paper and Scotch (3-M) Fine Line green-colored tape (available in widths from 1/16 inch up) for masking.
- Draw your trim scheme full-size on thin poster board and cut out patterns so they can be placed on the plane and traced with a soft pencil—this assures symmetry.
- Neither the frisket nor the 3-M tape needs sealing with clear prior to spraying the color.
- Spray only enough color to achieve uniform coverage. When dry, remove masking and lightly scuff the primed undercoat with very fine steel wool and retouch spots with a little color.
- Fine lines and letters may be done with a Rapidograph or a fine brush if desired.
Lines, Letters, and Transfers
- For black lines use a Rapidograph drafting pen filled with Koh-I-Noor Universal ink designed for drawing on films.
- Dry-transfer letters and designs are available in many styles and sizes and can add real pizzazz.
- Precreasing technique reduces transfer curling:
- With the waxy colored backing paper in place, rub the letter with the blunt end of a wooden stick to crease it slightly.
- Place the letter in position and burnish with a bone folder or the wrong end of a spoon.
- Peel the backing away at a shallow angle so as not to lift the letter.
Final Clear Coats, Buffing, and Waxing
- Rinse the airplane thoroughly and clean again with Sig Airplane Cleaner before applying black lines, transfers, and final clears.
- Spray the first clear coats very lightly to avoid lifting transfer letters and black lines. Once set, you can apply heavier coats.
- With lacquer clears, several light coats followed by a wet coat will give a very good result.
- If you used epoxy, you may need to use a thinner to get a smooth, tack-free film.
- If you used dope, buff to a brilliant gloss with a good paste compound and a soft wheel.
- For epoxy finishes, buff and wax to a final gloss: lightly buff uniformly with a fine compound and finish with a paste wax. Allow polish to dry, then wipe with a clean, soft cloth. Take care not to burn through the finish when buffing.
Safety
Some clear topcoats (e.g., Imron) give outstanding results but emit toxic vapors and should be sprayed only by a professional painter or with proper respiratory protection. Ordinary face masks are not adequate.
Conclusion
That's the basics of fabulous finishes. While this will get you going the right way, there is no substitute for experience. So get out in the shop and build!
Transcribed from original scans by AI. Minor OCR errors may remain.

