


Control Line: Aerobatics
Frank McMillan 12106 Gunter Grove San Antonio, TX 78231
Tuned Pipe Development
As anyone who has been around the Aerobatics events for much time at all will tell you, getting things to work well repeatedly is a function of skill, knowledge, perseverance, and lots of time. I can't think of anyone who has put more effort into developing new approaches to performance enhancement than Bill Werwage.
In the last few years Bill has been a leader in the development of tuned-pipe technology. No one has logged more air time with these setups, figuring out which combinations work reliably for everybody. Bill has been working with Randy Smith of Aero Products on next-generation tuned pipes. Randy and Bill have worked up a development program and Bill has performed the required testing.
The new pipes are constructed from woven carbon fiber and high-temperature epoxy resin. At first glance they are similar to previous versions, but they differ in many detailed improvements. The big difference is that they are shorter in overall length to get the weight distribution closer to the center of gravity. The geometry is altered to permit the shortening, and the pipes are fractionally lighter. Since Bill is personally constructing the pipes, the workmanship is flawless.
Testing the pipes has shown a power increase plus some less critical improvements. Right now I have one mounted in my test plane (my only plane) and am waiting for a reasonable day to get some flying in. The setup is the same one that Bill and Bob Hunt have spent so much time on: an OPS .40 rear-exhaust engine.
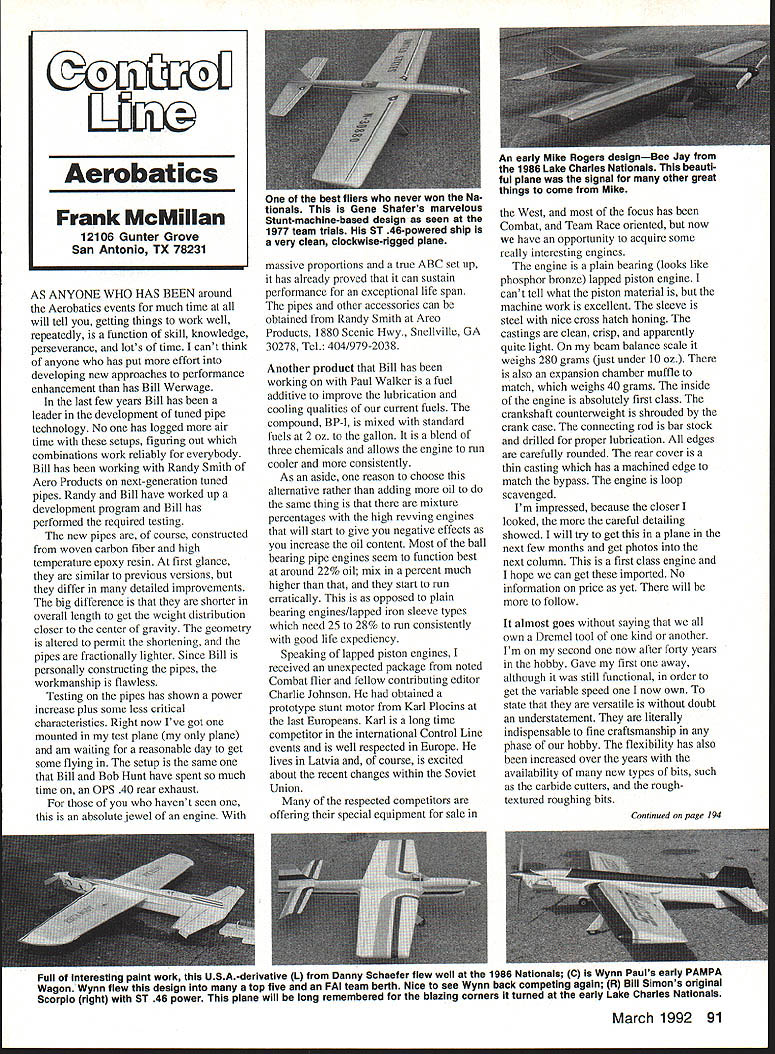
For those of you who haven't seen one, this is an absolute jewel of an engine. With massive proportions and a true ABC setup, it has already proved that it can sustain performance for an exceptional life span. The pipes and other accessories can be obtained from Randy Smith at Aero Products, 1880 Scenic Hwy., Snellville, GA 30278, Tel.: 404/979-2038.
Fuel Additive: BP-1
Another product that Bill has been working on with Paul Walker is a fuel additive to improve the lubrication and cooling qualities of our current fuels. The compound, BP-1, is mixed with standard fuels at 2 oz. per gallon. It is a blend of three chemicals and allows the engine to run cooler and more consistently.
As an aside, one reason to choose this alternative rather than adding more oil to the same mix is that there are mixture percentage limits with the high-revving engines that will start to give negative effects as you increase the oil content. Most of the ball-bearing pipe engines seem to function best at around 22% oil; mix in a percent much higher than that, and they start to run erratically. This is as opposed to plain-bearing engines/lapped-iron-sleeve types, which need 25–28% to run consistently with good life expectancy.
Imported Lapped-Piston Engine
Speaking of lapped-piston engines, I received an unexpected package from noted Combat flier and fellow contributing editor Charlie Johnson. He had obtained a prototype stunt motor from Karl Plocins at the last Europeans. Karl is a long-time competitor in the international Control Line events and is well respected in Europe. He lives in Latvia and, of course, is excited about the recent changes within the Soviet Union.
Many of the respected competitors are offering their special equipment for sale in the West, and most of the focus has been Combat and Team Race oriented, but now we have an opportunity to acquire some really interesting engines.
The engine is a plain-bearing (looks like phosphor bronze) lapped-piston unit. I can't tell what the piston material is, but the machine work is excellent. The sleeve is steel with nice cross-hatch honing. The castings are clean, crisp, and apparently quite light. On my beam-balance scale it weighs 280 grams (just under 10 oz.). There is also an expansion-chamber muffle to match, which weighs 40 grams. The inside of the engine is absolutely first class. The crankshaft counterweight is shrouded by the crankcase. The connecting rod is bar stock and drilled for proper lubrication. All edges are carefully rounded. The rear cover is a thin casting and has a machined edge to match the bypass. The engine is loop-scavenged.
I'm impressed: the closer I looked, the more the careful detailing showed. I will try to get this in a plane in the next few months and get photos into the next column. This is a first-class engine and I hope we can get these imported. No information on price as yet. There will be more to follow.
Tools and Maintenance
It almost goes without saying that we all own a Dremel tool of one kind or another. I'm on my second one now after forty years in the hobby. I gave my first one away, although it was still functional, in order to get the variable-speed one I own now. To state that they are versatile is an understatement. They are literally indispensable to fine craftsmanship in any phase of our hobby. The flexibility has also increased over the years with the availability of many new types of bits, such as carbide cutters and roughing bits.
Motor Brush Repair
If your motor's power or rpm drops noticeably — barring an accident like dropping it or not lubricating the shafts — the chances are good that the problem is with the brushes on the motor. To service the brushes:
- Unplug the unit and unscrew the end caps.
- Carefully remove the brushes. They are blocks of soft carbon on the end of a spring.
- Examine the brush ends. You will probably see a pronounced concave wear at the end; this reduces effective contact and prevents the motor from reaching full rpm.
- Use a flat sanding block or file to remove the soft material on the end until the brush is flat and square with the sides.
- Reinsert the brushes and run the tool. You may notice only a slight improvement for the first few minutes, but after that your Dremel should run like new.
You should be able to perform this repair several times before replacing the brushes.
Extending Bit Life
Another thought is on the expensive bits we use and the possibility of extending their life spans. The copper-colored, rough-textured cutters work well on balsa and hardwood, but they get hot and will pick up CA glue on the surface as the tool is passed through joints and filler areas. The accumulation renders the tool progressively less effective.
What I've done to overcome this is:
- Soak the bit in either nitromethane or a commercially available debonding solution.
- Hit the bit with a wire brush.
You may have to repeat this a few times to completely clear the tooling. I wouldn't recommend using heat to clear CA or epoxy, as it is likely to damage the tooling.
Safety and Toxic Materials
Because I'm concerned about safety — and know from years of flying the "real" planes that safety doesn't just happen — it's a state of mind you must be conscious of and practice just as you do your patterns.
The other day I received a call asking if I knew about the toxic nature of "Imron," since I had mentioned its use in the column. Let there be no doubt: yes, I do — that's why it was in the column. All the two-part coatings are toxic to some degree and many of the effects are cumulative. Imron and the Cronar series clear coats, among others, are marvelous materials, but I don't recommend using them casually. They are for professional use only and require special equipment.
As I mentioned previously, I have experienced the effects of Imron and epoxy. I would not recommend that to anyone. Be overcautious in using safety equipment like goggles and proper respirators when painting. Follow directions, and if you are in doubt, do not use the material.
March 1992 — Aerobatics — Frank McMillan, 12106 Gunter Grove, San Antonio, TX 78231
Transcribed from original scans by AI. Minor OCR errors may remain.

