
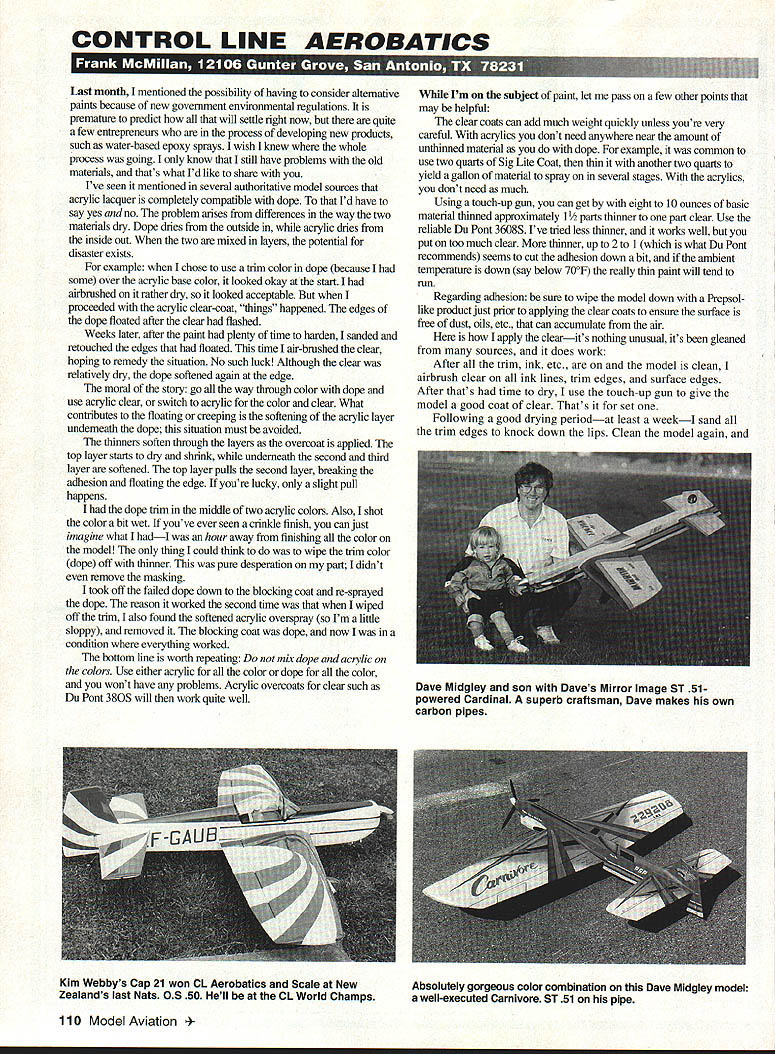
Control Line Aerobatics
Frank McMillan 12106 Gunter Grove, San Antonio, TX 78231
Paint compatibility: dope vs. acrylic
Last month I mentioned the possibility of having to consider alternative paints because of new government environmental regulations. It is premature to predict how all that will settle right now, but there are quite a few entrepreneurs developing new products, such as water-based epoxy sprays. I wish I knew where the whole process was going. I only know that I still have problems with the old materials, and that's what I'd like to share.
I've seen it stated in several authoritative model sources that acrylic lacquer is completely compatible with dope. To that I'd have to say: yes and no. The problem arises from differences in the way the two materials dry. Dope dries from the outside in, while acrylic dries from the inside out. When the two are mixed in layers, the potential for disaster exists.
Example: I used a trim color in dope over an acrylic base color. At first it looked acceptable — I airbrushed it on rather dry. But when I applied an acrylic clear coat, the edges of the dope floated after the clear had flashed. Weeks later, after the paint had had plenty of time to harden, I sanded and retouched the floated edges. I airbrushed clear again hoping to remedy the situation. No such luck — although the clear was relatively dry, the dope softened again at the edges.
Moral: go all the way through color with dope and use acrylic clear, or switch to acrylic for both color and clear. What contributes to the floating or creeping is the softening of the acrylic layer underneath the dope; this situation must be avoided.
Why edges float
- Thinners in the overcoat soften underlying layers as the overcoat is applied.
- The top layer starts to dry and shrink while the second and third layers underneath are still softened.
- The top layer pulls the softened layer, breaking adhesion and causing the edge to float.
- If you’re lucky, only a slight pull happens; if not, you get a crinkled or floated finish.
In my case I had dope trim sandwiched between two acrylic colors and I shot the color a bit wet. The result was a crinkled finish — I was an hour away from finishing all the color on the model. In desperation I wiped the trim dope off with thinner without removing the masking. That worked because I also removed the softened acrylic overspray and exposed the dope blocking coat beneath. I re-sprayed the dope and everything worked the second time.
Bottom line: Do not mix dope and acrylic for color. Use either acrylic for all the color or dope for all the color, and you won't have problems. Acrylic overcoats for clear, such as DuPont 380S, will then work well.
Clear coats and thinning
Some practical points:
- Clear coats can add a lot of weight quickly unless you're careful.
- With acrylics you don't need nearly as much unthinned material as with dope. For example, it was common to use two quarts of Sig Lite-Coat and thin it with another two quarts to yield a gallon. With acrylics you don't need that volume.
- Using a touch-up gun, you can get by with 8 to 10 ounces of basic material thinned approximately 1.5 parts thinner to 1 part clear. Use a reliable thinner such as DuPont 36085.
- I’ve tried less thinner and it works, but you risk putting on too much clear. More thinner, up to 2:1 (DuPont's recommendation), seems to reduce adhesion somewhat, and if ambient temperature is below about 70°F the really thin paint will tend to run.
Regarding adhesion: be sure to wipe the model down with a Prepsol-like product just prior to applying clear coats to remove dust, oils, etc., that can accumulate from the air.
How I apply clear
- After all trim, ink, etc., are on and the model is clean, airbrush clear on ink lines, trim edges and surface edges. Let this dry.
- Use a touch-up gun to give the model a good coat of clear. That completes set one.
- Allow a good drying period — at least a week.
- Sand all the trim edges to knock down the lips. Clean the model again.
- Shoot the final clear.
Blocking coat
A blocking coat is a color used to provide a uniform surface so your final color will be consistent. After working sanding sealers (which can be many shades), a blocking coat provides uniformity and also shows surface flaws so they can be corrected.
For many years I used Sig silver concentrated by removing some of the clear. It worked well to show finish flaws, sealed the surface, covered extremely well, and — if kept thin — was light.
Recently I've used a method recommended by Bill Werwage and Randy Smith: Sig Polar Gray. Polar Gray has very good coverage, sands surprisingly well, and dries to a glossy surface. I prefer it to the silver.
A tip for Polar Gray (I haven't tried this but it should work): mix one part Polar Gray to two parts white. The brightness of the white is diminished only slightly, but the uniformity and depth of coverage improve significantly.
Propellers — tips on pitch profiles
For some time I had trouble getting two-blade composite props to perform as well as expected in hot weather. I repitched props to a constant pitch, changed tip shape, and changed diameter. There were improvements, but line tension diminished above about 45° (while three-bladed props retained tension).
The solution was in the pitch profile. Most standard props decrease in pitch at the outer stations (outer third of the blade). I had been repitching to a specific pitch — four inches, for example — and maintaining it to the tip. That helped, but the real breakthrough came when I remembered a conversation with Bill Werwage about tweaking tips.
I changed to a profile where the outer two stations were set to 4.2 inches instead of a constant four. The change was dramatic: speed and line tensions became constant. Since then I’ve varied base pitch but kept the tips pitched slightly more, and this approach has worked extremely well.
Why it works: the tips are thin and tend to de-pitch slightly under high RPM. A slightly increased pitch at the tips compensates for this effect. I know this works, so I encourage those of you who repitch to try it.
Transcribed from original scans by AI. Minor OCR errors may remain.

