
CONTROL LINE AEROBATICS
Frank McMillan, 12106 Gunter Grove, San Antonio, TX 78231
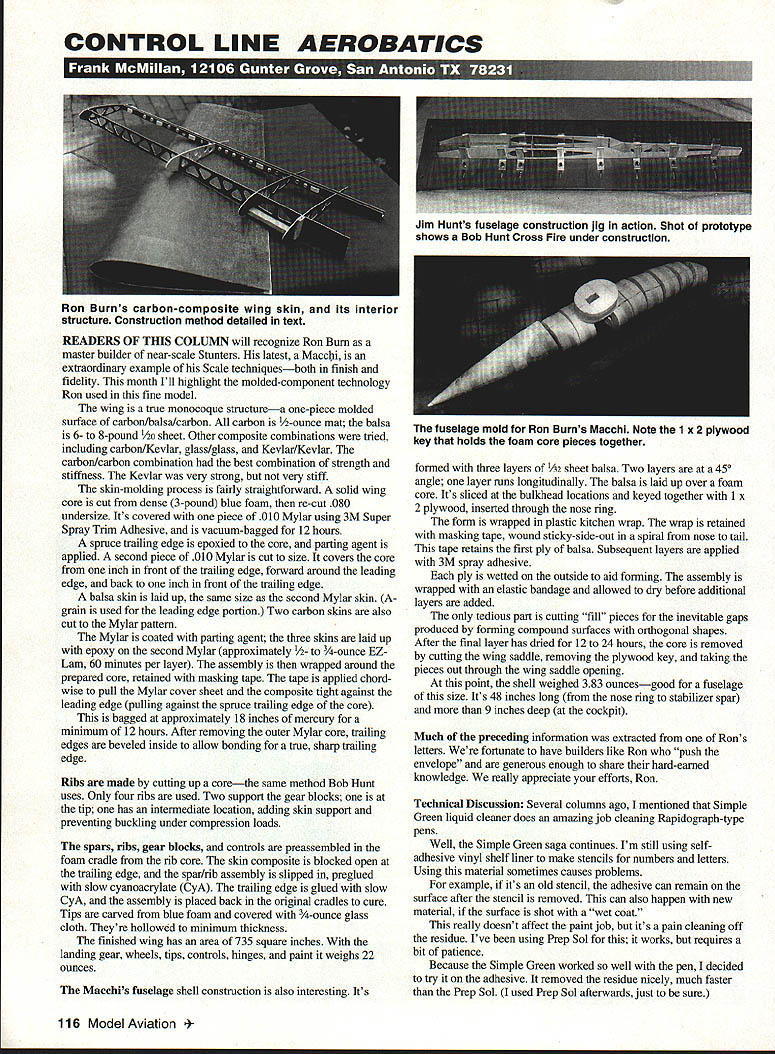
Readers of this column will recognize Ron Burn as a master builder of near-scale Stunters. His latest, a Macchi, is an extraordinary example of his scale techniques—both in finish and fidelity. This month I'll highlight the molded-component technology Ron used in this fine model.
The wing is a true monocoque structure—a one-piece molded surface of carbon/balsa/carbon. All carbon is 1/2-ounce mat; the balsa is 6- to 8-pound 1/20-inch sheet. Other composite combinations were tried, including:
- carbon/Kevlar
- glass/glass
- Kevlar/Kevlar
The carbon/carbon combination had the best balance of strength and stiffness. The Kevlar was very strong, but not very stiff.
The skin-molding process is fairly straightforward:
- A solid wing core is cut from dense (3-pound) blue foam, then re-cut .080 inch undersize. It's covered with one piece of .010 Mylar using 3M Super Spray Trim Adhesive, and vacuum-bagged for 12 hours.
- A spruce trailing edge is epoxied to the core, and a parting agent is applied. A second piece of .010 Mylar is cut to size. It covers the core from one inch in front of the trailing edge, forward around the leading edge, and back to one inch in front of the trailing edge.
- A balsa skin is laid up the same size as the second Mylar skin (A-grain is used for the leading-edge portion). Two carbon skins are also cut to the Mylar pattern.
- The Mylar is coated with parting agent; the three skins are laid up with epoxy on the second Mylar (approximately 1/2- to 3/4-ounce EZ-Lam, 60 minutes per layer). The assembly is then wrapped around the prepared core and retained with masking tape. The tape is applied chordwise to pull the Mylar cover and the composite tight against the leading edge (pulling against the spruce trailing edge of the core).
- The assembly is bagged at approximately 18 inches of mercury for a minimum of 12 hours. After removing the outer Mylar, core trailing edges are beveled inside to allow bonding for a true, sharp trailing edge.
Ribs are made by cutting up a core—the same method Bob Hunt uses. Only four ribs are used:
- two support the gear blocks
- one is at the tip
- one has an intermediate location, adding skin support and preventing buckling under compression loads
The spars, ribs, gear blocks, and controls are preassembled in the foam cradle from the rib core. The skin composite is blocked open at the trailing edge, and the spar/rib assembly is slipped in, preglued with slow cyanoacrylate (CyA). The trailing edge is glued with slow CyA, and the assembly is placed back in the original cradles to cure. Tips are carved from blue foam and covered with 3/4-ounce glass cloth. They're hollowed to minimum thickness.
The finished wing has an area of 735 square inches. With the landing gear, wheels, tips, controls, hinges, and paint it weighs 22 ounces.
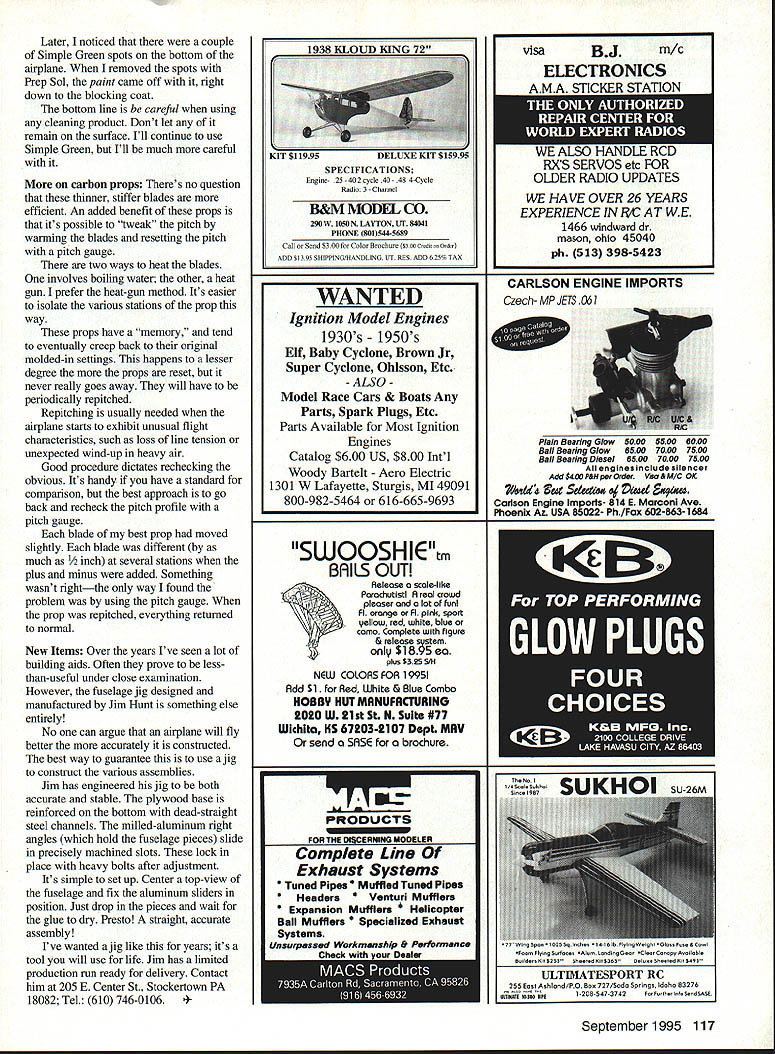
The Macchi's fuselage shell construction is also interesting. It's formed with three layers of 1/32-inch sheet balsa. Two layers are at a 45° angle; one layer runs longitudinally. The balsa is laid up over a foam core and sliced at the bulkhead locations, then keyed together with 1 x 2 plywood inserted through the nose ring.
Construction details:
- The form is wrapped in plastic kitchen wrap. The wrap is retained with masking tape, wound sticky-side-out in a spiral from nose to tail. This tape retains the first ply of balsa.
- Subsequent layers are applied with 3M spray adhesive. Each ply is wetted on the outside to aid forming.
- The assembly is wrapped with elastic bandage and allowed to dry before additional layers are added.
- The only tedious part is cutting "fill" pieces for the inevitable gaps produced by forming compound surfaces with orthogonal shapes.
After the final layer has dried for 12 to 24 hours, the core is removed by cutting the wing saddle, removing the plywood key, and taking the pieces out through the wing-saddle opening. At this point the shell weighed 3.83 ounces—good for a fuselage of this size. It's 48 inches long (from the nose ring to the stabilizer spar) and 9 inches deep at the cockpit.
Much of the preceding information was extracted from one of Ron's letters. We're fortunate to have builders like Ron who "push the envelope" and are generous enough to share their hard-earned knowledge. We really appreciate your efforts, Ron.
Technical Discussion
Several columns ago I mentioned that Simple Green liquid cleaner does an amazing job cleaning Rapidograph-type pens. Well, the Simple Green saga continues.
I'm still using self-adhesive vinyl shelf liner to make stencils for numbers and letters. Using this material sometimes causes problems: if it's an old stencil, the adhesive can remain on the surface after the stencil is removed. This can also happen with new material if the surface is shot with a wet coat. It really doesn't affect the paint job, but it's a pain cleaning off residue. I've been using Prep Sol for this; it works, but requires a bit of patience.
Because Simple Green worked so well with the pen, I decided to try it on adhesive residue. It removed the residue nicely, much faster than Prep Sol. (I used Prep Sol afterwards, just to be sure.) Later, I noticed a couple of Simple Green spots on the bottom of the airplane. When I removed the spots with Prep Sol, the paint came off with it, right down to the blocking coat.
The bottom line: be careful when using any cleaning product. Don't let any of it remain on the surface. I'll continue to use Simple Green, but I'll be much more careful with it.
More on carbon props: there's no question that these thinner, stiffer blades are more efficient. An added benefit is that it's possible to "tweak" the pitch by warming the blades and resetting the pitch with a pitch gauge.
There are two common ways to heat the blades:
- boiling water
- a heat gun
I prefer the heat-gun method; it's easier to isolate the various stations of the prop this way.
These props have a "memory" and tend to eventually creep back to their original molded-in settings. This happens to a lesser degree the more the props are reset, but it never really goes away. They will have to be periodically repitched.
Repitching is usually needed when the prop starts to exhibit unusual flight characteristics, such as:
- loss of line tension
- unexpected wind-up in heavy air
Good procedure dictates rechecking the obvious. It's handy if you have a standard for comparison, but the best approach is to go back and recheck the pitch profile with a pitch gauge. Each blade of my best prop had moved slightly. Each blade was different (by as much as 1/2 inch) at several stations when the plus and minus were added. Something wasn't right—the only way I found the problem was by using the pitch gauge. When the prop was repitched, everything returned to normal.
New Items
Over the years I've seen a lot of building aids. Often they prove to be less-than-useful under close examination. However, the fuselage jig designed and manufactured by Jim Hunt is something else entirely.
No one can argue that an airplane will fly better the more accurately it is constructed. The best way to guarantee this is to use a jig to construct the various assemblies.
Jim has engineered his jig to be both accurate and stable. The plywood base is reinforced on the bottom with dead-straight steel channels. The milled-aluminum right angles (which hold the fuselage pieces) slide in precisely machined slots. These lock in place with heavy bolts after adjustment.
It's simple to set up: center a top view of the fuselage and fit the aluminum sliders in position. Just drop in the pieces and wait for the glue to dry. Presto! A straight, accurate assembly.
I've wanted a jig like this for years; it's a tool you will use for life. Jim has a limited production run ready for delivery. Contact him at: Jim Hunt 205 E. Center St. Stockertown, PA 18082 Tel.: (610) 746-0106
Transcribed from original scans by AI. Minor OCR errors may remain.

