
CONTROL LINE AEROBATICS
Frank McMillan 12106 Gunter Grove, San Antonio TX 78231
Introduction
For most of my modeling life I've been fascinated by the superb transparent finishes common in free flight; the colors are beautiful and the sun shining through the structure gives me a thrill. I realize that plastic films can accomplish this, but I'm going toward the more traditional methods.
With the exploding popularity of Old Time and Classic events, I was looking for a procedure with which to cover and finish transparent surfaces to high standards. For those of you who haven't tried a sealed finish, it requires quite a few coats of dope. My experience has been that it's difficult to get a good surface seal against heavy fuel exposure with a clear finish. Covering with dyed tissue requires quite a bit of technique and practice to get a high-quality job, free of visible seams and overlaps. Some of you who have tried it know that it takes time and effort, so I was looking for a better way.
The more I thought about my goal, the more convinced I became that a combination of several techniques was the most promising.
Using Polyspan
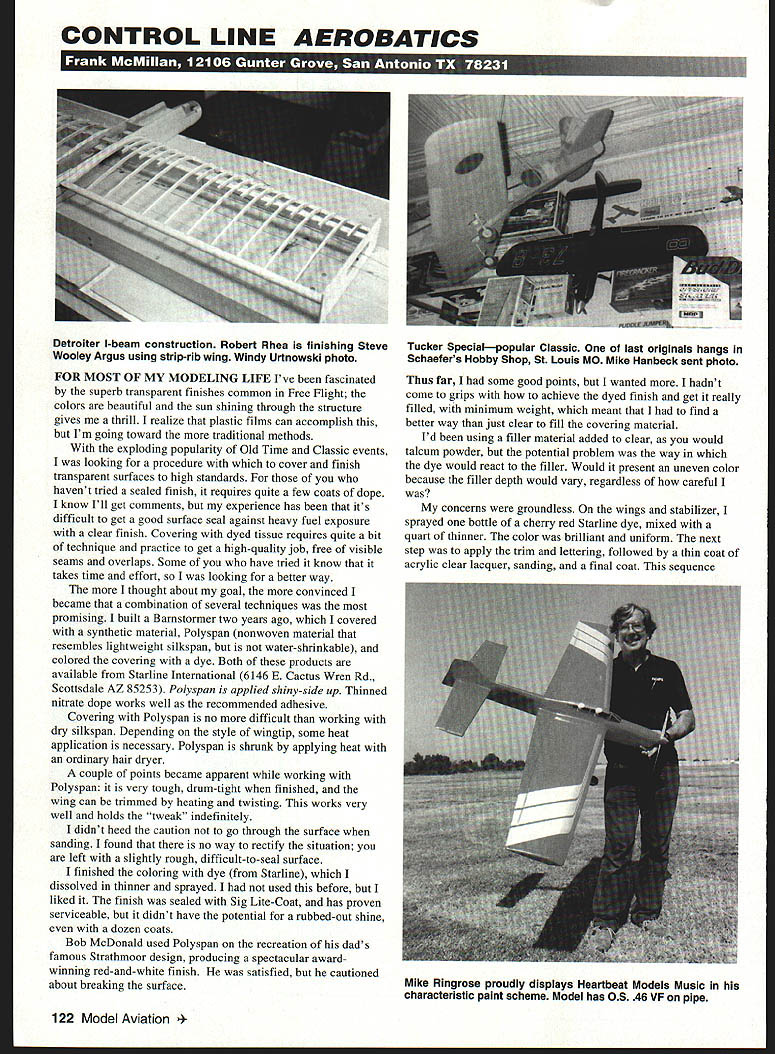
I built a Barnstormer two years ago, which I covered with a synthetic material, Polyspan (a nonwoven material that resembles lightweight silkspan, but is not water-shrinkable), and colored the covering with a dye. Both products are available from Starline International, 6146 E. Cactus Wren Rd., Scottsdale AZ 85253. Polyspan is applied shiny-side up. Thinned nitrate dope works well as the recommended adhesive.
Covering with Polyspan is no more difficult than working with dry silkspan. Depending on the style of wingtip, some heat application is necessary. Polyspan is shrunk by applying heat with an ordinary hair dryer.
A couple of points became apparent while working with Polyspan: it is very tough, drum-tight when finished, and the wing can be trimmed by heating and twisting. This works very well and holds the "tweak" indefinitely.
I didn't heed the caution not to go through the surface when sanding. I found that there is no way to rectify the situation; you are left with a slightly rough, difficult-to-seal surface.
Bob McDonald used Polyspan on the recreation of his dad's famous Strathmoor design, producing a spectacular award-winning red-and-white finish. He was satisfied, but he cautioned about breaking the surface.
Dyeing and Sealing
I finished the coloring with dye (from Starline), which I dissolved in thinner and sprayed. I had not used this before, but I liked it. The finish was sealed with Sig Lite-Coat and has proven serviceable, but it didn't have the potential for a rubbed-out shine, even with a dozen coats.
Thus far, I had some good points, but I wanted more. I hadn't come to grips with how to achieve the dyed finish and get it really filled, with minimum weight, which meant that I had to find a better way than just clear to fill the covering material.
I'd been using a filler material added to clear, as you would talcum powder, but the potential problem was the way in which the dye would react to the filler. Would it present an uneven color because the filler depth would vary, regardless of how careful I was?
My concerns were groundless. On the wings and stabilizer, I sprayed one bottle of a cherry-red Starline dye, mixed with a quart of thinner. The color was brilliant and uniform. The next step was to apply the trim and lettering, followed by a thin coat of acrylic clear lacquer, sanding, and a final coat. This sequence gave an excellent, very lightweight surface finish.
A side effect of using dye is that successive coats have a tendency to bleed through the top color. When laying out the color scheme, take into account the way the dye will show through; use the dye exactly as you want it to appear. You can use trim paint on top. Dye selection is important: gold, silver and black work fine.
To digress on filler again, the material I used was a zinc compound, extremely fine, which means it mixes well and uniformly. A filler like talc is exceptionally light. I've used the zinc filler on four airplanes and doubt it is the best I've experienced, but the powders sand well and the paints I've used adhere well. I prefer to spray a coat sufficient to fill open-bay structures, then smooth out with 0000 steel wool. The commercial name is Aero-1, available from Aero Products, 1880 Scenic Hwy., Snellville, GA 30278.
Engine Timing and Tools
I frequently mention the importance of a good-running engine. Individual engines must be retimed; modifications are best left to experts who specialize in setting up precision engines specifically for stunt. However, I have the spirit of adventure to investigate engine timing and other related factors.
In his video, Stunt Magazine's Bob Hunt presents RC Pattern columnist Dean Pappas, who takes you step-by-step through the retiming process. To correctly retime, several tools are required:
- A good dial caliper.
- A means of measuring the timing in degrees of crankshaft rotation, which requires a degree wheel and fixtures that can accurately and repeatedly display measurements.
In most cases, these devices were homemade using a modified protractor and improvised fixtures. Last year I ran across a superb commercially available unit made by Hyperformance Products (Box 5542, Fullerton, CA 92838-0542; Tel./Fax: (714) 952-3530). The heart of the package is an anodized hard-aluminum degree wheel, accompanied by two fixtures:
- One to hold the pointer for reading the degree wheel.
- The other to determine Top Dead Center on the piston—an important point.
There is also a complete instruction sheet describing measurement techniques, with illustrations on timing tables. I highly recommend this unit—it's the best that I've seen.
Thanks and Resources
It's been several years since Mary Gebhart and Bob Hazel assumed responsibility for Pampa Products. They have selflessly given time and energy in a position that gets little visibility. You can find them at the major contests with model engines, plentiful supplies and warm smiles. Sincere thanks for a job well done.
For plans, back issues, etc., contact Mary and Bob at Pampa Products, Box 2026, Loomis, CA 95650-2026; Fax: (916) 729-3289; Compuserve: 104412,3154; Voice mail: (916) 721-4328.
Correction
In the May 1997 issue, the SV12 identified as belonging to Gene Martine was actually constructed and flown by Dave Helmstrought of South Carolina, a longtime Nationals competitor. My apologies to both parties.
Transcribed from original scans by AI. Minor OCR errors may remain.

