
CONTROL LINE AEROBATICS
Frank McMillan, 12106 Gunter Grove, San Antonio TX 78231
Volunteers and Competition
When I think of the big competitive events — the Nationals, the Team Trials, the Vintage Stunt Championships, etc. — the people who usually come to mind are the winners or the unusual performers. However, I'd like to express gratitude, on behalf of the Stunt community, to the volunteers who make the competitions happen. Events running so efficiently are a tribute to their dedication, talent, and selflessness. Warren Tiahrt, Bruce Gifford, JoAnn Keville, Shareen Fancher, Lila Lee, and the superior cadre of judges — led and trained for many years by Dave Cook and Gary McClellan — are but a few.
As you reflect on the 1997 competition, remember that the results reflect what you, as a flier, did. If they were not what you expected, so be it. You had the same opportunity as everyone else. Celebrate the competition; it's the best it's ever been, and it keeps getting better because of dedicated volunteers.
A project that changed my building
I read an editorial in The Home Shop Machinist about a longtime contributor who died but left a legacy of always trying to extend himself in his projects. I had a similar experience years ago with the Martin Baker MB-5.
In 1977 the design was well beyond any project I had ever attempted. It was a Rabe-type molded-shell fuselage with dihedral wing and shock gear. I had never done many of the things required to make this design fly. There were major fixtures to construct, new techniques for jigs, and an accurate scalelike finish to apply, with all associated detailing. Time required to complete the model was estimated at more than 800 hours, and, above all, it had to be light.
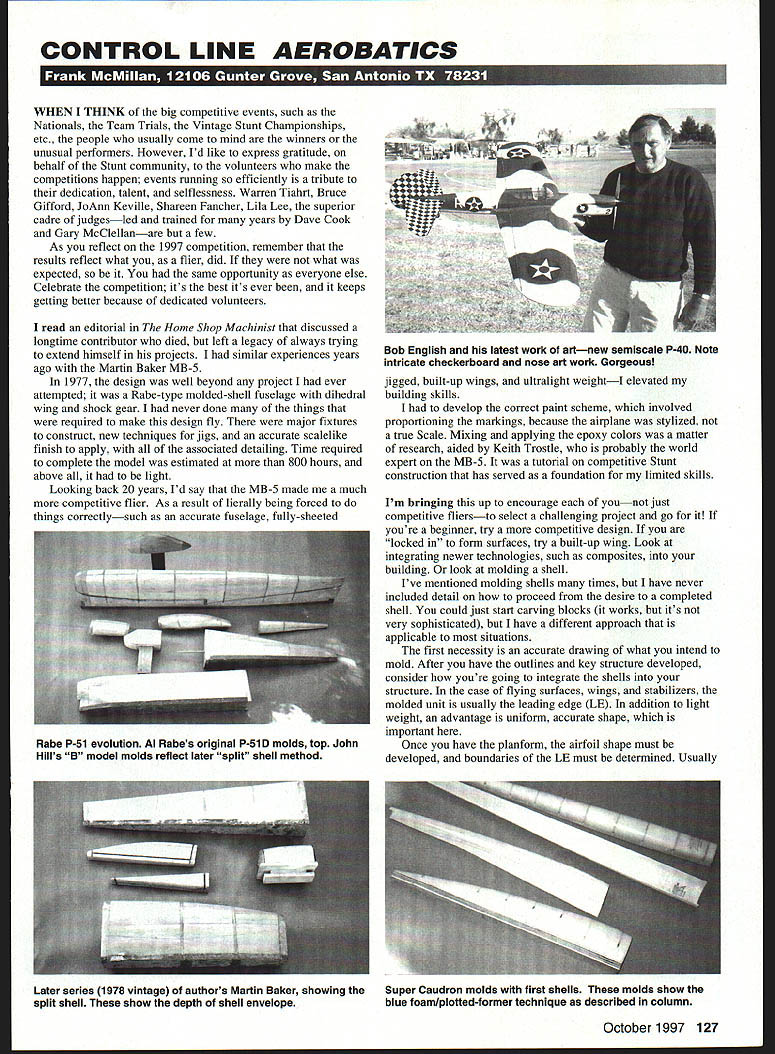
Looking back 20 years, I'd say the MB-5 made me a much more competitive flier. Being forced to do things correctly — such as an accurate fuselage, fully sheeted and jigged, built-up wings, and ultralight weight — elevated my building skills.
I had to develop the correct paint scheme, which involved proportioning the markings because the airplane was stylized, not a true Scale. Mixing and applying the epoxy colors involved research, aided by Keith Trostle, who is probably the world expert on the MB-5. It was a tutorial on competitive Stunt construction that has served as a foundation for my limited skills.
Pick a stretch project
I'm bringing this up to encourage each of you — not just competitive fliers — to select a challenging project and go for it. If you're a beginner, try a more competitive design. If you are "locked in" to formed surfaces, try a built-up wing. Look at integrating newer technologies, such as composites, into your building. Or look at molding a shell.
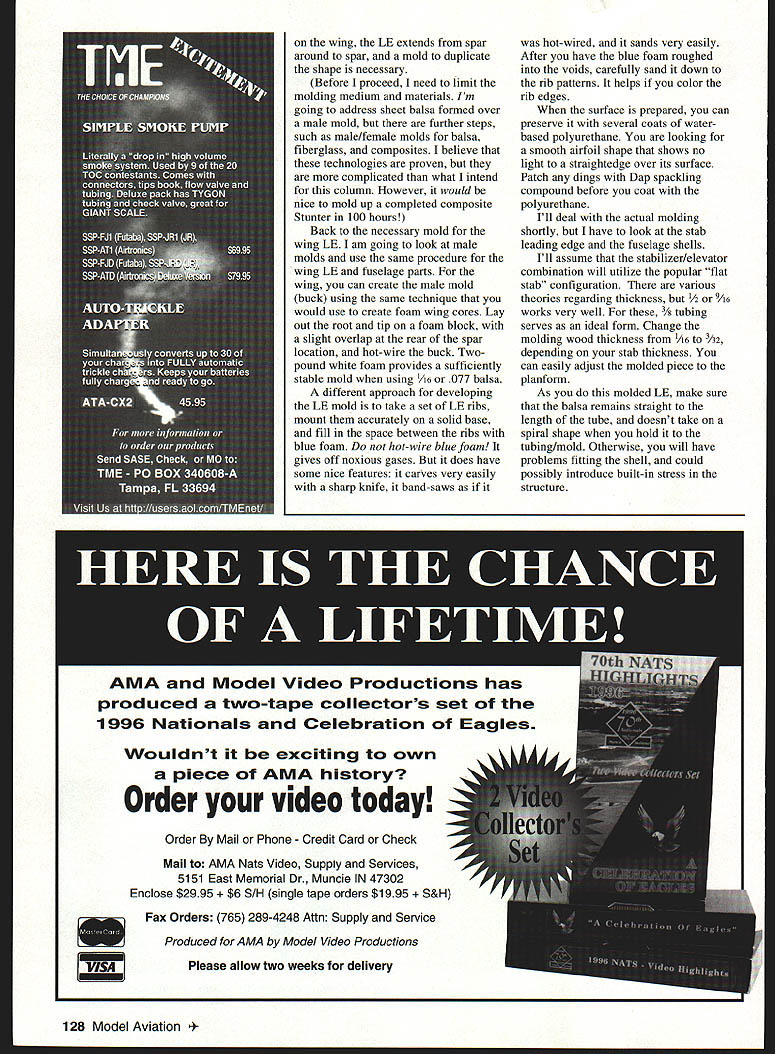
I've mentioned molding shells many times, but I have never included details on how to proceed from desire to a completed shell. You could just start carving blocks (it works, but it's not very sophisticated), but I have a different approach that is applicable to most situations.
Molding shells — overview
The first necessity is an accurate drawing of what you intend to mold. After you have the outlines and key structure developed, consider how you're going to integrate the shells into the structure. In the case of flying surfaces (wings and stabilizers), the molded unit is usually the leading edge (LE). In addition to light weight, an advantage is uniform, accurate shape, which is important.
Once you have the planform, the airfoil shape must be developed and the boundaries of the LE must be determined. Usually, on the wing, the LE extends from spar around to spar, and a mold to duplicate the shape is necessary.
(Before I proceed, I need to limit the molding medium and materials. I'm going to address sheet balsa formed over a male mold, though there are further steps, such as male/female molds for balsa, fiberglass, and composites. Those technologies are proven but more complicated than what I intend for this column.)
Wing LE molds
For the wing LE I look at male molds (bucks) and use the same procedure for wing and fuselage parts. For the wing you can create the male mold using the same technique used to create foam wing cores:
- Lay out the root and tip on a foam block, with a slight overlap at the rear of the spar location, and hot-wire the buck.
- Two-pound (2 lb) white foam provides a sufficiently stable mold when using 1/16-inch or 0.077-inch balsa.
A different approach for developing the LE mold is to take a set of LE ribs, mount them accurately on a solid base, and fill the spaces between the ribs with blue foam. Do not hot-wire blue foam — it gives off noxious gases. But it carves very easily with a sharp knife, band-saws as if it were hot-wired, and sands very easily. After you have the blue foam roughed into the voids, carefully sand it down to the rib patterns. It helps if you color the rib edges.
When the surface is prepared, preserve it with several coats of water-based polyurethane. You are looking for a smooth airfoil shape that shows no light to a straightedge over its surface. Patch any dings with Dap spackling compound before you coat with polyurethane.
Stabilizer LE and fuselage molds
I'll deal briefly with the stab leading edge and the fuselage shells.
Assume the stabilizer/elevator combination will use the popular "flat stab" configuration. There are various theories regarding thickness, but 1/2 inch or 9/16 inch works very well. For these, 3/8-inch tubing serves as an ideal form. Change the molding tool thickness from 1/16-inch to 3/32-inch, depending on your stab thickness. You can easily adjust the molded piece to the planform.
As you do this molded LE, make sure the balsa remains straight along the length of the tube and doesn't take on a spiral shape when held to the tube/mold. Otherwise you will have problems fitting the shell and could possibly introduce built-in stress in the structure.
To develop molds for fuselage shells, you have to do accurate drafting. This starts with a good side view, from which you derive the height of the forms. Then do a good top view, best located above or below the side view, to get the width. Remember to include all interior structure that will impinge on the formers (engine mounts, doublers, etc.).
Consider former spacing. Preference depends on how much you intend the fuselage shape to change. Where the shape changes — a decision you must make — you need more/closer-spaced formers. However, the shell can only move so much; the mold must accurately reflect the shape you want.
Position the formers where you want on the side view. They are necessary to provide a good, smooth shape between stations. I suggest that at least on the top, you design a forward and an aft section joined over a special former located between the wing hinge line and the wing high point.
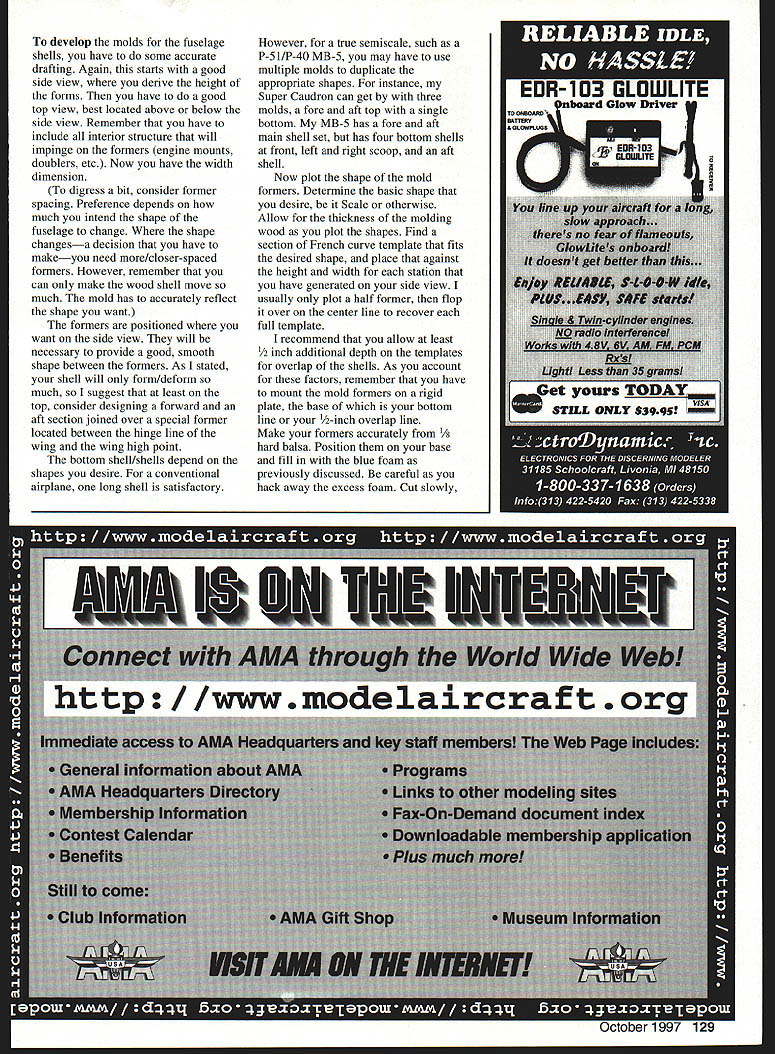
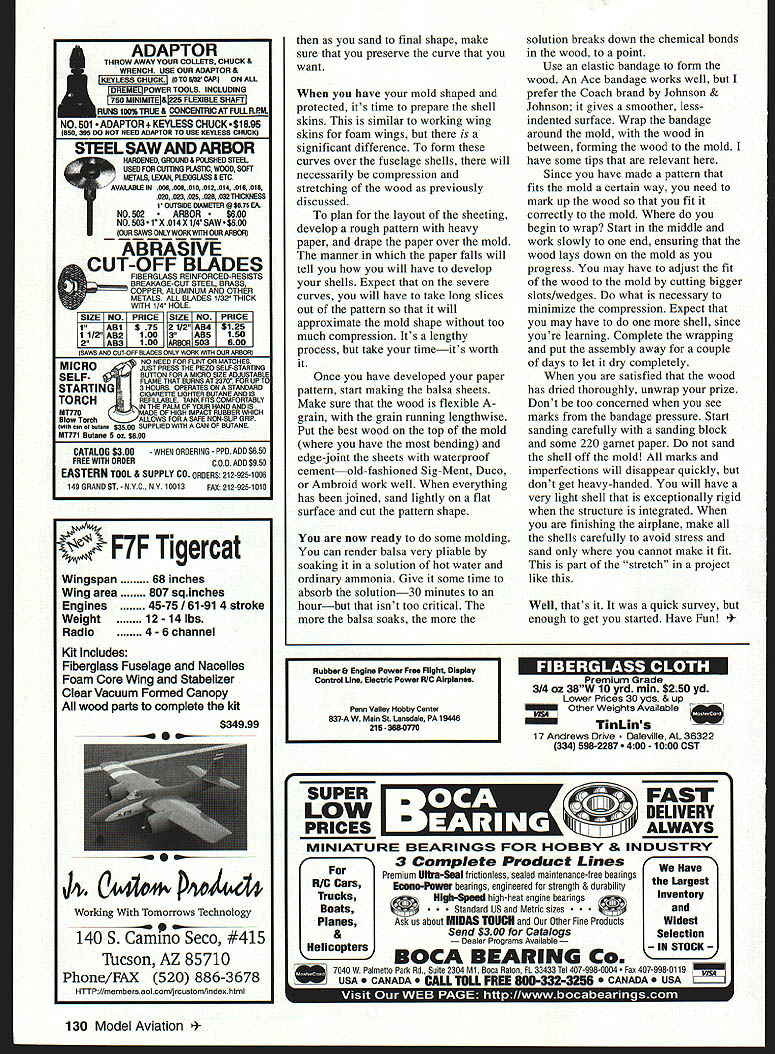
The bottom shell or shells depend on the shapes you desire. For a conventional airplane, one long bottom shell is satisfactory. For a true semiscale (P-51, P-40, MB-5), you may need multiple molds to duplicate the appropriate shapes. For instance, my Super Caudron gets by with three molds — a fore and aft top with a single bottom. My MB-5 has a fore and aft main shell set but has four bottom shells at the front: left and right scoops, and an aft shell.
Now plot the shape of the mold formers. Determine the basic shape you desire, be it Scale or otherwise. Allow for the thickness of the molding wood as you plot the shapes. Find a section of French curve template that fits the desired shape and place that against the height and width for each station generated on your side view. I usually plot only a half former, then flip it over on the center line to recover each full template.
I recommend allowing at least 1/8 inch additional depth on the templates for overlap of the shells. As you account for these factors, remember you have to mount the mold formers on a rigid plate — the base of which is your bottom line or your 1/2-inch overlap line. Make your formers accurately from 1/8-inch hard balsa. Position them on your base and fill in with blue foam as previously discussed. Be careful as you hack away the excess foam. Cut slowly, then as you sand to final shape, make sure you preserve the curve that you want.
Preparing and forming the shell skins
Preparing the shell skins is similar to working with skins for foam wings, but with a significant difference. To form these curves over the fuselage shells there will necessarily be compression and stretching of the wood.
To plan the layout of the sheeting, develop a rough pattern with heavy paper and drape the paper over the mold. How the paper falls will tell you how to develop your shells. Expect that on severe curves you will have to take long slices out of the pattern so it will approximate the mold shape without too much compression. It's a lengthy process, but take your time — it's worth it.
Once you have the paper pattern, make the balsa sheets. Make sure the wood is flexible against the grain, with the grain running lengthwise. Put the best wood on the top of the mold (where you have the most bending), and edge-joint the sheets with waterproof cement — old-fashioned Sig-Ment, Duco, or Ambroid work well. When everything has been joined, sand lightly on a flat surface and cut the pattern shape.
Molding procedure
You can render balsa very pliable by soaking it in a solution of hot water and ordinary ammonia. Give it time to absorb the solution — 30 minutes to an hour — but that isn't too critical. The more the balsa soaks, the more the solution breaks down the chemical bonds in the wood, to a point.
Use an elastic bandage to form the wood. An Ace bandage works well, but I prefer the Coach brand by Johnson & Johnson; it gives a smoother, less-indented surface. Wrap the bandage around the mold, with the wood in between, forming the wood to the mold. A few tips:
- Mark the wood so you can fit it correctly to the mold.
- Start in the middle and work slowly to one end, ensuring the wood lays down on the mold as you progress.
- Adjust the fit by cutting bigger slots/wedges where necessary to minimize compression.
- Expect you may have to make one more shell while you learn.
Complete the wrapping and put the assembly away for a couple of days to let it dry completely.
Finishing
When you are satisfied the wood has dried thoroughly, unwrap your prize. Don't be too concerned when you see marks from the bandage pressure. Start sanding carefully with a sanding block and some 220-grit paper. Do not sand the shell off the mold! All marks and imperfections will disappear quickly, but don't get heavy-handed.
You will have a very light shell that is exceptionally rigid when the structure is integrated. When finishing the airplane, make all the shells carefully to avoid stress and sand only where you cannot make it fit.
This is part of the "stretch" in a project like this.
That's it — a quick survey but enough to get you started. Have fun!
Transcribed from original scans by AI. Minor OCR errors may remain.

