
CONTROL LINE AEROBATICS
Frank McMillan, 12106 Gunter Grove, San Antonio TX 78231
John Brodak Fly-In (Father's Day weekend)
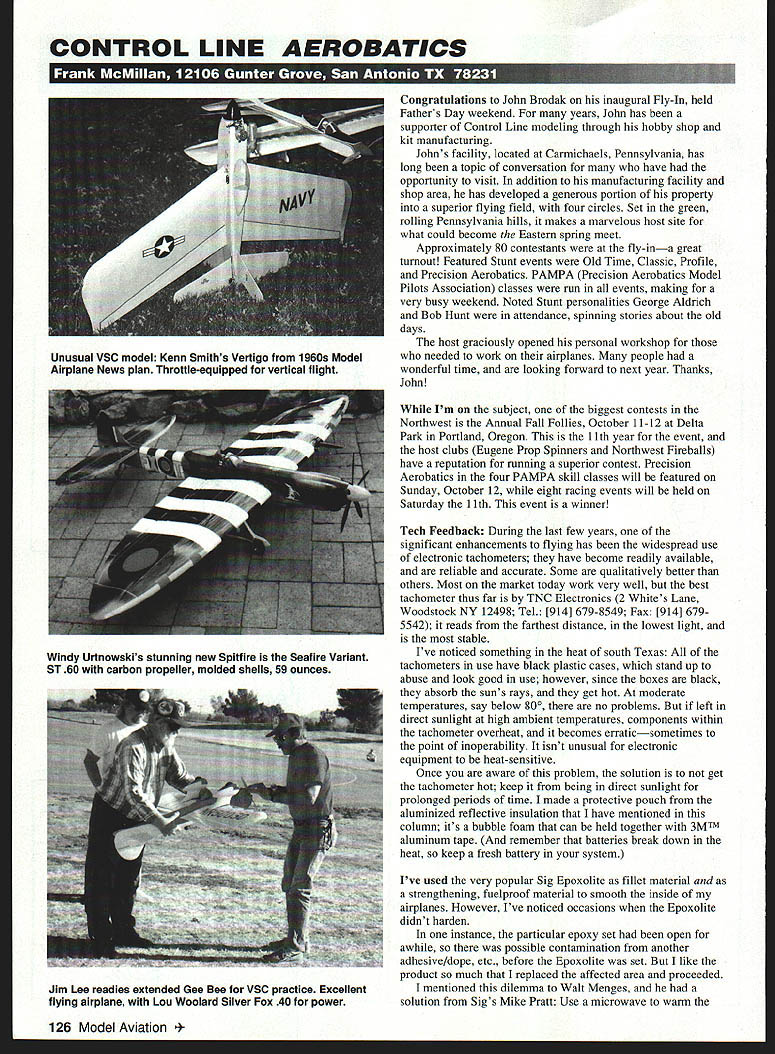
Congratulations to John Brodak on his inaugural Fly-In, held Father's Day weekend. For many years John has supported control line modeling through his hobby shop and kit manufacturing.
John's facility, located at Carmichaels, Pennsylvania, has long been a topic of conversation for many who have had the opportunity to visit. In addition to his manufacturing facility and shop area, he has developed a generous portion of his property into a superior flying field with four circles. Set in the green, rolling Pennsylvania hills, it makes a marvelous host site for what could become the Eastern spring meet.
Approximately 80 contestants attended the fly-in — a great turnout. Featured stunt events included:
- Old Time
- Classic
- Profile
- Precision Aerobatics
PAMPA (Precision Aerobatics Model Pilots Association) classes were run in all events, making for a very busy weekend. Noted stunt personalities George Aldrich and Bob Hunt were in attendance, spinning stories about the old days. The host graciously opened his personal workshop for those who needed to work on their airplanes. Many people had a wonderful time and are looking forward to next year. Thanks, John!
Northwest: Annual Fall Follies
One of the biggest contests in the Northwest is the Annual Fall Follies, October 11–12 at Delta Park in Portland, Oregon. This is the 11th year for the event, and the host clubs (Eugene Prop Spinners and Northwest Fireballs) have a reputation for running a superior contest. Precision Aerobatics in the four PAMPA skill classes will be featured on Sunday, October 12, while eight racing events will be held on Saturday the 11th. This event is a winner!
Tech Feedback: Tachometers
During the last few years one significant enhancement to flying has been the widespread use of electronic tachometers; they have become readily available, reliable, and accurate. Some are qualitatively better than others. Most on the market today work very well, but the best tachometer thus far is by TNC Electronics (2 Whites Lane, Woodstock NY 12498; Tel.: (914) 679-8549; Fax: (914) 679-5542). It reads from the farthest distance, in the lowest light, and is the most stable.
I've noticed an issue in the heat of south Texas: most tachometer cases are black plastic, which absorbs the sun's rays and gets hot. At moderate temperatures, say below 80°, there are no problems. But if left in direct sunlight at high ambient temperatures, components within the tachometer can overheat and become erratic — sometimes to the point of inoperability. Electronic equipment can be heat-sensitive.
Solution: do not let the tachometer get hot; keep it out of direct sunlight for prolonged periods. I made a protective pouch from aluminized reflective insulation (a bubble foam) and held it together with 3M aluminum tape. Also remember that batteries break down in the heat, so keep a fresh battery in your system.
Epoxolite Curing Tip
I've used the very popular Sig Epoxolite as fillet material and as a strengthening, fuelproof material to smooth the inside of my airplanes. However, I've noticed occasions when the Epoxolite didn't harden.
In one instance the epoxy set had been open for a while, so there was possible contamination from another adhesive or dope before the Epoxolite was set. I replaced the affected area and proceeded.
Walt Menges mentioned a solution from Sig's Mike Pratt: warm the separate components in a microwave before mixing; then mix and the epoxy will harden properly. You will want to experiment with how long to "nuke" the materials. Heat the epoxy until it is barely warm to the touch; any more will significantly shorten the working time.
Kit Review: John Brodak's George Aldrich Nobler
As you read this column it's nearing October, and time to be thinking about the design you'll build for next season. For Classic I had the opportunity to check out one of John Brodak's kit renditions of the George Aldrich Nobler. The example I saw was from the first production run.
When I opened the box it was packed with beautiful white balsa from Riley Wooten's Lone Star Balsa. The Nobler's main parts — fuselage sides, flaps, rudder, stabilizers, and elevators — were band-sawed to shape. They were accurate and crisp, true, and without warps, which is unusual. The wing ribs were die-cut and very well done. Small parts were bagged, and hardware was complete. The kit's canopy was pulled from George Aldrich's original mold. By the way, the blocks in the kit were in the five-pound range, which is outstanding.
The plans and instruction booklet completed this outstanding kit. The plans were redrawn from George's original plans, converting from clockwise to counterclockwise flight. The model presented is the original Nobler, drawn from the parts of the original model, and it is eligible for Classic and Old Time. George has signed off on the accuracy of the kit plans.
Complementing the plans is one of the best comprehensive, step-by-step, illustrated instruction booklets that I've seen. It was developed as John built a prototype from a production kit, tore out the fit of parts, and documented procedures outlined on the plans and in the booklet.
I highly recommend this excellent kit. It further supports the trend of limited-production kits with exceptional quality of design, contents, and presentation. I'll be reviewing more in detail in the coming months, and hopefully I'll be looking at representative kits from Dave Treble's Heartbeat Models Impact, Windy Urtnowski's Strega/Cardinal, and the new Randy Smith SV series.
Scratch-Building: Sky Tech Innovations — Lost Foam Construction
If kits aren't in your plans for the building season and you're looking at scratch-building, I recommend Sky Tech Innovations' Lost Foam construction system. I used the Lost Foam method on the last two Caudrons I built. Each model employed a different wing design and area, requiring specific setups. The second airplane used a molded leading edge and "C" style (3/16 x 3/8) spaced design. The first Caudron used a "D" front-end section. I've used the range of options available, including the Warren truss or geodetic rib layout.
The first wing was approximately 670 square inches; complete with wing flaps, controls, etc., minus covering, it weighed 9-1/2 ounces. The second wing, more than 720 square inches complete, weighed 10-1/4 ounces. These figures are very good and, I believe, repeatable by any careful builder. Each airplane flew "right off the jig" — clean and predictable through all maneuvers.
With the Lost Foam method, the most time-consuming part is cutting the parts in preparation for assembly; good parts fit is important, as with any construction project. Once started, I've been able to lift the basic wing off the jig in just a couple of hours.
Each construction section has an excellent illustrated step-by-step instruction booklet, and there is a forthcoming video from Bob Hunt's other company, Robin's View Productions.
I highlighted Lost Foam some time ago, but it's such an effective construction method that I felt it appropriate to mention again. The fixtures are still available, but as with any handmade product you have to plan and get your order in — they are filled on a first-come basis.
Contact: Sky Tech Innovations L.L.C., Box 368, Stockton, PA 18083; Day Tel: (610) 746-0106; Evening Tel: (610) 759-8813.
Transcribed from original scans by AI. Minor OCR errors may remain.

