
CONTROL LINE AEROBATICS
Frank McMillan, 12106 Gunter Grove, San Antonio TX 78231
With the Nationals (Nats) still fresh, I thought I would comment on some of the more technical points of the competition that I didn't have space for in last month's coverage.
There are some interesting approaches to getting the same high performance. In the higher placings, the performance level has been raised with the various "packages" that display exceptional "drive" in very light air conditions; the pilots were able to hit extremely hard corners and still have consistent, precise bottoms. That demands moderate-to-light models and a ton of horsepower under control.
I would characterize the power package this year as maturing. The newer engines, such as the Precision Aeros, have been used for several years and are running better — if that's possible — because pilots are higher up on the learning curve.
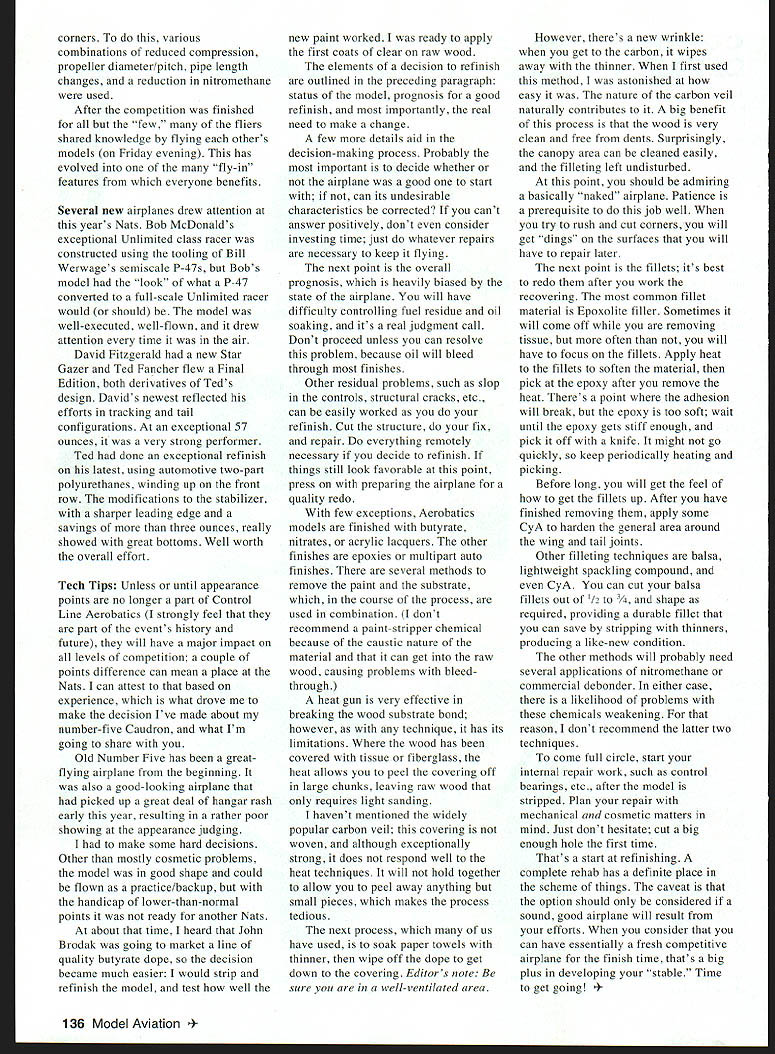
The top fliers who use the venerable ST .60, such as Windy Urtnowski, Bob Baron, and Bill Suarez, are achieving excellent results through continued fine-tuning of propellers and fuel. The problem with the older engines is keeping them running, since they have been out of production for many years.
The conditions at this year's Nats were significantly different than in 1997. Most fliers were realizing more power than before, so they were looking to control the power, which many saw as charging out of the circle. To do this, various combinations of reduced compression, propeller diameter/pitch changes, pipe length changes, and a reduction in nitromethane were used.
After the competition was finished for all but the "few," many of the fliers shared knowledge by flying each other's models on Friday evening. This has evolved into one of the many "fly-in" features from which everyone benefits.
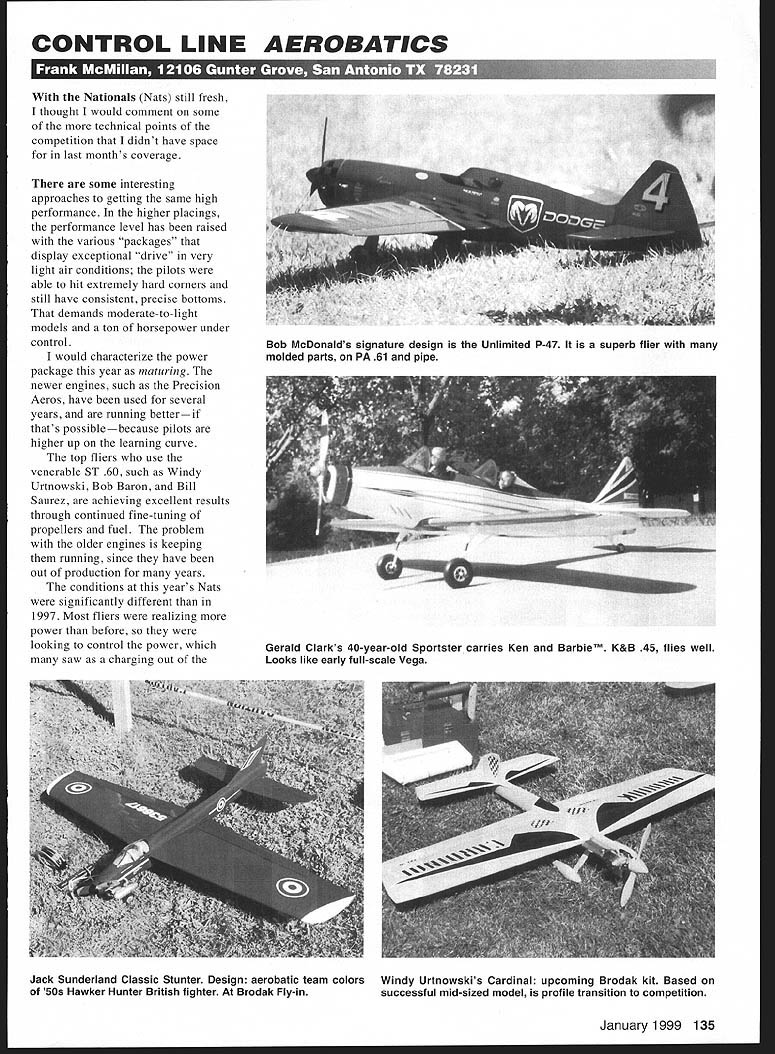
Several new airplanes drew attention at this year's Nats. Bob McDonald's exceptional Unlimited class racer was constructed using the tooling of Bill Werwage's semiscale P-47s, but Bob's model had the "look" of what a P-47 converted to a full-scale Unlimited racer would (or should) be. The model was well-executed, well-flown, and it drew attention every time it was in the air.
David Fitzgerald had a new Star Gazer and Ted Fancher flew a Final Edition, both derivatives of Ted's design. David's newest reflected his efforts in tracking and tail configurations. At an exceptional 57 ounces, it was a very strong performer.
Ted had done an exceptional refinish on his latest, using automotive two-part polyurethanes, winding up on the front row. The modifications to the stabilizer, with a sharper leading edge and a savings of more than three ounces, really showed with great bottoms. Well worth the overall effort.
Tech Tips
Unless or until appearance points are no longer a part of Control Line Aerobatics (I strongly feel that they are part of the event's history and future), they will have a major impact on all levels of competition; a couple of points difference can mean a place at the Nats. I can attest to that based on experience, which is what drove me to make the decision I've made about my number-five Caudron, and what I'm going to share with you.
Old Number Five has been a great-flying airplane from the beginning. It was also a good-looking airplane that had picked up a great deal of hangar rash early this year, resulting in a rather poor showing at the appearance judging. I had to make some hard decisions.
Other than mostly cosmetic problems, the model was in good shape and could be flown as a practice/backup, but with the handicap of lower-than-normal points it was not ready for another Nats. At about that time, I heard that John Brodak was going to market a line of quality butyrate dope, so the decision became much easier: I would strip and refinish the model, and test how well the new paint worked. I was ready to apply the first coats of clear on raw wood.
The elements of a decision to refinish are:
- Status of the model: Is it fundamentally a good airplane to start with?
- Prognosis for a good refinish: Can fuel residue and oil soaking be controlled? (Oil will bleed through most finishes.)
- Real need to make a change: Is a refinish justified given the time and effort?
A few more details aid in the decision-making process. Probably the most important is to decide whether or not the airplane was a good one to start with; if not, can its undesirable characteristics be corrected? If you can't answer positively, don't even consider investing time; just do whatever repairs are necessary to keep it flying.
The next point is the overall prognosis, which is heavily biased by the state of the airplane. You will have difficulty controlling fuel residue and oil soaking, and it's a real judgment call. Don't proceed unless you can resolve this problem, because oil will bleed through most finishes.
Other residual problems, such as slop in the controls, structural cracks, etc., can be worked on as you do your refinish. Cut the structure, do your fix, and repair. Do everything remotely necessary if you decide to refinish. If things still look favorable at this point, press on with preparing the airplane for a quality redo.
With few exceptions, aerobatics models are finished with butyrate, nitrate, or acrylic lacquers. Other finishes are epoxies or multipart auto finishes. There are several methods to remove the paint and the substrate, which, in the course of the process, are used in combination. I don't recommend a paint-stripper chemical because of the caustic nature of the material and because it can get into the raw wood, causing problems with bleed-through.
A heat gun is very effective in breaking the wood-substrate bond; however, as with any technique, it has its limitations. Where the wood has been covered with tissue or fiberglass, the heat allows you to peel the covering off in large chunks, leaving raw wood that only requires light sanding.
I haven't mentioned the widely popular carbon veil; this covering is so woven and, although exceptionally strong, it does not respond well to heat techniques. It will not hold together to allow you to peel away anything but small pieces, which makes the process tedious.
The next process, which many of us have used, is to soak paper towels with thinner, then wipe off the dope to get down to the covering. (Editor's note: Be sure you are in a well-ventilated area.)
However, there's a new wrinkle: when you get to the carbon, it wipes away with the thinner. When I first used this method, I was astonished at how easy it was. The nature of the carbon veil naturally contributes to it. A big benefit of this process is that the wood is very clean and free from dents. Surprisingly, the canopy area can be cleaned easily, and the filleting left undisturbed.
At this point, you should be admiring a basically "naked" airplane. Patience is a prerequisite to do this job well. When you try to rush and cut corners, you will get "dings" on the surfaces that you will have to repair later.
The next point is the fillets; it's best to redo them after you work the recovering. The most common fillet material is Epoxolite filler. Sometimes it will come off while you are removing tissue, but more often than not, you will have to focus on the fillets. Apply heat to the fillets to soften the material, then pick at the epoxy after you remove the heat. There's a point where the adhesion will break, but the epoxy is too soft; wait until the epoxy gets stiff enough, and pick it off with a knife. It might not go quickly, so keep periodically heating and picking.
Before long, you will get the feel of how to get the fillets up. After you have finished removing them, apply some CyA to harden the general area around the wing and tail joints.
Other filleting techniques include:
- Balsa fillets (cut from 1/2 to 3/4 in. stock, shaped as required). These provide a durable fillet that you can save by stripping with thinners, producing a like-new condition.
- Lightweight spackling compound (may require several applications of nitromethane or commercial debonder; potential for weakening).
- CyA (also may need debonder and can cause weakening).
For those reasons, I don't recommend spackling compound or CyA as primary fillet materials unless you accept the potential complications.
To come full circle, start your internal repair work, such as control bearings, after the model is stripped. Plan your repair with mechanical and cosmetic matters in mind. If you don't hesitate, cut a big enough hole the first time.
That's a start at refinishing. A complete rehab has a definite place in the scheme of things. The caveat is that the option should only be considered if a sound, good airplane will result from your efforts. When you consider that you can have essentially a fresh competitive airplane for the finish time, that's a big plus in developing your "stable." Time to get going!
Transcribed from original scans by AI. Minor OCR errors may remain.

