
CONTROL LINE AEROBATICS
Frank McMillan, 12106 Gunter Grove, San Antonio TX 78231
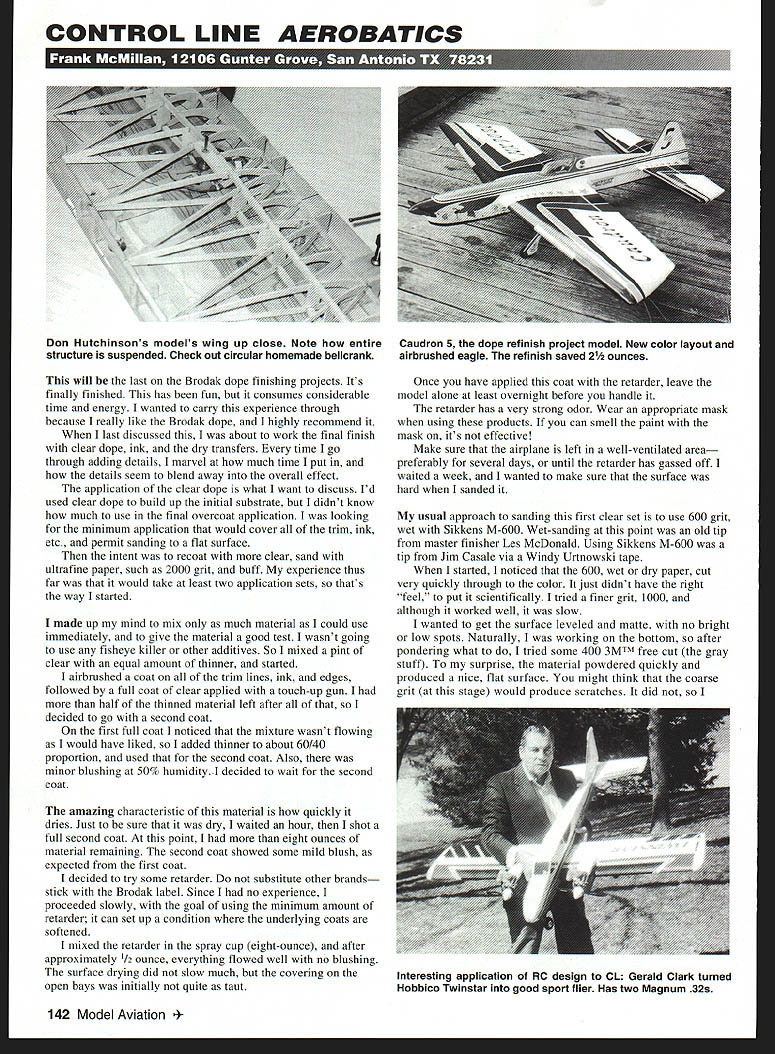
This will be the last on the Brodak dope finishing projects. It's finally finished. This has been fun, but it consumes considerable time and energy. I wanted to carry this experience through because I really like the Brodak dope, and I highly recommend it.
When I last discussed this, I was about to work the final finish with clear dope, ink, and the dry transfers. Every time I go through adding details, I marvel at how much time I put in, and how the details seem to blend away into the overall effect.
The application of the clear dope is what I want to discuss. I'd used clear dope to build up the initial substrate, but I didn't know how much to use in the final overcoat application. I was looking for the minimum application that would cover all of the trim, ink, etc., and permit sanding to a flat surface.
The intent was to recoat with more clear, sand with ultrafine paper such as 2000 grit, and buff. My experience thus far was that it would take at least two application sets, so that's the way I started.
I made up my mind to mix only as much material as I could use immediately, and to give the material a good test. I wasn't going to use any fisheye killer or other additives. So I mixed a pint of clear with an equal amount of thinner, and started.
I airbrushed a coat on all of the trim lines, ink, and edges, followed by a full coat of clear applied with a touch-up gun. I had more than half of the thinned material left after all of that, so I decided to go with a second coat.
On the first full coat I noticed that the mixture wasn't flowing as I would have liked, so I added thinner to about a 60/40 proportion (thinner/material), and used that for the second coat. Also, there was minor blushing at about 50% humidity. I decided to wait before applying the second coat.
The amazing characteristic of this material is how quickly it dries. Just to be sure that it was dry, I waited an hour, then I shot a full second coat. At this point I had more than eight ounces of material remaining. The second coat showed some mild blush, as expected from the first coat.
I decided to try some retarder. Do not substitute other brands—stick with the Brodak label. Since I had no experience, I proceeded slowly, with the goal of using the minimum amount of retarder; it can set up a condition where the underlying coats are softened.
I mixed the retarder in the spray cup (eight-ounce). After approximately 1/2 ounce, everything flowed well with no blushing. The surface drying did not slow much, but the covering on the open bays was initially not quite as taut.
Once you have applied this coat with the retarder, leave the model alone at least overnight before you handle it. The retarder has a very strong odor. Wear an appropriate mask when using these products. If you can smell the paint with the mask on, it's not effective!
Make sure that the airplane is left in a well-ventilated area—preferably for several days, or until the retarder has gassed off. I waited a week, and I wanted to make sure that the surface was hard when I sanded it.
My usual approach to sanding this first clear set is to use 600 grit, wet, with Sikkens M-600. Wet-sanding at this point was an old tip from master finisher Les McDonald. Using Sikkens M-600 was a tip from Jim Casale via Windy Urtnowski.
When I started, I noticed that the 600, wet or dry paper, cut very quickly through to the color. It just didn't have the right "feel," to put it scientifically. I tried a finer grit, 1000, and although it worked well, it was slow.
I wanted to get the surface leveled and matte, with no bright or low spots. Naturally, I was working on the bottom, so after pondering what to do, I tried some 400 3M free-cut (the gray stuff). To my surprise, the material powdered quickly and produced a nice, flat surface. You might think that the coarse grit (at this stage) would produce scratches. It did not, so I continued. I pressed on and finished the sanding process.
When completed, the entire airplane was flat, with all edges leveled. The expectation was that by applying the next set of clear, the surface would smooth out and lay down, requiring minimal sanding to produce a buffed surface.
When handling various paint types, it's wise to research points such as surface preparation, number of coats, and recoat time. The importance of these items is in determining how the material adheres to itself, and how durable it will be in the long term.
When reading the procedures manual published by Randolph, the manufacturer of the Brodak paint, I learned that if more than 24–48 hours had elapsed, the surface should be lightly sanded with 400 sandpaper for good mechanical interface. Using the 400 paper to sand the first clear set was pure luck on my part, but it worked.
I would stick to the 3M free-cut paper. The backing is softer than other types—wet or dry—especially. Working the combination is easy, if you can characterize 10–12 hours of sanding as pleasant.
Any time you sand to prepare a flat surface at this stage, you can expect to go through the clear into the color. If you don't, it's a sure indication that you have too much paint. Remember that you are aiming to have the thinnest total coat, to produce the lightest overall finish.
The Brodak dope is very easy to touch up using an airbrush. Using very thin material, apply enough to produce uniform color. The thin paint is used because the thicker material can quickly turn the touched-up area darker than the surrounding area. You must be careful. Just work through where you have sanded through.
I went through at least once on each surface, but it only took me about an hour to complete the final touch-up process. It took longer to change colors than it did to shoot them.
The Final Coat
I opened a new paint can and thinned it 60% thinner / 40% material. I wanted a thin-flowed series of coats. For the final coats, I had resolved to wait for good weather. I lucked out with an afternoon of less than 20% humidity and temperature in the mid-70s. Even I can spray in these conditions. I didn't want to use any retarder, and I wanted to lay on some nice flow coats.
As I sprayed, I noticed that the paint was drying almost as fast as I applied it. This was surprising; I was really flowing on this material, and it looked good. The surface looked nice and glossy. The material went on crystal-clear and really made the colors jump out.
To be sure that it was dry, I waited an hour between coats. I applied extra material on the edges of each coat prior to flowing on the main coats. The second coat and the final coat went on the same, with about 8–10 ounces of thinned material remaining.
I noticed a couple of things between coats. I inspected the airplane for anything unusual that I could correct before the final coat, and I saw several spots with raised edges that I had missed in the sanding. In particular, the canopy area was one area where several of the dry transfers needed some dressing.
Another surprise was that I was able to take more 400 sandpaper and flatten these raised edges very quickly. The dope powdered after only one hour. This was almost too easy!
The final coat went on again with no problems—no runs, the canopy did not alter shape, and the sanded lines were smooth. Overall, the sanding between the first set was not detectable.
Let the model gas off for at least 24 hours—preferably longer. Do not handle the airplane during this time; the underlying coats could be softened, as could the ink or dry transfers.
Expect the surface to lay down, progressing during the first week. You will be able to tell, as the odor will diminish. Do not handle the model until the odor is gone.
The bottom line with my airplane was that I saved 2½ ounces with the total finish, and that's excellent with any refinish. I've flown the model, and if anything, it may even be a subtle touch better than it was—perhaps because it's lighter. The project was certainly worth it.
Materials and Quantities
- Gray blocking coat: 2/3 pint
- White base coat: 2/3 pint
- Clear base coats: 3–4 pints
- Clear overcoat: 2 pints
- Total clear/dope used: about 6 pints
- Trim colors: 4-ounce bottles are sufficient
- Brodak thinner: about 1½ gallons
- Retarder: purchase a small amount (use Brodak retarder only)
Do not mix products at any time.
Would I do anything different in the next project? Well, no question I'll be using the Brodak dope. For one thing, I didn't pull up one masking line! I'll probably try the silver blocking coat, only to see if it's any better. Other than that, this was a wonderful experience.
Contact Brodak Manufacturing, 100 Park Ave., Carmichaels, PA 15320; Tel.: (724) 966-2726.
Please send pictures if you want to see yourself in print.
Transcribed from original scans by AI. Minor OCR errors may remain.

