
Control Line: Aerobatics
Wynn Paul
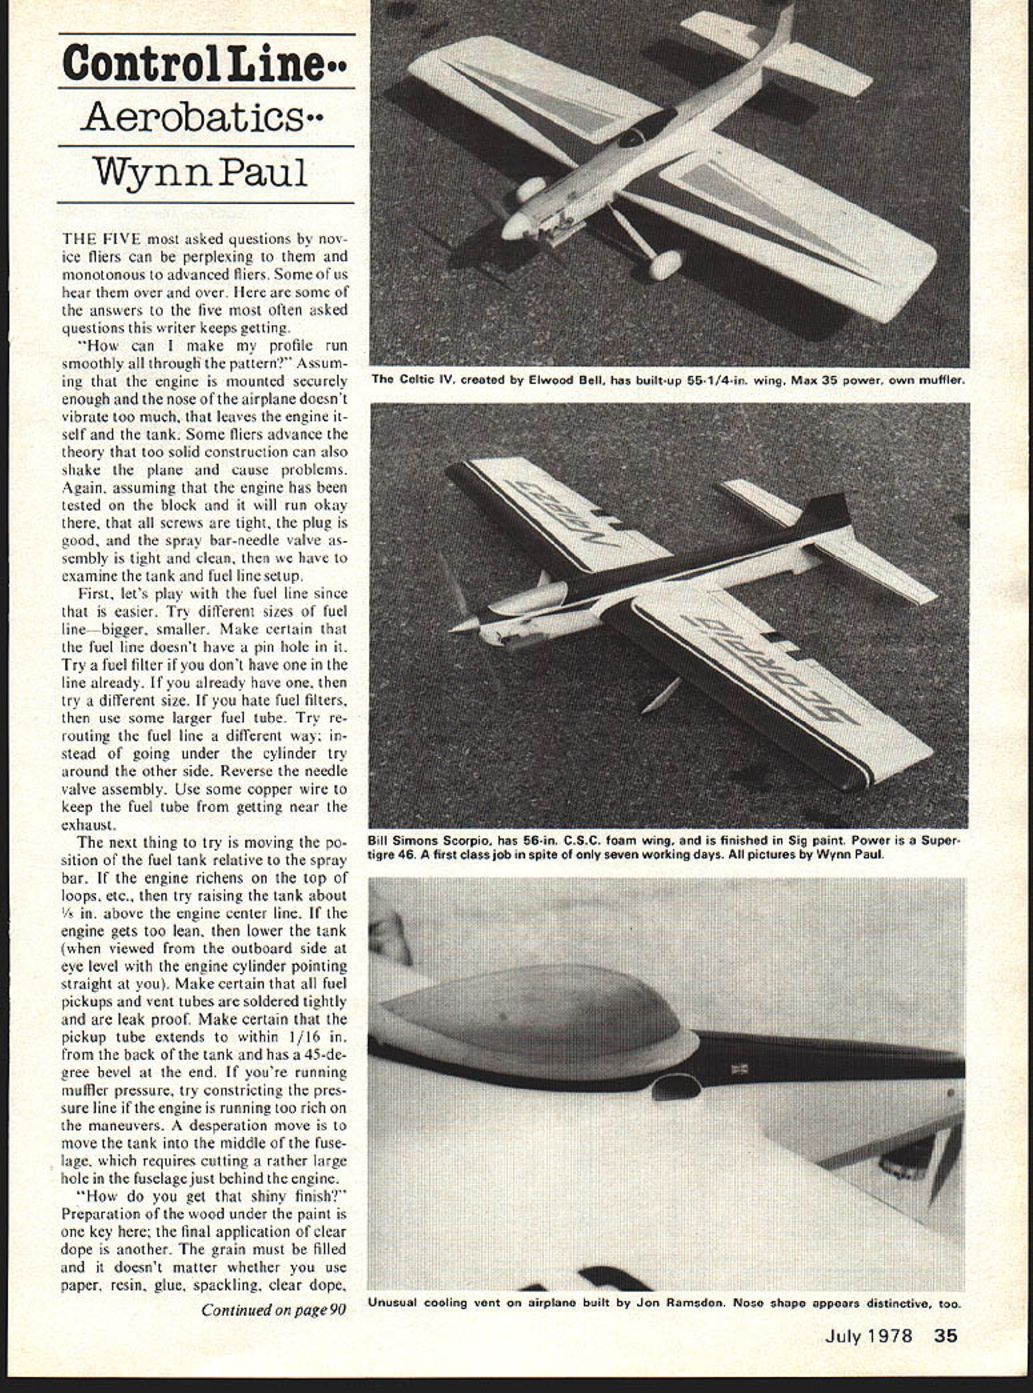
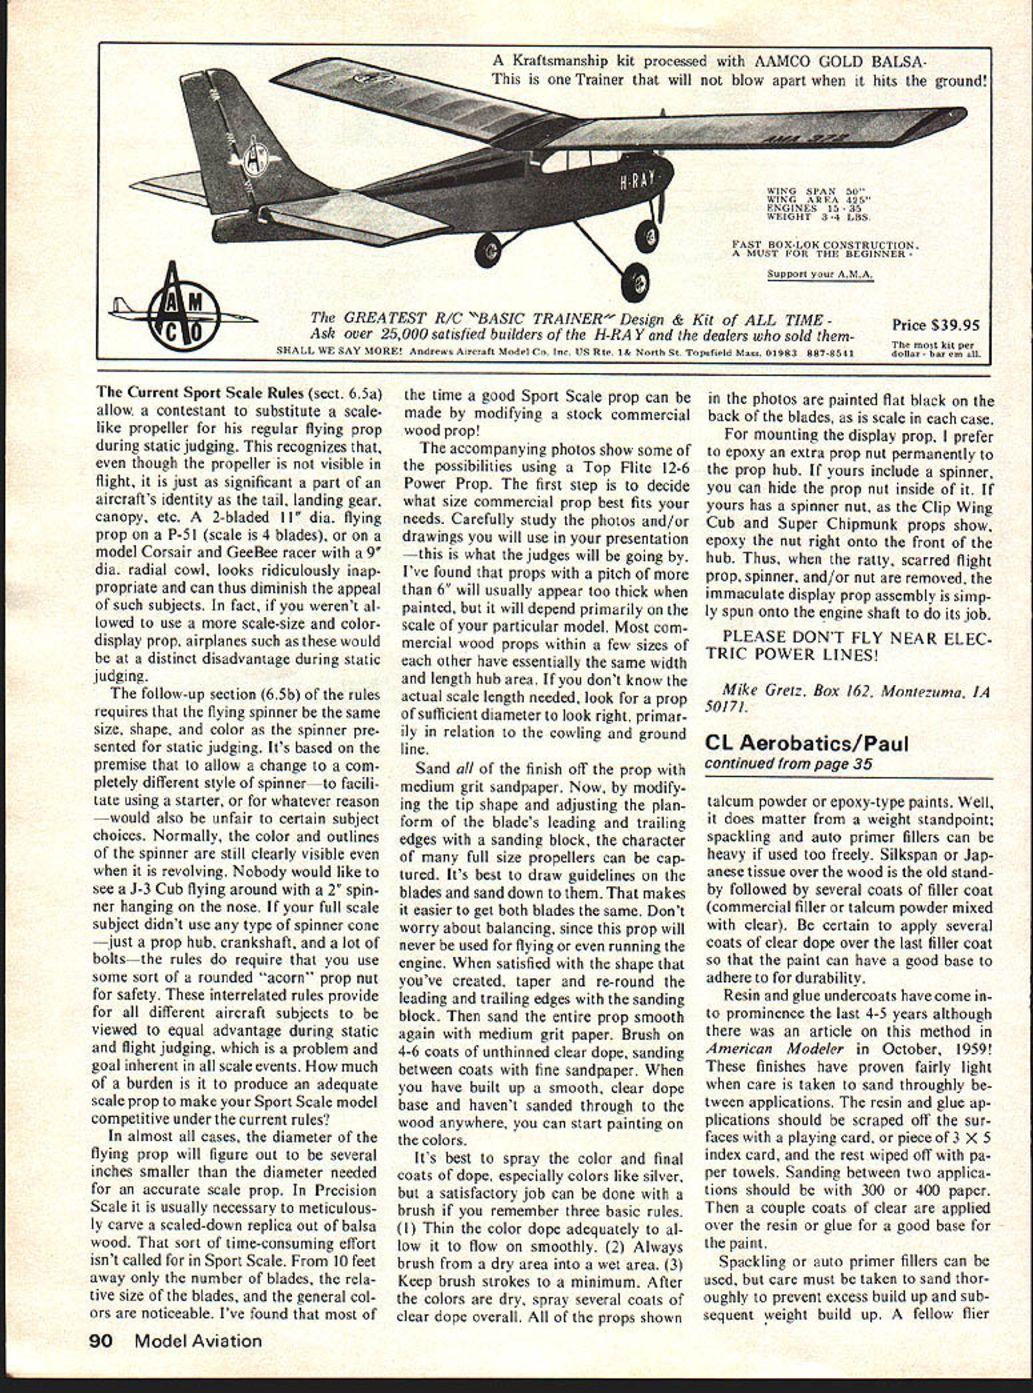
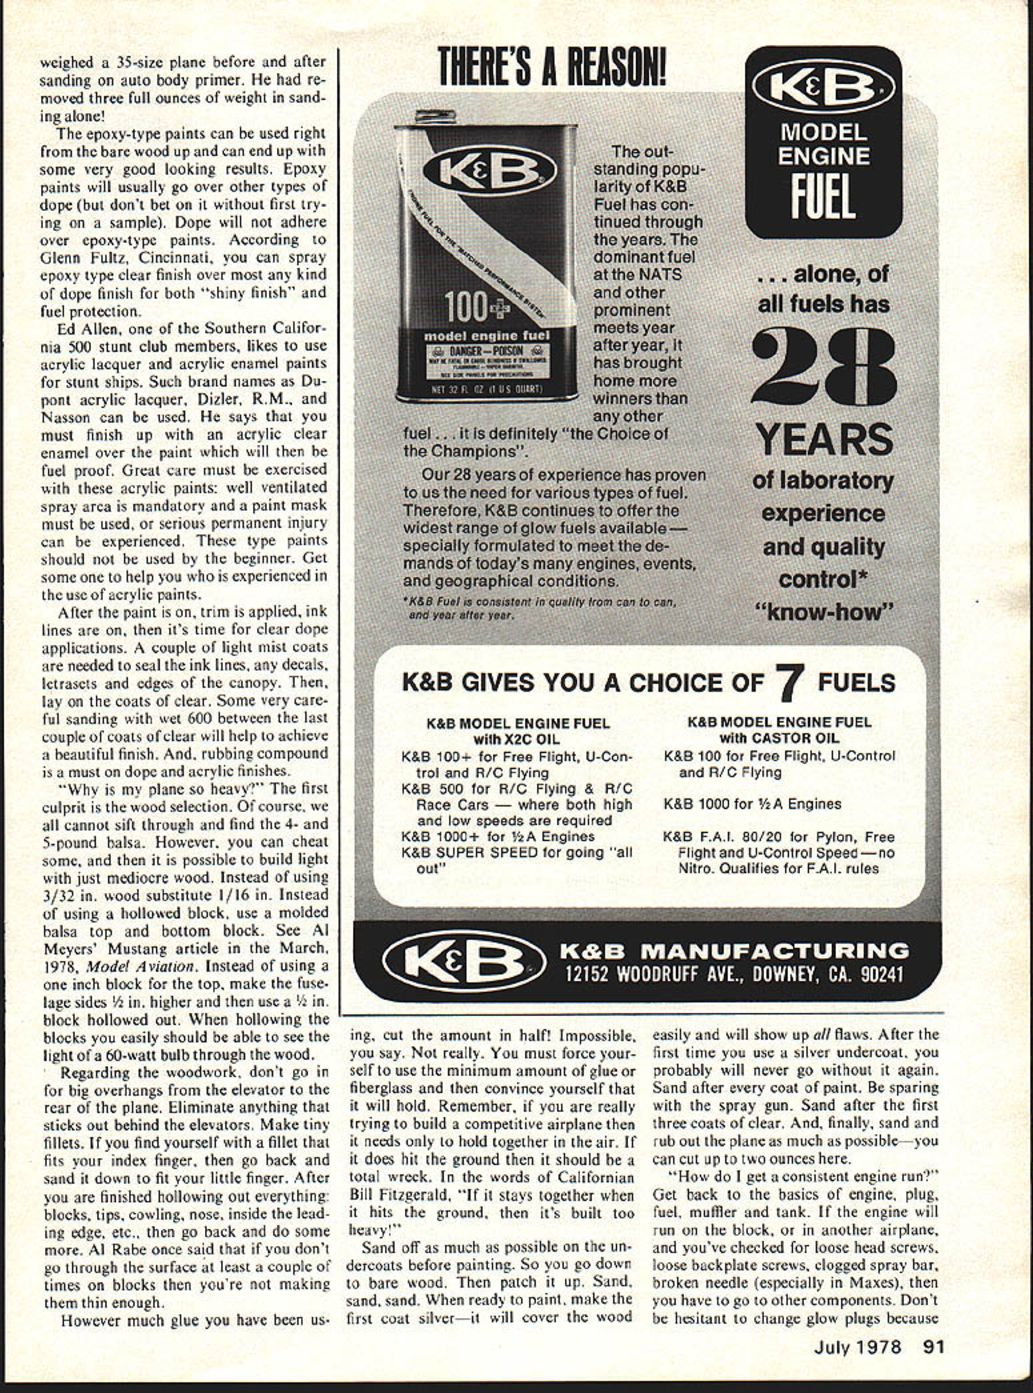
THE FIVE most asked questions by novice fliers can be perplexing to them and monotonous to advanced fliers. Some of us hear them over and over. Here are some of the answers to the five most often asked questions this writer keeps getting.
"How can I make my profile run smoothly all through the pattern?" Assuming that the engine is mounted securely enough and the nose of the airplane doesn't vibrate too much, that leaves the engine itself and the tank. Some fliers advance the theory that too solid construction can also shake the plane and cause problems. Again, assuming that the engine has been tested on the block and it will run okay there, that all screws are tight, the plug is good, and the spray bar-needle valve assembly is tight and clean, then we have to examine the tank and fuel line setup.
First, let's play with the fuel line since that is easier. Try different sizes of fuel line — bigger, smaller. Make certain that the fuel line doesn't have a pin hole in it. Try a fuel filter if you don't have one in the line already. If you already have one, then try a different size. If you hate fuel filters, then use some larger fuel tube. Try rerouting the fuel line a different way: instead of going under the cylinder try around the other side. Reverse the needle valve assembly. Use some copper wire to keep the fuel tube from getting near the exhaust.
The next thing to try is moving the position of the fuel tank relative to the spray bar. If the engine richens on the top of loops, etc., then try raising the tank about 1/8 in. above the engine center line. If the engine gets too lean, then lower the tank (when viewed from the outboard side at eye level with the engine cylinder pointing straight at you). Make certain that all fuel pickups and vent tubes are soldered tightly and are leak proof. Make certain that the pickup tube extends to within 1/16 in. from the back of the tank and has a 45-degree bevel at the end. If you're running muffler pressure, try constricting the pressure line if the engine is running too rich on the maneuvers. A desperation move is to move the tank into the middle of the fuselage, which requires cutting a rather large hole in the fuselage just behind the engine.
"How do you get that shiny finish?" Preparation of the wood under the paint is one key here; the final application of clear dope is another. The grain must be filled and it doesn't matter whether you use paper, resin, glue, spackling, clear dope. talcum powder or epoxy-type paints. Well, it does matter from a weight standpoint; spackling and auto primer fillers can be heavy if used too freely. Silkspan or Japanese tissue over the wood is the old standby followed by several coats of filler coat (commercial filler or talcum powder mixed with clear). Be certain to apply several coats of clear dope over the last filler coat so that the paint can have a good base to adhere to for durability.
Resin and glue undercoats have come into prominence the last 4-5 years although there was an article on this method in American Modeler in October, 1959! These finishes have proven fairly light when care is taken to sand thoroughly between applications. The resin and glue applications should be scraped off the surfaces with a playing card, or piece of 3 x 5 index card, and the rest wiped off with paper towels. Sanding between two applications should be with 300 or 400 paper. Then a couple coats of clear are applied over the resin or glue for a good base for the paint.
Spackling or auto primer fillers can be used, but care must be taken to sand thoroughly to prevent excess build up and subsequent weight build up. A fellow flier
Control Line: Aerobatics
Wynn Paul
weighed a 35-size plane before and after sanding on auto body primer. He had removed three full ounces of weight in sanding alone!
The epoxy-type paints can be used right from the bare wood up and can end up with some very good looking results. Epoxy paints will usually go over other types of dope (but don't bet on it without first trying on a sample). Dope will not adhere over epoxy-type paints. According to Glenn Fultz, Cincinnati, you can spray epoxy type clear finish over most any kind of dope finish for both "shiny finish" and fuel protection.
Ed Allen, one of the Southern California 500 stunt club members, likes to use acrylic lacquer and acrylic enamel paints for stunt ships. Such brand names as DuPont acrylic lacquer, Dizler, R.M., and Nasson can be used. He says that you must finish up with an acrylic clear enamel over the paint which will then be fuel proof. Great care must be exercised with these acrylic paints: well ventilated spray area is mandatory and a paint mask must be used, or serious permanent injury can be experienced. These type paints should not be used by the beginner. Get someone to help you who is experienced in the use of acrylic paints.
After the paint is on, trim is applied, ink lines are on, then it's time for clear dope applications. A couple of light mist coats are needed to seal the ink lines, any decals, letters and edges of the canopy. Then, lay on the coats of clear. Some very careful sanding with wet 600 between the last couple of coats of clear will help to achieve a beautiful finish. And, rubbing compound is a must on dope and acrylic finishes.
"Why is my plane so heavy?" The first culprit is the wood selection. Of course, we all cannot sift through and find the 4- and 5-pound balsa. However, you can cheat some, and then it is possible to build light with just mediocre wood. Instead of using 3/32 in. wood substitute 1/16 in. Instead of using a hollowed block, use a molded balsa top and bottom block. See Al Meyers' Mustang article in the March, 1978, Model Aviation. Instead of using a one inch block for the top, make the fuselage sides 1/2 in. higher and then use a 1/2 in. block hollowed out. When hollowing the blocks you easily should be able to see the light of a 60-watt bulb through the wood.
Regarding the woodwork, don't go in for big overhangs from the elevator to the rear of the plane. Eliminate anything that sticks out behind the elevators. Make tiny fillets. If you find yourself with a fillet that fits your index finger, then go back and sand it down to fit your little finger. After you are finished hollowing out everything—blocks, tips, cowling, nose, inside the leading edge, etc.—then go back and do some more. Al Rabe once said that if you don't go through the surface at least a couple of times on blocks then you're not making them thin enough.
However much glue you have been using, cut the amount in half! Impossible, you say. Not really. You must force yourself to use the minimum amount of glue or fiberglass and then convince yourself that it will hold. Remember, if you are really trying to build a competitive airplane then it needs only to hold together in the air. If it does hit the ground then it should be a total wreck. In the words of California Bill Fitzgerald, "If it stays together when it hits the ground, then it's built too heavy!"
Sand off as much as possible on the undersides before painting. So you go down to bare wood. Then patch it up. Sand, sand, sand. When ready to paint, make the first coat silver—it will cover the wood easily and will show up all flaws. After the first time you use a silver undercoat, you probably will never go without it again. Sand after every coat of paint. Be sparing with the spray gun. Sand after the first three coats of clear. And, finally, sand and rub out the plane as much as possible—you can cut up to two ounces here.
"How do I get a consistent engine run?" Get back to the basics of engine, plug, fuel, muffler and tank. If the engine will run on the block, or in another airplane, and you've checked for loose head screws, loose backplate screws, clogged spray bar, broken needle (especially in Maxes), then you have to go to other components. Don't be hesitant to change glow plugs because they may be weak.
Assuming engine mounted securely enough on the nose and the airplane doesn't vibrate too much (that leaves the engine itself and the tank), some fliers advance the theory that too solid construction can also shake the plane and cause problems. Again, assuming the engine has tested on the block and will run okay, screws tight, plug good, spray bar-needle valve assembly tight and clean, have a look at the tank and fuel line setup.
First, let's play fuel line since it's easier. Try different sizes of fuel line—bigger and smaller. Make certain fuel line doesn't have a pin hole. Try a fuel filter; if you don't have one already, try different sizes. If you hate fuel filters, use some larger fuel tube. Try rerouting the fuel line a different way— instead of going under the cylinder try around the other side. Reverse the needle valve assembly. Use some copper wire to keep the fuel tube from getting near the exhaust. Next thing, try moving the position of the fuel tank relative to the spray bar; if the engine richens on top loops, etc., try raising the tank about 1/8 in. above engine centerline; if the engine gets too lean, lower the tank. Viewed from the outboard side at eye level with the engine cylinder pointing straight, make certain fuel pickups and vent tubes are soldered tightly and are leak proof. Make certain the pickup tube extends within 1/16 in. of the back of the tank and has a 45-degree bevel end. If you're running muffler pressure, try constricting the pressure line. If the engine is running too rich in maneuvers, as a last resort move the tank toward the middle of the fuselage—this requires cutting a rather large hole in the fuselage just behind the engine.
Preparation of wood under paint is key to the final application of clear dope. Another grain must be filled. It doesn't matter whether you use paper, resin, glue, spackling or clear dope. Sand it off as much as possible on the undercoats before painting. Then go down to bare wood, patch it up, sand and, when ready, paint. The silver undercoat will cover the wood easily and will show up all flaws. Sand after every coat and rub out as much as possible for a shiny finish. They now cost a dollar or so.
Is your fuel consistent? If it's a home brew there is a good chance that it could have picked up some water from the air. There's also a chance that the home brew is not consistent with the last batch. I had a horrible experience that cost me two engines and a place or two in the Nationals with some backyard brew that had no oil. Sure, there are lots of smaller fuel distributors who have good, consistent mixes of fuel, but you need to be careful. And, I will maintain that two gallon cans of the same fuel side by side can run differently.
It seems unlikely that a muffler could cause an inconsistent run, except if the muffler pressure is too much or too little. Experimenting with the size of the muffler pressure lines could help. In some instances the muffler pressure fitting is in a bad place receiving too much or too little pressure. Finally, the back pressure of the muffler may be causing the engine to heat up and/or not allowing the engine to breathe properly for a good run.
I feel that most inconsistent runs stem from the fuel tank and fuel lines. The tank must be checked for leaks, broken tubing, clogged lines. The fuel tubing must go in as straight a line as possible from the pickup tube to the spray bar. No bends or twists that are not necessary. If you have a removable tank, this makes it much easier to adjust. The tank can be moved up and down in relation to the spray bar. Or, the engine can be adjusted with shims, etc. I recall that Bill Werwage inletted the mounting beams on his 1977 Juno so that he could raise the engine (when the airplane is viewed in the upright position).
"Where did you get that design?" I doubt seriously if more than 25% of the stunt fliers could plot an airfoil mathematically and accurately from scratch. And, I doubt if many more have had aeronautical design training other than from what they picked up in the model magazines. We all like to sit down and sketch out a new plane, then put it into working drawings using proven wing areas, force moment arms, tailplane sizes, and powerplant components. Actually, how many canards have you seen at the Nationals in the finals of Open Stunt? How many disguised combat planes have won the Walker Cup trophy? And, I've only seen one person ever fly the Sea Fury. Yes, I know that a twin-engine stunter placed back in the '60s. (1967, Rich Loomis, first in Senior.)
The best advice I can give to someone who wants to depart from a kit airplane is to look at what works for other accomplished fliers who do well in competition over a period of years. Then sit down and draw up a couple of planes that appeal to you. Then, using some full-size plans from published planes that have been in Nationals and FAI competition, adapt your rough drawings to utilize the basic important ingredients that must be present for a successful stunt plane; wing area related to engine size and total weight, aspect ratio of the wing, force moment-arms for both nose and tail, tailplane size (tail volume), flap size, thrust line placement in respect to the wing, fuselage side area, control movement, equal or unequal wing panels, leading edge sweepback, dihedral, airfoil size, and tip configuration. Lastly, stick with your design for three or four versions to work out the bugs.
For information on stunt or P.A.M.P.A. contact Wynn Paul, 1640 Maywick Drive, Lex., Ky., 40504.
Transcribed from original scans by AI. Minor OCR errors may remain.

