
Control Line: Aerobatics
Wynn Paul
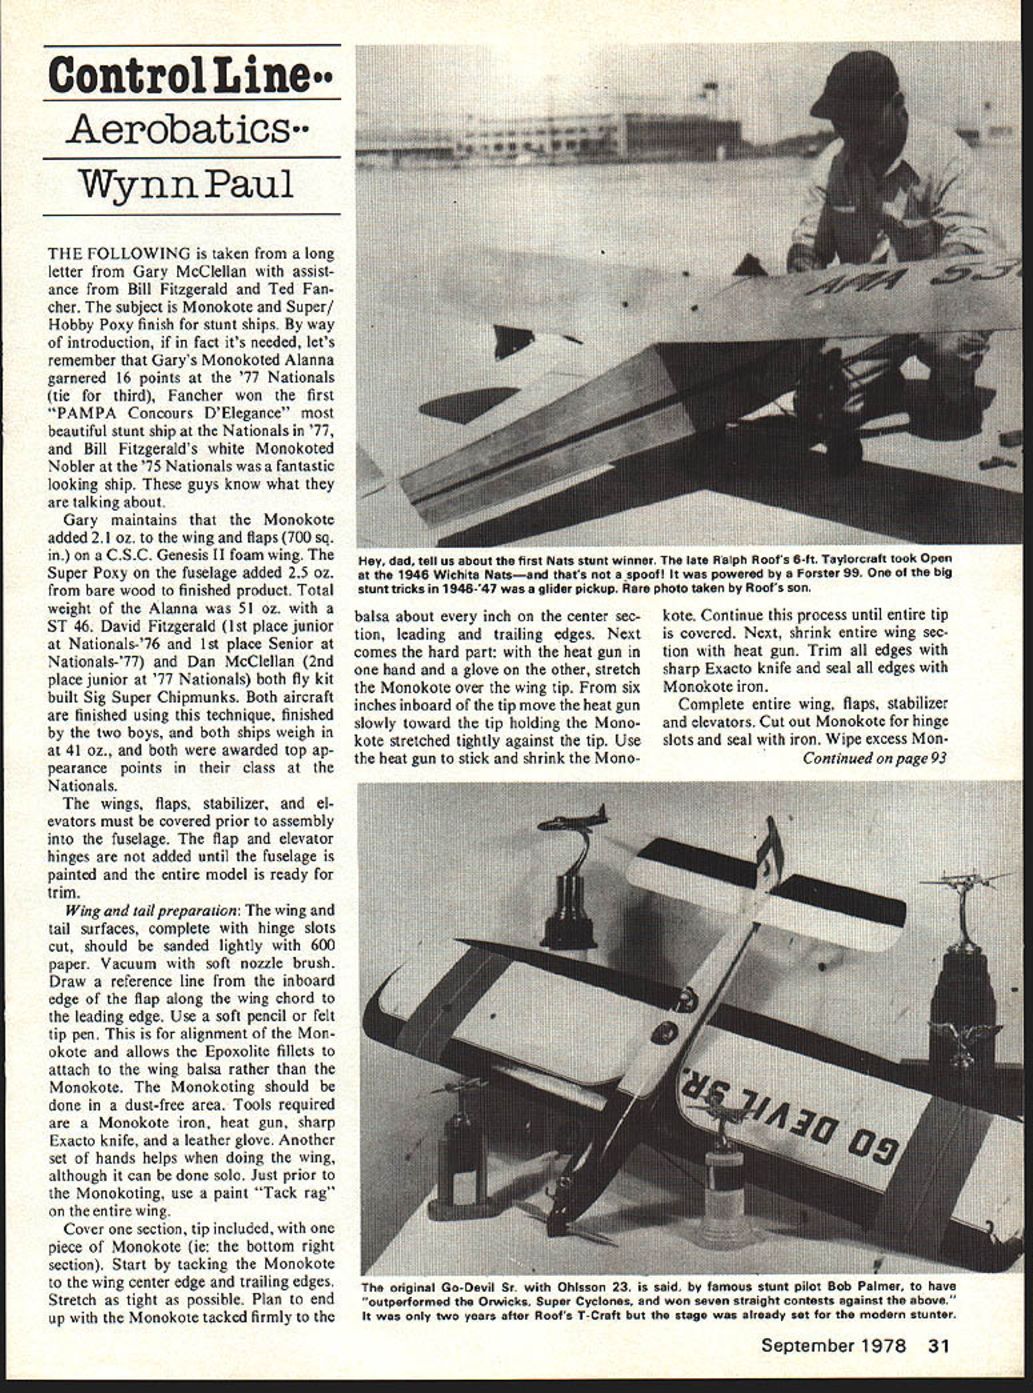
THE FOLLOWING is taken from a long letter from Gary McClellan with assistance from Bill Fitzgerald and Ted Fancher. The subject is Monokote and Super/Hobby Poxy finish for stunt ships. By way of introduction, in fact it's needed, let's remember that Gary's Monokoted Alanna garnered 16 points at the '77 Nationals (tie for third). Fancher won the first "PAMPA Concours D'Elegance" most beautiful stunt ship at the Nationals in '77, and Bill Fitzgerald's white Monokoted Nobler at the '75 Nationals was a fantastic looking ship. These guys know what they are talking about.
Gary maintains that the Monokote added 2.1 oz. to the wing and flaps (700 sq. in.) on a C.S.C. Genesis II foam wing. The Super Poxy on the fuselage added 2.5 oz. from bare wood to finished product. Total weight of the Alanna was 51 oz. with a ST 46. David Fitzgerald (1st place junior at Nationals-'76 and 1st place Senior at Nationals-'77) and Dan McClellan (2nd place junior at '77 Nationals) both fly kit built Sig Super Chipmunks. Both aircraft are finished using this technique, finished by the two boys, and both ships weigh in at 41 oz., and both were awarded top appearance points in their class at the Nationals.
The wings, flaps, stabilizer, and elevators must be covered prior to assembly into the fuselage. The flap and elevator hinges are not added until the fuselage is painted and the entire model is ready for trim.
Wing and tail preparation:
The wing and tail surfaces, complete with hinge slots cut, should be sanded lightly with 600 paper. Vacuum with soft nozzle brush. Draw a reference line from the inboard edge of the flap along the wing chord to the leading edge. Use a soft pencil or felt tip pen. This is for alignment of the Monokote and allows the Epoxolite fillets to attach to the wing balsa rather than the Monokote. The Monokoting should be done in a dust-free area. Tools required are a Monokote iron, heat gun, sharp Exacto knife, and a leather glove. Another set of hands helps when doing the wing, although it can be done solo. Just prior to the Monokoting, use a paint "Tack rag" on the entire wing.
Cover one section, tip included, with one piece of Monokote (i.e. the bottom right section). Start by tacking the Monokote to the wing center edge and trailing edges. Stretch as tight as possible. Plan to end up with the Monokote tacked firmly to the balsa about every inch on the center section, leading and trailing edges. Next comes the hard part: with the heat gun in one hand and a glove on the other, stretch the Monokote over the wing tip. From six inches inboard of the tip move the heat gun slowly toward the tip holding the Monokote stretched tightly against the tip. Use the heat gun to stick and shrink the Monokote. Continue this process until entire tip is covered. Next, shrink entire wing section with heat gun. Trim all edges with sharp Exacto knife and seal all edges with Monokote iron. Complete entire wing, flaps, stabilizer and elevators. Cut out Monokote for hinge slots and seal with iron. Wipe excess Monokote. glue from sealed joints using acetone. It's a good idea to brush all seams with a thin line of Hobby Poxy clear.
Now is the time to assemble the wing and stabilizer into the fuselage. Cover all surfaces with masking tape and newspaper to protect the Monokote during assembly and finishing of the fuselage.
Fuselage Preparation: Mask off Monokote edge next to fuselage leaving 1/32 in. of Monokote exposed for joining fillets. Apply Epoxolite fillets (as small as possible). Apply very slightly thinned Hobby Poxy Formula II glue to entire fuselage and fillets, wipe off excess with paper towels, allow to cure. Sand very lightly with 400 wet or dry paper used dry.
Spray one fairly heavy coat of Super Poxy primer. Sand off all excess primer using 400 paper. Spray second coat of primer. Sand with 400 paper wet using good lighting until you are satisfied the primed fuselage is as good as you can get it. Be careful not to sand through the primer. Clean fuselage thoroughly with Prep-Sol. Remask wing and tail. Prior to spraying color, wipe fuselage with lint-free rag (nylon sock) and Super Poxy thinner. Let the thinner dry for at least 20 minutes.
Mix Super Poxy paint: 1 part color, 1 part catalyst, 1 part thinner. Test spray on smooth surface, thin as required. Spray one coat, using good lighting and let dry for 24 hours. When spraying with Epoxy type paints use a mask and spray only in a well ventilated area, not in an enclosed room. If a second coat is required, sand first coat with 600 paper wet. Gary advises using only one coat, but for a super finish a second coat will help. It will add some weight, though.
Trim: A color scheme should be developed that will disguise the Monokote/Super Poxy joint. For instance, a blue fuselage and yellow wings. Ink lines require a Mylar film ink covered with a thin line of Hobby Poxy clear. Hobby Poxy should be used for all trim on the Monokote. It adheres to Monokote much better than Super Poxy. Perfect paints and the Pactra Formula U paints also adhere well to Monokote. After spraying trim, lift masking tape in about 20 minutes to reduce edge build-up. Gary has used the K & B Super Poxy because it is usable as soon as mixed, whereas the Hobby Poxy requires a 45-minute wait before spraying. Hobby Poxy works equally well and goes on well over Super Poxy. Always use a filtered mask and goggles while spraying Epoxy paints. Anyone having further questions on this method please contact Gary at 1665 Hunt Drive, Burlingame, CA 94010.
Transcribed from original scans by AI. Minor OCR errors may remain.

