

Control Line: AEROBATICS
Wynn Paul
Introduction
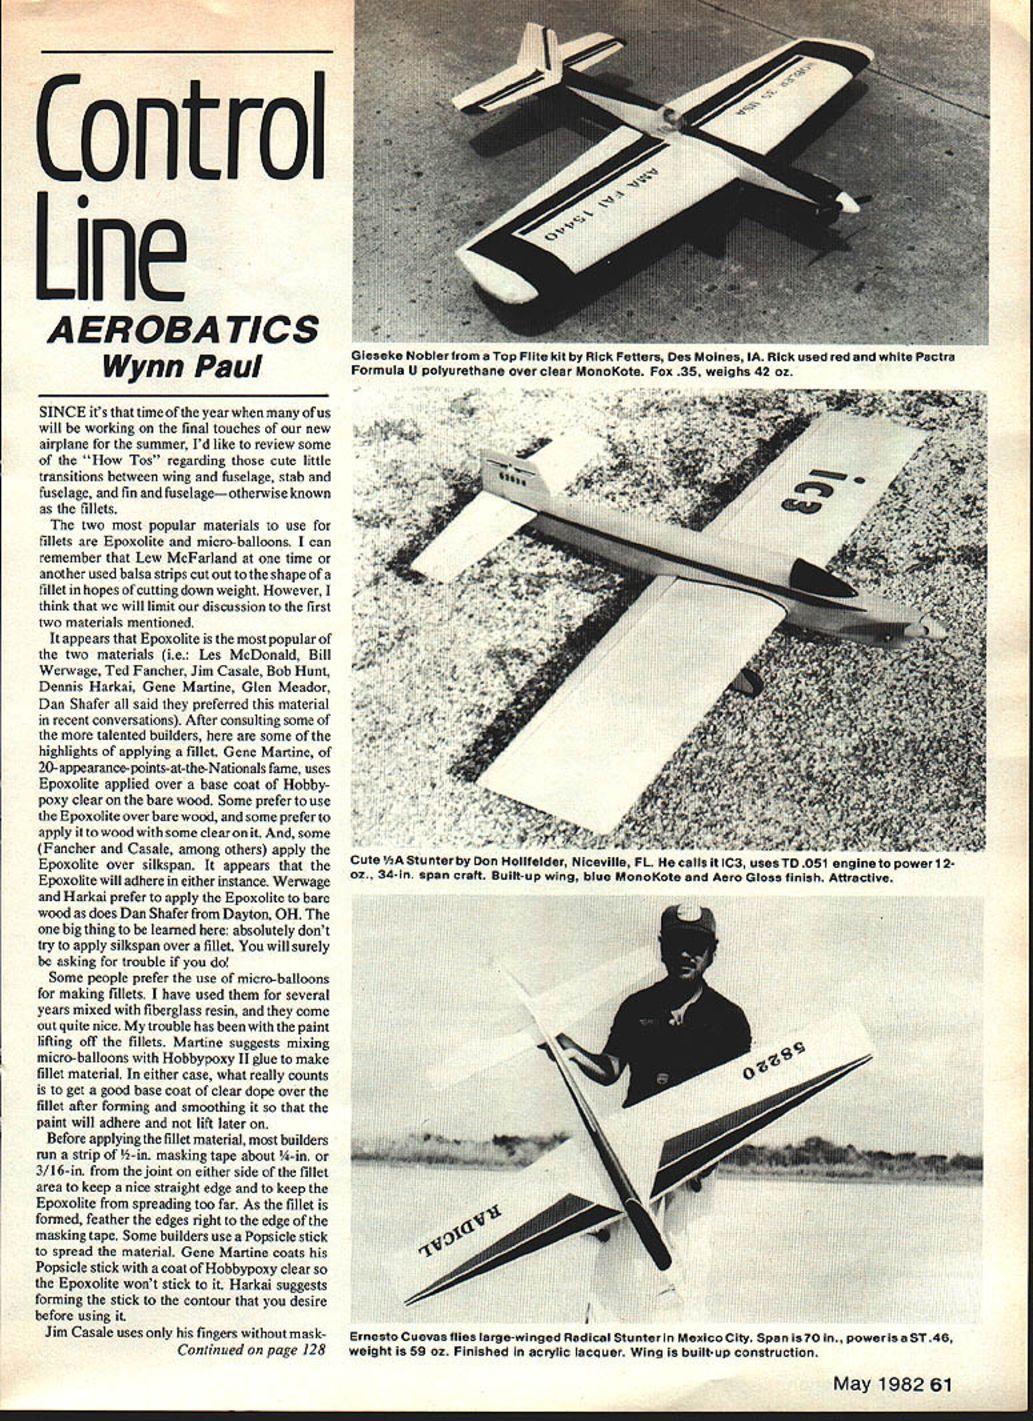
Since it's that time of the year when many of us will be working on the final touches of our new airplane for the summer, I'd like to review some of the "how tos" regarding those cute little transitions between wing and fuselage, stab and fuselage, and fin and fuselage—otherwise known as the fillets.
The two most popular materials to use for fillets are Epoxolite and micro-balloons. I can remember that Lew McFarland at one time or another used balsa strips cut to the shape of a fillet in hopes of cutting down weight. However, this discussion will be limited to the first two materials mentioned.
Materials: Epoxolite vs. Micro-balloons
It appears that Epoxolite is the most popular of the two materials. Les McDonald, Bill Werwage, Ted Fancher, Jim Casale, Bob Hunt, Dennis Harkai, Gene Martine, Glen Meador, and Dan Shafer have all said they preferred this material in recent conversations. After consulting some of the more talented builders, here are some highlights of applying a fillet.
Gene Martine (of 20-appearance-points-at-the-Nationals fame) uses Epoxolite applied over a base coat of Hobbypoxy clear on the bare wood.
- Some prefer to use Epoxolite over bare wood; others prefer to apply it to wood that already has a coat of clear on it.
- Some (Fancher and Casale, among others) apply Epoxolite over silkspan. Epoxolite will adhere in either instance.
- Werwage and Harkai prefer to apply Epoxolite to bare wood, as does Dan Shafer from Dayton, OH.
- One big rule: absolutely don't try to apply silkspan over a fillet. You will surely be asking for trouble if you do.
Micro-balloons:
- Some builders prefer micro-balloons mixed with fiberglass resin; I have used them for several years and they come out quite nice.
- A common issue with micro-balloons is paint lifting off the fillets.
- Gene Martine suggests mixing micro-balloons with Hobbypoxy II glue to make fillet material.
In either case, what really counts is to get a good base coat of clear dope over the fillet after forming and smoothing it so the paint will adhere and not lift later on.
Preparing and Applying Fillet Material
Before applying the fillet material, most builders run a strip of 1/2-in. masking tape about 1/4-in. or 3/16-in. from the joint on either side of the fillet area to keep a nice straight edge and to keep the Epoxolite from spreading too far. As the fillet is formed, feather the edges right to the edge of the masking tape.
Tools and methods for spreading/forming fillets:
- Popsicle stick: many builders use one to spread the material. Gene Martine coats his stick with a coat of Hobbypoxy clear so the Epoxolite won't stick to it. Harkai suggests forming the stick to the contour you desire before using it.
- Fingers: Jim Casale uses only his fingers without masking tape to form the fillets, maintaining that he has a better "feel" for the fillet in this manner.
- Reshaped propeller: some builders use a propeller reshaped for a spreader.
- Glue gun: Ted Fancher suggests using a glue gun with the tip cut off leaving a 1/8-in. hole. He spreads the Epoxolite with the gun, citing very little waste with this method.
- When using a Popsicle stick, fingers, a dowel, or a propeller, use some water for lubrication to help smooth the fillet.
After the fillet has been laid and formed, remove the masking tape immediately and finish feathering the edges of the fillet before it dries. Later, put another thin coat of Epoxolite on the fillet and sand smooth when cured.
Sanding and Smoothing Fillets
Now you are ready to finish-sand the fillet using a collection of small dowels wrapped with sandpaper or small pieces of sandpaper rolled into circles. This is a good place to use Al Elmore's Wandit tool in smoothing the fillets.
- Finish-sand the surface of the fillet and eliminate any shiny areas on its surface. Dope finishes will not stick to shiny parts.
- Rough up the finish even though it is smooth with no bumps or valleys.
- Spend several hours sanding a little, then hold the plane up to the light and reflect the rays off the surface while looking for uneven parts.
- You can also turn off the room lights and use a flashlight to inspect the surface, or reduce the room lighting to a single bulb and reflect that off the fillets.
By this time you should have the plane in its final complete stage with all parts glued in place and all fillets applied, including those around the canopy and the rudder and fin.
Choosing a Finish: Dope vs. Epoxy/Acrylic
At this point you must decide whether you will use a dope finish or an epoxy/acrylic-type finish.
- Dope finishes are harder to adhere to synthetic materials (i.e., Epoxolite fillets) and must be prepared differently.
- Epoxy-type finishes will go right on Epoxolite fillets with no difficulties.
If you desire a dope finish, you will have to get some nitrate dope, in the form of Aero Gloss clear, on the fillets to act as a base for further coats of paint and trim.
Ted Fancher thinks that the solvents in nitrate-type dopes (Aero Gloss, Testors, Randolph) remove the greasy residue that appears on the surface of two-part mixtures such as Epoxolite. Apparently, butyrate dopes (Sig) do not adhere to Epoxolite or to micro-balloons as well as nitrate dopes. Some people will swear they can go right from the start using Sig (or other) butyrate dopes on top of Epoxolite; I've tried this and it has worked sometimes. But the recommendations of some top builders are: "Put Aero Gloss clear (a nitrate-type dope) on the Epoxolite first, and then use the Sig or other butyrate dopes over the nitrate dope."
If you are going to use an epoxy-type finish (K&B or Hobbypoxy) or one of the acrylic finishes (Ditzler auto paint), then you need not put any nitrate-type dope over the raw fillets. This is the opinion of Bob Hunt, Ted Fancher, Gene Martine, and others. The epoxy-type paints will cover the fillets and the rest of the plane quite well. Their chief drawback is that, in the hands of many builders, the overall finish will be considerably heavier than a sprayed dope finish.
Preparing Fillets for a Dope-Type Finish
Some experts say to rub on Aero Gloss clear in 100% unthinned form using your fingers. Others say to use 50/50 Aero Gloss clear and thinner on the assumption that the thinner helps penetrate the fillet material and soak in. Either way will work.
Application options:
- Rub on the clear with fingers.
- Brush it on.
- Spray it on.
Opinions differ on the number of coats:
- Some say two coats of clear on a fillet are enough.
- Others say to use 4 to 5 coats.
The goal is to get a good coat of nitrate-type dope on the fillet as a base for other coats of paint and trim.
Werwage and Harkai do not apply a filler coat on the fillets; they mask off the fillets when spraying, contending that a filler coat on the fillets will make them more susceptible to lifting. Most others do put a filler coat over the fillets. The trick is not to sand through the underlying coats of clear when smoothing off the filler coat. After sanding the filler coat, spray or brush another two coats of 50/50 clear over the fillet for final sealing.
When ready to shoot either silver or color base coat over the clear, clean off the clear coat with alcohol or Metal Prep to remove sanding dust, finger grease, or other foreign matter.
Final Note
This should give the builder a good idea of the "how to" of applying fool-proof fillets to his new plane.
For further information on Stunt or PAMPA, contact Wynn Paul, 1640 Maywick Dr., Lexington, KY 40504.
Transcribed from original scans by AI. Minor OCR errors may remain.

