
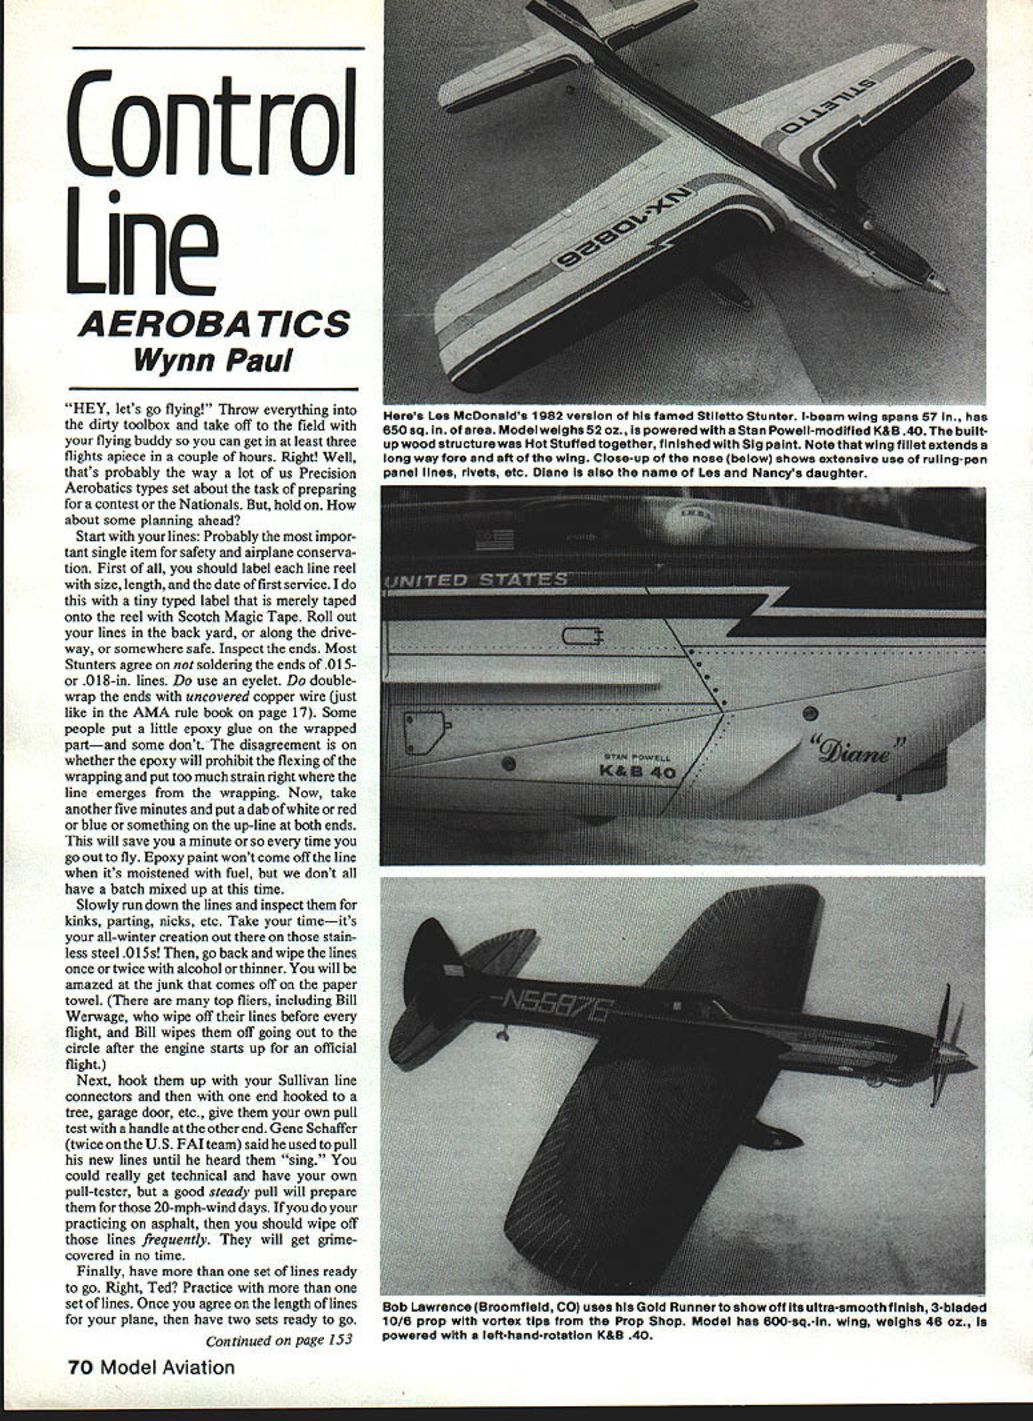
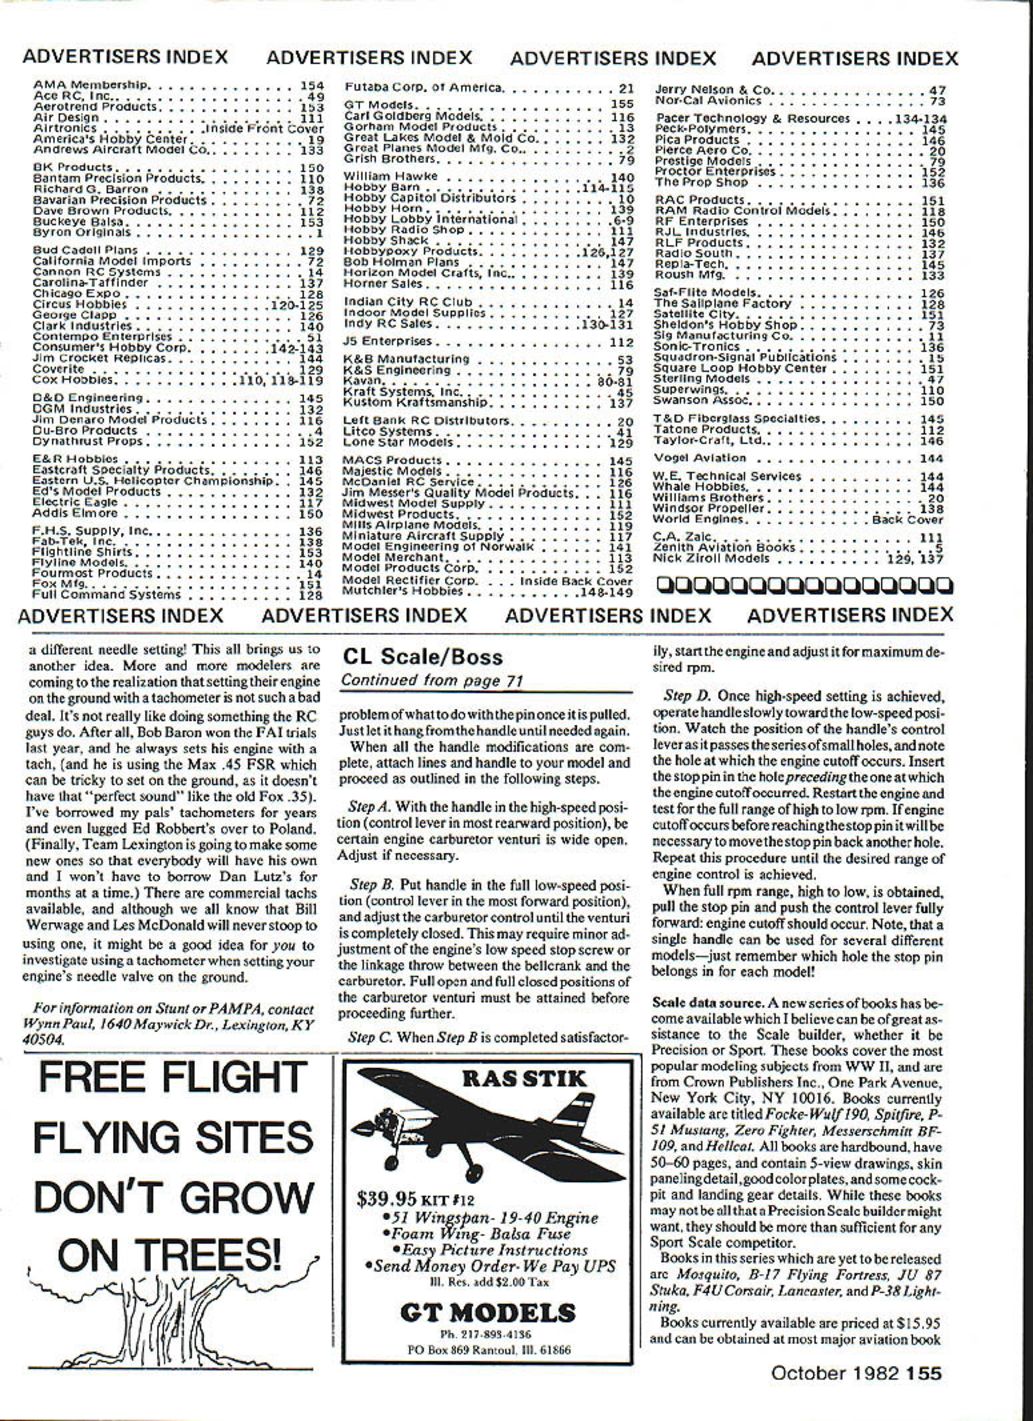
Control Line: Aerobatics
Wynn Paul
Precision Aerobatics is often approached casually—throw everything in the toolbox and head for the field. That can work for a quick session, but contest preparation benefits from planning and routine. The following covers preflight preparation that will save time, reduce crashes, and keep equipment in top shape.
Line Preparation
- Label every line reel with size, length, and date of first service (a small typed label taped with Scotch Magic Tape works well).
- Roll out the lines in a safe area (back yard, driveway, etc.) and inspect both ends.
- For .015" and .018" stainless lines:
- Do not solder the ends. Use an eyelet.
- Double-wrap the end with uncovered copper wire (as in the AMA rules).
- Some fliers add a small dab of epoxy over the wrap; others avoid epoxy because it can concentrate strain where the line exits the wrap.
- Mark the up-line at both ends with a dab of paint (white, red, or blue) so you can identify it quickly at the field. Use epoxy paint if fuel contact is likely.
- Slowly run the full length of each line and check for kinks, parting, nicks, or other damage.
- Wipe the lines once or twice with alcohol or thinner to remove grime—many top fliers clean their lines before every flight.
- Hook the lines to attachments (Sullivan connectors, tree, garage door, etc.) and perform a pull test using the handle on the other end. A steady, firm pull conditions new lines for windy days; some experienced fliers pull until the line “sings.”
- If you practice on asphalt, wipe lines frequently—they pick up grime fast.
- Have at least two sets of lines ready once you decide on the proper length for a given model.
Handle and Cable Inspection
- Inspect handles and cables regularly. If you use an E-Z Just handle (or similar), inspect the cable every ~10 flights.
- Pull the cable back through the handle to inspect it for internal wear or fraying.
- Attach the handle to hooks and pull hard to check integrity—many crashes have been caused by cables parting inside handles.
- No matter the handle type, check cables often.
Engine-Starting Practice
- Practice engine starting at home with a helper and a filled tank. Learn the feel and signs of a good start so you avoid long flipping sessions at the field.
- Before flipping the prop, check for a “bump” when you revolve the prop: if there is no bump, the engine will not start. No bump indicates either no spark/heat at the glowplug or no fuel reaching the engine.
- Make sure glowplug leads and connections are in good condition and properly soldered.
Glowplugs and Starters
- Consider the style of glowplug rather than brand. Idle-bar or shielded plugs are popular because they resist fouling during rich idle and initial run.
- For engines such as St. .46, Max .40/.45 FSR, or HP .40, an idle-bar (shielded) plug is strongly recommended.
- After a very lean or extremely hot run (e.g., a lean run around 9,000 rpm), consider replacing the glowplug—plugs can be damaged by hot operation.
- Modern starters like the GloBee give reliable voltage to the plug. Some experienced fliers still use a single 1½-volt dry cell with good results, but ensure whichever power source you use provides sufficient current.
Needle Valve and Preflight Settings
- Think back to your last flying session: was it hotter or colder, more or less humid, or at a different light/temperature level? These environmental factors change the required needle setting.
- General guidance:
- Colder temperature or higher humidity → open the needle (richer).
- Hotter temperature → close the needle (leaner).
- Changing prop size or fuel nitro percentage also requires a needle adjustment.
- Make small adjustments and observe engine response rather than making large, uncertain changes.
Pre-Flight Checklist (before flipping the prop)
- Tank filled and fuel line primed.
- Glowplug type appropriate and leads/solder joints sound.
- Starting power source ready (GloBee, battery, etc.).
- Needle roughly preset for current conditions (temp/humidity/prop/fuel).
- Lines labeled, cleaned, and pull-tested.
- Handle and cable inspected.
- Spare set of lines available.
Regular, methodical preparation at home and at the field dramatically reduces mishaps and wasted time. Practice basic tasks—line care, handle inspection, starting procedure, and needle adjustments—until they become routine.
Transcribed from original scans by AI. Minor OCR errors may remain.

