
CONTROL LINE RACING
Dave McDonald Box 384, Daleville IN 47334 E-mail: DMcD143@aol.com
Are you having trouble with those Scale Race tanks? Are you in need of a better shutoff design? If so, this month's column is for you.
Tank Venting
How many times have you heard someone refer to "front feed" in their tank setup? This refers to the fuel pickup point in a tank, and in racing these tanks have become the standard.
How do we do this? Let's talk about a typical scale race tank and its plumbing.
A 2 1/2–3 ounce cylindrical tank has become the standard. Typical procedure:
- Start with a 2 1/2-ounce cylindrical tank. Trim the fast-fill pipe to the length of your rubber fast-fill. If your tank came assembled, unsolder the front of the tank.
- Cut an angle on the front of the tank as seen in Fig. 3, using the filler pipe as your guide. If you cut past this, you will need to reconfigure the filling location, and it may be simpler to build a tank from scratch. By using the filler pipe as the guide you will be able to reinstall the front cap. If you make the angle too acute, you will have trouble getting the end cap to fit and may need to fabricate a new end cap.
- After the angle is established, reinstall the front plate and solder in place. The angle on the front of the tank helps the air roll off the front of the tank.
- Locate the vertical and horizontal centerlines of the tank, as pictured in Fig. 1. Locate where the pickup line and the pressure line are to be located; keep in mind that the pickup should be on the centerline.
- When satisfied with the locations, use a punch to make a hole in the front cap of the tank. Use a punch instead of a drill, because a punched hole creates a lip for your tubing to be soldered to, giving a better joint than a drilled hole.
- Extend the pickup line approximately 1/2 inch into the tank, as noted in Fig. 2. If the pickup is not extended enough you may encounter difficulties on takeoff—anything from a slight sag in power to a complete flameout. The extension assures the pickup will be covered in fuel at all times.
Now that your tank is plumbed and ready to install, take extreme care with the mounting angle. In a front-feed system the fuel moves forward and outboard during flight. To accomplish this, the tank must be mounted with the back of the tank inboard and the front outboard, as seen in Fig. 4. Fuel will move to the farthest outboard position during flight; since the pickup is in the front, that is where we want the fuel. Note in Fig. 4 that the tank is actually sitting in a pocket in the fuselage.
To check the efficiency of the system, always log the total number of laps you get on a tank and measure the volume of fuel that remains in the system. This information is invaluable if you need to stretch your pit window.
Shutoffs
A faulty shutoff will cause as many problems as any other piece of equipment. I have received many letters and comments over the past couple of years from people wanting to know how to build shutoffs or where to purchase them.
Whether you're building a shutoff or buying one, remember: reliability, functionality, size versus location, and adaptability to your needs. I have seen many styles; some are good, others seem doomed to failure from the start.
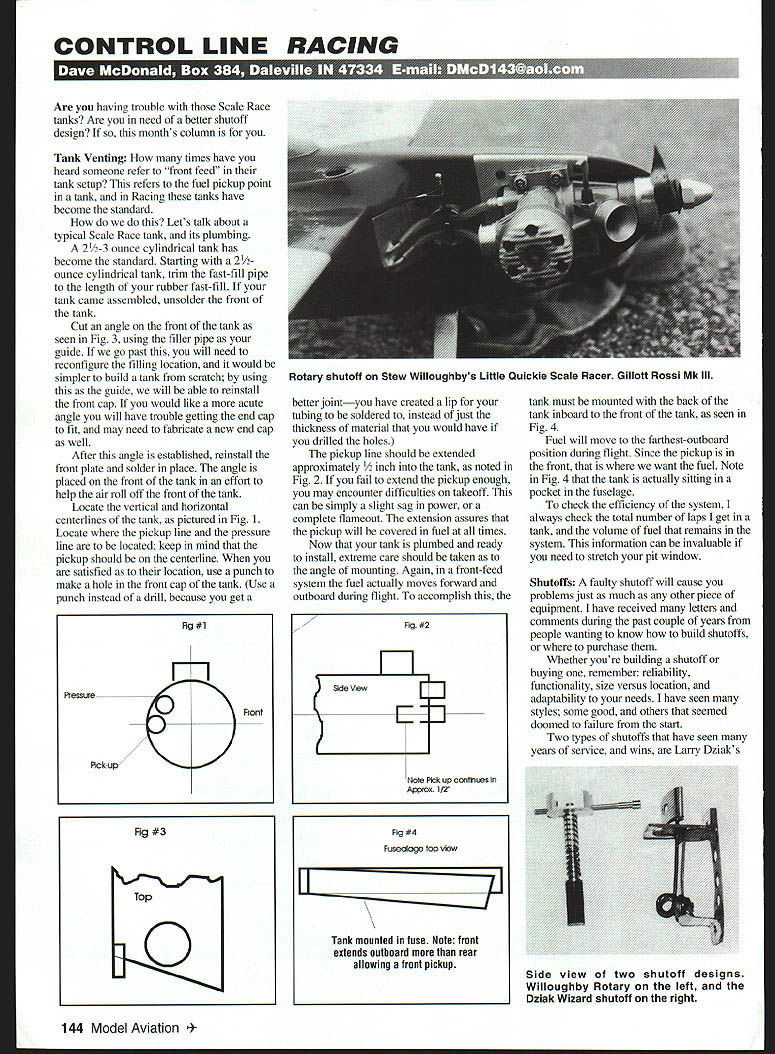
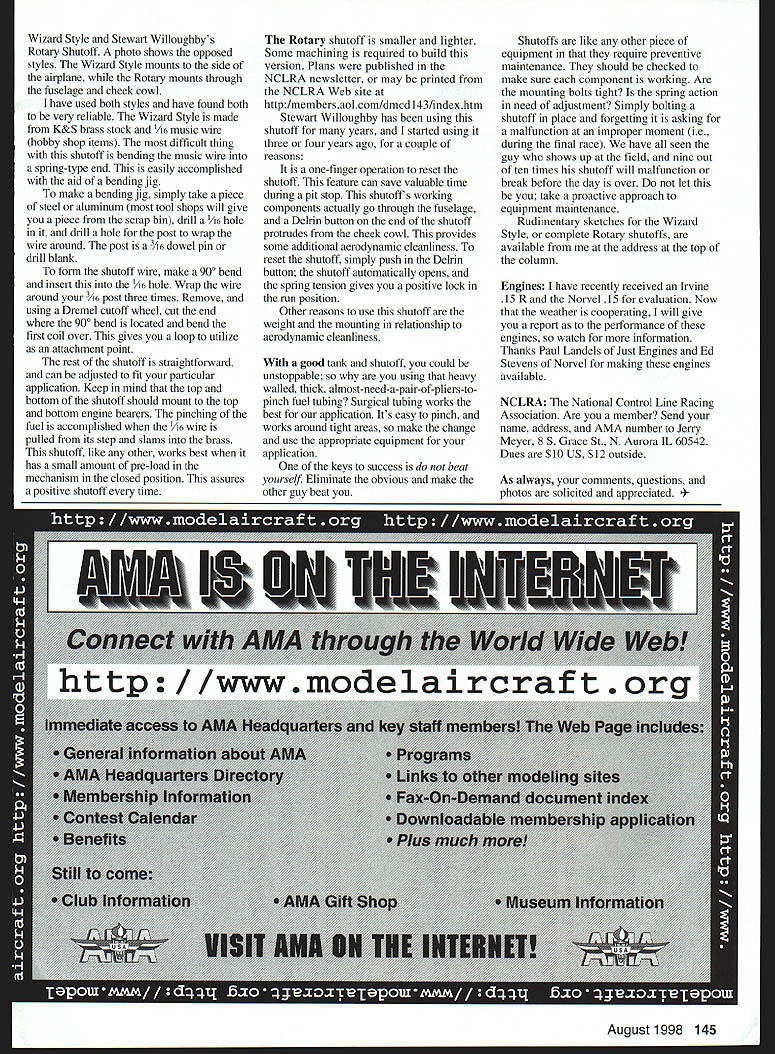
Two types of shutoffs that have seen many years of service and wins are Larry Dziak's Wizard shutoff and Stew Willoughby's Rotary shutoff. The Wizard style mounts on the side of the airplane; the Rotary mounts through the fuselage cheek/cowl. I have used both and found them very reliable.
Wizard-style shutoff
The Wizard style is made from K&S brass stock and 1/16" music wire, available at hobby shops. The most difficult part is bending the music-wire spring-type end; this is easily accomplished with a bending jig.
To make a bending jig:
- Take a piece of steel or aluminum (tool shops will often provide a scrap piece).
- Drill a 1/16" hole for the post.
- Wrap the music wire around the 1/16" post three times to form the blank.
- Remove and cut the end with a Dremel cutoff wheel.
- The 90° bend located at the first coil-over gives a loop to use as the attachment point.
The rest of the shutoff is straightforward and can be adjusted to fit the particular application. Keep in mind the top or bottom of the shutoff should be mounted to the top or bottom of the engine bearers. Pinching the fuel line to accomplish shutoff is done between the brass pieces; like other pinch-style shutoffs, it works best with a small amount of preload so the mechanism is in the closed position, assuring positive shutoff.
Rotary shutoff
The Rotary shutoff is smaller and lighter but requires some machining to build. Plans have been published in the NCLRA newsletter and may be printed on the NCLRA website. Stew Willoughby has been using his shutoff for years and adopted it for a couple of reasons—one-finger operation to reset the shutoff being a major one. This feature can save valuable time during a pit stop.
This shutoff’s working components go through the fuselage, and a Delrin button on the end protrudes from the cheek cowl, providing additional aerodynamic cleanliness. To reset the shutoff, simply push the Delrin button; the shutoff automatically opens, and the spring tension gives you a positive lock in the run position. Other advantages are the lower weight and cleaner mounting in relation to aerodynamics.
Shutoffs, like any other equipment, require preventive maintenance. Check that each component is working: are the mounting bolts tight? Does the spring action need adjustment? Simply bolting a shutoff in place and forgetting it is asking for a malfunction at an improper moment (for example, during the final race). We have all seen the person who shows up at the field and whose shutoff malfunctions or breaks before the day is over. Do not let this be you—take a proactive approach to equipment maintenance.
Rudimentary sketches for the Wizard-style or complete Rotary shutoffs are available from me at the address at the top of the column.
Tubing
With a good tank and shutoff you could be unstoppable. So why use that heavy, thick, almost-need-a-pair-of-pliers-to-pinch fuel tubing? Surgical tubing works best for our application. It’s easy to pinch and works around tight areas—make the change and use the appropriate equipment for your application.
One of the keys to success is: do not beat yourself. Eliminate the obvious and make the other guy beat you.
Engines
I have recently received an Irvine .15 R and the Norvel .15 for evaluation. Now that the weather is cooperating, I will report on the performance of these engines—watch for more information. Thanks to Paul Landels of Just Engines and Ed Stevens of Norvel for making these engines available.
NCLRA
The National Control Line Racing Association. Are you a member? Send your name, address, and AMA number to:
Jerry Meyer 8 S. Grace St. North Aurora, IL 60542
Dues are $10 US, $12 outside.
As always, your comments, questions, and photos are solicited and appreciated.
Transcribed from original scans by AI. Minor OCR errors may remain.

