
Control Line
Scale
Mike Stott
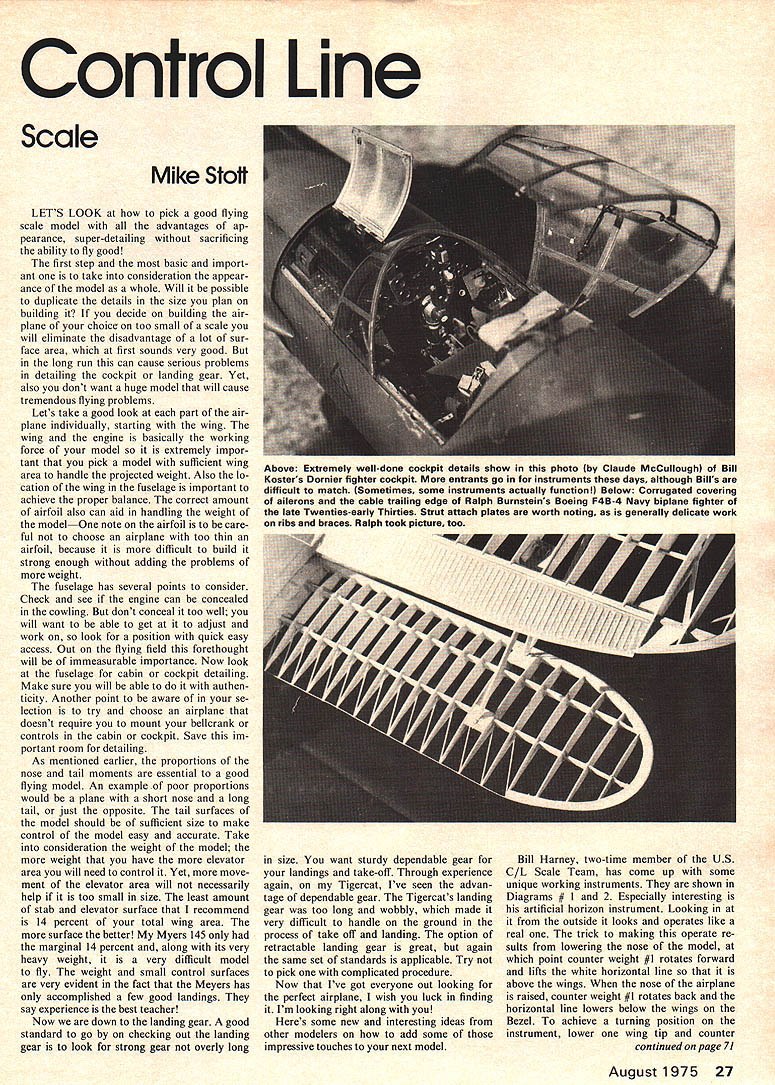
LET'S LOOK at how to pick a good flying scale model with all the advantages of appearance, super-detailing without sacrificing the ability to fly good!
The first step and the most basic and important one is to take into consideration the appearance of the model as a whole. Will it be possible to duplicate the details in the size you plan on building it? If you decide on building the airplane of your choice on too small a scale you will eliminate the disadvantage of a lot of surface area, which at first sounds very good. But in the long run this can cause serious problems in detailing the cockpit or landing gear. Yet, also you don't want a huge model that will cause tremendous flying problems.
Let's take a good look at each part of the airplane individually, starting with the wing. The wing and the engine is basically the working force of your model so it is extremely important that you pick a model with sufficient wing area to handle the projected weight. Also the location of the wing in the fuselage is important to achieve the proper balance. The correct amount of airfoil also can aid in handling the weight of the model—One note on the airfoil is to be careful not to choose an airplane with too thin an airfoil, because it is more difficult to build it strong enough without adding the problems of more weight.
The fuselage has several points to consider. Check and see if the engine can be concealed in the cowling. But don't conceal it too well; you will want to be able to get at it to adjust and work on, so look for a position with quick easy access. Out on the flying field this forethought will be of immeasurable importance. Now look at the fuselage for cabin or cockpit detailing. Make sure you will be able to do it with authenticity. Another point to be aware of in your selection is to try and choose an airplane that doesn't require you to mount your bellcrank or controls in the cabin or cockpit. Save this important room for detailing.
As mentioned earlier, the proportions of the nose and tail moments are essential to a good flying model. An example of poor proportions would be a plane with a short nose and a long tail, or just the opposite. The tail surfaces of the model should be of sufficient size to make control of the model easy and accurate. Take into consideration the weight of the model; the more weight that you have the more elevator area you will need to control it. Yet, more movement of the elevator area will not necessarily help if it is too small in size. The least amount of stab and elevator surface that I recommend is 14 percent of your total wing area. The more surface the better! My Meyers 145 only had the marginal 14 percent and, along with its very heavy weight, it is a very difficult model to fly. The weight and small control surfaces are very evident in the fact that the Meyers has only accomplished a few good landings. They say experience is the best teacher!
Now we are down to the landing gear. A good standard to go by on checking out a landing gear is to look for strong gear not overly long in size. You want sturdy dependable gear for your landings and take-off. Through experience again, on my Tigercat, I've seen the advantage of dependable gear. The Tigercat's landing gear was too long and wobbly, which made it very difficult to handle on the ground in the process of take-off and landing. The option of retractable landing gear is great, but again the same set of standards is applicable. Try not to pick one with complicated procedure.
Now that I've got everyone out looking for the perfect airplane, I wish you luck in finding it. I'm looking right along with you!
Here's some new and interesting ideas from other modelers on how to add some of those impressive touches to your next model.
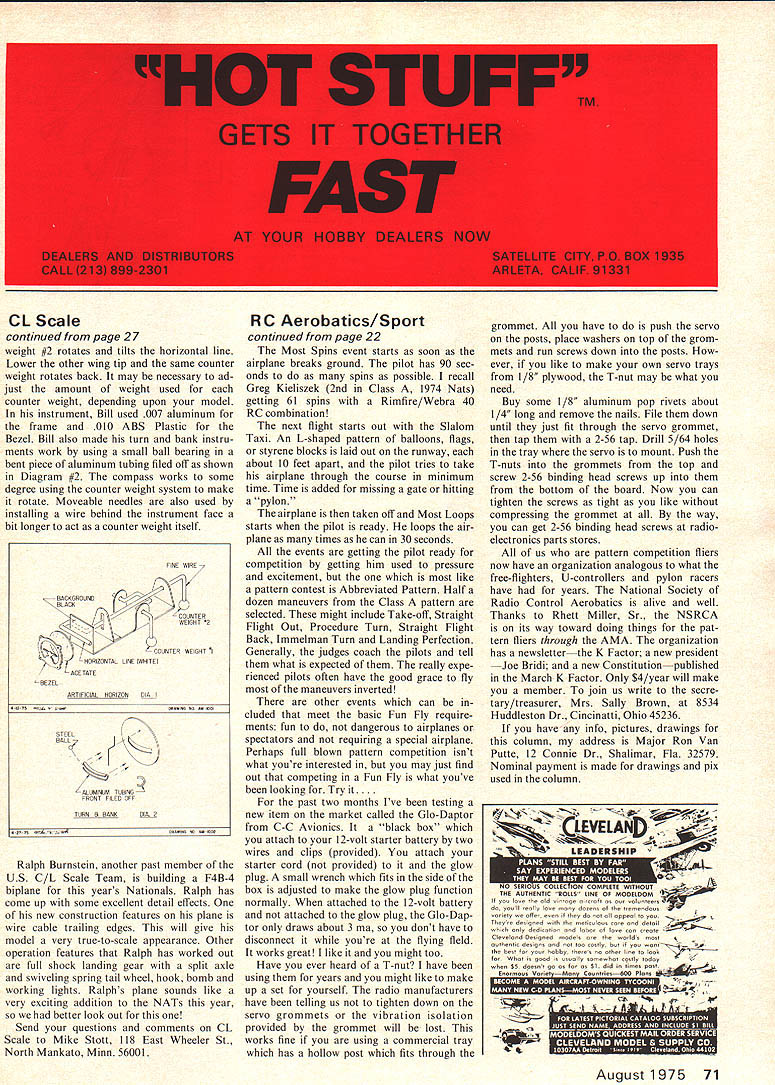
Bill Harney, two-time member of the U.S. C/L Scale Team, has come up with some unique working instruments. They are shown in Diagrams #1 and 2. Especially interesting is his artificial horizon instrument. Looking at it from the outside it looks and operates like a real one. The trick to making this operate results from lowering the nose of the model, at which point counterweight #1 rotates forward, lifts the white horizontal line above the wings; when the nose of the airplane is raised counterweight #1 rotates back and the horizontal line lowers below the wings. To achieve a turning position on the instrument, lower one wing tip and counterweight #2 rotates and tilts the horizontal line. Lower the other wing tip and the same counterweight rotates back. It may be necessary to adjust the amount of weight used for the counterweights depending upon the model. Bill used .007 aluminum for the frame and .010 ABS plastic for the bezel. Bill also made the turn-and-bank instruments work using a small ball bearing and a bent piece of aluminum tubing tilted off as shown in Diagram #2. The compass works to some degree using counterweights.
CL Scale continued from page 27
Ralph Burnstein, another past member of the U.S. C/L Scale Team, is building a F4B-4 biplane for this year's Nationals. Ralph has come up with some excellent detail effects. One of his new construction features on this plane is wire cable trailing edges. This will give his model a very true-to-scale appearance. Other operational features that Ralph has worked out are full shock landing gear with a split axle and swiveling spring tail wheel, hook, bomb and working lights. Ralph's plane sounds like a very exciting addition to the NATS this year, so we had better look out for this one!
Send your questions and comments on CL Scale to Mike Stott, 118 East Wheeler St., North Mankato, Minn. 56001.
Transcribed from original scans by AI. Minor OCR errors may remain.

