
Control Line: Scale
Bill Boss 77-06 269th Street New Hyde Park, NY 11040
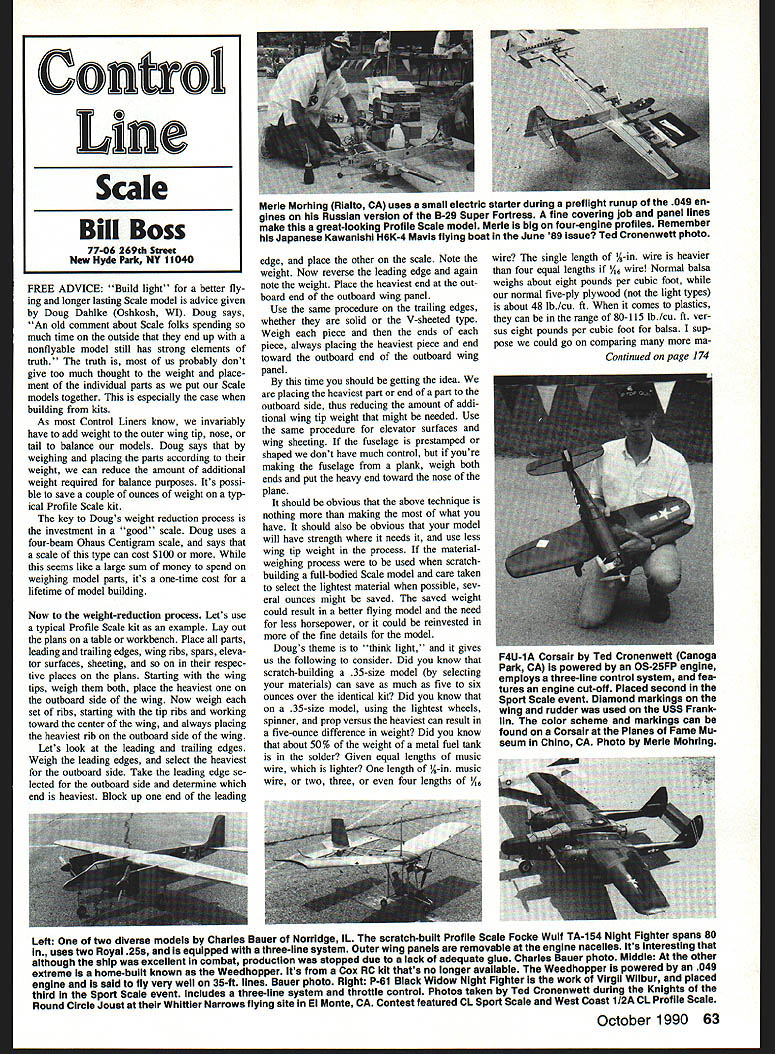
Free advice: "Build light"
"Build light" for a better flying and longer lasting Scale model is advice given by Doug Dahlke (Oshkosh, WI). Doug says, "An old comment about Scale folks spending so much time on the outside that they end up with a nonflyable model still has strong elements of truth." The truth is, most of us probably don't give much thought to the weight and placement of individual parts as we put our Scale models together, especially when building from kits.
As most control liners know, we invariably have to add weight to the outer wing tip, nose, or tail to balance our models. Doug says that by weighing and placing parts according to their weight, we can reduce the amount of additional weight required for balance. It's possible to save a couple of ounces on a typical profile Scale kit.
The key to Doug's weight-reduction process is investing in a good scale. Doug uses a four-beam Ohaus Centigram scale and says a scale of this type can cost $100 or more. While this seems like a large sum to spend on weighing model parts, it's a one-time cost for a lifetime of model building.
Weight-reduction procedure (example for a typical profile Scale kit):
- Lay out the plans on a table or workbench.
- Place all parts (leading and trailing edges, wing ribs, spars, elevator surfaces, sheeting, etc.) in their respective places on the plans.
- Starting with the wing tips, weigh both and place the heavier on the outboard side of the wing.
- Weigh each set of ribs, starting with the tip ribs and working toward the center of the wing; always place the heavier rib on the outboard side.
- For leading and trailing edges: weigh each piece and then determine which end of each piece is heavier. Block up one end, weigh the other end, then reverse and weigh again. Place the heaviest end toward the outboard end of the outboard wing panel.
- Use the same procedure for elevator surfaces and wing sheeting.
- If the fuselage is prestamped or pre-shaped you have less control; if you're building a fuselage from a plank, weigh both ends and put the heavy end toward the nose.
The principle is simple: place the heaviest part or end of a part toward the outboard side, reducing the amount of tip weight required. If you use this material-weighing process when scratchbuilding a full-bodied Scale model and select the lightest material where possible, several ounces might be saved. That saved weight can produce a better flying model that needs less horsepower, or allow you to reinvest weight savings into more fine detail.
Some weight-to-material facts to consider:
- Scratch-building a .35-size model (by selecting materials) can save as much as five to six ounces over the identical kit.
- On a .35-size model, using the lightest wheels, spinner, and prop versus the heaviest can result in a five-ounce difference.
- About 50% of the weight of a metal fuel tank can be in the solder.
- Given equal lengths of music wire: one length of 1/8-in. wire is heavier than four equal lengths of 1/16-in. wire.
- Normal balsa weighs about 8 lb/cu ft. Normal 5-ply plywood (light types) about 48 lb/cu ft. Some plastics can range 80–115 lb/cu ft versus 8 lb/cu ft for balsa.
The choice of materials matters. By this time Doug's message should be clear: think light and build light for better flying and longer-lasting models.
Warbirds — Classic American Fighters & Bombers
Warbirds—Classic American Fighters & Bombers is a book that WWII fighter and bomber lovers might want to add to their library. The book, by Michael O'Leary, Norman Pealing, and Mike Jerram, compiles work previously published in Gunfighters and Bombers (O'Leary), American Warbirds (Pealing), and Warbirds (Jerram). This 239-page work contains over 260 color illustrations of classic American fighters and bombers, including:
- P-51
- P-40
- F8F Bearcat
- F6F Hellcat
- F4F Wildcat
- F4U Corsair
- P-47
- P-38
- TBM Avenger
- AD Skyraider
- B-25
- A-26
- PV-2 Harpoon
- B-26 Marauder
- A-20 Havoc
- B-17
- B-24
- B-29
The photos are of excellent quality and show much of the finer detail useful for model-building and color documentation. The 1990 edition (ISBN 0-517-01218-9) is published by Military Press and distributed by Crown Publishers, Inc., 225 Park Ave. South, N.Y., NY 10003. I found my copy at Barnes & Noble; the cost was about $20.
New trim sheets
Eagle Products has introduced a line of fuelproof trim sheets (when applied as per instructions). They come in four styles:
- Three-color sheet (complementary colors such as yellow–orange–red or Cub yellow–red–gray)
- Solid fluorescent colors
- Vertical stripe sheet (stripes in graduated sizes)
- Horizontal stripe sheet (stripes in graduated sizes)
Details:
- The three-color sheets feature a large 3½-in. center stripe, a ¾-in. stripe on either side of the center stripe, and a ½-in. stripe alongside the larger stripes.
- Each package contains three 6-in.-wide x 27-in.-long sheets.
- Sheets can be cut to any desired shape or design; remove the liner and stick them on the model following the instructions. No heat or other adhesives are required.
While these trim sheets may have limited use on Scale models, they should be very helpful for dressing up sport-flying models. Prices range from about $1.75 to $2.25 per package depending on type. For more information, write to Eagle Products, P.O. Box 4609, Covina, CA 91723 (tel. 1-818/339-1311).
Caption correction
In the July column, the picture of Bill Reynolds and the Grumman Bearcat was credited as being taken by C. Peter Cornils. The credit should have read Chris Cornils. Cornils is Chris' wife's name. Chris, sorry for the error.
Please send ideas, notices of upcoming CL Scale events, contest reports, and especially photos of CL Scale activity to me at the address at the top of this column.
Transcribed from original scans by AI. Minor OCR errors may remain.

