
Control Line: Scale
Bill Boss 77-06 29th Street New Hyde Park, NY 11040
Model restoration is a subject to which we probably don't give much thought. What do we do when a considerable amount of fuel and dirt has collected in the engine compartment and on the structure in general after several years' use? How do you prepare the craft so that an all-new paint scheme can be applied, and so it will look and go on the way it did originally?
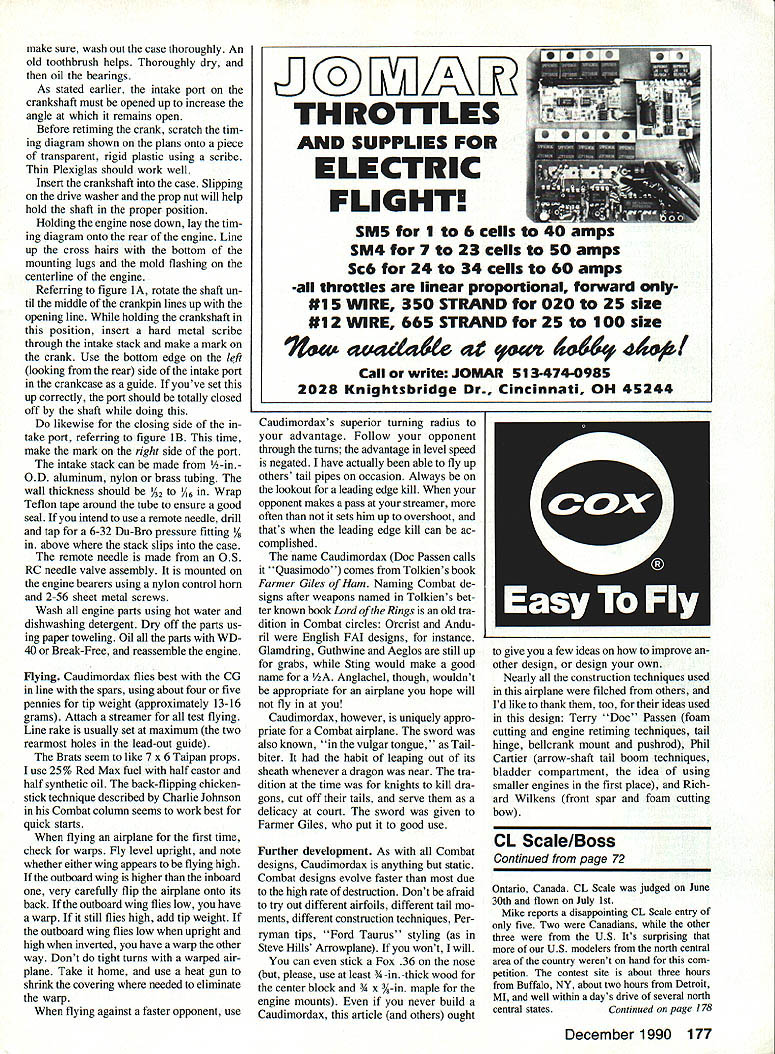
George Gaydos (Elmwood Park, NJ) would like to share with us his method of model refurbishing that has kept his scale models flying for many years. One of Gaydos's airplanes, an F7F Tigercat that started out as a carrier model and was converted to scale several years back, is now 20 years old and still going strong.
Gaydos says that the biggest challenge is correcting the damage in those areas where fuel and oil chemical residues have been collecting over long periods, rather than the restoration as a whole. These areas are usually in the engine compartment or nacelles.
The first step, of course, is to determine whether the model is worth saving. Generally, sentimental feelings about a model play a great part in our decision. If the answer is yes, proceed as follows:
- Remove the engine, any accessories, wheels, and the fuel tank if possible.
- Decide whether the model is in poor enough condition to warrant removal and replacement of fabric, silkspan, wood covering, or planking strips. If so, much of the chemical problem will disappear with the old covering or replaced wood.
- If restoration does not require removal of surface coverings or major replacement of structure, the job becomes simpler: remove surface chemicals from the entire model, paying attention to areas with heavy fuel and oil residue concentrations.
Gaydos's method is basically a two-step process:
- Clean or remove dirt and chemical residues from all model surfaces by wiping the model down with rags and dope thinners or alcohol. Always work in a well-ventilated area when cleaning with thinners or alcohol, or when painting. The backyard on a good day is the perfect place for this cleaning operation. Use rubber gloves and eye protection.
- If using thinners, you'll notice that some of the original paint will be removed. Care should be taken not to use so much thinner as to loosen the model's covering or joints. When the aircraft appears sufficiently clean, allow it to dry thoroughly.
- Apply some clear dope to a test area. If the dope dries normally, proceed to step 2.
- Remove fuel and oil residues from areas such as the engine compartment or nacelles.
- Begin with a general cleaning of the compartment using thinners or alcohol.
- A great swab for this operation can be made by attaching small pieces of old bath towel to the end of a piece of 1/4-in. doweling with rubber bands.
- If fuel and oil have penetrated the wood to the extent that thinners aren't effective, use successive applications of baking soda to the affected area. The baking soda will turn color as it absorbs the residues. Clean the area with thinners after each application. When the baking soda no longer turns color, it has drawn as much of the residue from the structure as possible.
- If you have difficulty making the baking soda adhere, add a little water to make a paste; it will absorb residues as it dries. Understand that the baking soda procedure can be quite lengthy; it can take a week or more to get the job done.
- When you are satisfied that all residues have been removed, again apply dope to a small area. If the dope dries well, you're ready to refinish the model.
Before repainting you might want to consider adding operating features not original to the model, such as flaps or a bomb or fuel-tank drop. This is also the time to examine the airplane closely for stress cracks, worn elevator hinges, etc. It might also be time to apply some epoxy resin cloth to the engine compartment for reinforcement against future damage. Once you've completed all modifications and added any features, then filled and sanded nicks and dents, you're ready to finish the restoration job by giving the model its new paint.
Control Line: Scale
Canadian Nats
Mike Welshans, steady contributor, reports the 1990 Canadian National Competition was held June 30–July 8, 1990, at Huron Park.
CL Scale
Ontario, Canada. CL Scale was judged on June 30 and flown on July 1. Mike reports a disappointing CL Scale entry of only five. Two were Canadians, while the other three were from the U.S. It's surprising that more of our U.S. modelers from the north-central area of the country weren't on hand for this event. The contest site is about three hours from Buffalo, NY, about two hours from Detroit, MI, and well within a day's drive of several north-central states.
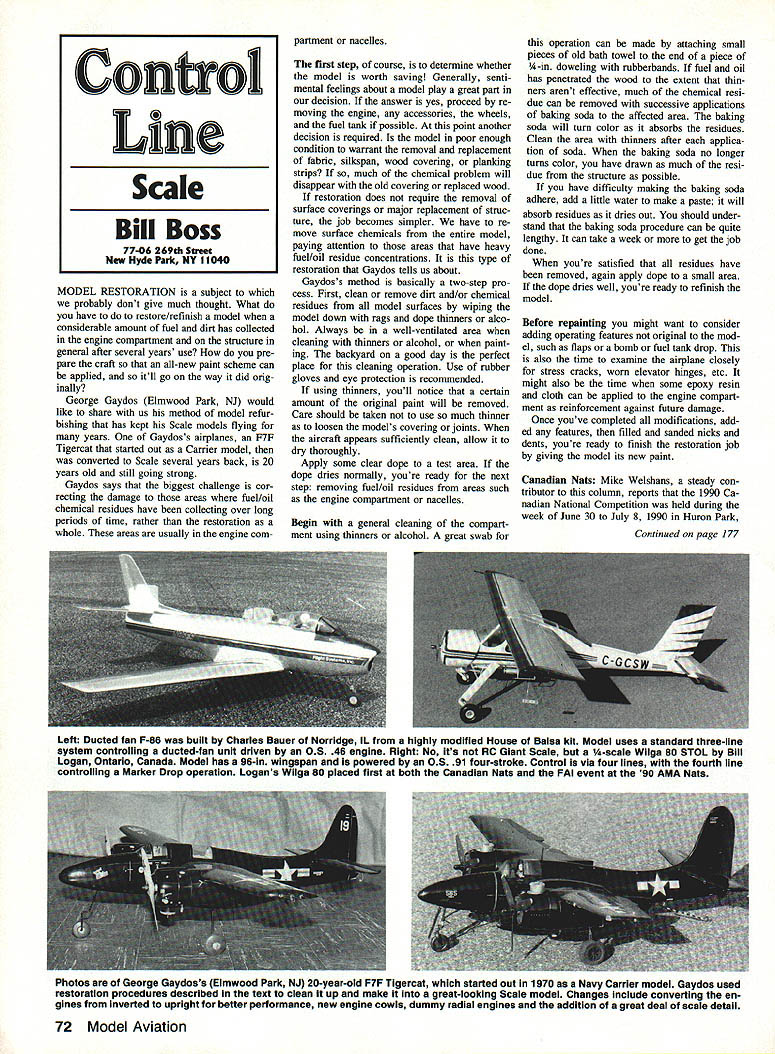
- First place was taken by Bill Logan of Ontario, Canada, with a 1/4-scale Wilga 80 (Polish origin) STOL modeled after a full-scale aircraft located in Georgetown, Ontario. Powered by an O.S. 91 four-stroke, the model is said to show highly realistic sound and flight performance. It has a 96-in. wingspan, yet weighs only 12 lb.
- Second place went to our reporter, Mike Welshans of Ferndale, MI. Welshans' winning Howard DGA-15-P was featured in Model Aviation's 1989 Nats coverage (November 1989 issue). This DGA is 84 in., 1/2-scale and powered by an Enya .45.
- Charlie Bauer of Norridge, IL, took third place with a House of Balsa F-86 powered by an O.S. .46 and ducted-fan unit (pictured in the May 1990 Model Aviation).
- Paul Smith of Sterling Heights, MI, captured fifth place with a scratch-built de Havilland Tiger Moth that didn't make an official flight.
The 1991 Canadian Nationals will again be held at Huron Park, Ontario, Canada. If you'd like to participate, contest information can be obtained by writing to Gerald Shaw, 21 Chauncey Court, London, Ontario, Canada N6K 1V1.
Please send ideas, notices of upcoming CL Scale events, contest reports and especially photos of CL Scale activity to me at the address at the very beginning of this column.
Transcribed from original scans by AI. Minor OCR errors may remain.

