
CONTROL LINE: SCALE
Bill Boss, 77-06 269th Street, New Hyde Park, NY 11040
Scale Model Pilot Figures
Have you ever noticed the difference in the appearance of your scale model after a scale pilot figure has been added? If painted and positioned properly in the cockpit, it can greatly enhance the overall appearance of your model.
While most scale modelers learn to add great detail to their models, painting a model figure seems like a monumental task to many. The task has been made easier through a videotape just released by Robin's View Productions, L.L.C. The tape is called How To Paint Pilot Figures; it's in the company's "Modeler's Master Class" series.
Robin's View Productions is headed by Bob Hunt; he's a World-Champion stunt flier and an excellent model builder. The company uses professional, state-of-the-art video cameras and editing equipment.
Don Typond, an all-around modeler for more than 50 years, is featured in the video; he shows how to paint three different types of pilot figures. Don's modeling experience spans control line, radio control, and free flight, and also includes ship models, automobiles, and military figures. The two-hour video takes you step-by-step through the entire painting process, from selection of paints and brushes to the last stroke of the paint job.
Don shows, in sharp close-ups, how to paint:
- a Williams Bros. Standard pilot with a leather helmet,
- a DGA latex pilot with realistic-looking hair,
- a Hangar 9 WWII USAAF fighter pilot in full battle dress.
After viewing this video, almost any of us should be able to make great-looking pilot figures.
The next step is learning how to position that great-looking pilot figure in the cockpit. If it's not placed properly, all of the detailing work will have been wasted.
When placing a pilot figure in the model, put it in a position that gives the pilot the appearance of being engaged in some sort of action. Don't place the figure so the pilot's head is pressed against the headrest, which makes him look like he's staring off into space.
A good example of how to place the pilot figure might be taken from the position you're in while you drive your automobile. You don't drive with your head back against the headrest—you lean forward, looking straight ahead at traffic. You're able to observe the instrument panel with ease or look from side to side at your mirrors. A pilot does much the same: a straight-ahead look at his flight path or instrument panel, or a side look while taxiing or flying. There's no sense in creating a great-looking pilot if it's not used to its best advantage.
To obtain a copy of How To Paint Pilot Figures, write to Robin's View Productions, L.L.C., 205 E. Center St., Box 68, Stockertown, PA 18083; Tel.: (610) 746-0106. The tape is $19.95 plus $3 shipping and handling.
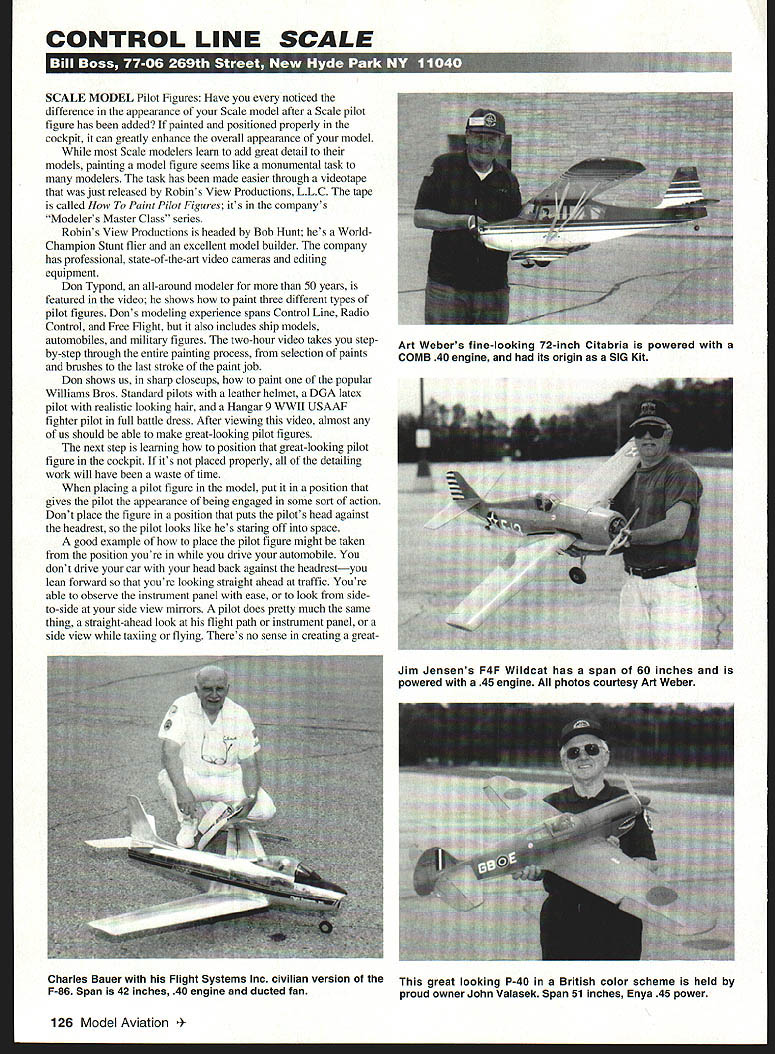
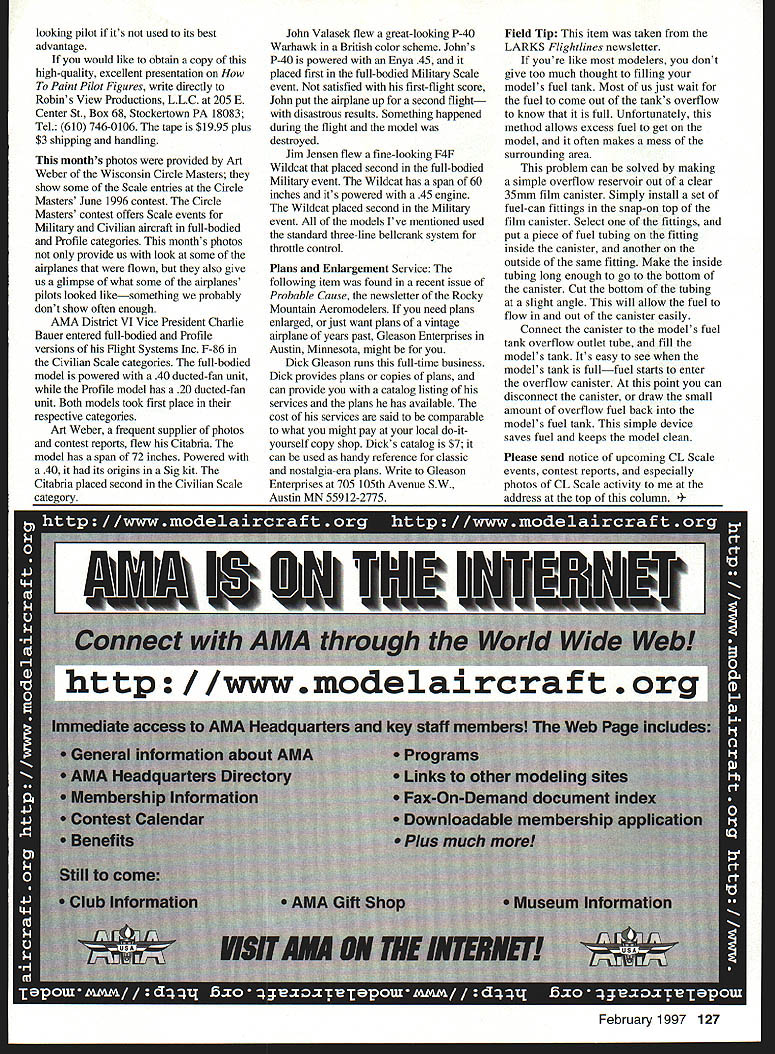
This month's photos were provided by Art Weber of the Wisconsin Circle Masters; they show some of the scale entries at the Circle Masters' June 1996 contest. The Circle Masters' contest offers scale events for military and civilian aircraft in full-bodied and profile categories. The photos not only show some of the airplanes that were flown, but also give a glimpse of what some of the airplanes' pilots looked like—something we probably don't show often enough.
AMA District VI Vice President Charlie Bauer entered full-bodied and profile versions of his Flight Systems Inc. F-86 in the civilian scale categories. The full-bodied model is powered with a .40 ducted-fan unit, while the profile model has a .20 ducted-fan unit. Both models took first place in their respective categories.
Art Weber, a frequent supplier of photos and contest reports, flew his Citabria. The model has a 72-inch span and is powered with a .40; it originated from a Sig kit. The Citabria placed second in the civilian scale category.
John Valasek flew a great-looking P-40 Warhawk in a British color scheme. John's P-40 is powered with an Enya .45, and it placed first in the full-bodied military scale event. Not satisfied with his first-flight score, John put the airplane up for a second flight—with disastrous results. Something happened during the flight and the model was destroyed.
Jim Jensen flew a fine-looking F4F Wildcat that placed second in the full-bodied military event. The Wildcat has a 60-inch span and is powered with a .45 engine. All of the models mentioned use the standard three-line bellcrank system for throttle control.
Plans and Enlargement Service
The following item was found in a recent issue of Probable Cause, the newsletter of the Rocky Mountain Aeromodelers. If you need plans enlarged, or just want plans of a vintage airplane of years past, Gleason Enterprises in Austin, Minnesota, might be for you.
Dick Gleason runs this full-time business. He provides plans or copies of plans and can send a catalog listing his services and the plans he has available. The cost of his services is comparable to what you might pay at a local do-it-yourself copy shop. Dick's catalog is $7 and can be used as a handy reference for classic and nostalgia-era plans. Write to Gleason Enterprises, 705 105th Avenue S.W., Austin, MN 55912-2775.
Field Tip
This item was taken from the Larks Flightlines newsletter.
If you're like most modelers, you don't give too much thought to filling your model's fuel tank. Most of us just wait for the fuel to come out of the tank's overflow to know that it is full. Unfortunately, this method allows excess fuel to get on the model and often makes a mess of the surrounding area.
This problem can be solved by making a simple overflow reservoir out of a clear 35mm film canister:
- Install a set of fuel-can fittings in the snap-on top of the film canister.
- Select one fitting and put a piece of fuel tubing on the fitting inside the canister and another piece on the outside of the same fitting.
- Make the inside tubing long enough to reach the bottom of the canister. Cut the bottom of the tubing at a slight angle to allow fuel to flow in and out easily.
- Connect the canister to the model's fuel tank overflow outlet tube and fill the model's tank.
It's easy to see when the model's tank is full—fuel starts to enter the overflow canister. At this point you can disconnect the canister or draw the small amount of overflow fuel back into the model's tank. This simple device saves fuel and keeps the model clean.
Please send notice of upcoming CL scale events, contest reports, and especially photos of CL scale activity to me at the address at the top of this column.
Transcribed from original scans by AI. Minor OCR errors may remain.

