
CONTROL LINE SCALE
Bill Boss, 77-06 269th Street, New Hyde Park, NY 11040
Building with Paper
Ken Long of Whittier, California has been the main subject of my past two columns. I covered the types of corrugated material and card stock that can be used for more than 90% of scratch-built scale models' construction. I also described the basics of putting such models together, and the glues that should be used.
I'll conclude this series with information about covering the model's structure and applying surface details, such as rivets and access panels, as the covering is applied — something not easily done when using the more traditional methods of covering with balsa, silk, or silkspan.
Covering the Structure
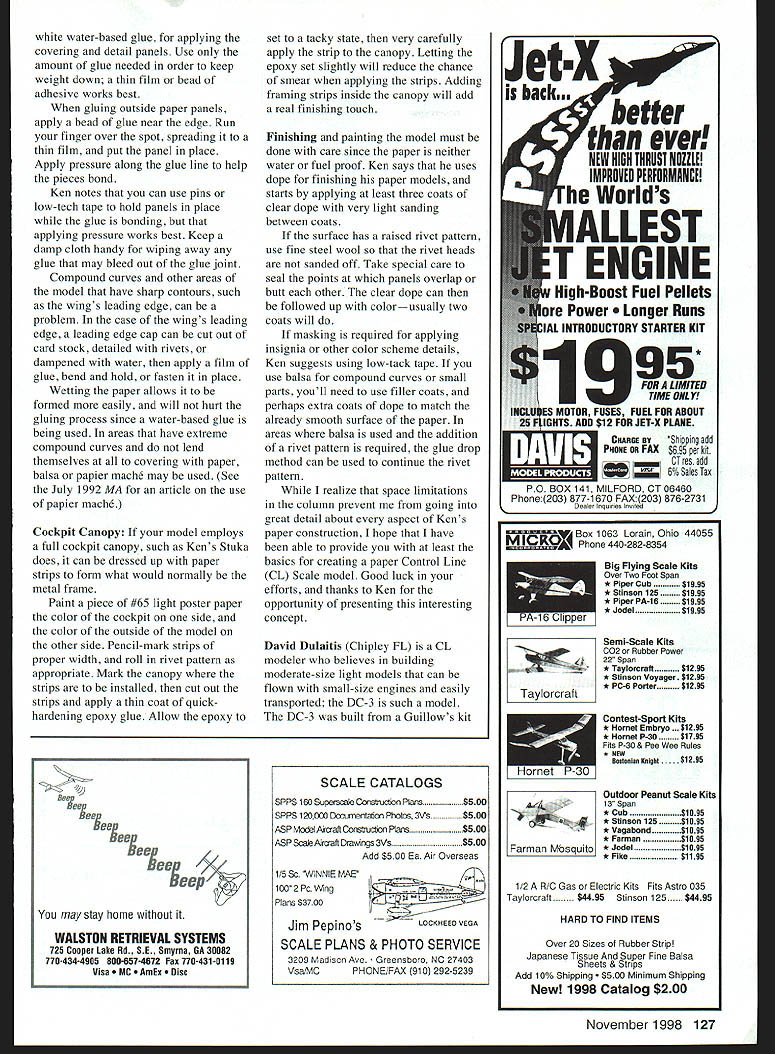
The main type of paper used for covering the models' structure is heavy #69 card stock, about .016" thick. For Ken's Sport Scale Stuka Ju 87D, he plotted the approximate locations where large panels of skin would be applied, and placed or added ribs or formers at those locations for gluing purposes.
Succeeding panels should be overlapped by about 3/8", providing ample area for gluing. The overlap also gives the model a more scale-like appearance.
It's a good idea to cut the covering panels out of scrap paper to serve as patterns for the finished panels. The scrap-paper mockup can be put in place and size-adjusted to make sure the panel will fit properly. Use the mockup to cut the card stock; before gluing it in place, you can add the rivet pattern and any other surface details.
Rivet detail can be applied in a couple of different ways.
- For raised rivets:
- Measure and cut the panel to size. Mark and draw lines on the inside of the panel for the rivet locations.
- Lay a piece of scrap heavy paper on a hard surface to act as a pad. Place the marked panel on the scrap paper with the penciled lines facing up.
- Create the rivets by tracing (with moderate pressure) the penciled lines with a dressmaker's tracing wheel. This will provide a raised rivet pattern on the opposite side of the panel.
Dressmakers' tracing wheels come in various diameters and numbers of teeth for different rivet spacings. You can obtain them at craft or fabric stores that sell dressmaking supplies.
- For flush rivets:
- Use small brass tubing, such as 1/16" diameter. Sharpen the end of the tube, place it in position on the face of the panel, and lightly tap it in to form the rivet.
- You can tap them one at a time, or make a rivet wheel for easier application. To make a rivet wheel: use a soft metal disk (3/4" to 1" diameter), drill 1/16" holes around the circumference, force-fit short pieces of 1/16" brass tube into the holes, drill a center hole for a screw axle, bolt it to a wooden or metal handle, and use it to roll flush rivet patterns onto the paper in minutes.
Other details, such as engine cowling panels, munition-access panels, or maintenance hatches, can be applied in light card stock after the initial covering (#69 card stock) is completed. Cut the additional panels to exact size, add detail as described above, and then glue them in place.
Gluing
Ken used Elmer's Glue-All (white, water-based glue) for applying the covering detail panels. Use only the amount of glue needed to keep weight down; a thin film of adhesive works best.
- When gluing outside paper panels, apply a bead of glue near the edge, run your finger along the spot to spread a thin film, and put the panel in place.
- Apply pressure along the glue line to help the pieces bond. Pins or low-tack tape can hold panels while the glue bonds, but applying pressure works best.
- Keep a damp cloth handy to wipe away glue that may bleed out of the joint.
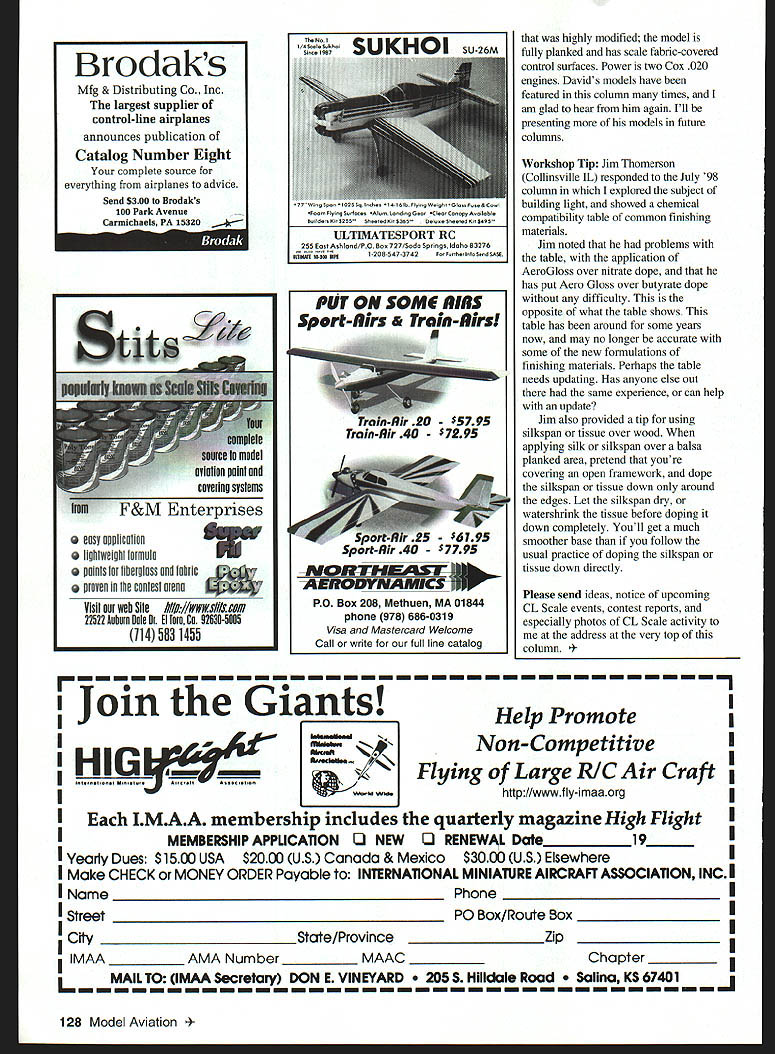
Compound Curves
Areas with extreme compound curves (such as a wing leading edge) can be a problem. In these cases, cut the leading-edge cap out of card stock and add the detailed rivets to that piece. Dampening the paper and applying a film of glue allows the piece to be bent and held until fastened in place. Wetting the paper makes it form easily and will not hurt the gluing process since a water-based glue is used.
Areas with extreme compound curves may also be covered with balsa or papier-mâché. See the July 1992 Model Aviation article on using papier-mâché for more detail.
Cockpit Canopy
If the model employs a full cockpit canopy, as Ken's Stuka does, it can be dressed up by applying paper strips to form what would normally be a metal frame.
- Paint a piece of #65 light poster paper the color of the cockpit sides on the inside and the color of the model on the outside.
- On the painted side, pencil-mark the strips to the proper width, roll them, and apply the rivet pattern as appropriate.
- Allow the epoxy (or adhesive) to set to a tacky state, then very carefully apply the strips to the canopy. Letting the epoxy set slightly reduces the chance of smearing.
- Adding framing strips inside the canopy will add a real finishing touch.
Finishing and Painting
Finishing and painting must be done with care since the paper is neither water- nor fuel-proof. Ken uses dope for finishing his paper models, starting with at least three coats of clear dope with very light sanding between coats.
- If the surface has a raised rivet pattern, use fine steel wool so the rivet heads are not sanded off.
- Take special care to seal the points at which panels overlap or butt each other.
- After clear dope, apply color—usually two coats will do.
If masking is required for insignia or other color-scheme details, use low-tack tape. If you use balsa for compound curves or small parts, you may need filler coats and extra coats of dope to match the already smooth paper surface. Where balsa is used and a rivet pattern is required, the glue-drop method can be used to continue the rivet pattern.
While space limitations prevent going into great detail about every aspect of Ken's paper construction, these basics should help you create a paper Control Line (CL) scale model. Good luck, and thanks to Ken for the opportunity to present this interesting concept.
Model Spotlight
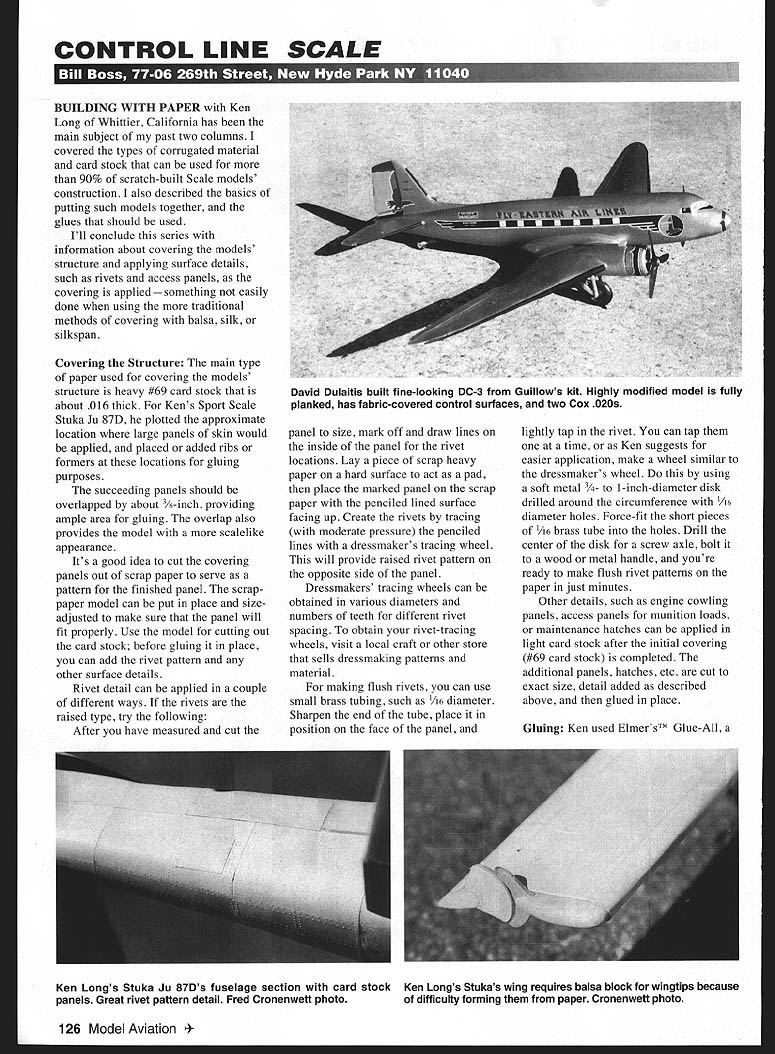
David Dulaitis (Chipley, FL) is a CL modeler who believes in building moderate-size, light models that can be flown with small engines and easily transported; his DC-3 is such a model. The DC-3 was built from a Guillow's kit that was highly modified; the model is fully planked and has scale fabric-covered control surfaces. Power is two Cox .020 engines. David's models have been featured in this column many times, and I am glad to hear from him again. I'll be presenting more of his models in future columns.
Workshop Tip
Jim Thomerson (Collinsville, IL) responded to the July '98 column in which I explored building light and showed a chemical compatibility table of common finishing materials.
Jim noted problems with the table: he had difficulty applying Aero Gloss over nitrate dope, but has put Aero Gloss over butyrate dope without difficulty. This is the opposite of what the table shows. The table has been around for some years and may no longer be accurate with some of the new formulations of finishing materials. Perhaps the table needs updating. Has anyone else had the same experience or can help with an update?
Jim also provided a tip for using silkspan or tissue over wood: when applying silk or silkspan over a balsa-planked area, pretend you're covering an open framework, and dope the silkspan or tissue down only around the edges. Let the silkspan dry, or water-shrink the tissue before doping it down completely. You'll get a much smoother base than if you dope the silkspan or tissue down directly.
Please send ideas, notice of upcoming CL Scale events, contest reports, and especially photos of CL Scale activity to me at the address at the very top of this column.
Transcribed from original scans by AI. Minor OCR errors may remain.

