
CONTROL LINE SCALE
Bill Boss 77-06 269th Street, New Hyde Park, NY 11040
MUSIC WIRE
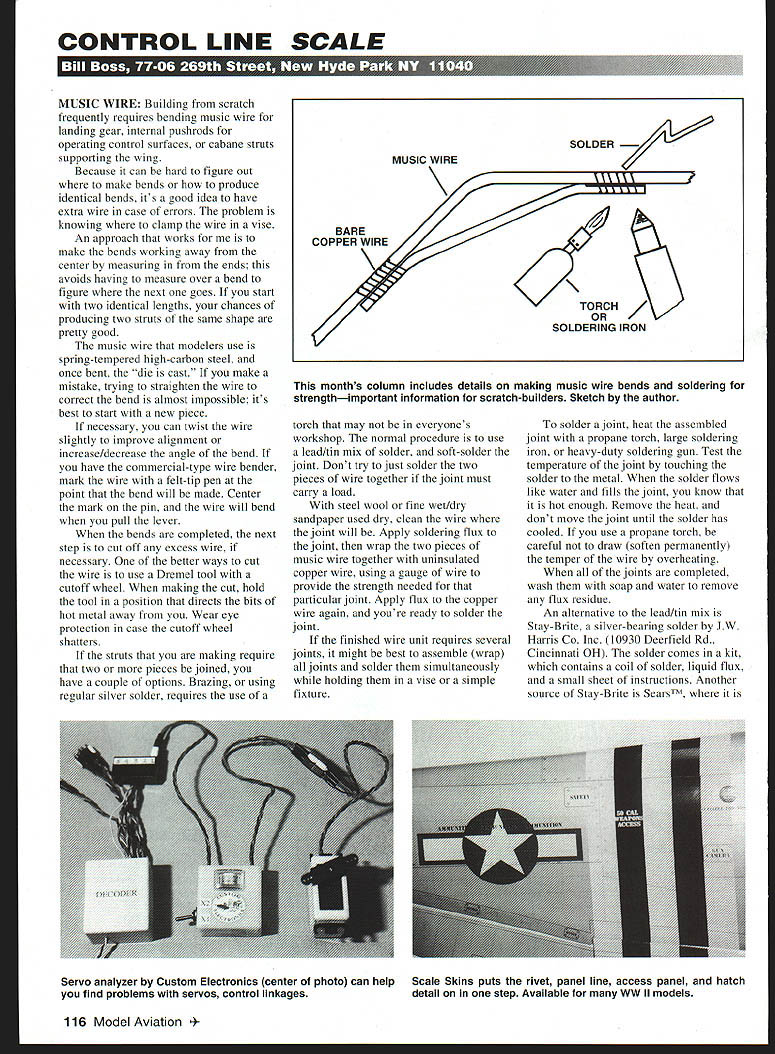
Building from scratch frequently requires bending music wire for landing gear, internal pushrods for operating control surfaces, or cabane struts supporting the wing. Because it can be hard to figure out where to make bends or how to produce identical bends, it's a good idea to have extra wire in case of errors. The problem is knowing where to clamp the wire in a vise.
An approach that works for me is to make the bends working away from the center by measuring in from the ends; this avoids having to measure over a bend to figure where the next one goes. If you start with two identical lengths, your chances of producing two struts of the same shape are pretty good.
Music wire that modelers use is spring-tempered high-carbon steel, and once bent, the "die is cast." If you make a mistake, trying to straighten the wire to correct the bend is almost impossible; it's best to start with a new piece.
If necessary, you can twist the wire slightly to improve alignment or increase/decrease the angle of the bend. If you have a commercial-type wire bender, mark the wire with a felt-tip pen at the point the bend will be made. Center the mark on the pin, and the wire will bend when you pull the lever.
When the bends are completed, cut off any excess wire if necessary. One of the better ways to cut the wire is to use a Dremel tool with a cutoff wheel. When making the cut, hold the tool so it directs bits of hot metal away from you. Wear eye protection in case the cutoff wheel shatters.
If the struts you are making require two or more pieces to be joined, you have a couple of options. Brazing, or using regular silver solder, requires a torch that may not be in everyone's workshop. The normal procedure is to use a lead/tin mix and soft-solder the joint. Don't try to just solder two pieces of wire together if the joint must carry a load.
For a strong soft-soldered joint:
- Clean the wire where the joint will be with steel wool or fine wet/dry sandpaper used dry.
- Apply soldering flux to the joint.
- Wrap the two pieces of music wire together with uninsulated copper wire, using a gauge that provides the strength needed for that particular joint.
- Apply flux to the copper wire again. If the finished unit requires several joints, assemble (wrap) all joints and solder them simultaneously while holding the assembly in a vise or simple fixture.
To solder a joint:
- Heat the assembled joint with a propane torch, large soldering iron, or heavy-duty soldering gun.
- Test the temperature by touching solder to the metal. When the solder flows like water and fills the joint, it is hot enough.
- Remove the heat and do not move the joint until the solder has cooled.
- If you use a propane torch, be careful not to draw (soften permanently) the temper of the wire by overheating.
- When all joints are completed, wash them with soap and water to remove flux residue.
An alternative to the lead/tin mix is Stay-Brite, a silver-bearing solder by J.W. Harris Co. Inc. The Stay-Brite kit contains a coil of solder, liquid flux, and a small sheet of instructions. Another source of Stay-Brite is Sears, where it is sold as "Lead Free Solder" and comes with a tube of acid flux.
Stay-Brite melts at relatively low heat (about 430°F) and is several times stronger than lead/tin-type solder. It can be applied with a torch, heavy soldering iron, or gun. When finished, wash the joint with soap and water to remove flux residue.
This month's column includes details on making music wire bends and soldering for strength—important information for scratch-builders. Sketch by the author.
The basis for this item was the Indy Sportliners, who found it in the BARCS (Bay Area Radio Control Society) News, San Pablo, CA.
WRAM SHOW 1999
The 1999 WRAM (Westchester Radio Aero Modelers) Show, held the weekend of February 27–28, was a most successful affair. Good weather (about 50°F) brought out large crowds of modelers who browsed the wares of 200+ exhibitors.
There were seminars, model competitions, WRAM Youth Aviation Programs, an AMA District II meeting, and the spotlight was on a great 1/12-scale model of the Spadefish 411 World War II submarine. The model had many operating features, highlighted with the sounds of a submarine underway.
The WRAM Show is radio-control (RC)-oriented; however, many products on display can be used by Scale and other control-line (CL) modelers. I also enjoyed saying hello to many people I know in modeling but only see once or twice a year.
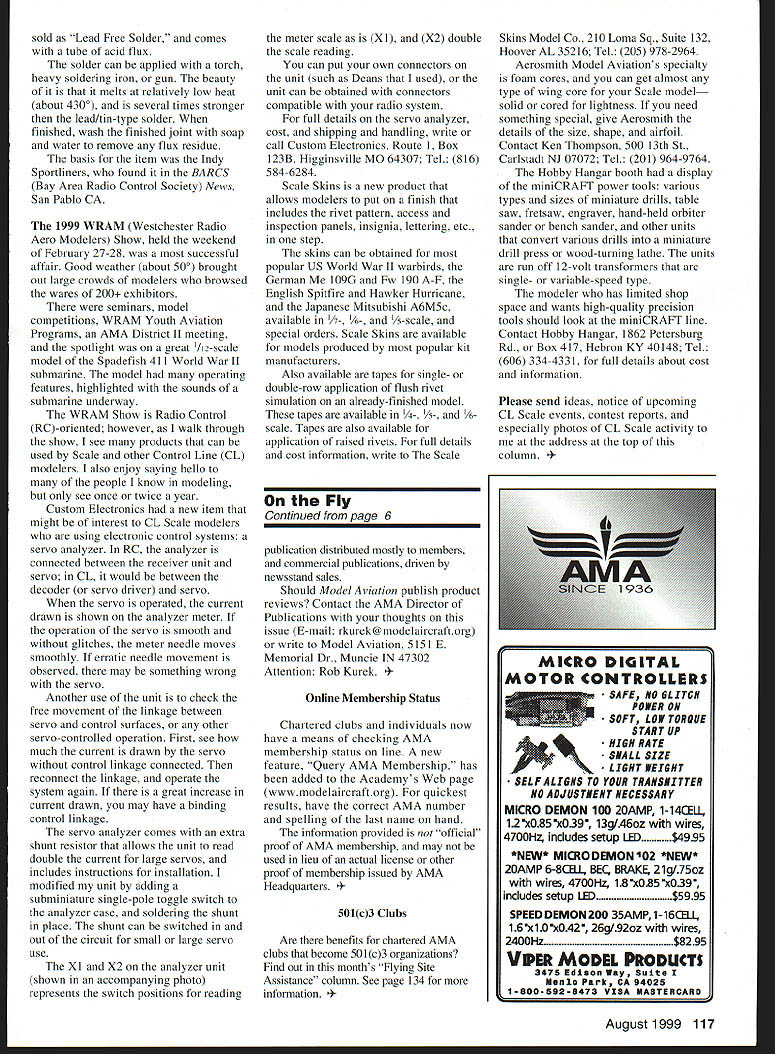
Servo Analyzer (Custom Electronics)
Custom Electronics had a new item that might interest CL Scale modelers using electronic control systems: a servo analyzer. In RC, the analyzer is connected between the receiver and servo; in CL it would be between the decoder (or servo driver) and servo.
Uses and features:
- When the servo is operated, the current drawn is shown on the analyzer meter. Smooth operation produces smooth needle movement; erratic movement indicates a possible servo problem.
- You can check free movement of the linkage between servo and control surfaces by first noting current draw with the linkage disconnected, then reconnecting the linkage and operating the system again. A large increase in current suggests a binding linkage.
- The unit comes with an extra shunt resistor that allows the analyzer to read double the current for larger servos and includes instructions for installation.
- The analyzer's X1 and X2 positions switch the meter scale between normal (X1) and double (X2) readings.
- You can fit your own connectors (Deans or others), or obtain the unit with connectors compatible with your radio system.
I modified my unit by adding a subminiature single-pole toggle switch to the analyzer case and soldering the shunt in place so it can be switched in and out for small or large servos.
For full details, cost, and shipping: Custom Electronics, Route 1, Box 123B, Higginsville, MO 64037; Tel.: (816) 584-6284.
Scale Skins
Scale Skins is a product that allows modelers to apply a finish that includes rivet patterns, access and inspection panels, insignia, lettering, etc., in one step.
Available subjects:
- Most popular US World War II warbirds, the German Me 109G and Fw 190 A–F, the English Spitfire and Hawker Hurricane, and the Japanese Mitsubishi A6M5c.
- Scales: 1/4-, 1/6-, and 1/5-scale, and special orders.
- Skins are available for models produced by most popular kit manufacturers.
Additional products:
- Tapes for single- or double-row application of flush rivet simulation on an already-finished model (available in 1/4-, 1/3-, and 1/2-scale).
- Tapes for application of raised rivets.
For details and pricing: The Scale Skins Model Co., 210 Loma Sq., Suite 132, Hoover, AL 35216; Tel.: (205) 978-2964.
Aerosmith Model Aviation
Aerosmith Model Aviation specializes in foam cores. You can get almost any type of wing core for a scale model—solid or cored for lightness. For special requests, provide the size, shape, and airfoil.
Contact: Ken Thompson, 500 13th St., Carlstadt, NJ 07072; Tel.: (201) 964-9764.
Hobby Hangar — miniCRAFT Tools
The Hobby Hangar booth displayed the miniCRAFT line of power tools: miniature drills, table saw, fretsaw, engraver, hand-held orbital sander and bench sander, and other units that convert drills into a miniature drill press or wood-turning lathe. The units run off 12-volt single- or variable-speed transformers.
Modelers with limited shop time who want high-quality precision tools should consider the miniCRAFT line.
Contact: Hobby Hangar, 1862 Petersburg Rd., Box 417, Hebron, KY 41048; Tel.: (606) 334-4331.
Please send ideas, notice of upcoming CL Scale events, contest reports, and especially photos of CL Scale activity to me at the address at the top of this column.
Transcribed from original scans by AI. Minor OCR errors may remain.

