
Control Line: Scale
Dick Byron
SCALE REFERENCES:
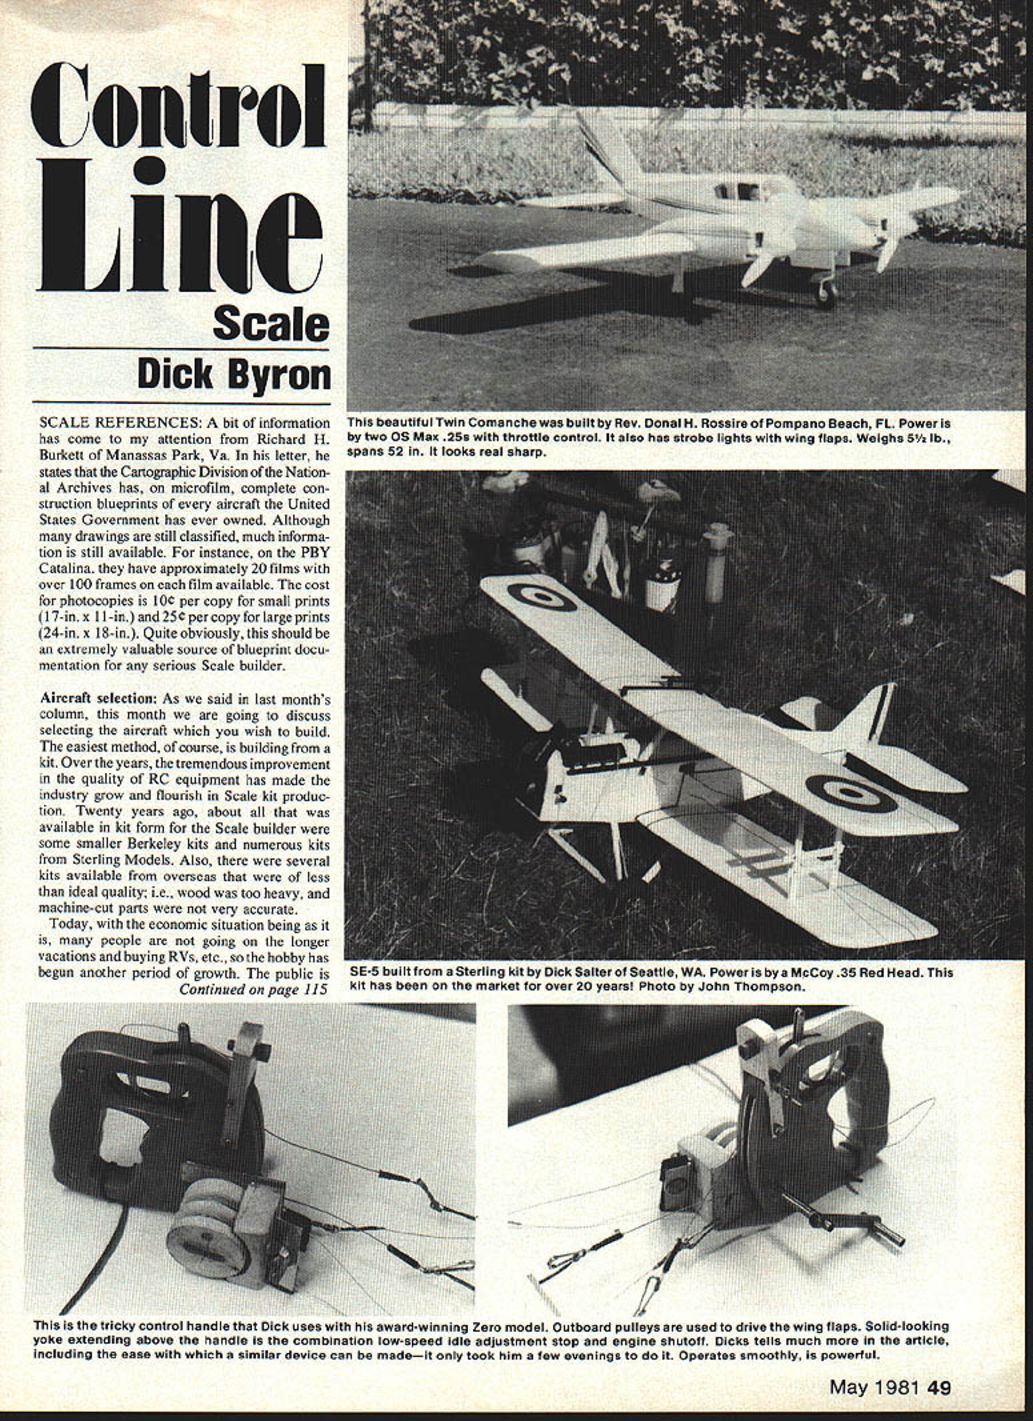
A bit of information has come to my attention from Richard H. Burkett of Manassas Park, Va. In his letter he states that the Cartographic Division of the National Archives has, on microfilm, complete construction blueprints of every aircraft the United States Government has ever owned. Although many drawings are still classified, much information is still available. For instance, on the PBY Catalina they have approximately 20 films with over 100 frames on each film available. The cost for photocopies is 10¢ per copy for small prints (17-in. x 11-in.) and 25¢ per copy for large prints (24-in. x 18-in.). Quite obviously this should be an extremely valuable source of blueprint documentation for any serious scale builder.
AIRCRAFT SELECTION:
As we said in last month's column, this month we are going to discuss selecting the aircraft you wish to build. The easiest method, of course, is building from a kit. Over the years, the tremendous improvement in the quality of RC equipment has made the industry grow and flourish in scale kit production.
Twenty years ago, about all that was available in kit form for the scale builder were some smaller Berkeley kits and numerous kits from Sterling Models. Also, there were several kits available from overseas that were of less than ideal quality; i.e., wood was too heavy, and machine-cut parts were not very accurate.
Today, with the economic situation being as it is, many people are not going on the longer vacations and buying RVs, etc., so the hobby has begun another period of growth. The public is more demanding, and the kit manufacturers have risen to the occasion. There are an extremely large number of RC scale kits available for the more popular aircraft that anyone would wish to build. The reason I lean in the direction of the RC kits is simply because the larger aircraft tend to fly better — they have a lower wing loading. They are much more realistic in flight. The smaller aircraft which are still currently available will fly well, but tend to have a higher wing loading and require greater skill to make them fly as realistically as the larger aircraft.
The changes necessary to convert an RC scale model to a CL model are actually quite simple:
- Mount the bellcrank on the center of gravity or slightly behind it.
- Make appropriate structural changes so the bellcrank can be solidly mounted in the aircraft.
- Add a leadout guide on the inboard wing tip.
In the case of one modeler, Lew McFarland, he has flown in several Nats with a CL Sport Scale Acromaster that is also flown at other times as an RC scale airplane. With the extremely large selection available, a modeler should be able to select the aircraft he desires in the price range he desires without too much difficulty.
If the aircraft you wish to build is not available in kit form in the size you would like, obviously the next option is to build from plans. There are several outstanding sources available from which to purchase very accurate construction plans for scale models. Most of these are RC, but the simple changes outlined above will make them into CL models very easily.
Building from plans adds another dimension to scale modeling in that you actually have to produce the kit as you build the aircraft. The best advantage of this is that you have the opportunity to select the proper wood for the job; i.e., light wood for the aft portion of the aircraft, and stronger wood where strength is required. Since weight is such a detrimental thing, perhaps building from plans would be more attractive for the serious competitor, even though the quality of wood in the kits now available is generally very high.
I could list many sources for plans; however, that may take several volumes. So as not to show favoritism, I suggest the same method I use: read every piece of information on airplanes that you possibly can. This is necessary to obtain the documentation to build scale designs.
The third and most difficult alternative is to draw the plans yourself. This can be done from an accurate set of three-view drawings that can be either commercially enlarged (costing many dollars) or — the most popular and least expensive method — by using an opaque projector. (Bill Hannahan had an excellent article on how to do this in the July 1980 issue of Model Aviation.) The opaque projector can be moved toward or away from the wall to increase or decrease the size of the plan you desire. However, note that the opaque projection head must be perfectly square with the surface of the wall or screen that you are projecting the image on; otherwise, the plans will be distorted due to the optical effects involved.
Designing and building a scale model from scratch is extremely tedious and requires a tremendous amount of motivation to complete the project. For the aspiring modeler who wishes to enjoy the fun of CL scale flying, perhaps the kit is the best way to begin. Just remember to put together the documentation on the aircraft first, before you decide which aircraft you are going to build. You will be much more successful with the project if you attack it in this manner.
Every modeler who has any interest at all in scale should belong to the National Association of Scale Aeromodelers. The editor of their newsletter is Bill Pepin of Albuquerque, NM, and membership may be obtained by sending $5 to John Preston, Secretary-Treasurer, 7012 Elvira Court, Falls Church, VA 22042. The information in their newsletter is quite valuable in securing hard-to-get documentation.
FLAP ACTUATING MECHANISM:
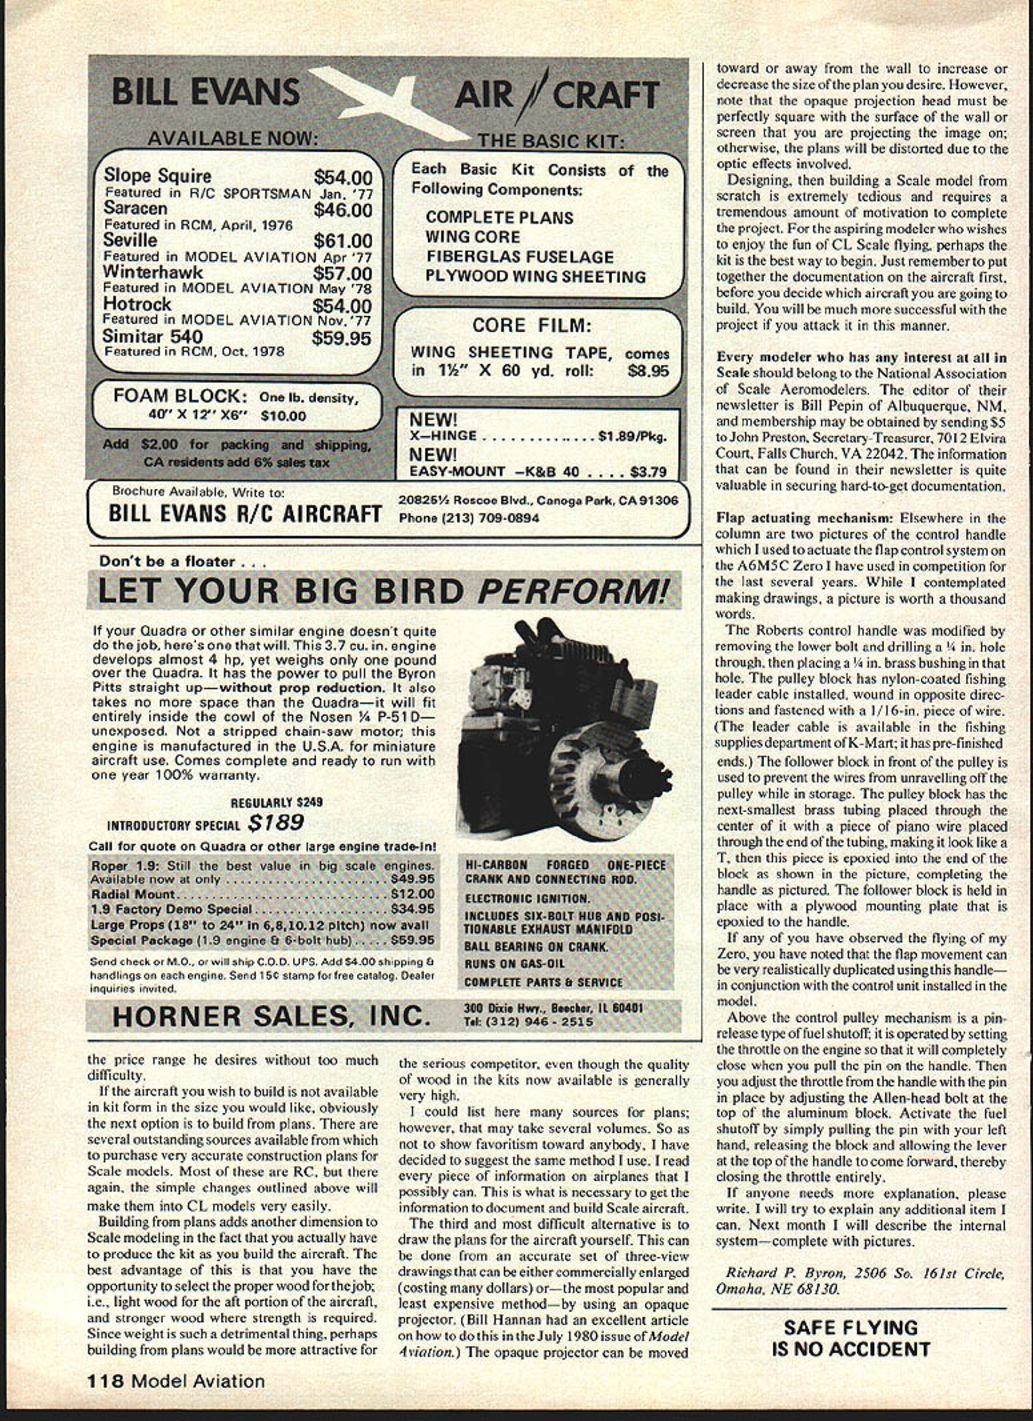
Elsewhere in the column are two pictures of the control handle which I used to actuate the flap control system on the A6M5C Zero I have used in competition for the last several years. While I contemplated making drawings, a picture is worth a thousand words.
The Roberts control handle was modified as follows:
- Remove the lower bolt and drill a 1/4-in. hole through the handle, then place a 1/4-in. brass bushing in that hole.
- Use a pulley block with nylon-coated fishing leader cable installed, wound in opposite directions and fastened with a 1/16-in. piece of wire. (The leader cable is available in the fishing supplies department of K-Mart; it has pre-finished ends.)
- Install a follower block in front of the pulley to prevent the wires from unravelling off the pulley while in storage.
- Place the next-smallest brass tubing through the center of the pulley block with a piece of piano wire placed through the end of the tubing, making it look like a T. Epoxy this piece into the end of the block.
- Hold the follower block in place with a plywood mounting plate that is epoxied to the handle.
If you have observed the flying of my Zero, you have noted that the flap movement can be very realistically duplicated using this handle — in conjunction with the control unit installed in the model.
Above the control pulley mechanism is a pin-release type of fuel shutoff. It is operated by setting the throttle on the engine so that it will completely close when you pull the pin on the handle. Then you adjust the throttle from the handle with the pin in place by adjusting the Allen-head bolt at the top of the aluminum block. Activate the fuel shutoff by simply pulling the pin with your left hand, releasing the block and allowing the lever at the top of the handle to come forward, thereby closing the throttle entirely.
If anyone needs more explanation, please write. I will try to explain any additional item I can. Next month I will describe the internal system — complete with pictures.
Richard P. Byron 2506 S. 161st Circle Omaha, NE 68130
Transcribed from original scans by AI. Minor OCR errors may remain.

