
Control Line: Scale
Bill Boss
Profiles in Scale for Juniors
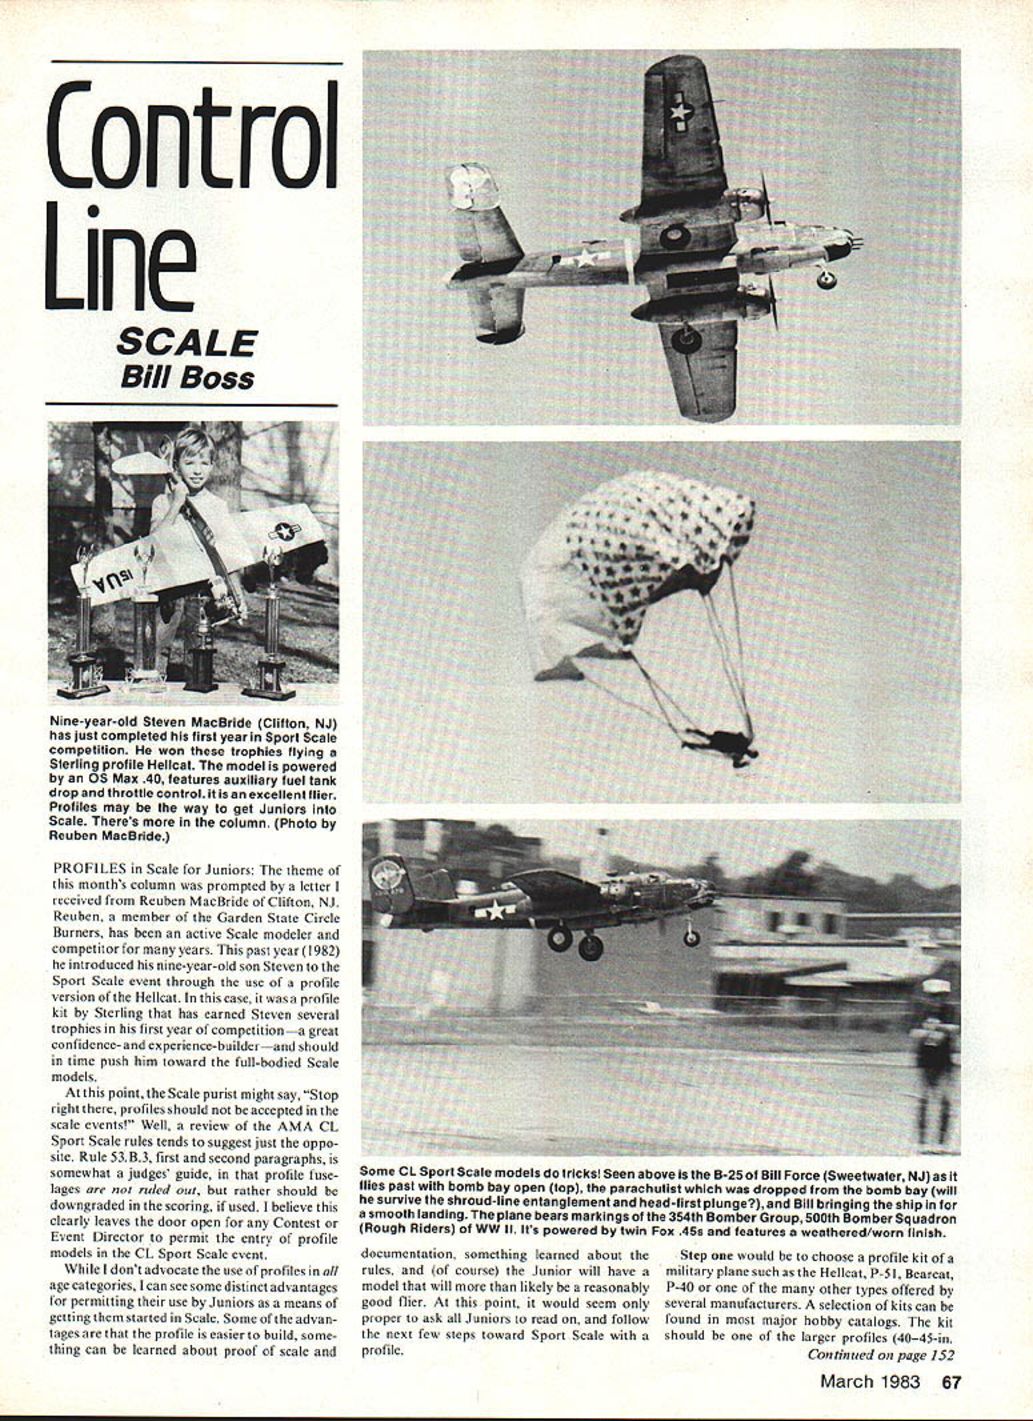
The theme of this month's column was prompted by a letter I received from Reuben MacBride of Clifton, N.J. Reuben, a member of the Garden State Circle Burners, has been an active scale modeler and competitor for many years. This past year (1982) he introduced his nine-year-old son, Steven, to the Sport Scale event through the use of a profile version of the Hellcat. In this case, it was a profile kit by Sterling that has earned Steven several trophies in his first year of competition — a great confidence- and experience-builder — and should in time push him toward full-bodied scale models.
At this point, the scale purist might say, "Stop right there, profiles should not be accepted in the scale events!" A review of the AMA CL Sport Scale rules tends to suggest just the opposite. Rule 53, B.3, first and second paragraphs, is somewhat a judges' guide in that profile fuselages are not ruled out, but rather should be downgraded in the scoring if used. I believe this clearly leaves the door open for any contest or event director to permit the entry of profile models in the CL Sport Scale event.
While I don't advocate the use of profiles in all age categories, I can see distinct advantages for permitting their use by juniors as a means of getting them started in scale. Some advantages are that a profile is easier to build, teaches proof of scale and documentation, introduces the rules, and (of course) gives the junior a model that will more than likely be a reasonably good flier. Juniors should read on and follow the next few steps toward Sport Scale with a profile.
Getting started
- Choose a profile kit.
- Select a profile kit of a military plane such as the Hellcat, P-51, Bearcat, P-40, or one of the many other types offered by several manufacturers. A selection of kits can be found in most major hobby catalogs.
- The kit should be one of the larger profiles (40–45 in. wingspan) capable of handling a .35 cu. in. engine equipped with a throttle control. This size profile also has sufficient space within the wing for mounting a three-line bellcrank required for operation of the engine throttle control. If you don't understand how to make this type of control system installation, ask your dad or a more experienced fellow modeler for help.
- Obtain reference drawings and information.
- Get a 3-view drawing of the plane to be modeled that includes scale detailing such as skin panel outlines, overall color scheme, and possibly some structural details. Three-view drawings adequate for this project can be found in the Profile series of publications, or as color drawings that have appeared in various modeling magazines.
Let's now assume you have the kit, matching three-views, and any other information you feel is needed for this first venture in Sport Scale.
Build your plane, do all the basic filling and sanding, and then stop — do not proceed with painting. It is now time to study the scale detail and three-views and decide what details are to be added to the model. Does the model require wing guns? Should it have radio antenna masts? Are you going to dress up the landing gear struts? Should wheel-well-cover doors be added to the landing gear? If your model requires any of the above external additions, this is the point at which they should be installed.
After these items have been completed, study the color scheme so that you will know where all markings and insignia belong, and determine the color of the paints that will be needed. You are now ready to proceed with painting.
Apply the overall color as the first step. Don't rush the job; allow sufficient time (24–48 hours) before sanding down the initial paint or before applying the second or third coats. When the overall color is complete, you are ready to apply trim paint. The trim might be in the form of invasion stripes on the wings and fuselage, squadron markings on the rudder, or painting in the wheel-well outline on the underside of the wing. When trim painting is done, apply insignia or lettering decals as required.
If decals in the kit are not suitable for the plane you have modeled, you will probably be able to find them at your local hobby shop. Several manufacturers make decal sheets of stars-and-bars insignia and lettering in various sizes. Some decal sheets even have wording for details such as HAND HOLD, LIFT HERE, FUEL FILLER, etc., and are great for dressing up your model.
When all details are complete, mount the engine and fuel tank, and be sure that all controls are properly connected. You are now ready for that first test flight!
Alternate to decals
Here is a fairly simple method for making lettering, numbering, or insignia when decals of the required size are not available.
Required items:
- An X-Acto knife
- Masking tape, 2–3 inches wide
- A sheet of soft aluminum (the aluminum sheet used for chimney flashing will do fine)
Method:
- Place a length of masking tape lightly on the aluminum sheet. It is not necessary to press the tape hard onto the aluminum; just be sure it is smooth and has no wrinkles.
- Draw the letter, number, or insignia you desire on the tape at the required size. For example, draw the letter "C."
- Using the X-Acto knife, cut along the drawn lines. When all lines are cut, remove the letter shape from the tape. What remains on the aluminum sheet is your stencil.
- Carefully remove the stencil (do not tear or stretch the tape) from the aluminum and apply it to your model in the appropriate location. Be sure all edges are down tight on the model.
- Paint in the letter with the desired color. When the paint is dry, remove the stencil.
While the process above describes making a single letter, any number of letters, numbers, or combinations can be made at one time. A little thought and planning will allow you to make almost any kind of letter, number, or insignia.
Contact
Send CL Scale ideas, photos, and building tips to: Bill Boss 77-06 260th St. New Hyde Park, N.Y. 11040
Transcribed from original scans by AI. Minor OCR errors may remain.

