
Control Line: Speed
Glenn Lee, 819 Mandrake Drive, Batavia IL 60510
Jet Test Stand
The jet engine test stand shown in the September issue does not belong to Jerry Thomas, as previously stated. It was designed and built by Earl Bailey—the manufacturer of the Bailey jet engines—from Houston, Texas. Earl did extensive testing of model pulse jets before arriving at the design of the engine he is producing. Jerry Thomas is one of the most avid jet fliers in the U.S., and borrowed the test stand to compare it with his own thrust-measuring equipment.
Our pulse jet engines are erratic beasts and do not always operate the way we would like or expect. A good thrust-measuring device is almost imperative; it is the fastest way to test a new design or modifications to your engine.
More on lapping
I receive quite a few letters, many with good questions. John Callahan (Houston, Texas) had several useful questions, so I’ll cover them here.
John and others in the Houston area are flying something called Four Start 40—an event aimed to get people started in pylon racing, from which they can progress to Quickie 500 and other faster classes. They use ringed Super Tiger .40 engines, so John asked if these can be lapped and relieved to reduce internal friction and go faster.
The answer is a definite "yes—maybe." It’s complicated; several factors enter in.
In speed events we use lapped ABC engines almost exclusively, so I rarely think about ringed engines. There are still a lot of ringed engines out there, and most are good. Ringed engines can be improved by proper treatment of the cylinder, but the gain probably won't be as much as from an ABC setup. Such modifications can make your engine run smoother and cooler.
Most of the friction in a ringed engine comes from the ring, and lapping and tapering the sleeve will not change that very much. The biggest improvement you can make is to get the sleeve round and the piston round so they fit properly and you get minimum leakage past the ring.
If you want to experiment:
- Get some spare rings.
- Insert a ring by itself in the sleeve and look through the sleeve at a light to see if the ring touches the wall all the way around.
- If it doesn't, bend the ring as necessary until it does.
Warning: you might break some rings. It isn’t easy to remove a ring from the piston or install a new one, so you have to learn the technique. Rings are usually a kind of cast iron and may be brittle.
The necessity for a tapered sleeve depends a lot on the piston: what is the piston alloy, and what is the piston clearance? Many ringed pistons are machined from 2024 aluminum or other wrought-aluminum alloys, which have a large coefficient of thermal expansion. If there isn't enough clearance between the piston diameter and the sleeve, the piston will expand and bind when it gets hot. Manufacturers learn how much clearance is needed, so you probably shouldn't worry unless you see signs of binding. If the piston skirt is scuffed from rubbing, tapering the sleeve will definitely help.
Some manufacturers use pistons machined from castings, which have more silicon (less expansion) so less clearance is needed. These pistons expand from heat as they travel down during the stroke, so lapping the sleeve to get it round and tapering it to give more clearance at the bottom can increase operating rpm. Just don't expect as much increase as from modifying a lapped ABC engine, because you haven't eliminated friction from the ring.
The type of ring used makes a huge difference in friction. Conventional rings are compressed for insertion into the sleeve, so they exert a spring force against the wall for the entire stroke. Dykes rings, like those used in K&B engines, are machined round and then cut with a narrow slitting saw. They depend on combustion gas pressure to force the ring against the wall to seal. As the piston goes down and combustion pressure drops, the force against the wall drops too, so they only rub during the top part of the stroke. You can see this effect in the wear marks in the sleeve. Again, if the piston rubs too tight against the sleeve, tapering can reduce that friction.
On using lapping compound to seat a new ring: I wouldn't recommend it. It usually takes only one or two runs to seat the ring enough for the engine to start readily, so you shouldn't need any abrasive. I would worry about abrasive getting in crevices—like under the ring—where it can keep wearing metal away where you don't want it. If you get too much clearance between the ring and the piston slot, you can lose too much compression.
On lap length and shape: you cannot simply make a lap as long as the sleeve and expect it to wear the sleeve to the desired taper. You want a short lap so you remove metal only where you want to; you can't depend on a long lap to wear correctly to the shape you want. A diamond lap shaped like the correct contour would probably work, but who would make it for you and how much would it cost? A lap that is too short is also not good—it would be too hard to keep straight in the sleeve.
When to adjust the tension or pressure on the lap is something you have to learn by feel. You can feel when it is cutting; when the torque on the lap goes away, expand it until it is cutting again. If the sleeve gets too hot, you have too much pressure. Keep the lap wet with the oil-abrasive mixture; don't let it get dry. If you go through the chrome, strip the sleeve, taper it, rechrome it, and then hone and lap it again.
On books and resources: I told John that this column is about the best source I know. I don't know of any book that tells you much about these specific techniques, and there aren't many old, experienced machinists left. We've learned a lot in the last couple of years and will keep experimenting.
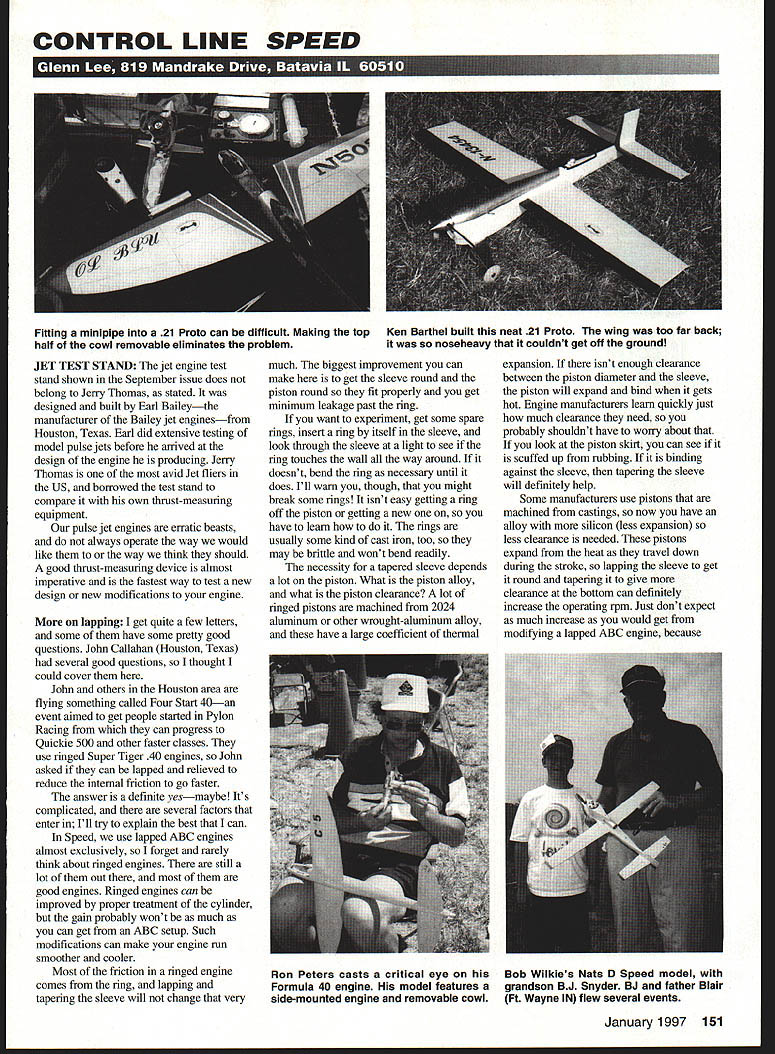
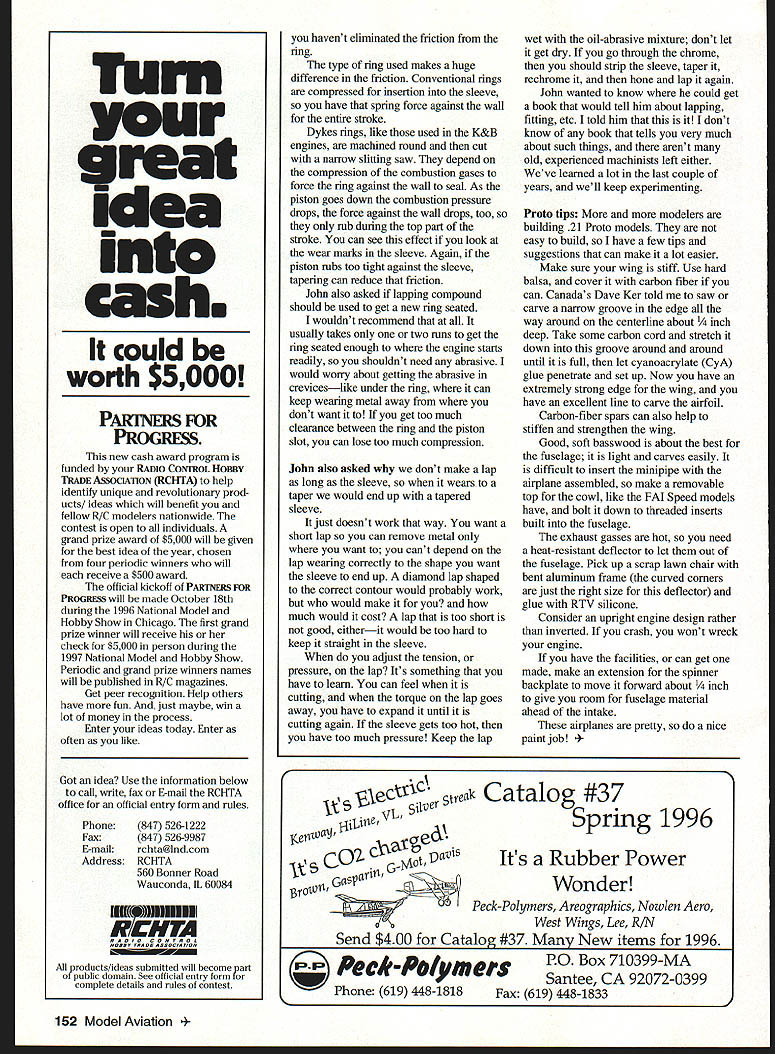
Proto tips
More modelers are building .21 Proto models. They are not easy to build, so here are a few tips to make it easier:
- Make sure your wing is stiff. Use hard balsa and cover it with carbon fiber if you can.
- To reinforce the wing cowl edge: saw or carve a narrow groove in the edge of the wing cowl around the centerline about 1/4 inch deep. Stretch carbon cord down into the groove until it is full, then let cyanoacrylate (CyA) penetrate and set. You'll have an extremely strong edge and a hard edge to carve the airfoil.
- Carbon-fiber spars can help stiffen and strengthen the wing.
- Use good, soft balsa for the fuselage; it is light and carves easily.
- Make a removable top for the cowl (like FAI Speed models) and bolt it to threaded inserts in the fuselage—it's difficult to insert the minipipe with the airplane fully assembled.
- Provide a heat-resistant deflector for the exhaust gases. A scrap aluminum can works well—the curved corners are just the right size. Glue it in place with RTV silicone.
- Consider an upright engine design rather than inverted; in a crash you won't wreck the engine as easily.
- If you have the facilities (or can get one made), make an extension for the spinner backplate to move it forward about 1/2 inch to give room for fuselage material ahead of the intake.
- These airplanes are pretty—do a nice paint job!
Transcribed from original scans by AI. Minor OCR errors may remain.

