
Control Line: Speed
Glenn Lee 819 Mandrake Dr., Batavia, IL 60510
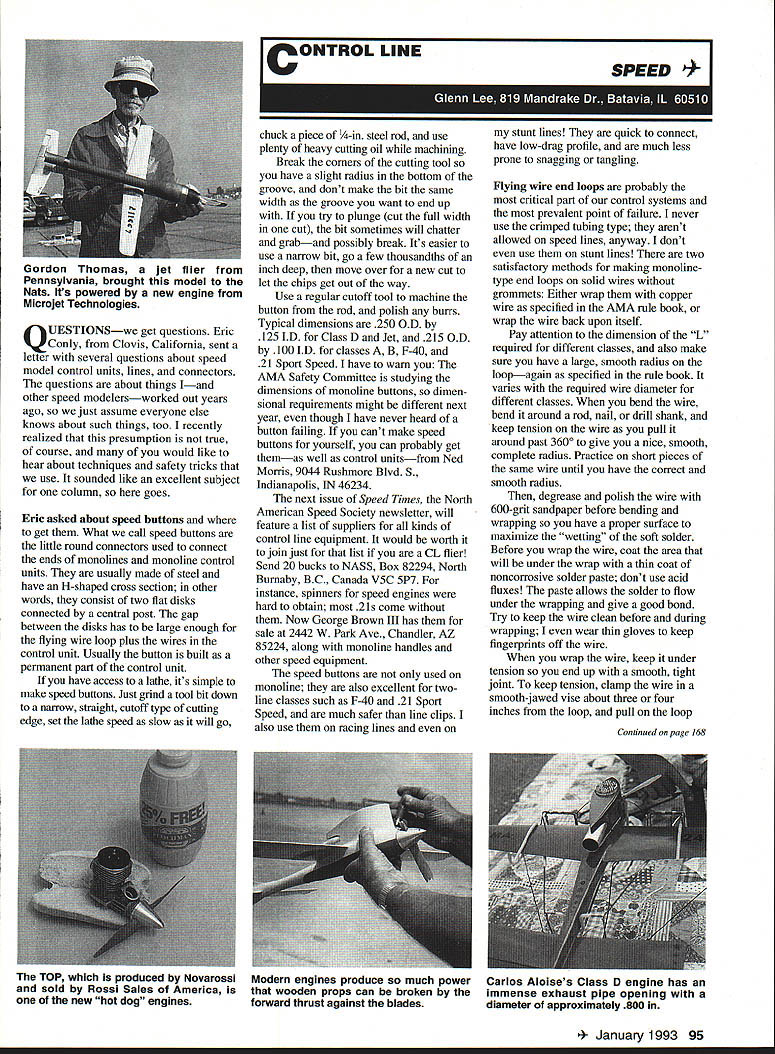
Introduction
We get questions. Eric Conly, from Clovis, California, asked several questions about speed-model control units, lines, and connectors. Many techniques and safety tricks used by experienced speed modelers are assumed common knowledge but are not. This column covers those techniques, focusing on speed buttons, end loops, line connectors, and flexible lead-outs.
Speed buttons — what they are
Speed buttons are the small round connectors used to attach the ends of monolines to monoline control units. They are usually made of steel and have an H-shaped cross section (two flat disks connected by a central post). The gap between the disks must be large enough for the flying-wire loop plus the wires to pass into the control unit. Often the button is built as a permanent part of the control unit.
Making speed buttons (lathe method)
If you have access to a lathe, you can make speed buttons yourself:
- Grind a tool bit to a narrow, straight, cutoff-type cutting edge.
- Set the lathe speed as slow as it will go and chuck a piece of 1/4-inch steel rod.
- Use plenty of heavy cutting oil while machining.
- Break the corners of the cutting tool so there is a slight radius in the bottom of the groove.
- Use a narrow bit and take multiple shallow passes rather than plunging full width in one cut to avoid chatter and breakage.
- Use a regular cutoff tool to machine the button from the rod, and polish any burrs.
Typical dimensions:
- .250 O.D. by .125 I.D. for Class D and Jet
- .215 O.D. by .100 I.D. for classes A, B, F-40, and .21 Sport Speed
Note: The AMA Safety Committee is studying the dimensions of monoline buttons; dimensional requirements may change.
Suppliers
If you cannot make speed buttons, you can probably obtain them (and control units) from Ned Morris, 9044 Rushmore Blvd. S., Indianapolis, IN 46234.
The next issue of Speed Times, the North American Speed Society newsletter, will include a supplier list for control-line equipment. Membership info: send $20 to NASS, Box 82294, North Burnaby, B.C., Canada V5C 5P7.
For example, spinners for speed engines (many .21s come without them) are available from George Brown III, 2442 W. Park Ave., Chandler, AZ 85224, who also sells monoline handles and other speed equipment.
For a broad list of control-line supplies including good clips, contact Bob Bearden, RR 2, Box 70, Beecher, IL 60401.
Uses and advantages of speed buttons
Speed buttons are used not only on monoline but also on two-line classes such as F-40 and .21 Sport Speed. They are much safer than line clips. I also use them on racing lines and stunt lines. Advantages:
- Quick to connect
- Low-drag profile
- Less prone to snagging or tangling
Flying-wire end loops — importance and methods
Flying-wire end loops are a critical and common point of failure. I never use the crimped-tubing type (and they are not allowed on speed lines). There are two satisfactory methods for making monoline-type end loops on solid wires without grommets:
- Wrap with copper wire as specified in the AMA rule book, or
- Wrap the wire back upon itself.
Pay attention to the required dimension of the "L" for different classes and ensure a large, smooth radius on the loop per rule-book specifications. Bend the wire around a rod, nail, or drill shank, keeping tension as you pull it around past 360° to produce a smooth, complete radius. Practice on short pieces of the same wire until you get the correct shape.
Before wrapping:
- Degrease and polish the wire with 600-grit sandpaper to maximize solder wetting.
- Coat the area that will be under the wrap with a thin coat of noncorrosive solder paste (do not use acid fluxes). The paste allows solder to flow under the wrap for a good bond.
- Keep the wire clean during wrapping — wear thin gloves to avoid fingerprints.
Wrapping technique:
- Clamp the wire in a smooth-jawed vise about 3–4 inches from the loop.
- Pull on the loop with a short length of heavy music wire or a nail to keep the loop under tension.
- Wrap the overlap tightly and smoothly while maintaining tension so the joint is snug.
- If you use this type of wrapping, make sure you have a small 90° bend on the tip of the overlap wire. This keeps that end from pulling out even if the solder slips.
Soldering and finishing:
- Coat the complete joint with solder paste and solder with an electric soldering gun — do not use a torch (torch heat will destroy wire strength).
- Preferred solder: 50/50 lead-tin alloy (low temperature, good wetting, strong).
- Use tinned wrapping wire (e.g., tinned bus-bar wire) so plating helps wick solder into crevices for a full joint.
- Wash flux off with hot water, then apply a thin coat of oil to prevent rusting.
Line connectors
Line connectors are another critical piece of equipment. The safest type are the scissors-type clips; never use the fishing-kind clips with sliding locks. Those sliding-lock clips were banned from competition years ago. For good clips and other control-line supplies, see the supplier information above (Bob Bearden).
Flexible wire lead-outs (stranded wires)
For two-line airplanes using flexible lead-outs, use this method for stranded-wire end loops:
- Form the loop by bending around a rod as with solid wire, leaving about four inches of overlap.
- Unravel all strands of the overlap for about three inches (or to the desired loop end).
- Wrap the unraveled strands back onto the main cable, one strand at a time:
- The first unraveled strand is wrapped around the main cable plus the overlap about eight times.
- The next unraveled strand is wrapped the same way, and so on.
- The last unraveled strand is wrapped around the main cable only.
- This creates a tapered wrap roughly 1/2 inch long in which every strand shares the load.
- Clip excess wrapped wire and then solder or epoxy the joint.
Notes:
- Most stranded cables are stainless steel and may require acid flux for soldering.
- Epoxy provides an alternative joint of equal strength without potential corrosion from acid flux.
Final safety reminders
- Always follow AMA rules for dimensions and allowed materials.
- Avoid torch heat on control wires.
- Keep parts clean, solder properly, and protect finished joints from corrosion.
Transcribed from original scans by AI. Minor OCR errors may remain.

